Purpose
The purpose of this Quick Reference Guide (QRG) is to provide a step-by-step guide of how to Manipulate Existing Reports in Oracle Analytics Cloud (OAC) – DV.
Introduction and Overview
This QRG covers the process of Manipulating Existing Reports in OAC DV. Users can perform self-service on reports by adding filters, duplicating canvases, and dragging and dropping subject areas to meet specific reporting needs. We will use the NCFS Budget to Actuals 701 Report as an example, but these steps and processes can be used for most OAC DV reports.
Manipulating NCFS Budget to Actuals 701 Report
Follow the below steps to manipulate NCFS Budget to Actuals 701 Report. There are 43 steps to complete this process.
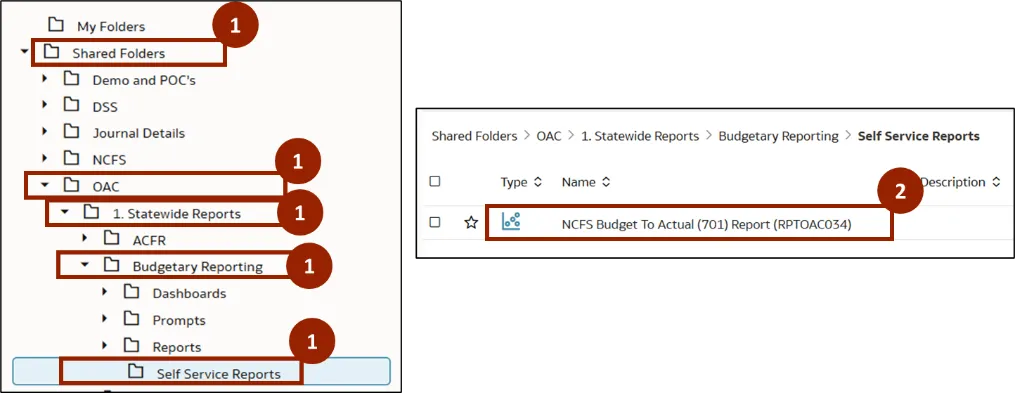
Step 1. Navigate to the Shared Folders, then open the OAC folder. In the OAC folder, click Statewide Reports and select Budgetary Reporting. In the Budgetary Reporting folder, click Self Service Reports.
Step 2. A list of DV templates is displayed within the selected report type. Double-click the NCFS Budget To Actual (701) Report (RPTOAC034) report.
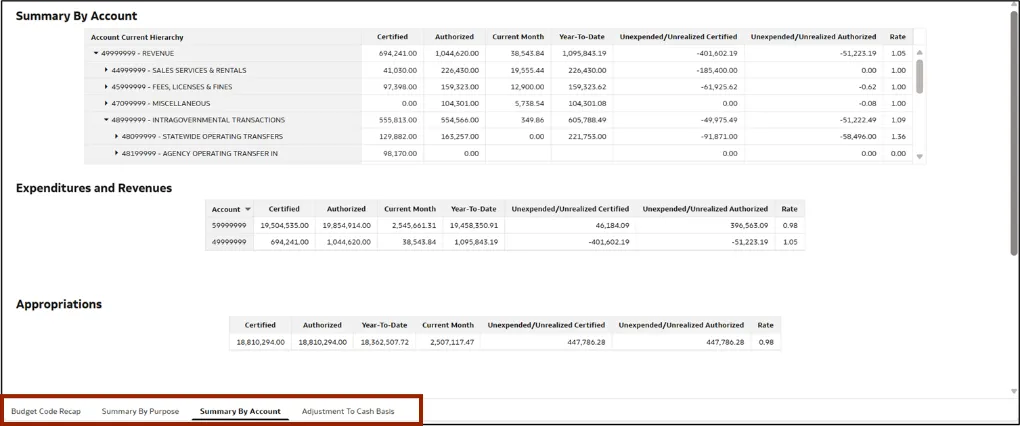
Note: The report contains several tabs: Budget Code Recap, Summary By Purpose, Summary By Account, and Adjustment To Cash Basis. Most self-service activities will be performed in the Summary By Account tab.
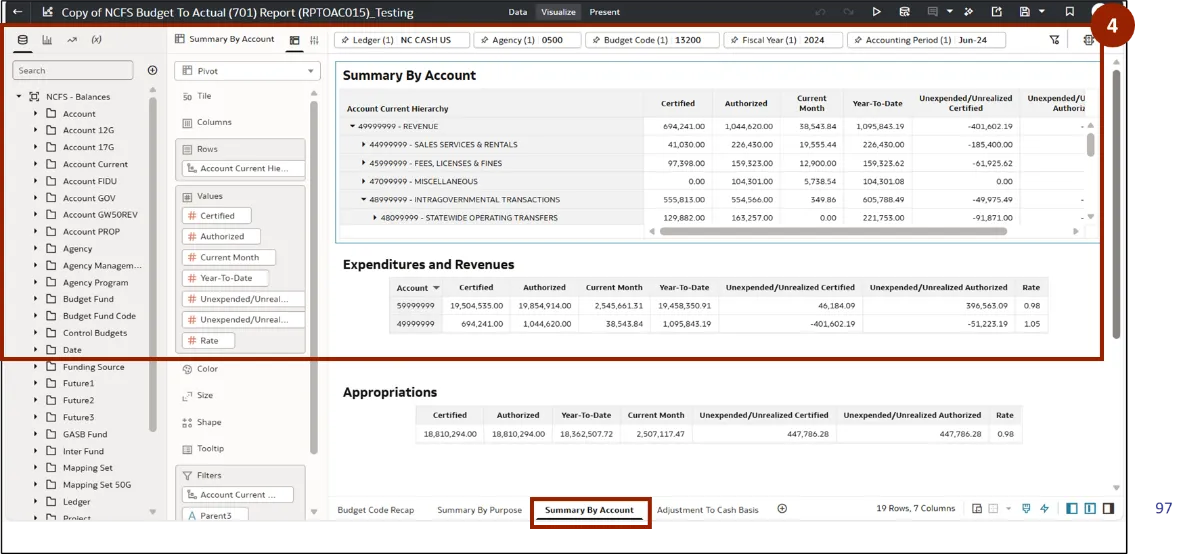
Step 3. Once the report is open, in the Summary By Account tab, click the Edit icon.

Step 4. The report opens in edit mode.
Note: Before conducting any analyses, right-click on the tabs below to duplicate the canvas. This ensures that your original canvas remains intact and unchanged while you perform your work.
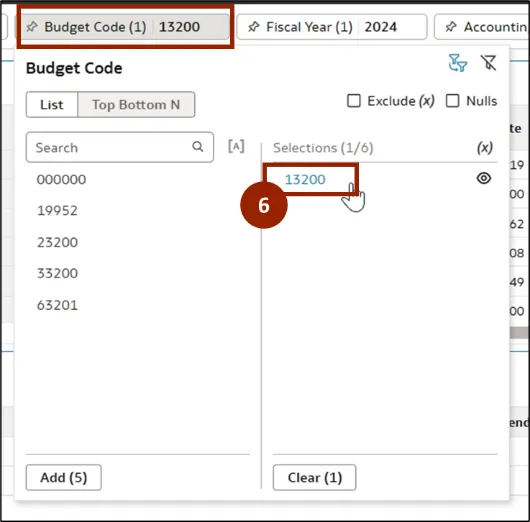
Step 5. Click the Budget Code filter.
Step 6. In the Selections section, clear any existing applied filters by clicking the relevant selection(s).
Note: To clear a filter in the Selections pane, click the filtered item(s) and they will be removed.
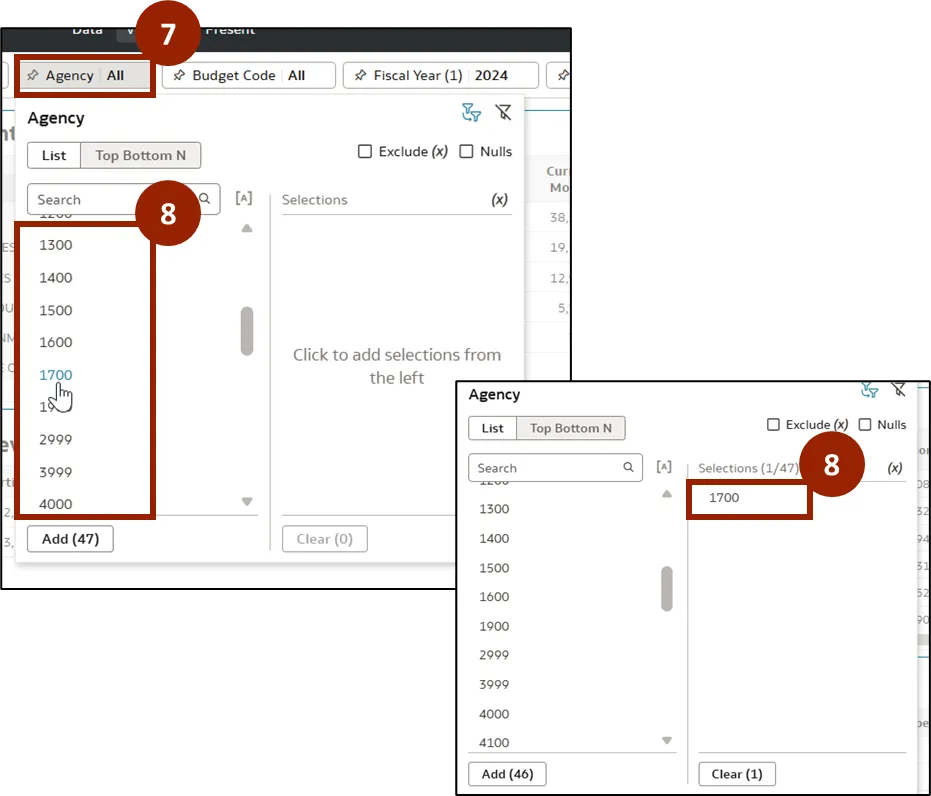
Step 7. Click the Agency filter.
Step 8. Agency pop-up appears. Select the desired agency from the list. In this example, select 1700. The selected filter will appear in the Selections section, and the report will automatically update to reflect your selection.
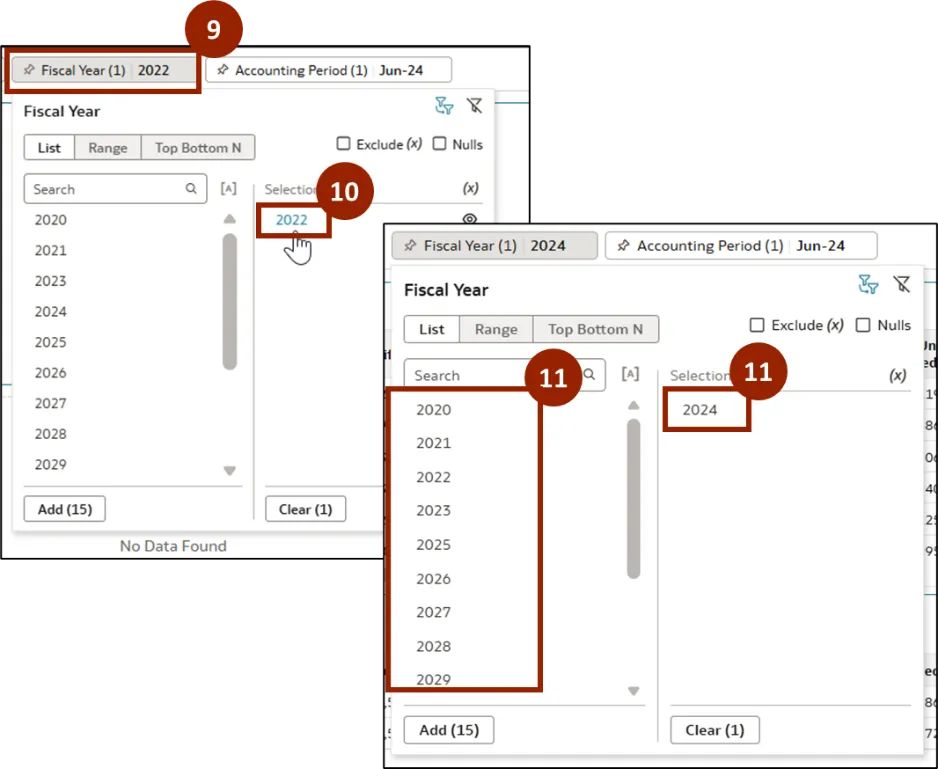
Step 9. Click the Fiscal Year filter.
Step 10. Fiscal Year pop-up appears. In the Selections section, clear any existing applied filter by clicking the relevant selection.
Step 11. Select the desired year from the list. In this example, select 2024. The selected filter will appear in the Selections section, and the report will automatically update to reflect your selection.
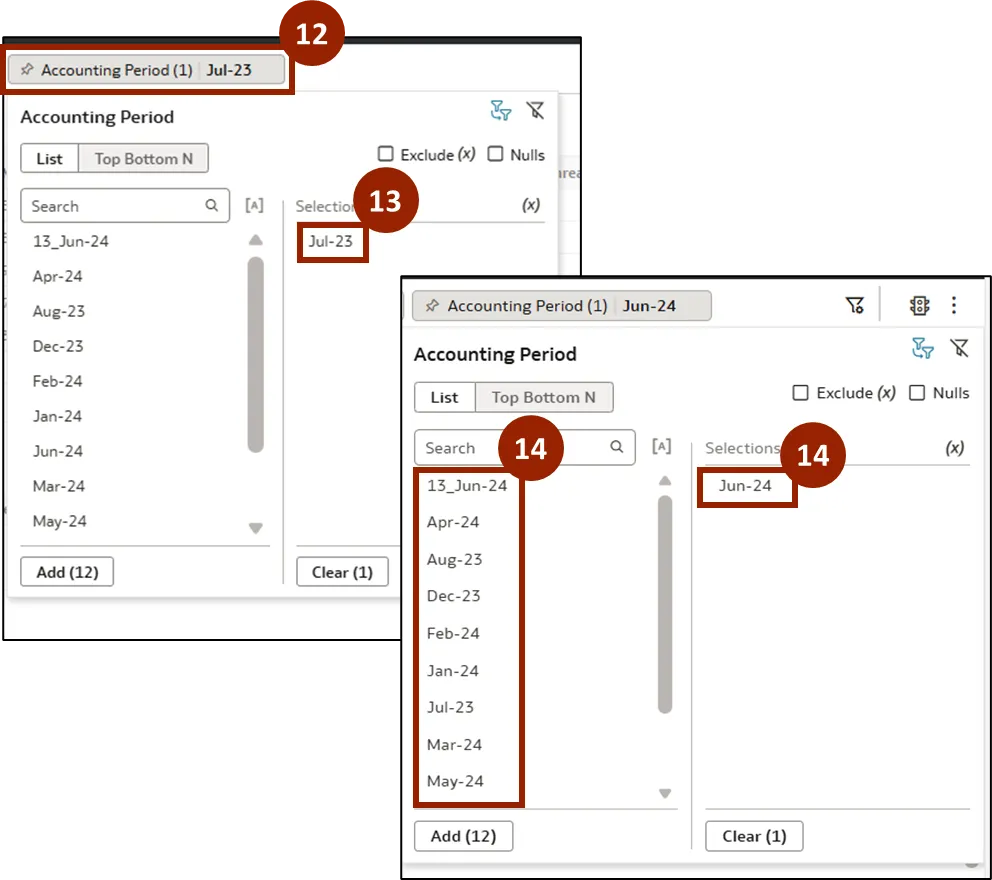
Step 12. Click the Accounting Period filter.
Step 13. Accounting Period pop-up appears. In the Selections section, clear any existing applied filter by clicking the applied filter to remove them.
Step 14. Select the desired date from the list. In this example, select Jun-24. The selected filter will appear in the Selections section, and the report will automatically update to reflect your selection.
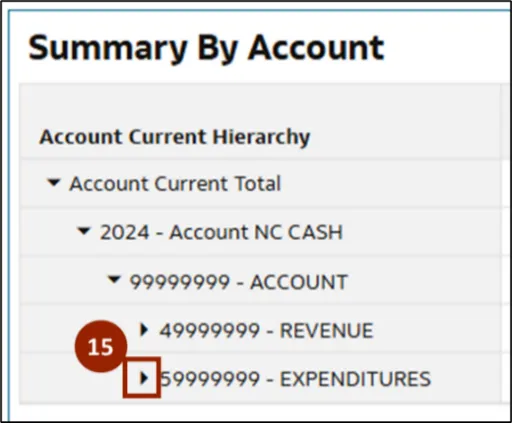
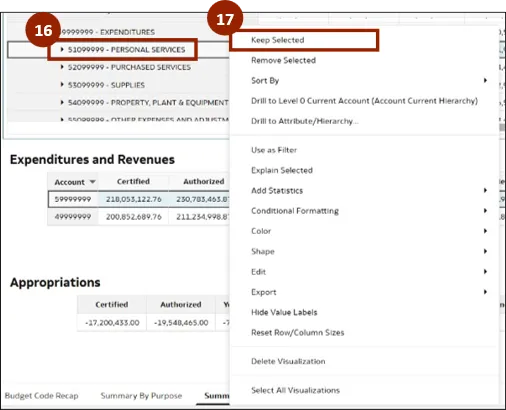
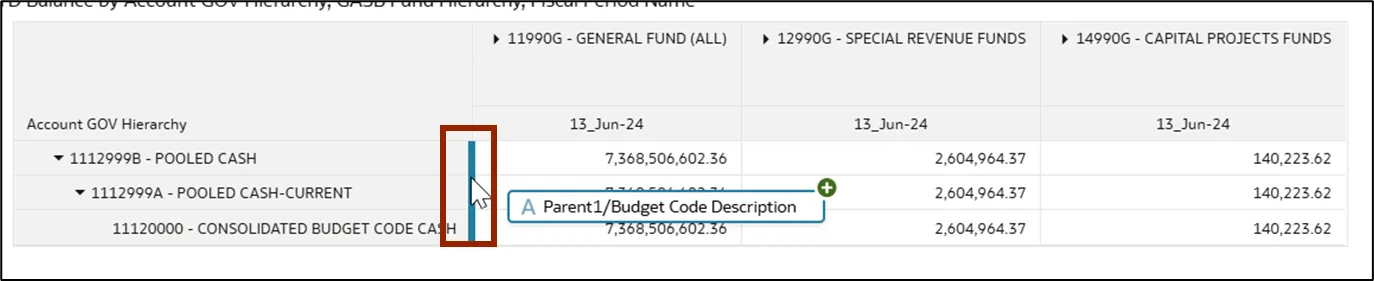
Step 15. Once the report is automatically updated, click the Caret icon next to 59999999 -EXPENDITURES to drill down and reveal further child accounts.
Step 16. Right-click 51099999 - PERSONAL SERVICES.
Step 17. A pop-up menu appears. Select Keep Selected.
Step 18. Once the report is updated, click the Caret icon next to Budget Fund Code from the subject area.
Step 19. Select and hold Child Description.
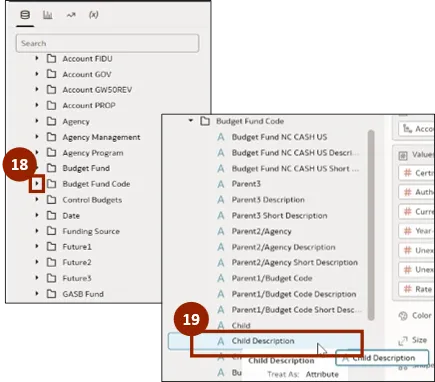
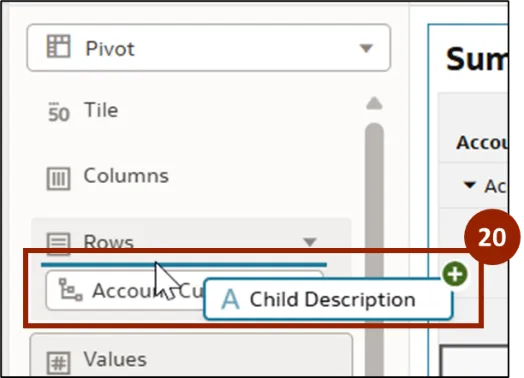
Step 20. Drop Child Description into the Rows section. Position either above or below the existing row fields, as required by the user’s reporting needs.
Note: Users can customize their reports by dragging subject areas to different positions in the layout as required:
- Above existing rows or columns.
- Below existing rows or columns.
- On existing rows or columns: Replaces the selected row or column with the new subject area.
Note: The user can also drag the subject area directly into the report and nest it besides the rows or below the columns as required.
Step 21. The report is automatically updated to display total salaries grouped by individual budget fund.

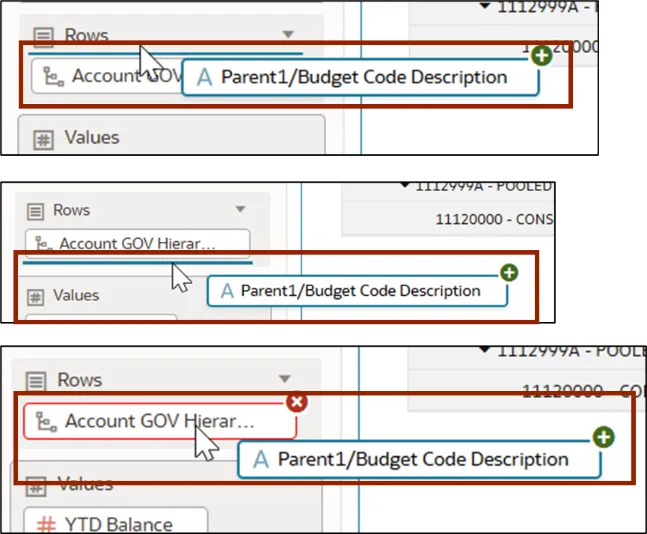
Step 22. Next, select and hold Parent1/Budget Code Description.
Step 23. Drop Parent1/Budget Code Description into the Rows section. Position it either above or below the existing row fields, as required by the user’s reporting needs.
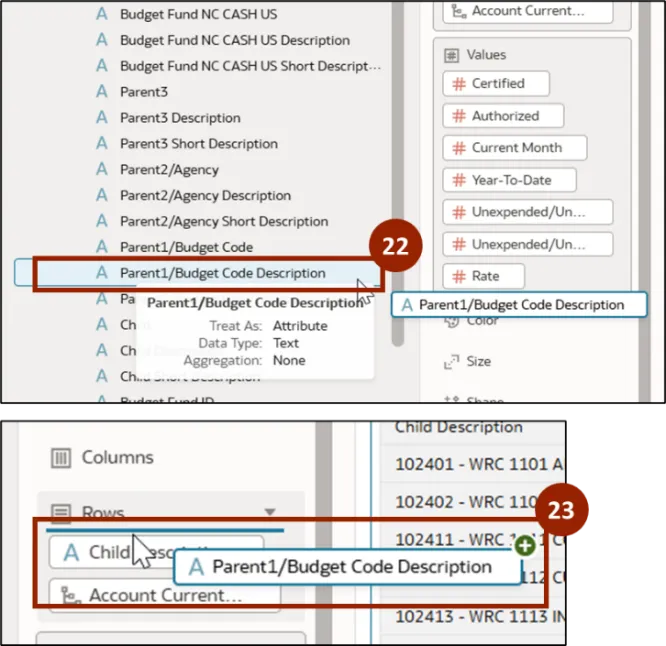
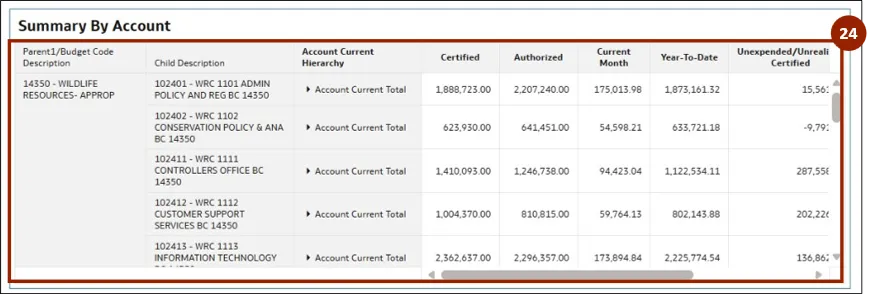
Step 24. The report is automatically updated to display the budget codes along with salary totals.
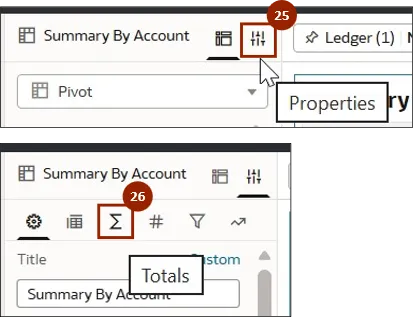
Note: The user can calculate totals for any desired rows or columns and subtotals using the Properties icon within the report interface.
Step 25. Click the Properties icon beside Summary By Account section.
Step 26. In the Properties tab, click Totals icon.
Step 27. Click Off for Grand Total Rows to toggle it On.
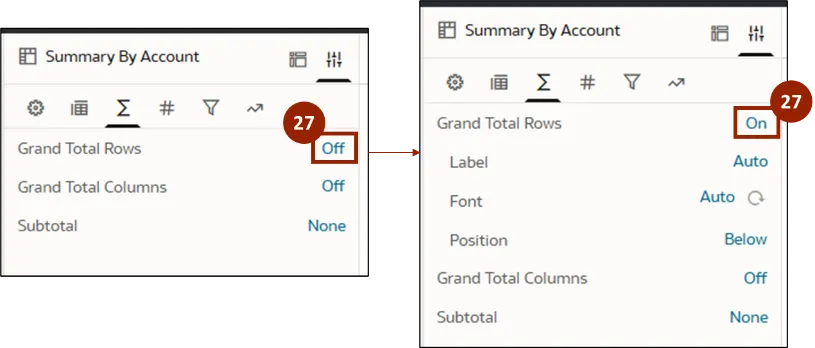
Step 28. To add a subtotal, click None beside Subtotal.
Step 29. A pop-up menu appears. Check the box of the desired option. In this example, select Parent1/Budget Code Description.

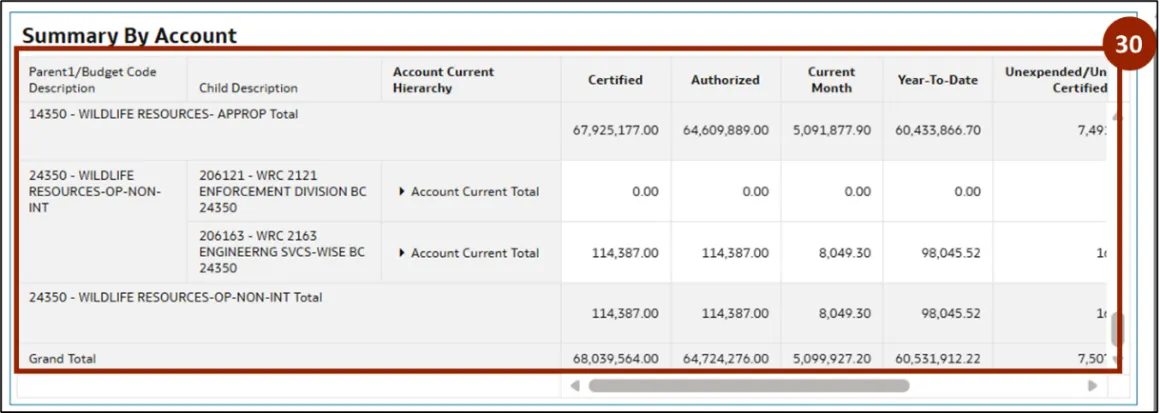
Step 30. The report is automatically refreshed to show the total salary for each budget code, as well as a grand total salary for the entire year.
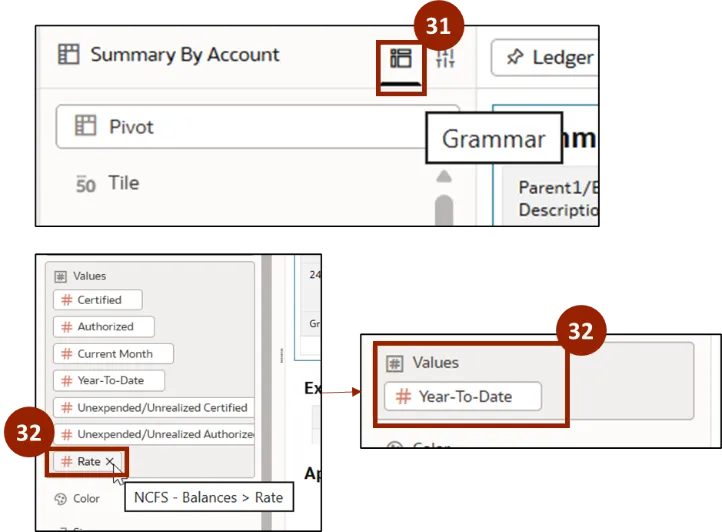
Step 31. Next, the user can analyze the report to display salaries across multiple years. Click the Grammar icon.
Step 32. In the Values section, click x icon to remove all the values except Year-To-Date.
Step 33. Once the report is updated, click the Caret icon next to Date from the Subject Area.
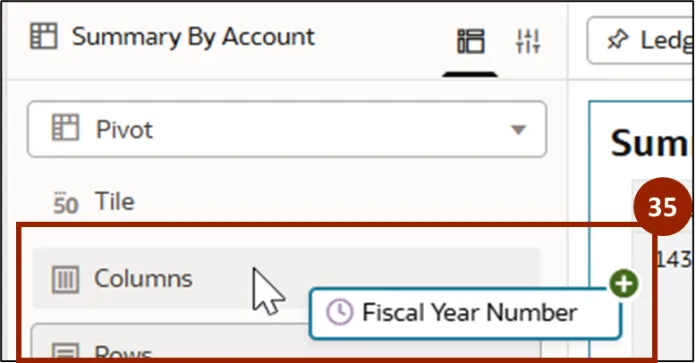
Step 34. Select and hold Fiscal year Number.
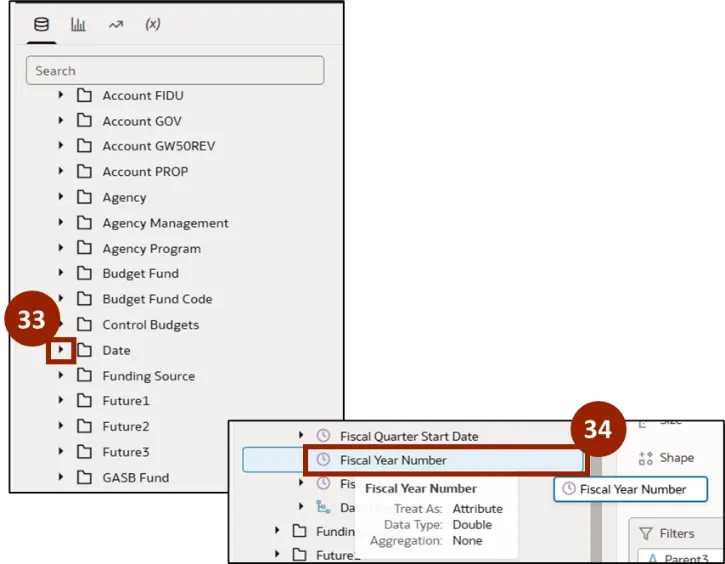
Step 35. Drop Fiscal Year Number in the Columns section.
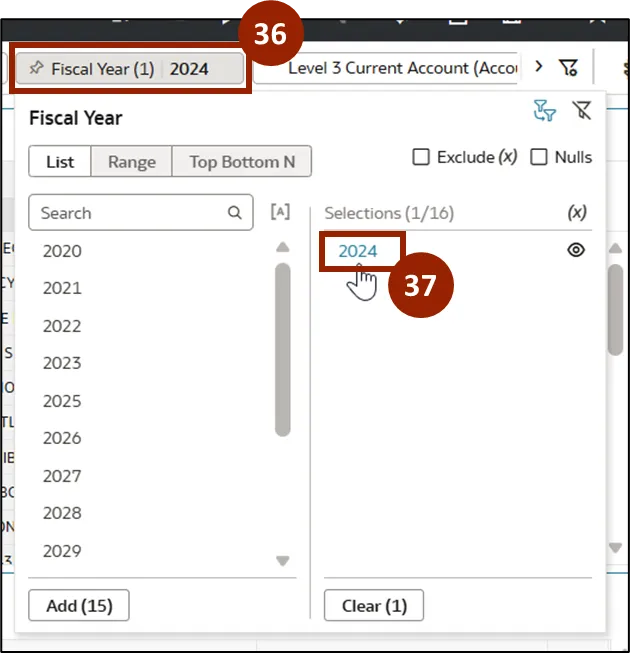
Step 36. Once the report is updated, click Fiscal Year filter.
Step 37. Click 2024 in Selections section to clear the applied filter.
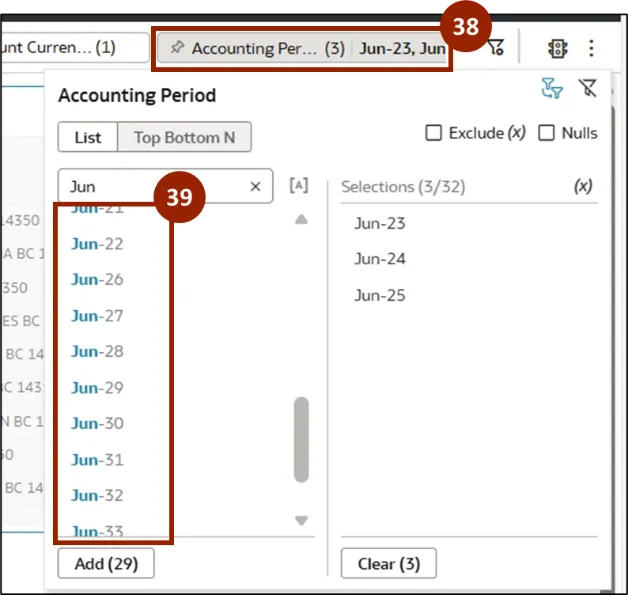
Step 38. Next, click Accounting Period filter.
Step 39. Select the desired date from the list.
Step 40. Once the report is updated, click the Caret icon next to Fact – GL Balance from the Subject Area.
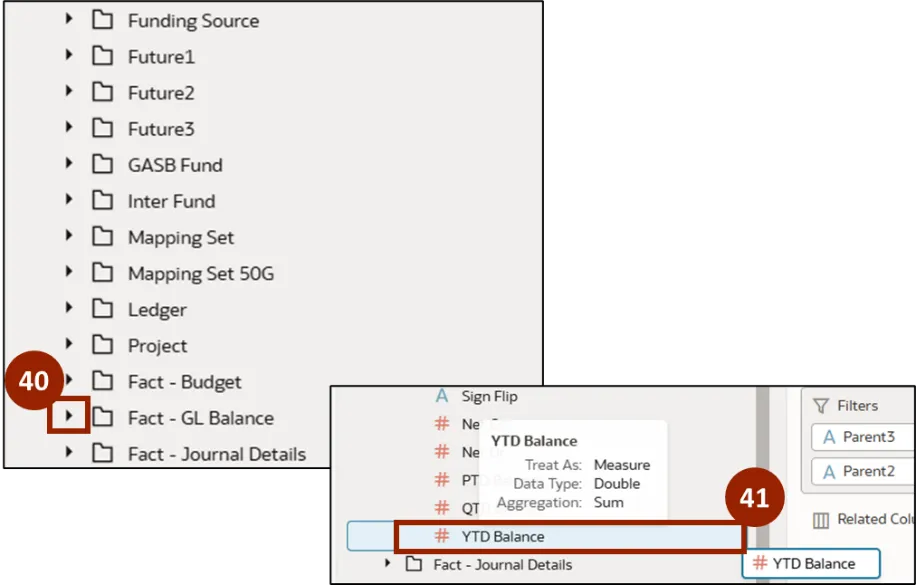
Step 42. Drop YTD Balance into the Values section to replace the existing Value field.

Step 43. The report is updated to display the selected budget codes, budget funds, accounts, and years, providing a detailed breakdown of salaries by account.

Wrap-Up
OAC users can manipulate existing reports in OAC DV by following the steps above. Users have the flexibility to filter data, select specific subject areas, and tailor the report to meet their needs. In this example, we demonstrated how to track cash for a particular agency and budget code, empowering users to gain targeted financial insights efficiently.
Additional Resources
- Virtual Instructor Led Training (vILT)