Purpose
The purpose of this Quick Reference Guide (QRG) is to provide a step-by-step guide of how to perform Self Service analysis in Oracle Cloud Analytics (OAC) Classic.
Introduction and Overview
This QRG guides users through self service analysis in OAC Classic by outlining how to access, customize, and analyze reports. Users can filter and organize data, drill down for detailed insights, and modify criteria to create tailored, actionable reports—enabling efficient and informed decision-making.
Self Service in OAC Classic
Follow the below steps to perform Self-Service in OAC Classic. There are 13 steps to complete this process.
Step 1. Navigate to the desired report and scroll down to the bottom of the report. Click Analyze.

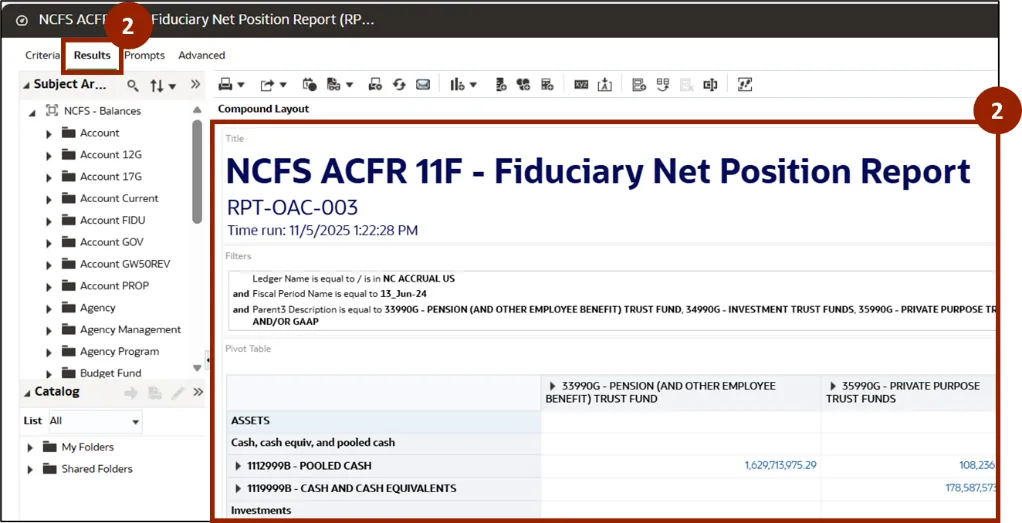
Step 2. After selecting Analyze, the report opens in a new customization window under the Results tab.
Note: The Results tab shows data based on the columns selected in the Criteria tab. Data is displayed using user-selected visualizations, such as tables, pivot tables, graphs, and maps.
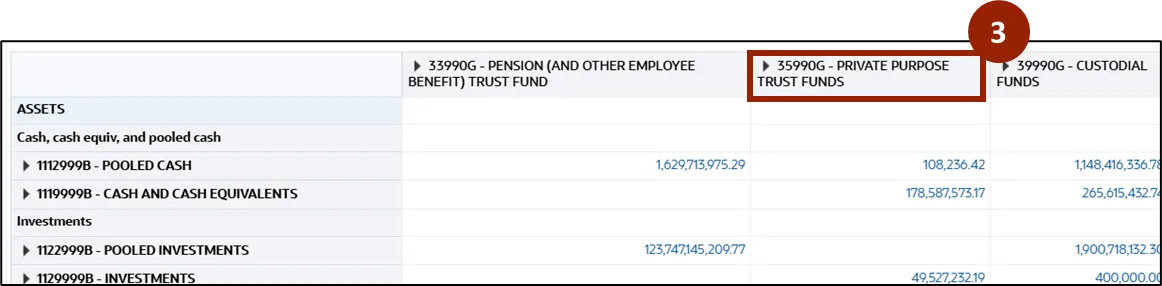
Step 3. The user can right-click the desired column in the report to analyze data for that specific column.
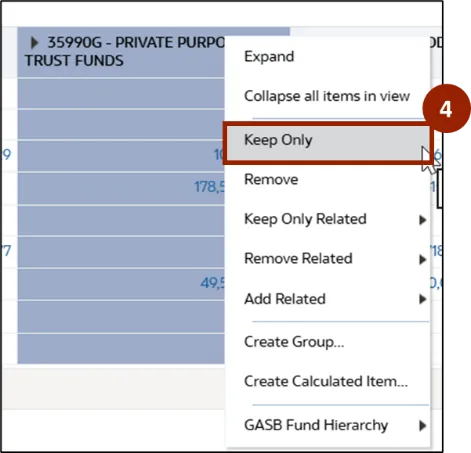
Step 4. A pop-up menu appears. Select Keep Only for the required column.
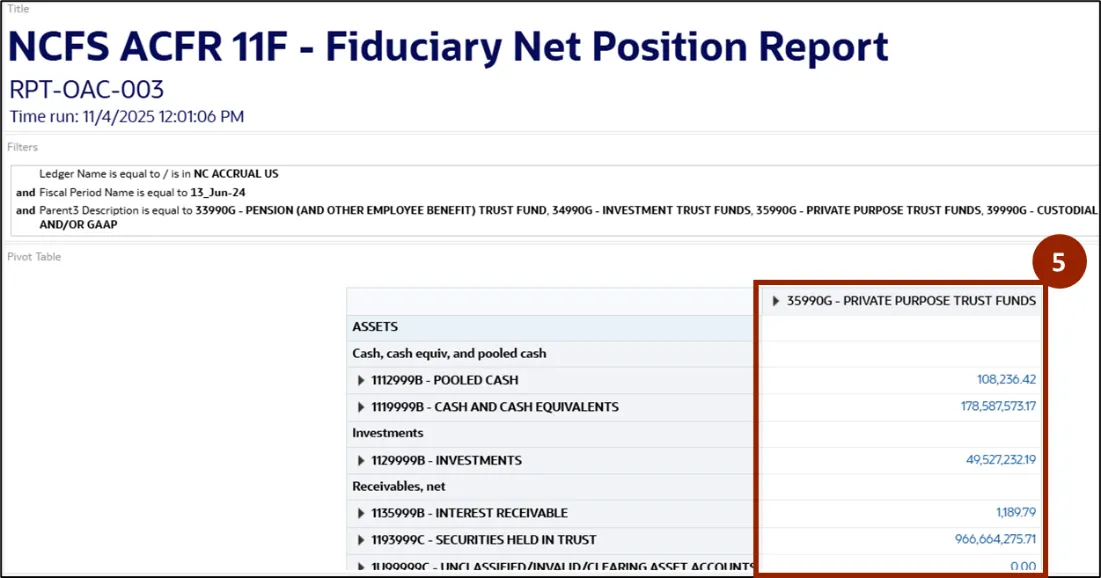
Step 5. The report refreshes, showing only the selected column.
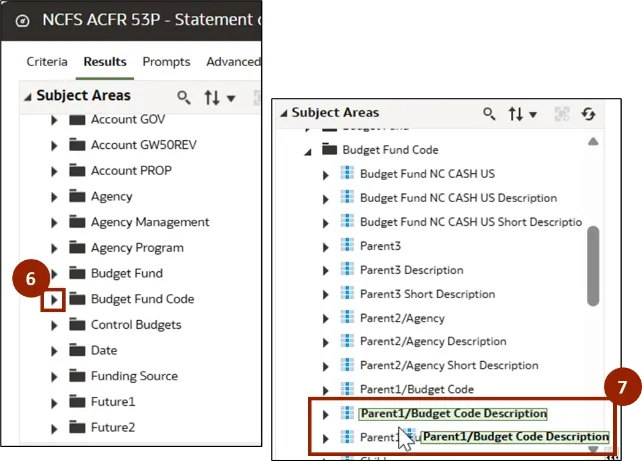
Step 6. In the Subject Areas section, the list of available agency chart segments is displayed. The user can select the desired option from the list. In this example, click the caret icon next to Budget Fund Code to view the drop-down menu.
Step 7. From the drop-down list, select and hold Parent1/Budget Code Description.
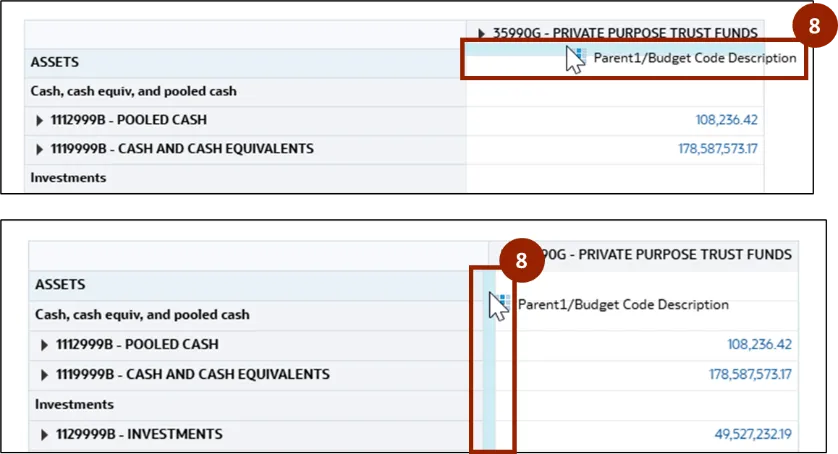
Step 8. Drag Parent1/Budget Code Description and place it either below the columns or beside the rows as required.
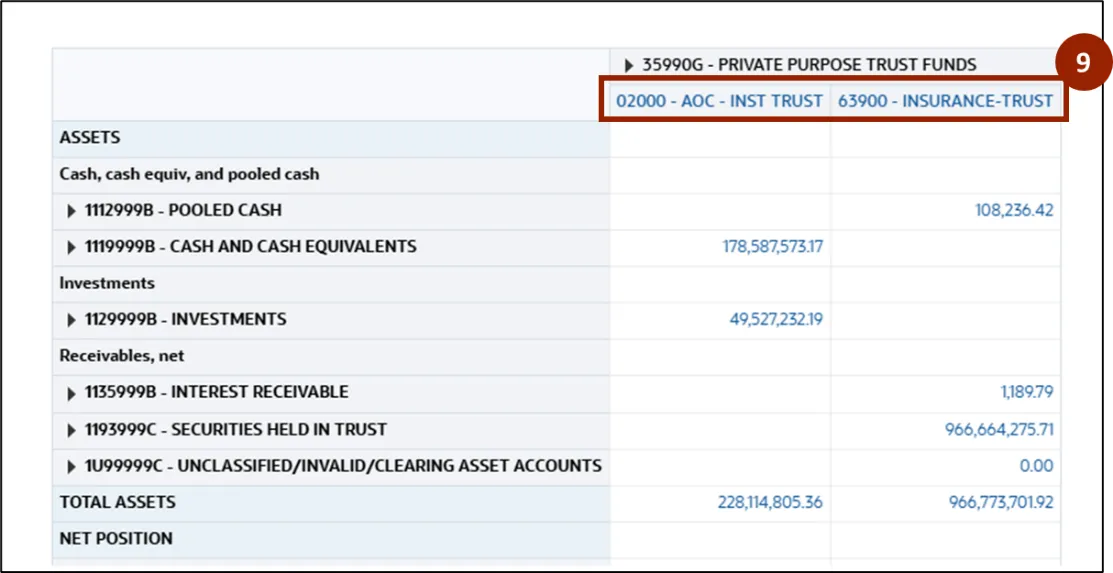
Step 9. The report refreshes to display the Budget Codes that correspond to each column or row for the specific agency.
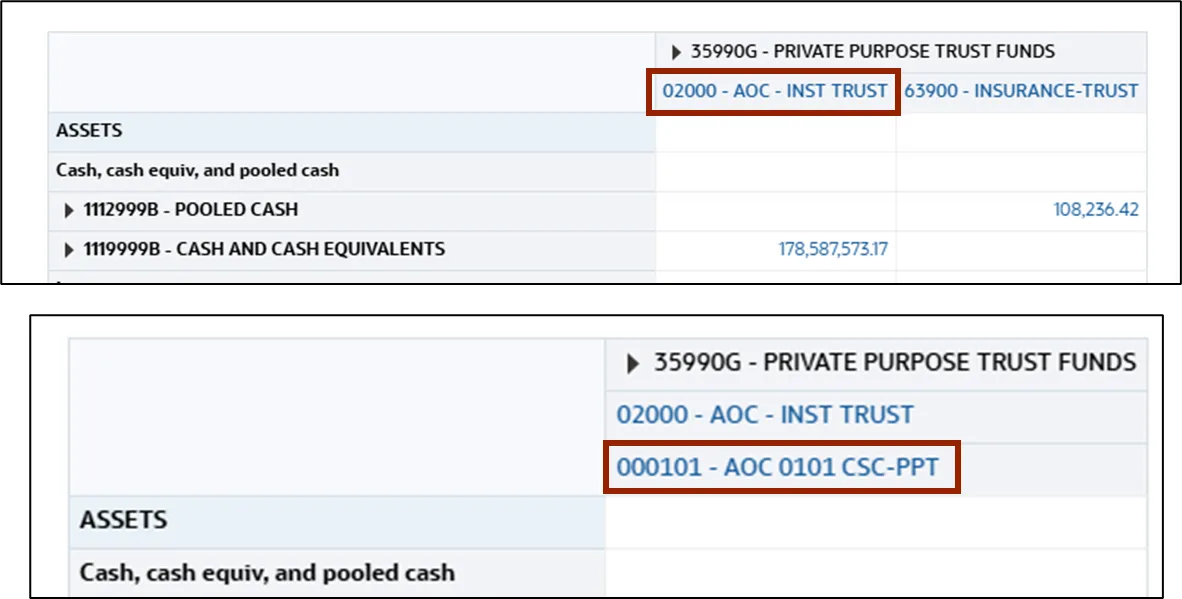
Note: To view more detailed information, the user can click the specific budget code link located above or below the columns. This allows them to drill down and display the corresponding child-level budget fund details for that column.
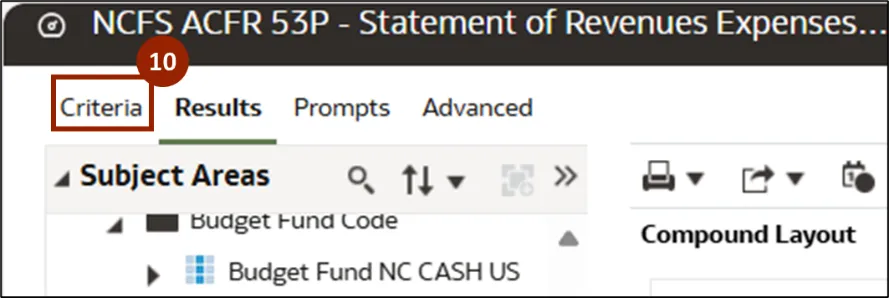
Step 10. To modify the selection criteria in the report, click the Criteria tab.
Note: The Criteria tab contains selected columns from one or more subject areas. It also lets you access column functions, such as sorting and editing properties.
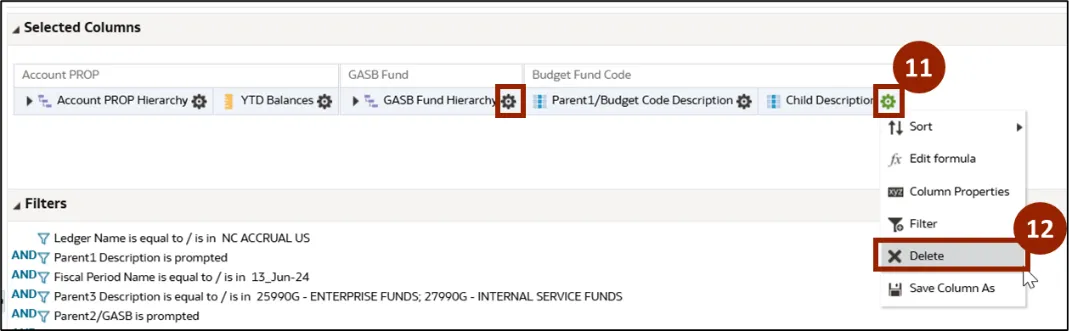
Step 11. In the Selected Column section, locate the applied selection fields. Click the gear icon next to Child Description and Parent1/Budget Code Description.
Step 12. A drop-down list is displayed. Select Delete to remove the columns.
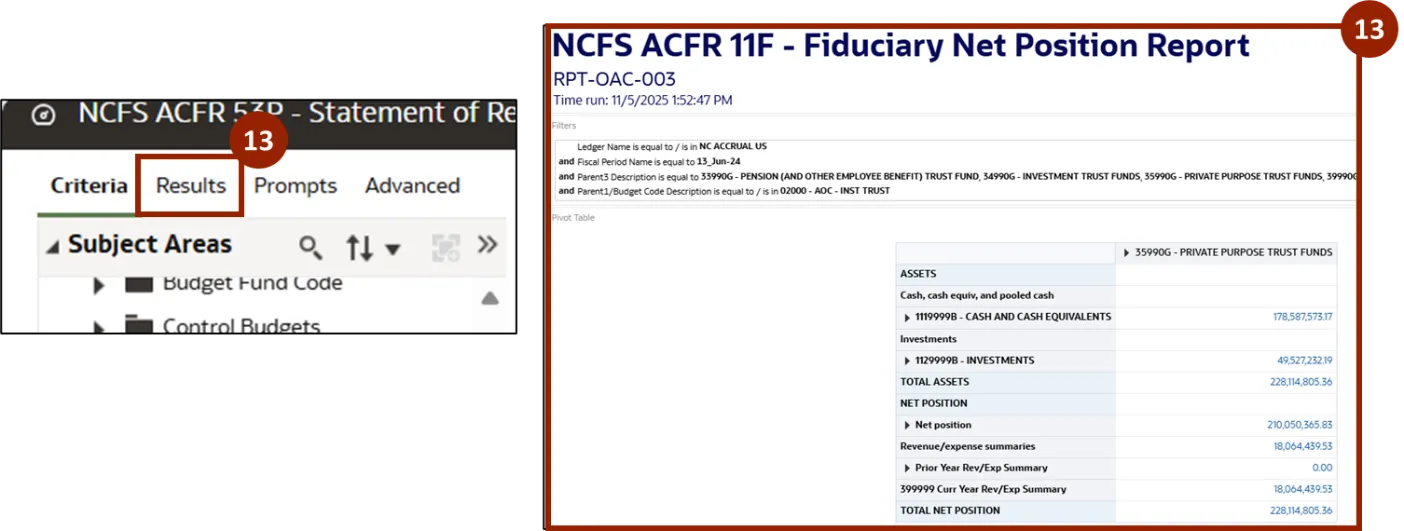
Step 13. Click the Results tab to view the refreshed report without the previously applied criteria.
Note: The Prompts and Advanced tabs are advanced features designed for technical users.
Wrap-Up
OAC users can perform self service in OAC Classic using the steps above to independently analysis and customize reports, extracting meaningful insights for efficient and informed decision-making.
Additional Resources
- Virtual Instructor Led Training (vILT)