Purpose
The purpose of this Quick Reference Guide (QRG) is to provide a step-by-step guide of how to generate classic reports and apply filters in Oracle Cloud Analytics (OAC) Classic.
Introduction and Overview
This QRG outlines the two main processes for generating reports and applying filters or parameters in OAC Classic. Users can 1) Generate a report in Classic, and/or 2) Apply Filters. Generating a report in OAC Classic provides an overview of how to open the desired report. Applying filters and parameters enables users to customize the report output to meet specific reporting needs, ensuring more targeted and meaningful insights.
Generating a Report in Classic
Follow the below steps to generate a report in OAC classic. There are 9 steps to complete this process.
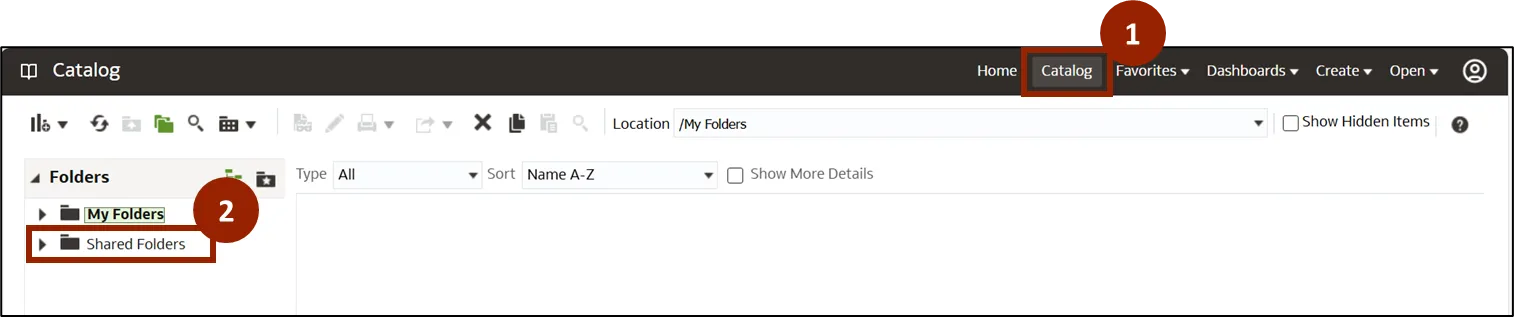
Step 1. Navigate to the Classic Home page. Click Catalog.
Step 2. Once on the Catalog screen, click Shared Folders in the Folders section.
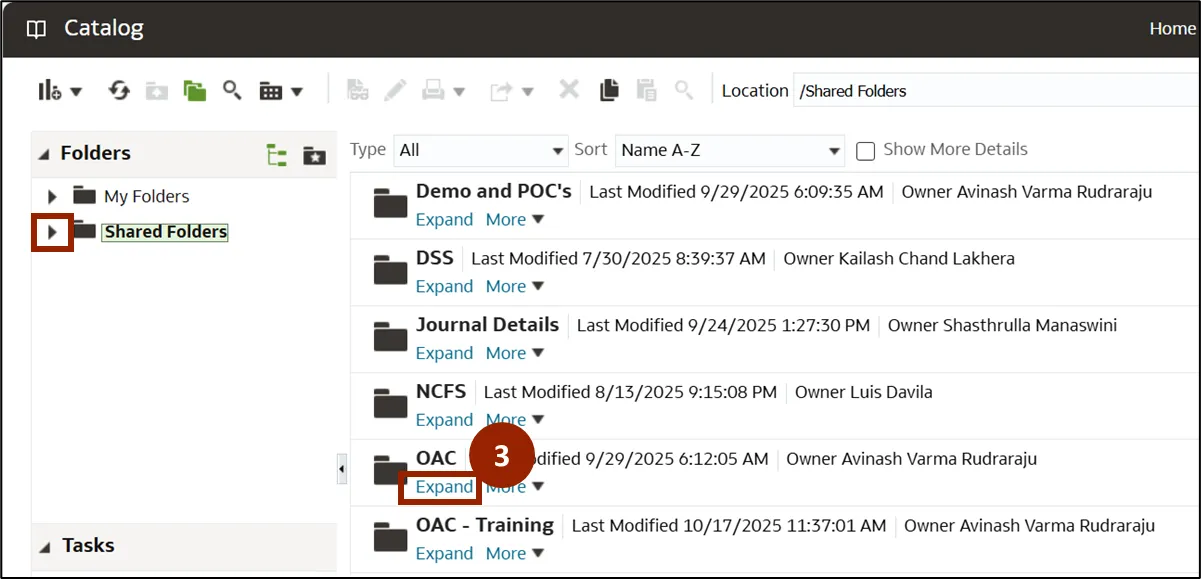
Step 3. A list of folders is displayed. Click Expand under the OAC folder to display its sub-folder.
Note: The user can also click the caret (expand) icon next to Shared Folder to further expand the folders.
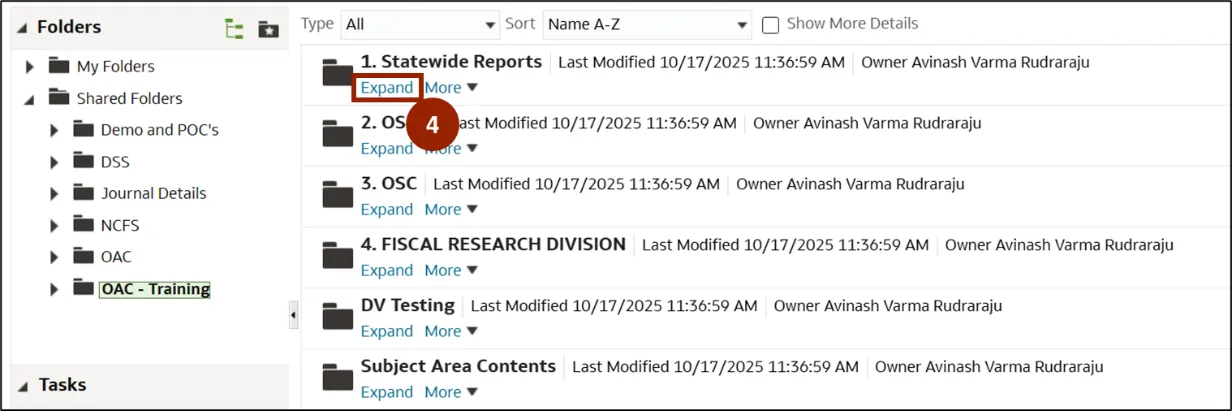
Step 4. In the OAC folder, click Expand under the Statewide Reports folder.
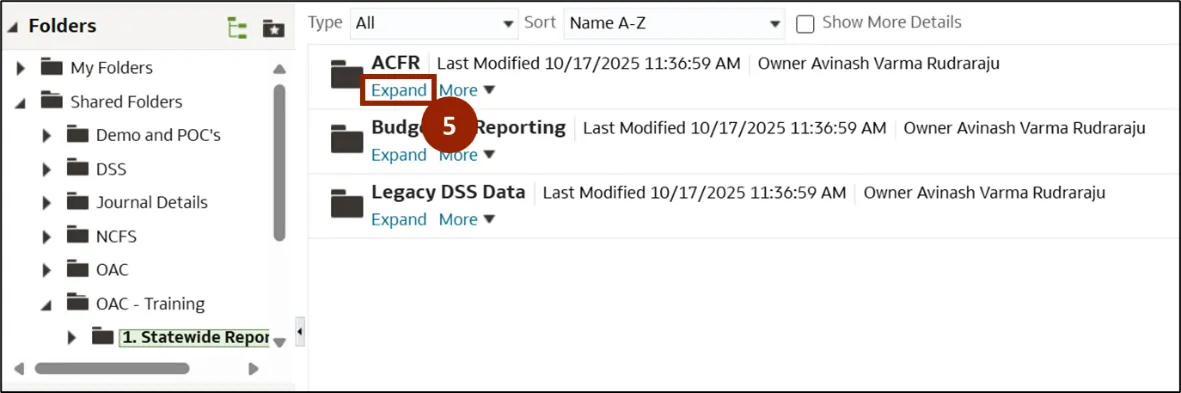
Step 5. ACFR, Budgetary Reporting, and Legacy DSS Data folders are displayed. Click Expand below ACFR to open and display the sub-folders.
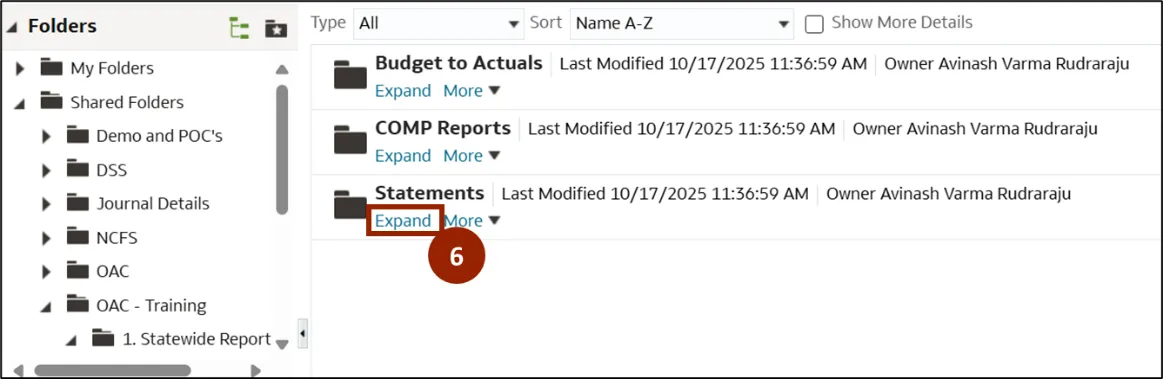
Step 6. Budget to Actuals, COMP Reports, and Statements folders are displayed. Click Expand below Statements folder to display the sub-folders.
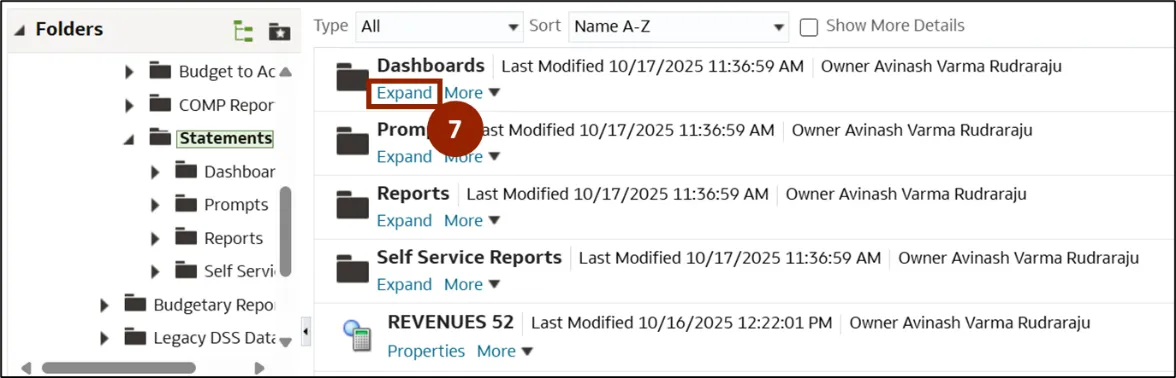
Step 7. Dashboards, prompts, Reports, and Self-Service Reports folders are displayed. Click Expand under the Dashboard folder to view the reports.
Note: The Prompts, Reports, and Self-Service Reports folders are required to generate the Dashboard. As a result, no user action is needed for these folders.
Step 8. All the reports are displayed. Scroll down and click Open to view the desired report.
Note: Each report will have both the original report and a Journal Details report.

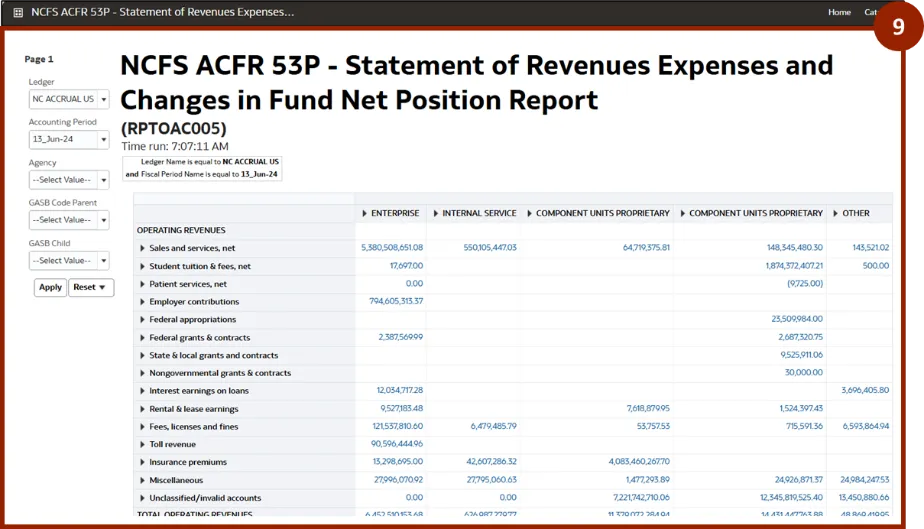
Step 9. The report is automatically generated using the default parameters and displayed on the screen.
Apply Filters
Follow the below steps to apply filters or parameters to the report. There are 4 steps to complete this process.
Step 1. To apply desired filters or parameters, generate the desired report as previously demonstrated.
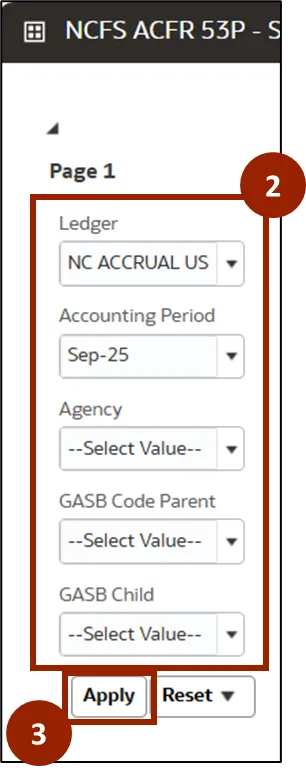
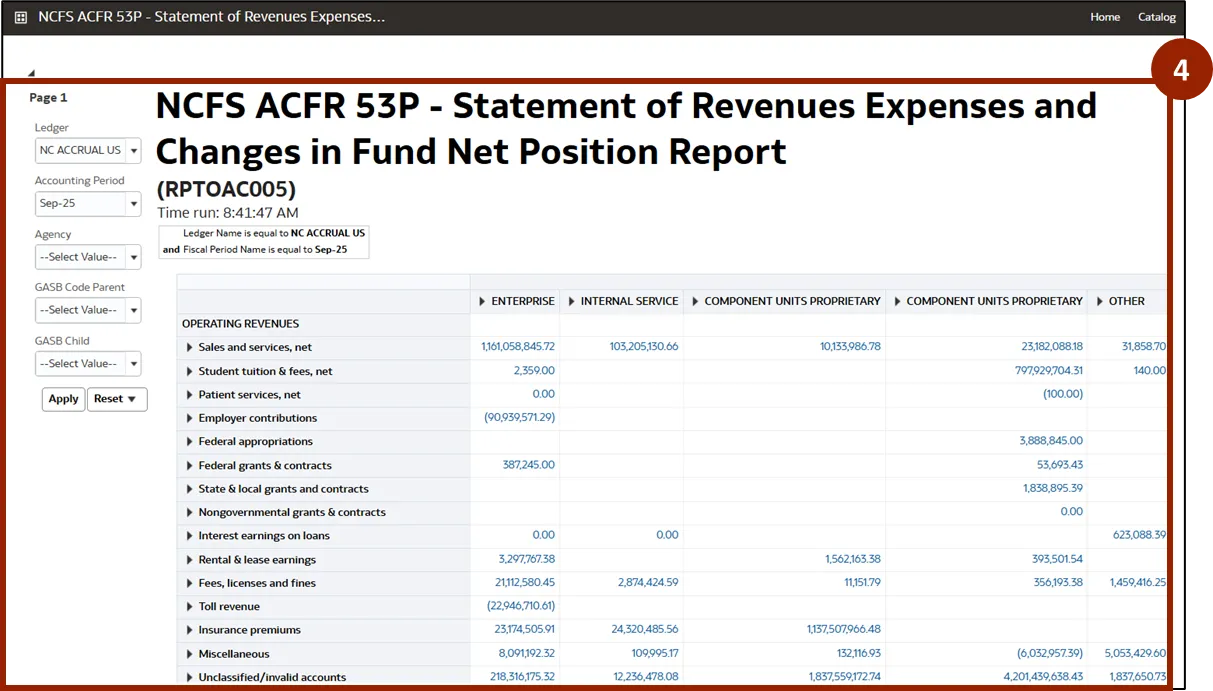
Step 2. On the left side, select the desired filters or parameters from the drop-down fields below to filter the reports:
- Ledger: Select the desired Ledger from the drop-down menu.
- Accounting Period: Select the desired date from the drop-down menu.
- Agency: Select the required agency from the drop-down menu.
- GASB Parent: Select the appropriate GASB Code Parent from the drop-down menu.
- GASB Child: Select the desired GASB Child from the drop-down menu.
Step 3. Click the Apply button to filter the report.
Step 4. The report is generated with the selected filters and parameters, and the updated results are displayed.
Wrap-Up
OAC users can generate reports and apply filters in Classic using the steps above. These processes allow users to access reports in Classic and tailor report outputs for targeted insights, supporting efficient and meaningful data analysis.
Additional Resources
- Virtual Instructor Led Training (vILT)