Purpose
The purpose of this Quick Reference Guide (QRG) is to provide step-by-step explanation on how to setup and manage Inventory ABC classes, Assignment groups, and Classification Sets for the entire Warehouse Organization in the North Carolina Financial System (NCFS). This QRG also covers how to Create a Cycle Count, Record Cycle Count Sequences, Approve Cycle Count Sequences, Review Inventory Item Quantity Updates, Recount Inventory Items from the Cycle Count, Cancel a Cycle Count, and Review the NC Cycle Count Variance Report (RPT-IN-003) in NCFS.
Introduction and Overview
This QRG covers how to and manage Inventory ABC classes, Assignment groups, and Classification Sets for the entire Warehouse Organization, Create a Cycle Count, Record Cycle Count Sequences, Approve Cycle Count Sequences, Review Inventory Item Quantity Updates, Recount Inventory Items from the Cycle Count, Cancel a Cycle Count and Review the NC Cycle Count Variance Report (RPT-IN-003) in NCFS.
Manage Inventory ABC Classes, Assignment Groups, and Classification Sets
To manage ABC Classes, assignment groups, & classification sets in NCFS for the entire warehouse organization, please follow the steps below. There are 46 steps to complete this process.
Step 1. My Enterprise>Setup and Maintenance>Inventory Management>Manage ABC Classes
- Performed by Agency Manager one time setup (not done by warehouse managers).
- Each Warehouse setup individually.
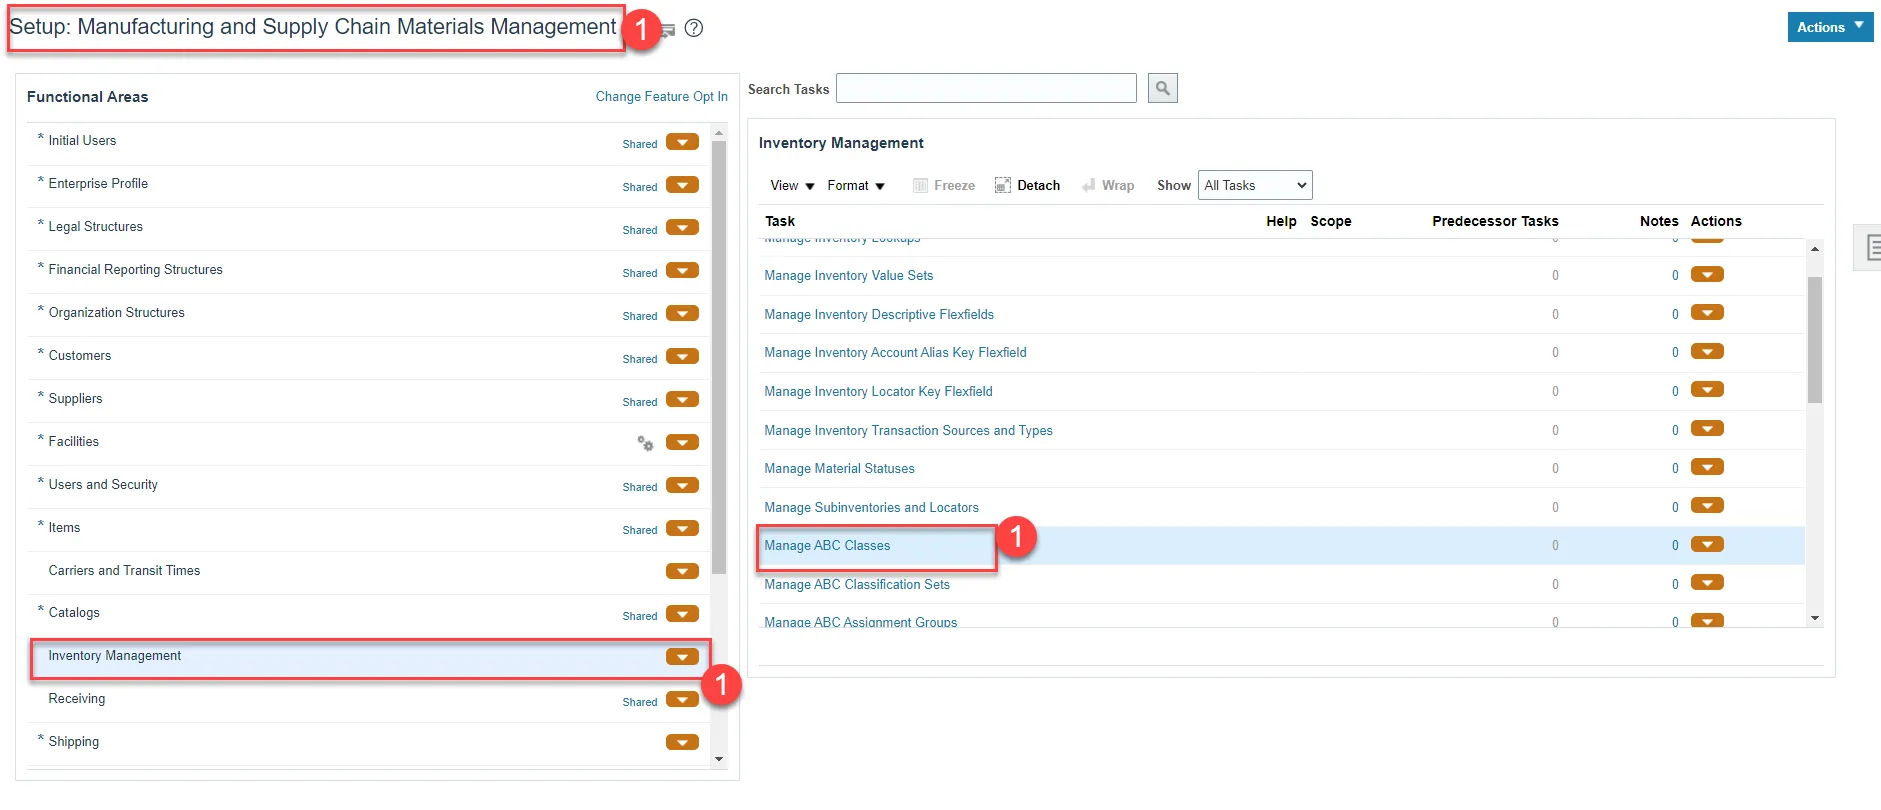
Step 2. Click the Plus Sign or Actions and Add Row to add the ABC Class.
Step 3. Enter the ABC Class Name and Description. Start Date will default to today’s date.
Step 4. Click Save and Close.

Step 5. My Enterprise>Setup and Maintenance>Inventory Management>Manage ABC Classification Sets
- Each Warehouse setup individually.
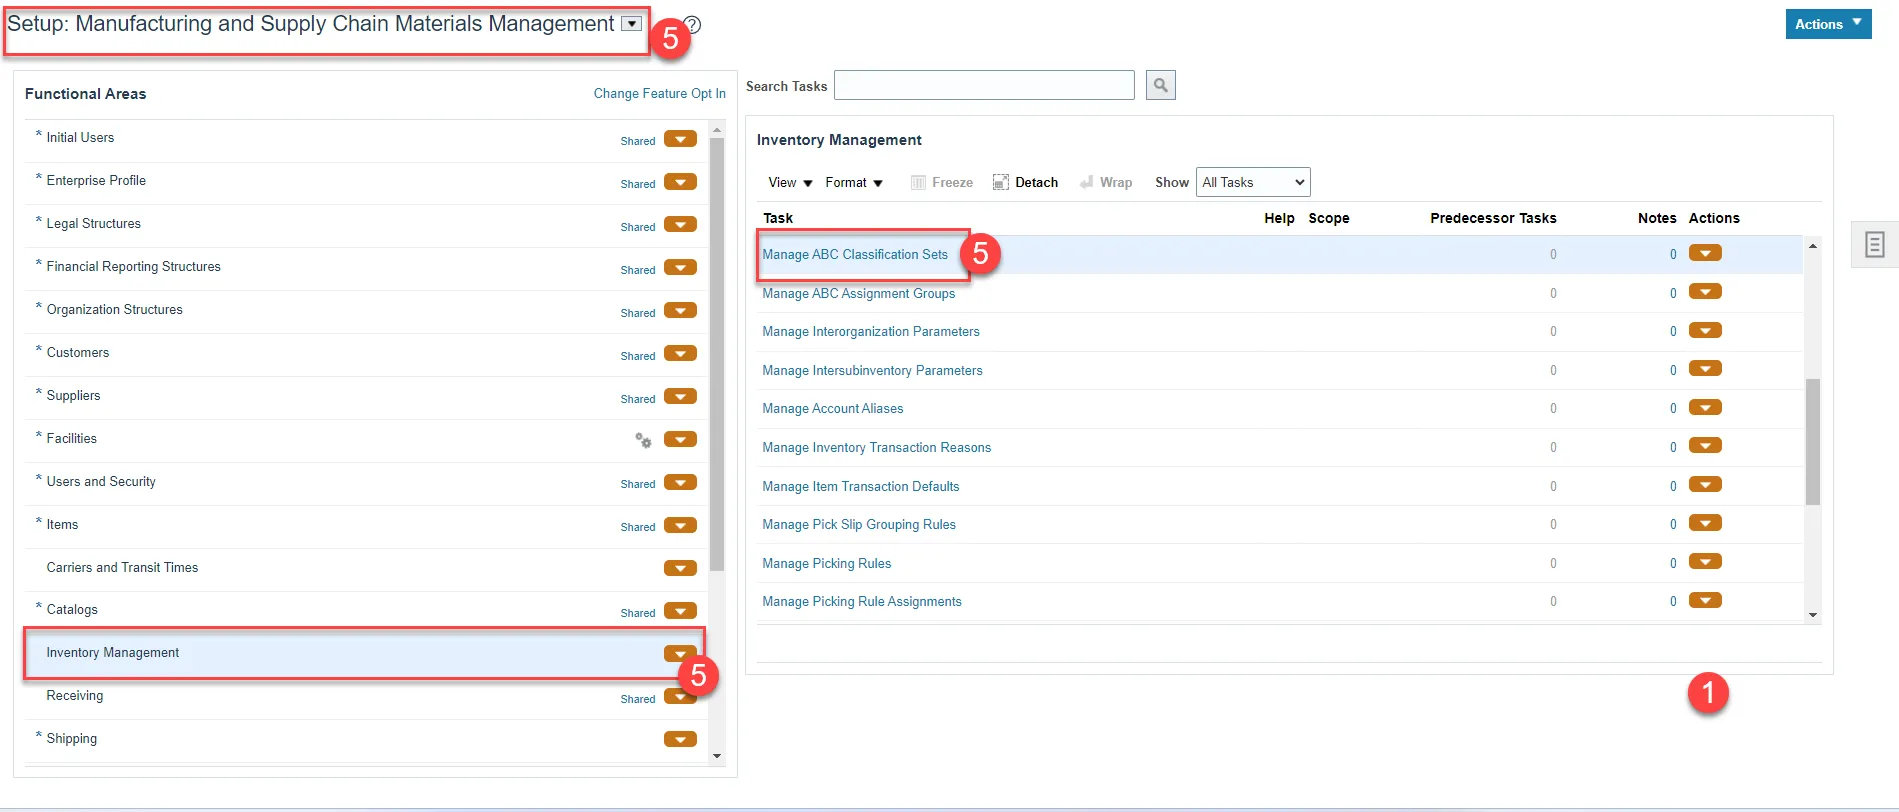
Step 6. Click the Plus Sign or Actions and Create.

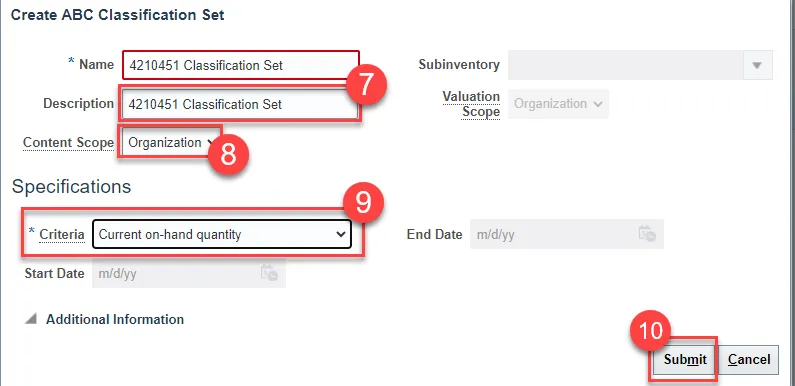
Step 7. Enter Classification Set Name and Description.
Step 8. Select Organization for Content Scope field.
Step 9. Select Current on-hand quantity for Criteria field.
Step 10. Click Submit.
Step 11. The Classification Set is created and will have a Status of None while the Process job runs.
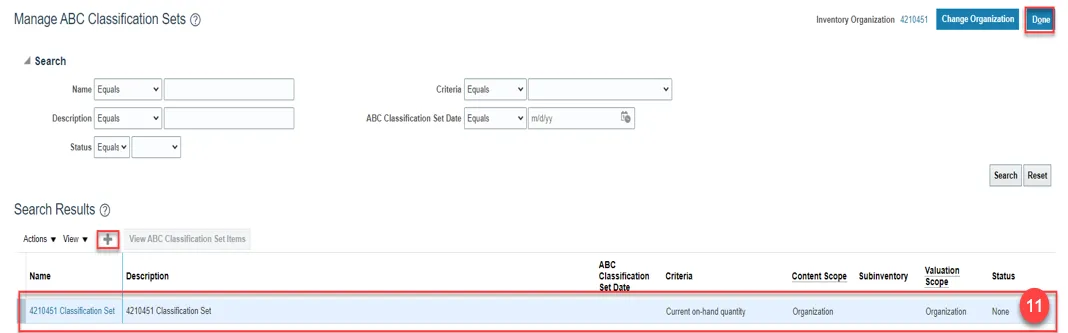
Step 12. Once the process is complete, the status will change to complete, and the View ABC Classification Set Items button will populate and be clickable.

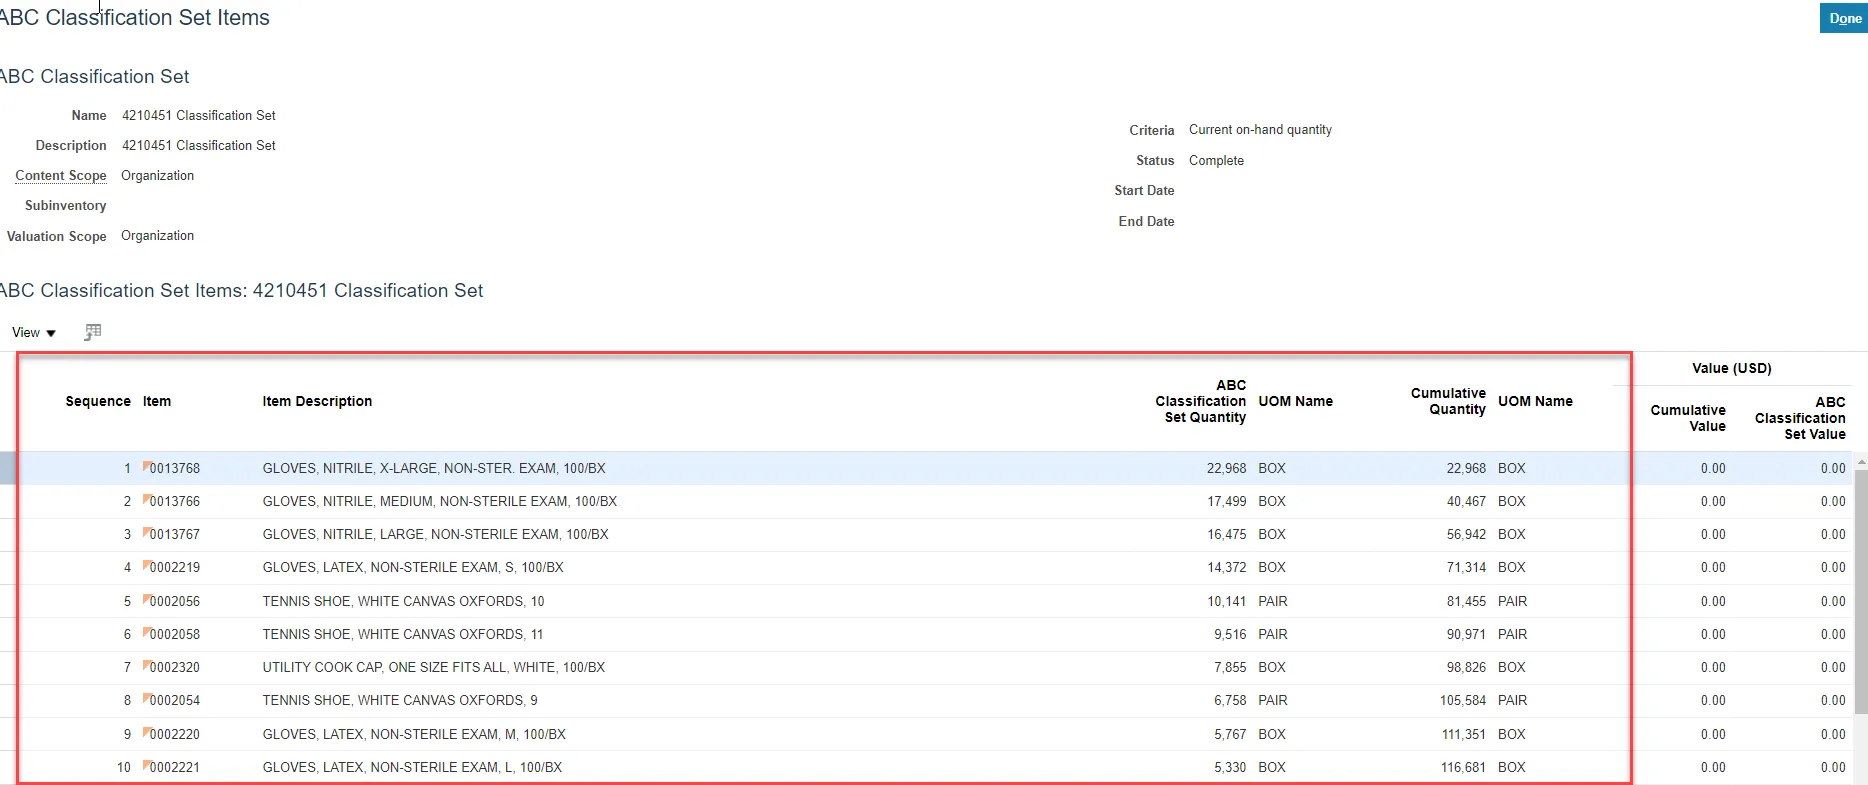
Step 13. Click View ABC Classification Set Items to view every item in this warehouse, item description, the quantity on hand and unit of measure (UOM).
- Orders in ascending order by highest on hand quantity to lowest on hand quantity.
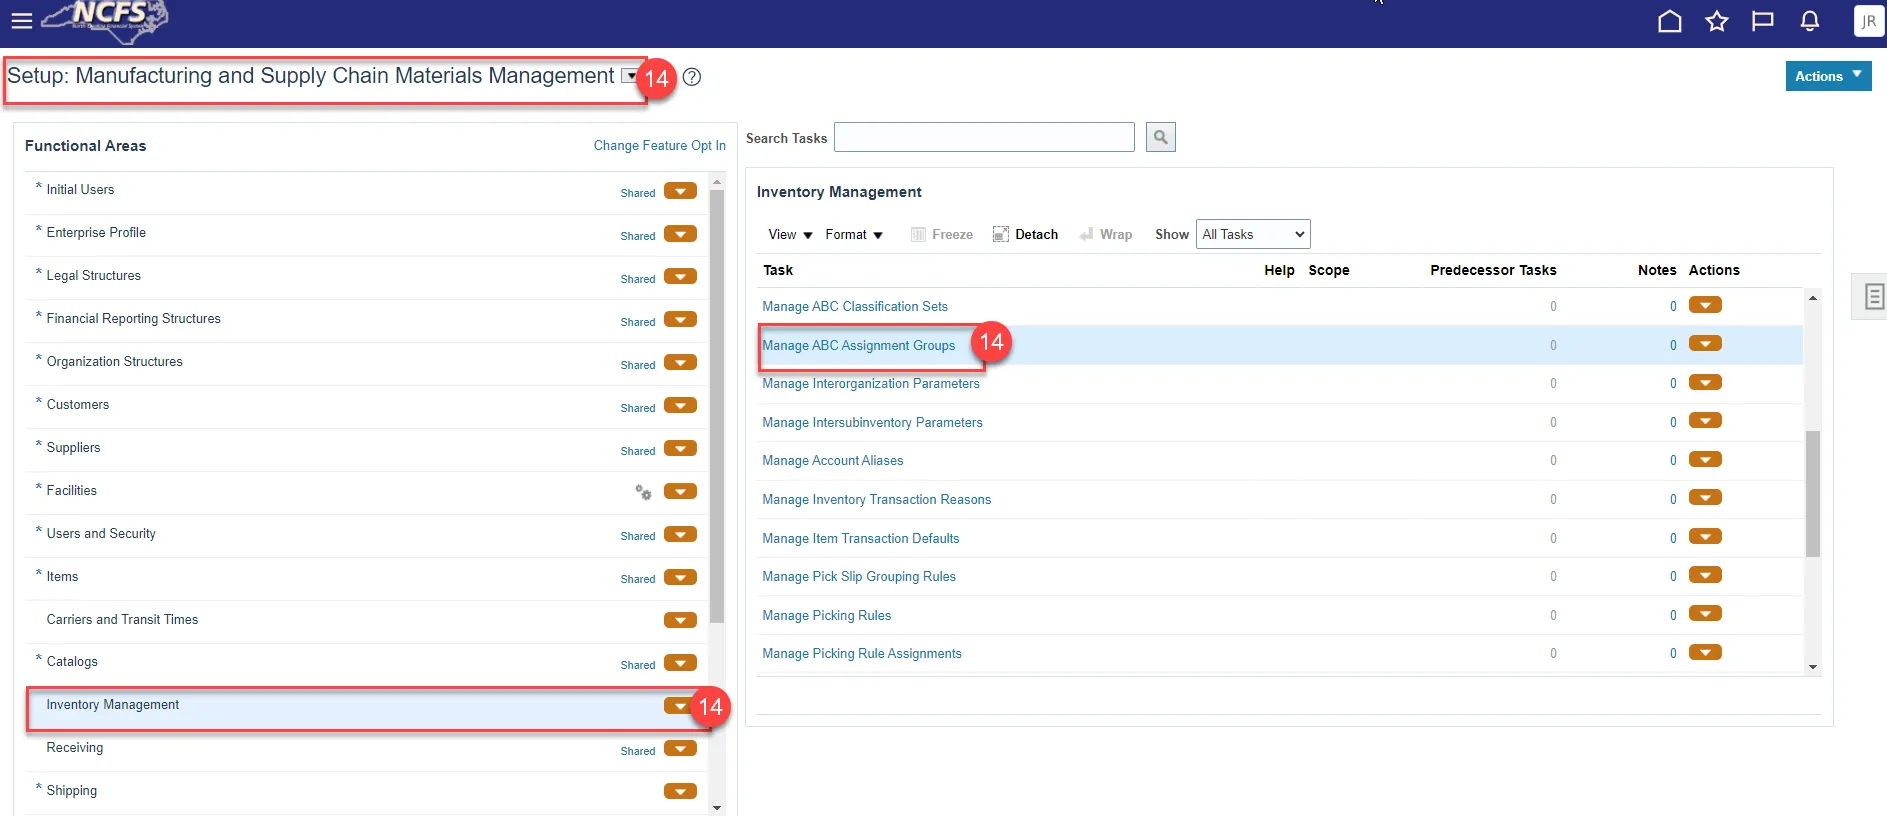
Step 14. My Enterprise>Setup and Maintenance>Inventory Management>Manage ABC Assignment Groups
Step 15. Click the Plus sign or Actions and Create.

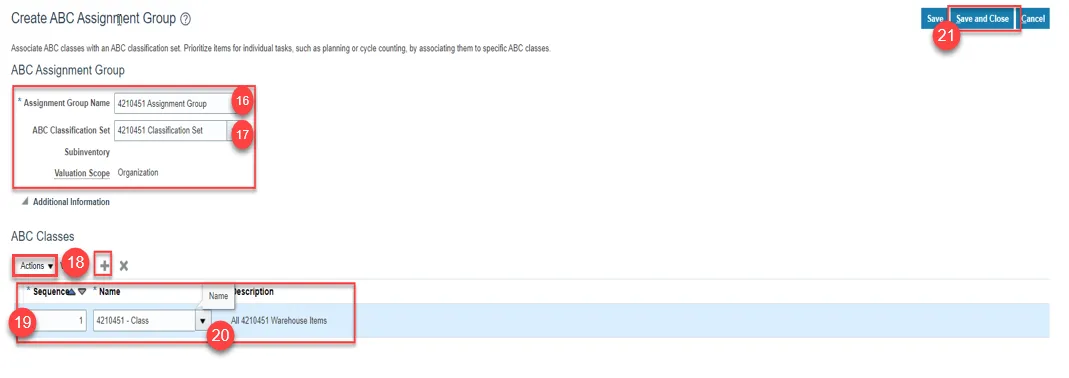
Step 16. Enter the Assignment Group Name.
Step 17. Select the ABC Classification Set from the drop-down list.
Step 18. Click the Plus Sign or Actions and Add Row.
Step 19. Enter a Sequence Number. Example: 1.
Step 20. Select the ABC Class from the drop-down list. The Description will populate upon selection.
Step 21. Click Save and Close.
Step 22. Click Perform ABC Assignments.
Step 23. Click Save and Close.

Step 24. Performing ABC Assignments will Automatically assign all items to the ABC Class setup:
- Sequence is the number of items in this warehouse.
- The item currently showing is the last item on the list.
Step 25. Click Submit button.

Step 26. If you add items to this warehouse between cycle counts, go the Manage ABC Assignment Groups and click Update ABC Assignments to manually add the new item(s) to the ABC Assignment Group to be on the Cycle Count.

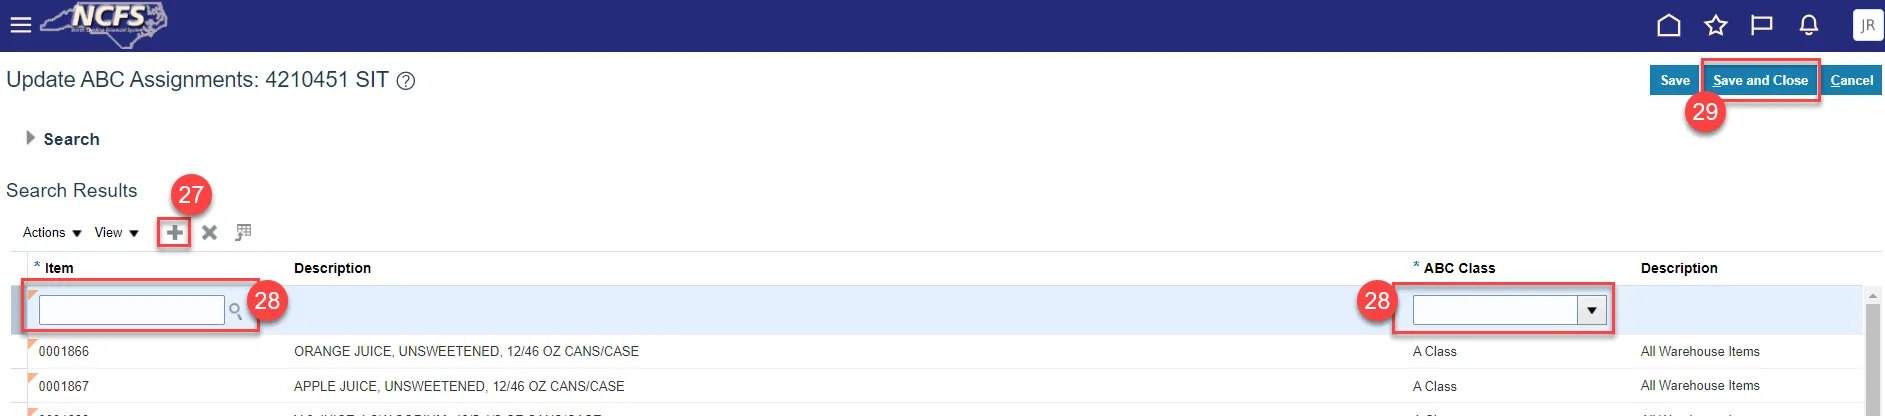
Step 27. Click the Plus Sign Button to add a new item.
Step 28. Enter the Item Number in the Item field and then select the ABC Class from the drop down.
Step 29. Click Save and Close.
***If you have multiple items to be added follow these steps to expedite the process. ***
Step 30. Navigate to the Manage ABC Assignment Groups screen.
Step 31. Select the ABC Assignment Group Name and click the Edit button or select Edit from Actions drop-down.

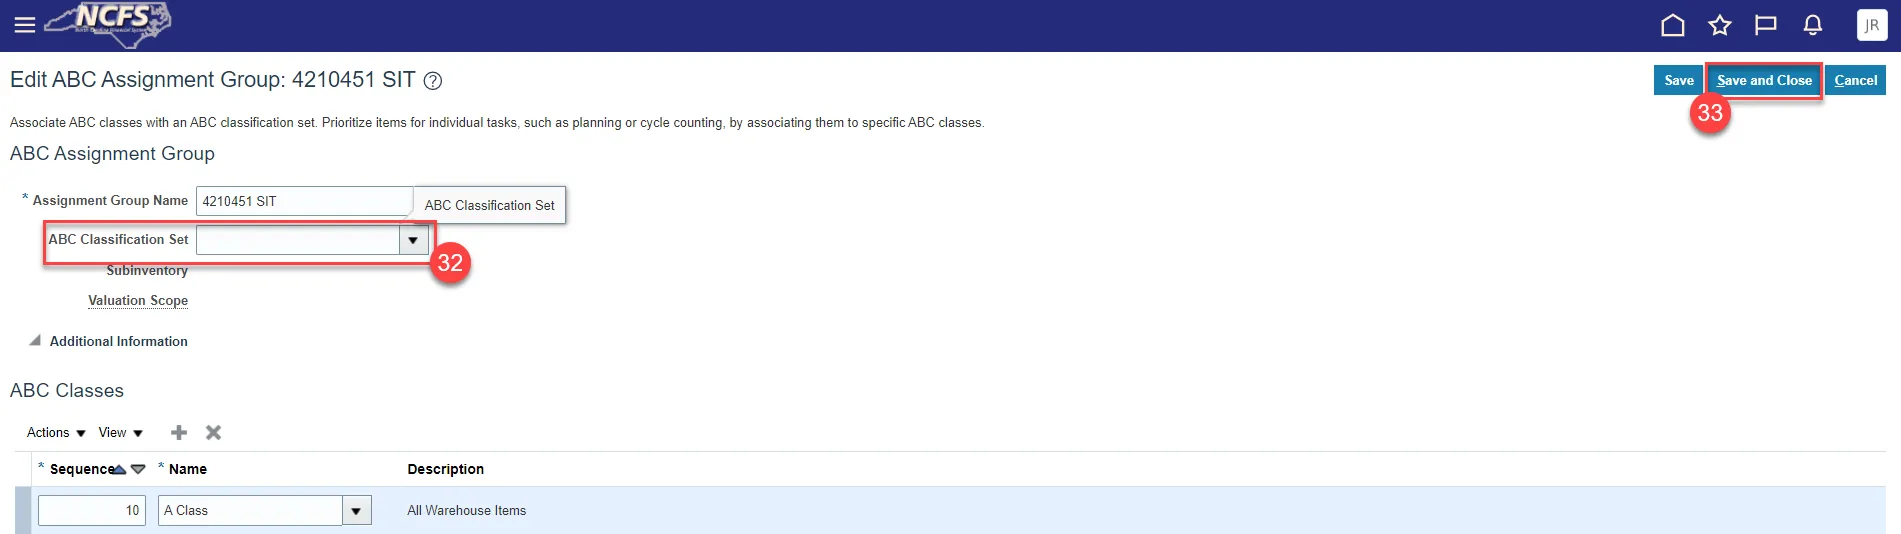
Step 32. Remove the ABC Classification Set from the ABC Classification Set field.
Step 33. Click Save and Close.
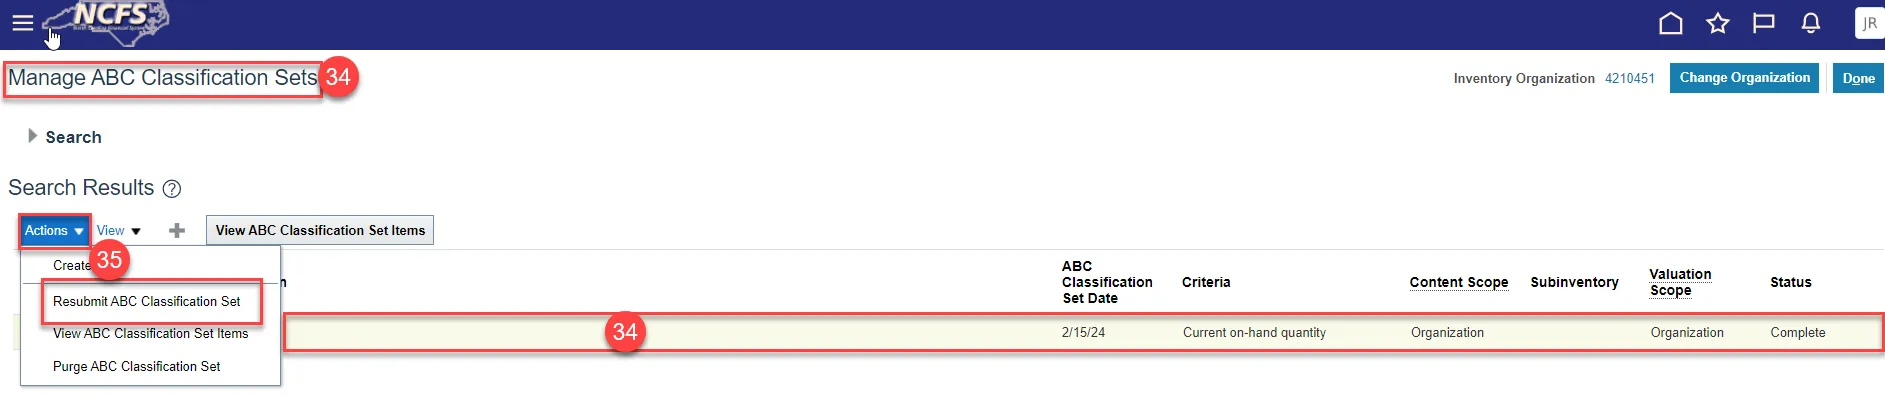
Step 34. Navigate to the Manage ABC Classification Sets and select the ABC Classification Set.
Step 35. Click on Actions and select Resubmit ABC Classification Set.
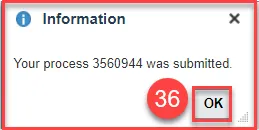
Step 36. An Information pop-up window will appear, click OK.
Step 37. Navigate back to Manage ABC Assignment Groups.
Step 38. Select the appropriate ABC Assignment Group Name.
Step 39. Click the Edit button.

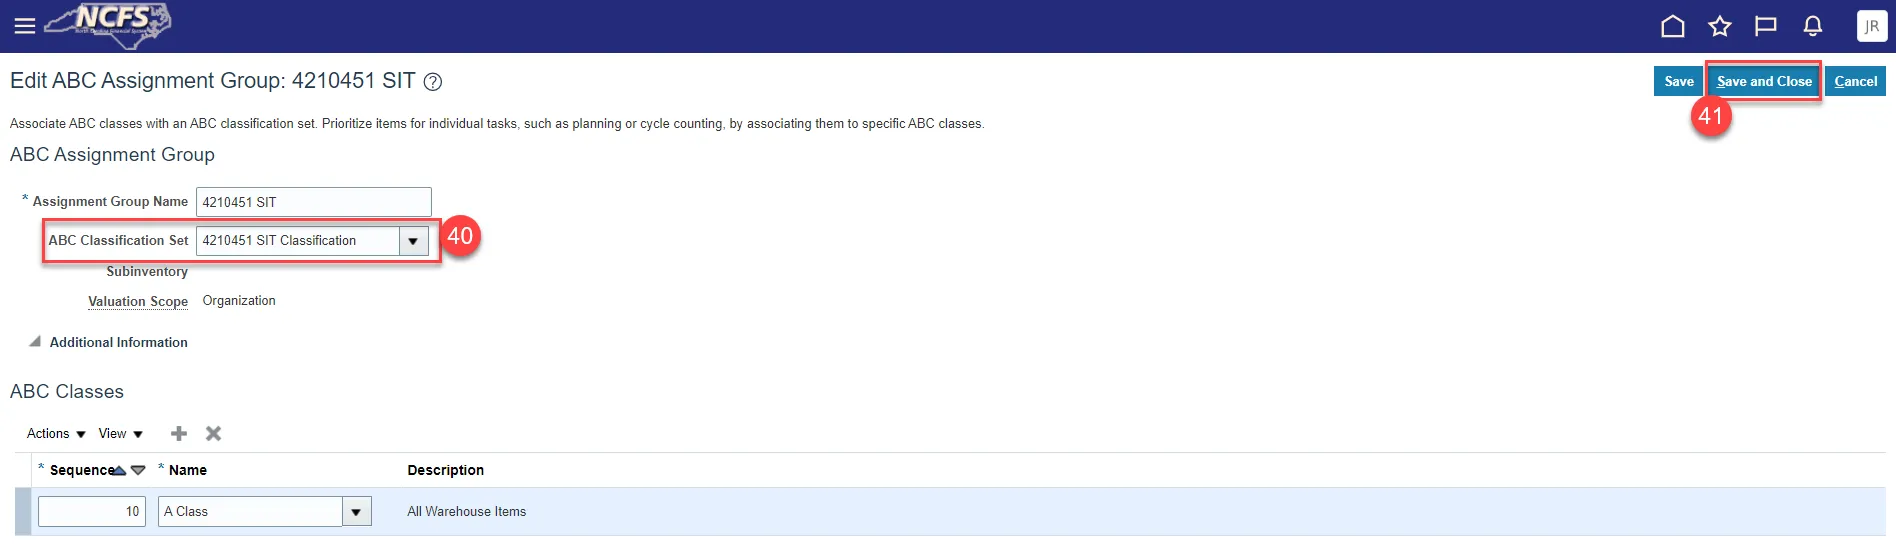
Step 40. Select the ABC Classification Set from the drop-down.
Step 41. Click Save and Close.
Step 42. Click the Perform ABC Assignments button.

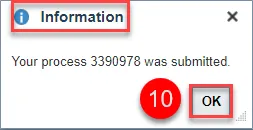
Step 43. Click the Submit button.
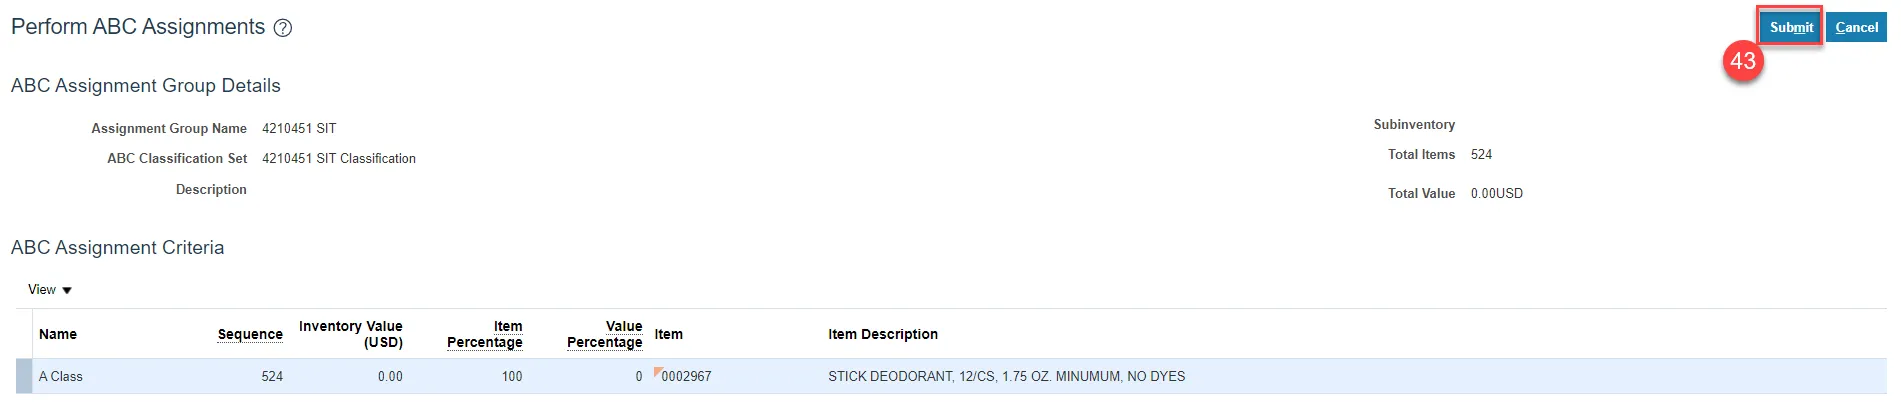
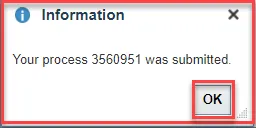
Step 44. An Information pop-up window will appear, click OK.
Step 45. Click Save and Close.
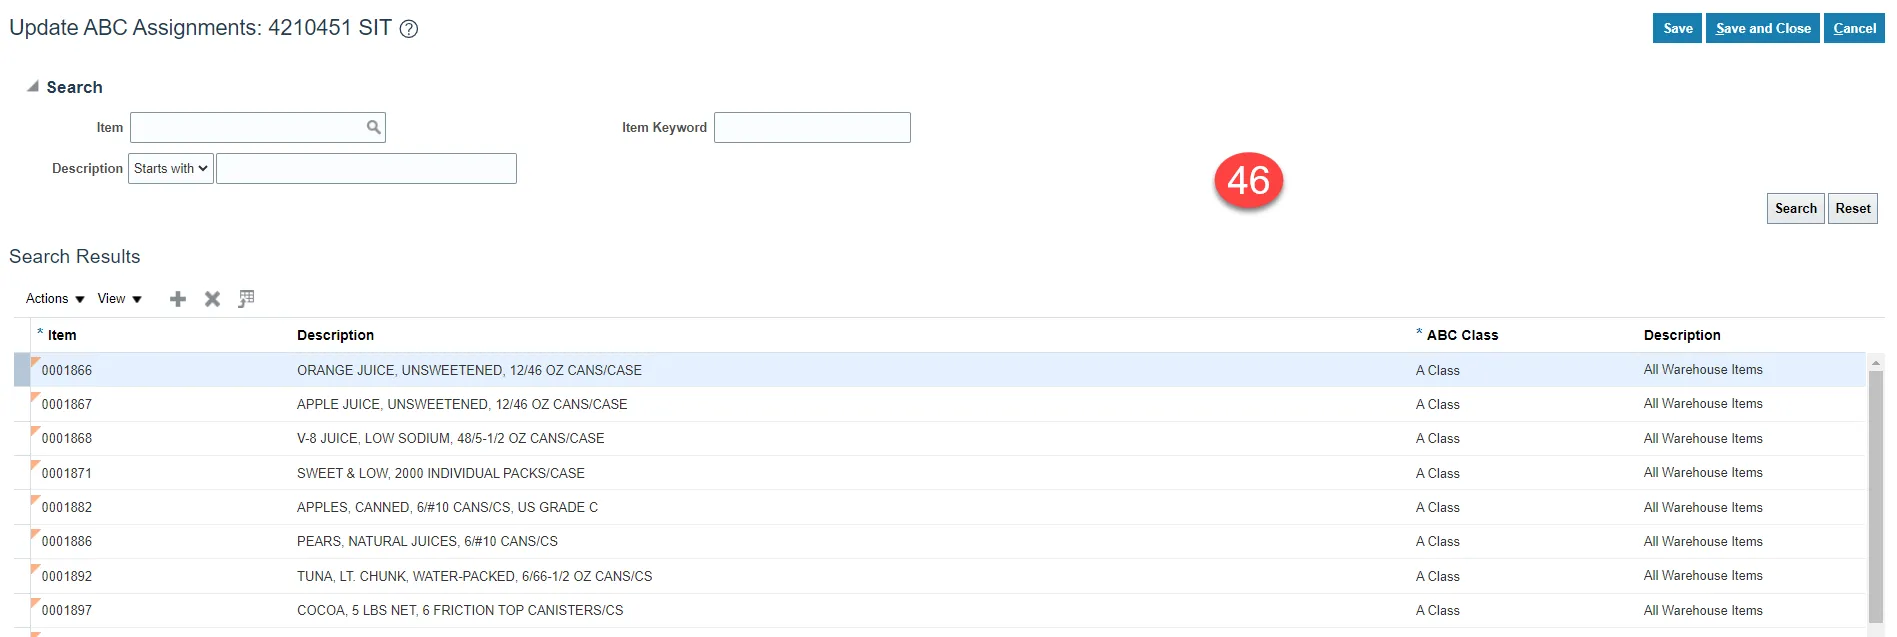
Step 46. Validate if the new item(s) are included in the ABC Assignments Group by clicking on the Update ABC Assignments button.
Creating a Cycle Count
There are 51 steps to complete this process.
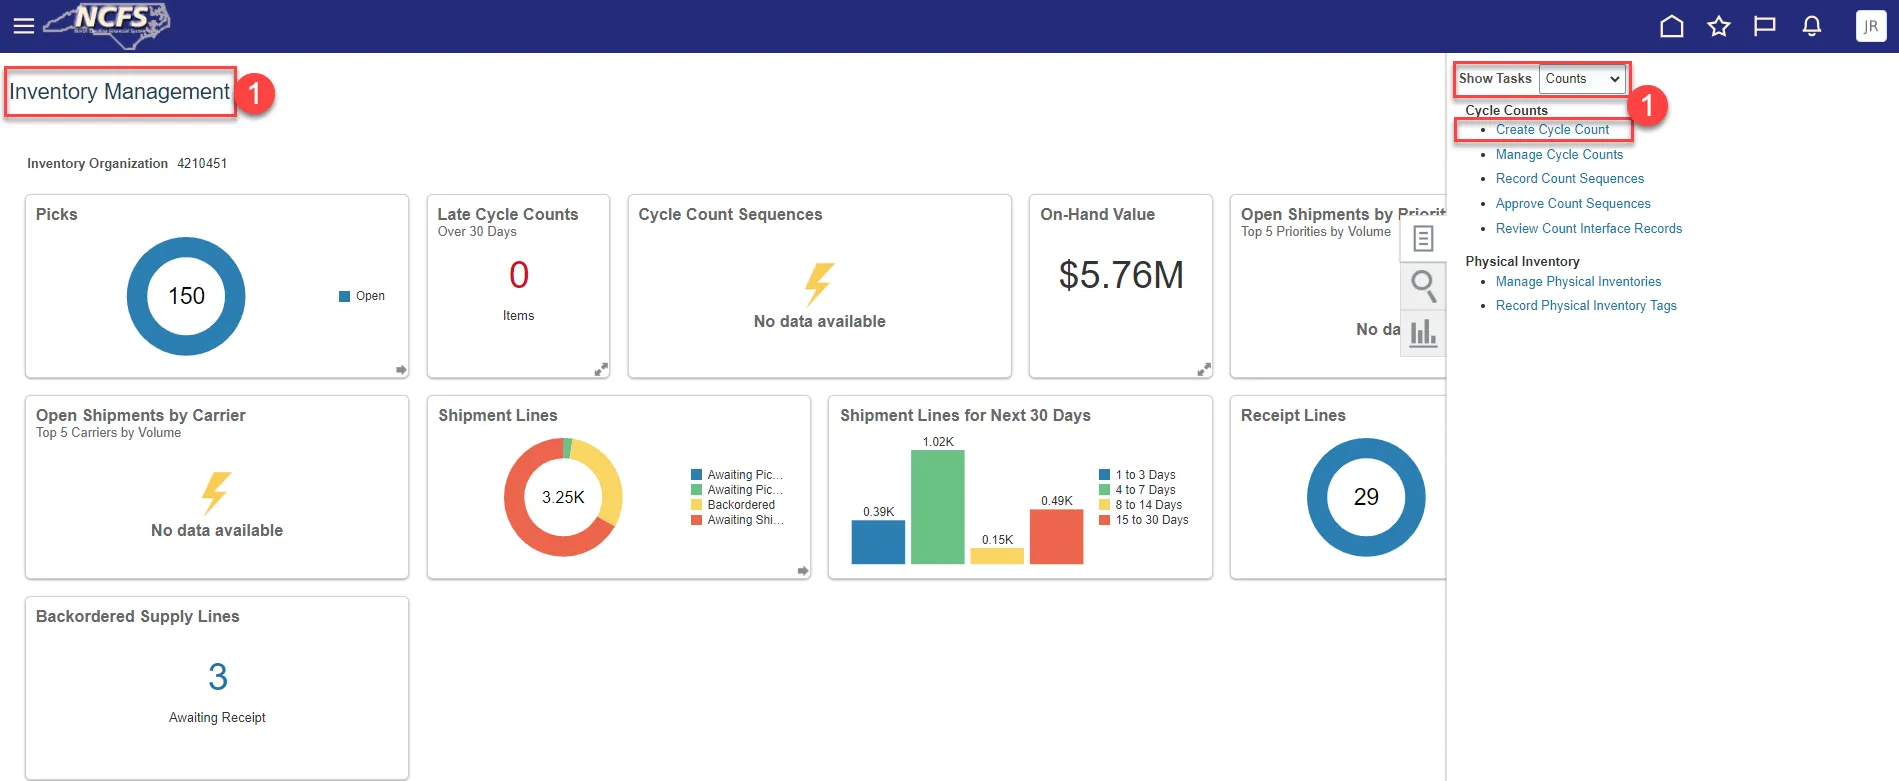
Step 1. Supply Chain Execution>Inventory Management>Create Cycle Count
- Done by Warehouse Managers.
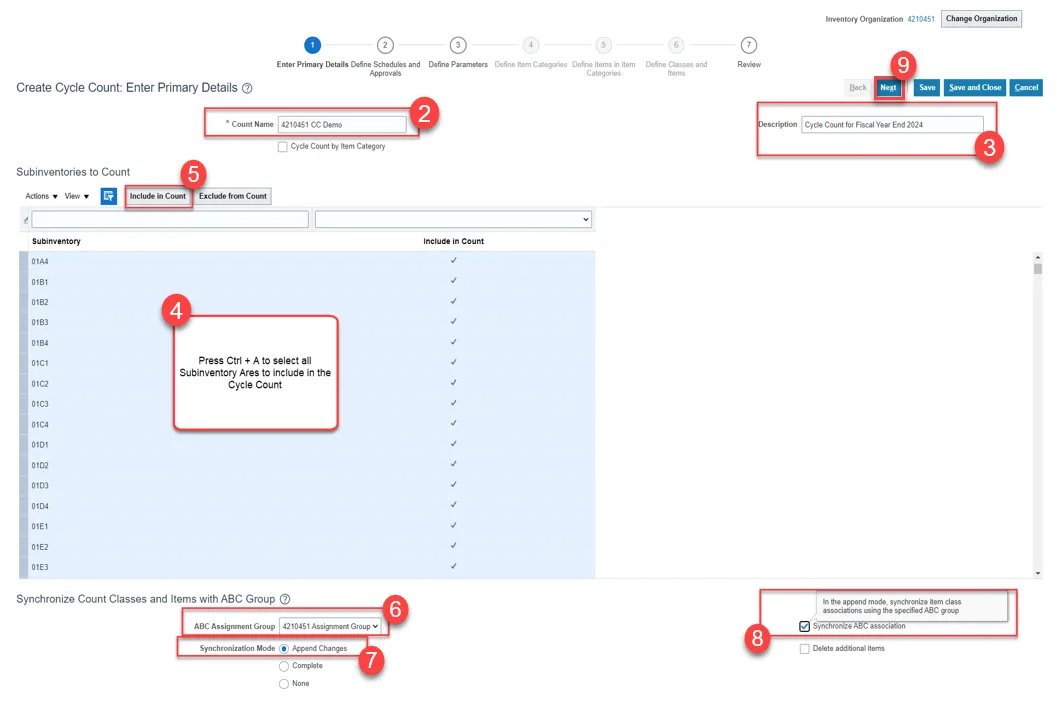
Step 2. Enter Count Name.
Step 3. Enter Description.
Step 4. Select all Subinventory's.
Note: For larger warehouses, you will need to perform this step several times to capture all the Subinventory’s listed.
Step 5. Click the Include in Count button.
Step 6. Select the ABC Assignment Group from the drop-down list.
Step 7. Click Append Changes button for Synchronization Mode.
Step 8. Check the Synchronize ABC association box.
Step 9. Click the Next button.
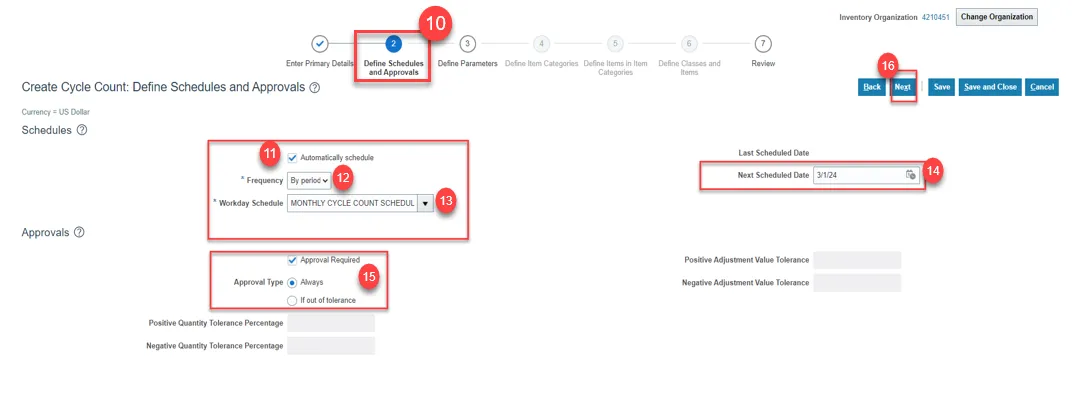
Step 10. Define Schedules and Approvals.
Step 11. Check the Automatically schedule box.
Step 12. Select By period for Frequency.
Step 13. Select Monthly Cycle Count Schedule for Workday Schedule.
Step 14. Select Next Scheduled Date or leave it blank if running for one time only.
Step 15. Check Approval Required box and Approved Type is Always.
Step 16. Click the Next Button.
Step 17. Define Parameters.
Step 18. Enter 1 for Starting Count Sequence field.
Step 19. Enter Maximum Days Before Late. Example: 2 days.
Step 20. Start Date will default to today’s date.
Step 21. Check Count Zero Quantity box.
Step 22. Check Serialized items allowed box.
Step 23. Serial Numbers per Count will default to One.
Step 24. Serial Numbers Adjustment will default to Adjust if possible.
Step 25. Click Save and then Next.

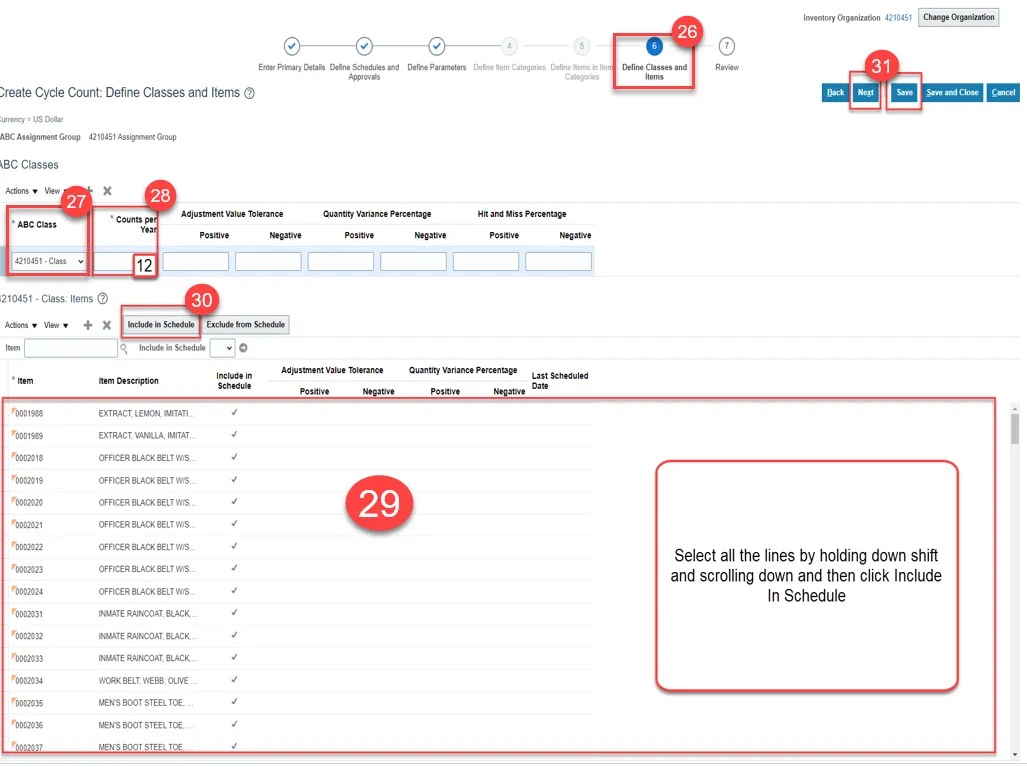
Step 26. Define Classes and Items.
- Steps 4 & 5 are skipped because we did not choose the item category for item class setup.
Step 27. ABC Class will default in the ABC Class field.
Step 28. Enter 12 in the Counts per year field.
Step 29. Select all the Items to be included in the Cycle Count.
Step 30. Click Include in Schedule Button.
Step 31. Click Save and Next.
Step 32. Review all the Cycle Count Details selected.
Step 33. Click Save and Close.

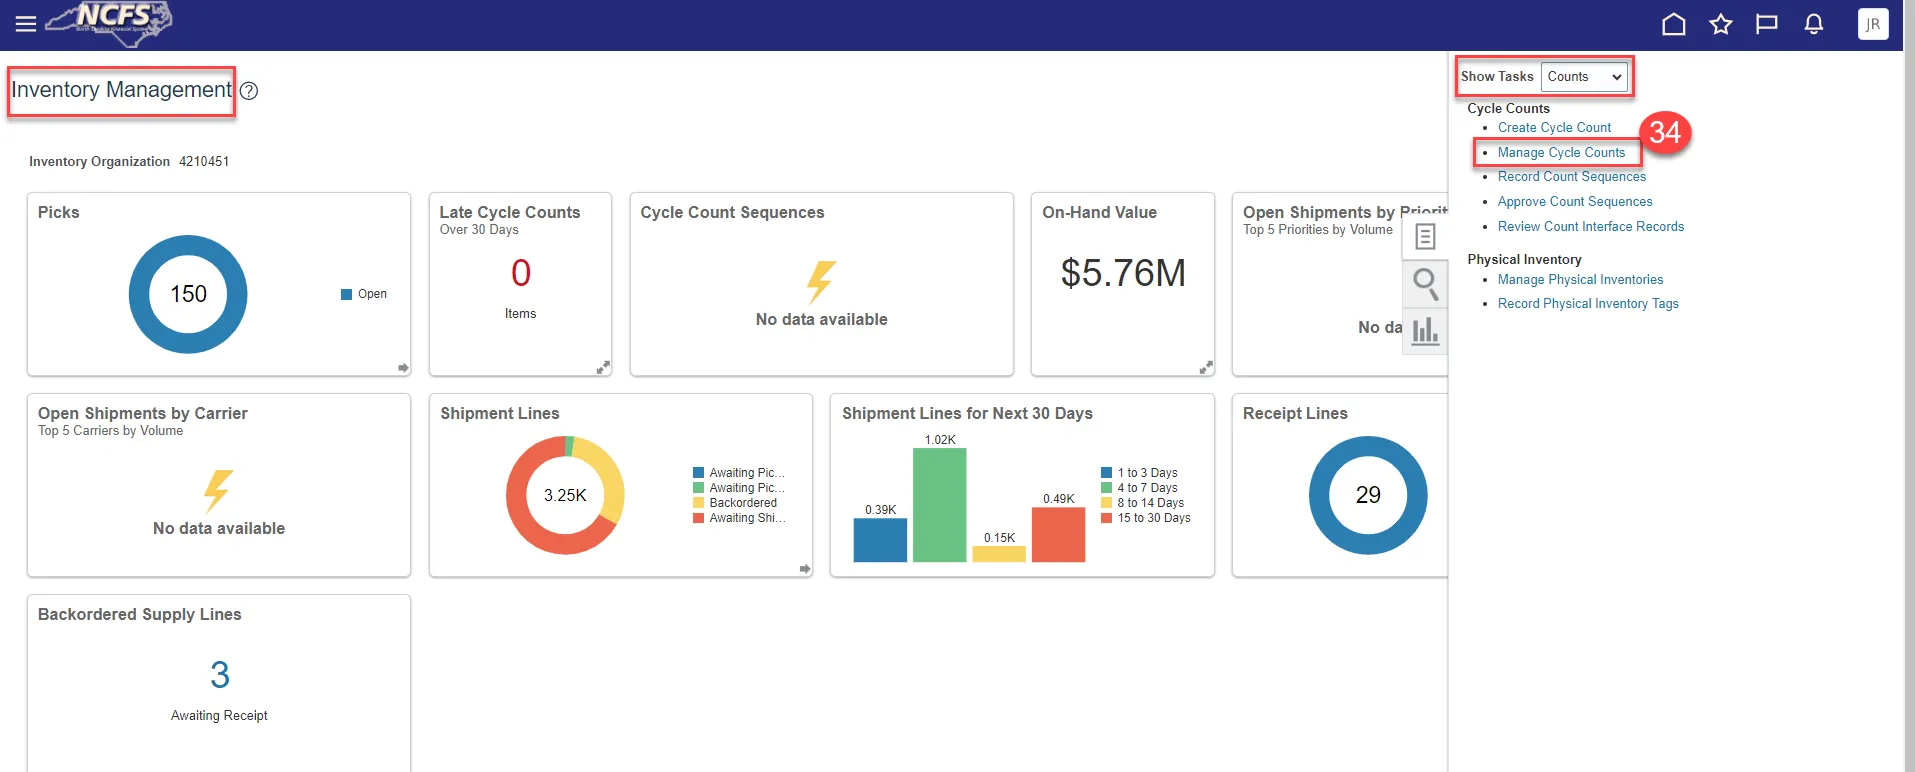
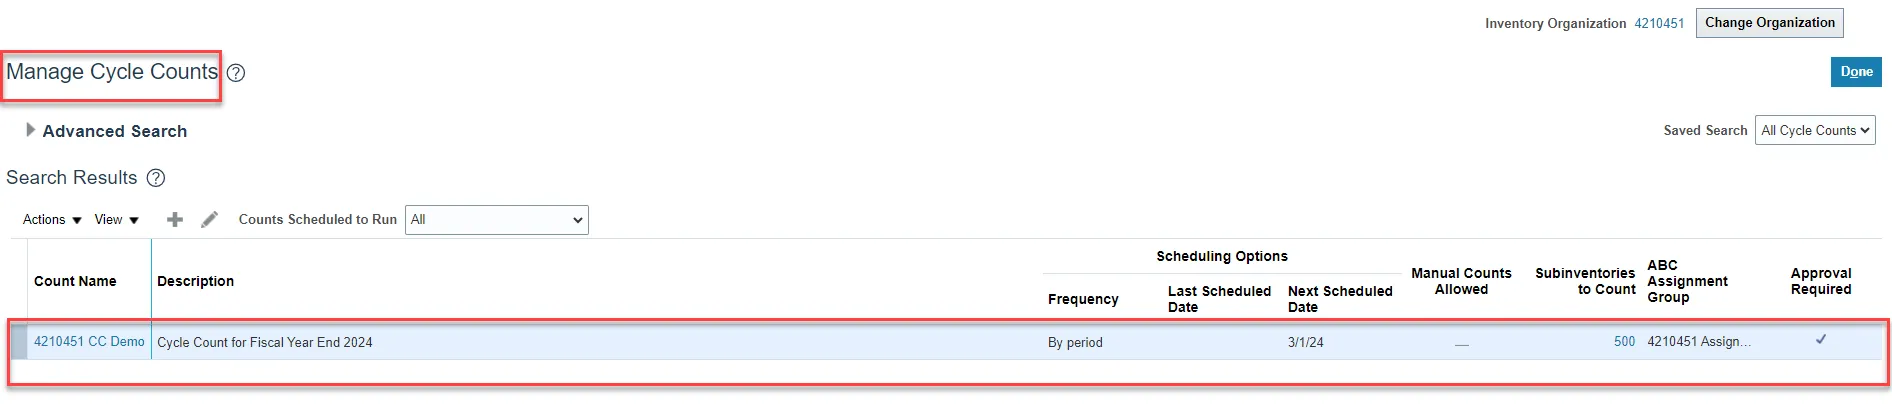
Step 34. You can access the Cycle Count under Manage Cycle Counts.
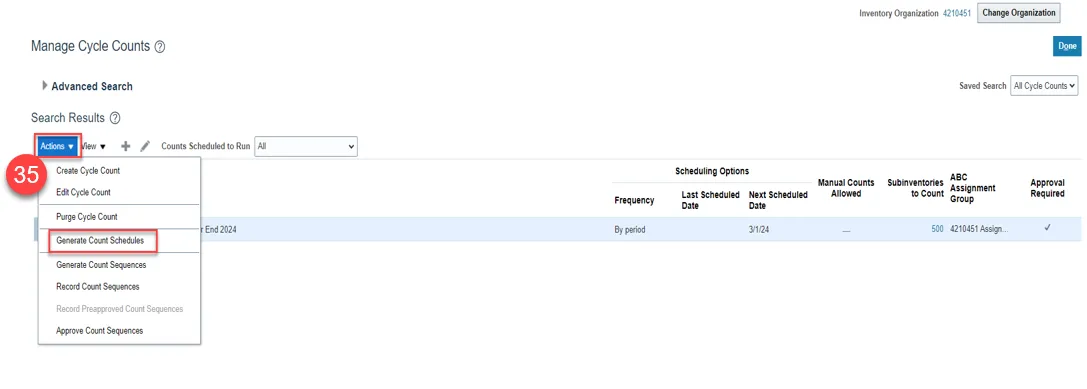
Step 35. Click Actions and select Generate Count Schedules.
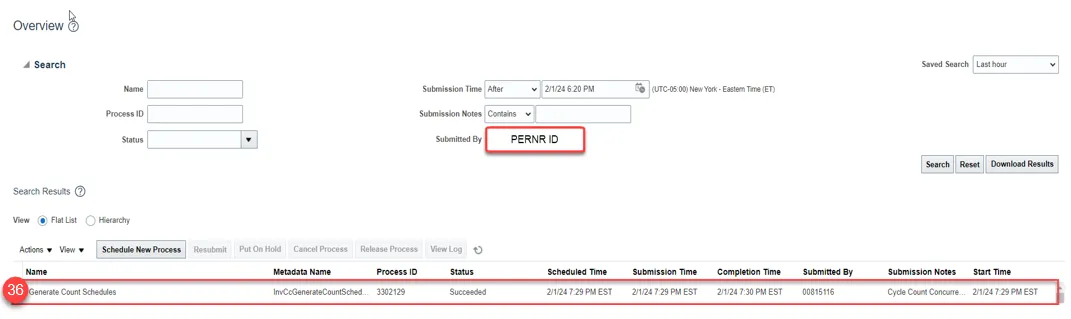
Step 36. Check Scheduled Processes to see when Generate Count Schedules is completed.
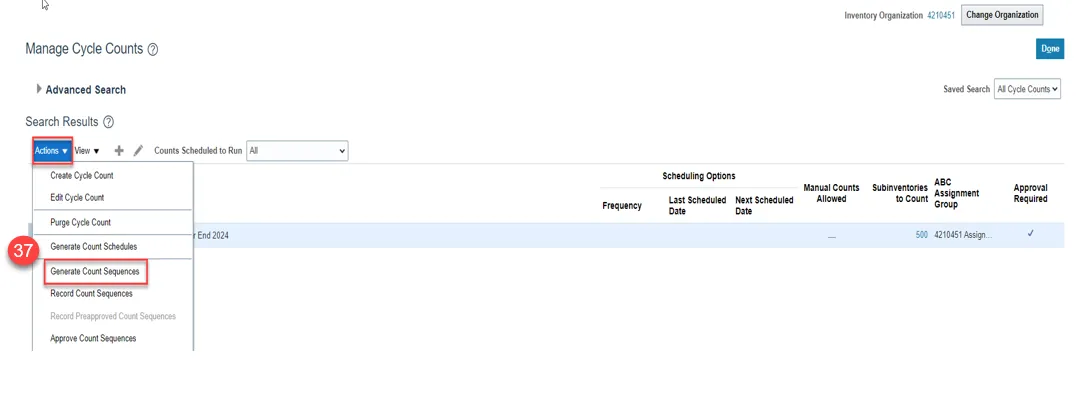
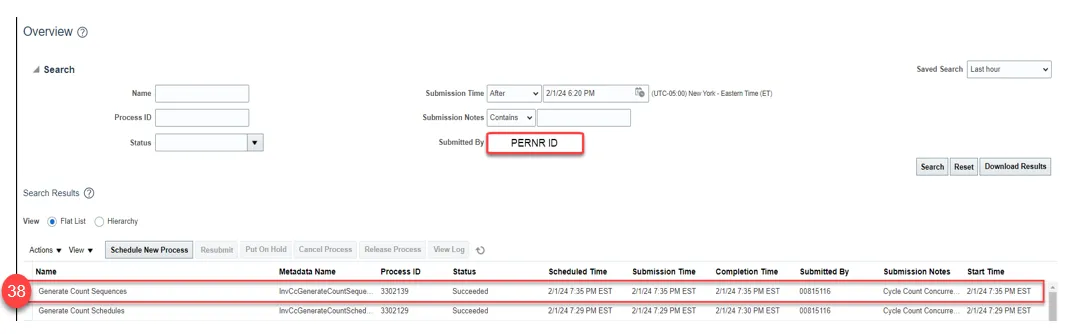
Step 37. Click on Actions and select Generate Count Sequences.
Step 38. Check Scheduled Processes to see when Generate Count Sequences is completed.
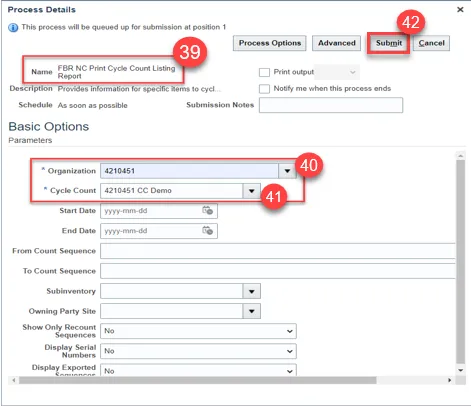
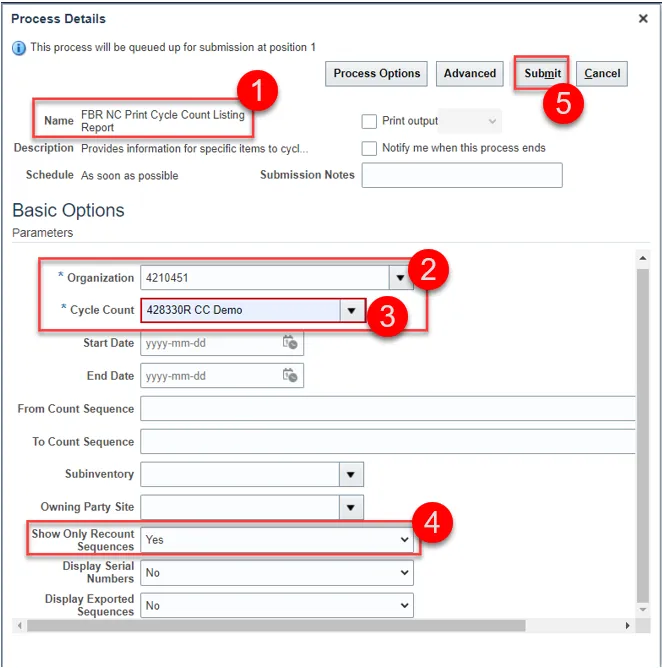
Step 39. Next, run the FBR NC Print Cycle Count Listing Report in Scheduled Processes.
Step 40. Enter the Organization.
Step 41. Select the Cycle Count from the drop-down menu.
Step 42. Click Submit.
Step 43. Check the Process Job Status in Scheduled Processes.
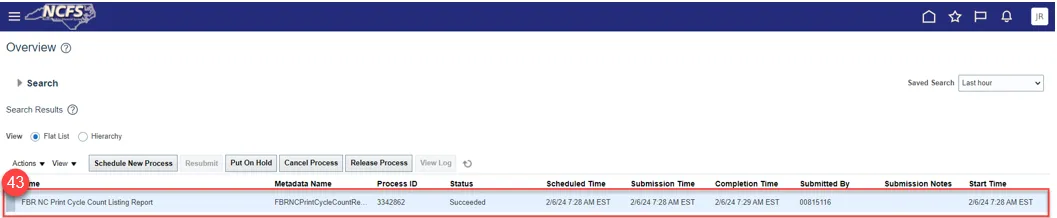
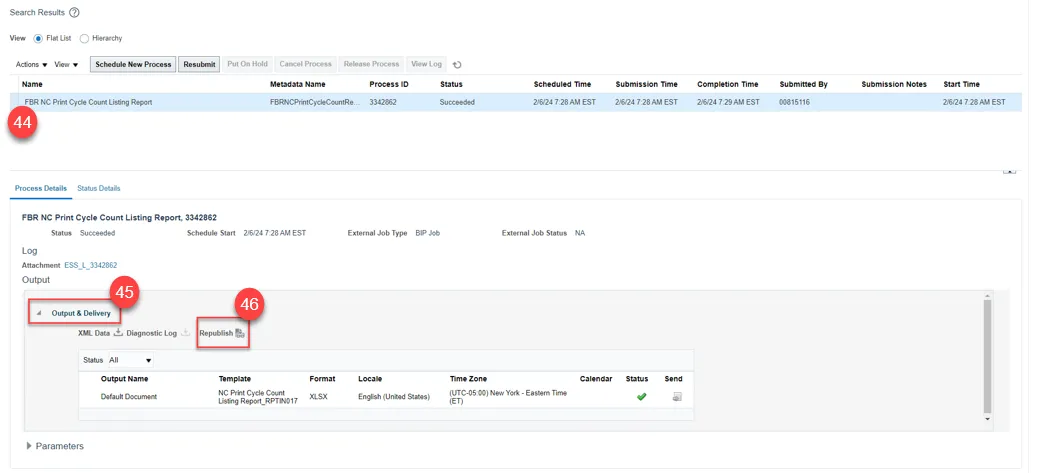
Step 44. Click the Process Job.
Step 45. Under Output & Delivery.
Step 46. Click on the Republish Icon.
Step 47. The Cycle Count Listing Report window will open.
Step 48. Click on the Gear icon on the right.
Step 49. Select Export and then Excel.
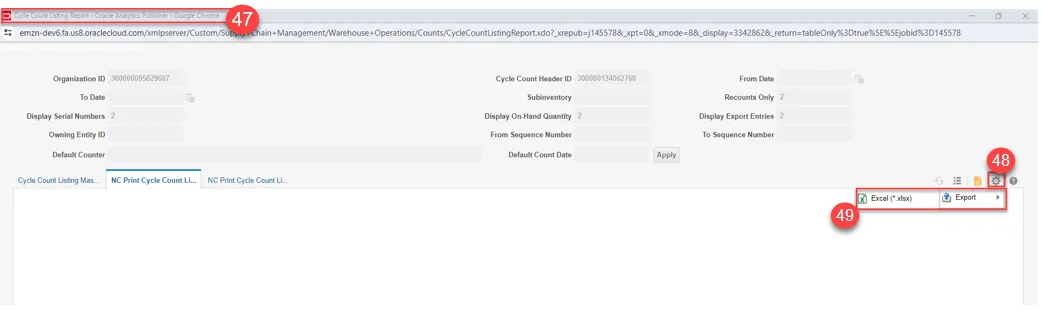
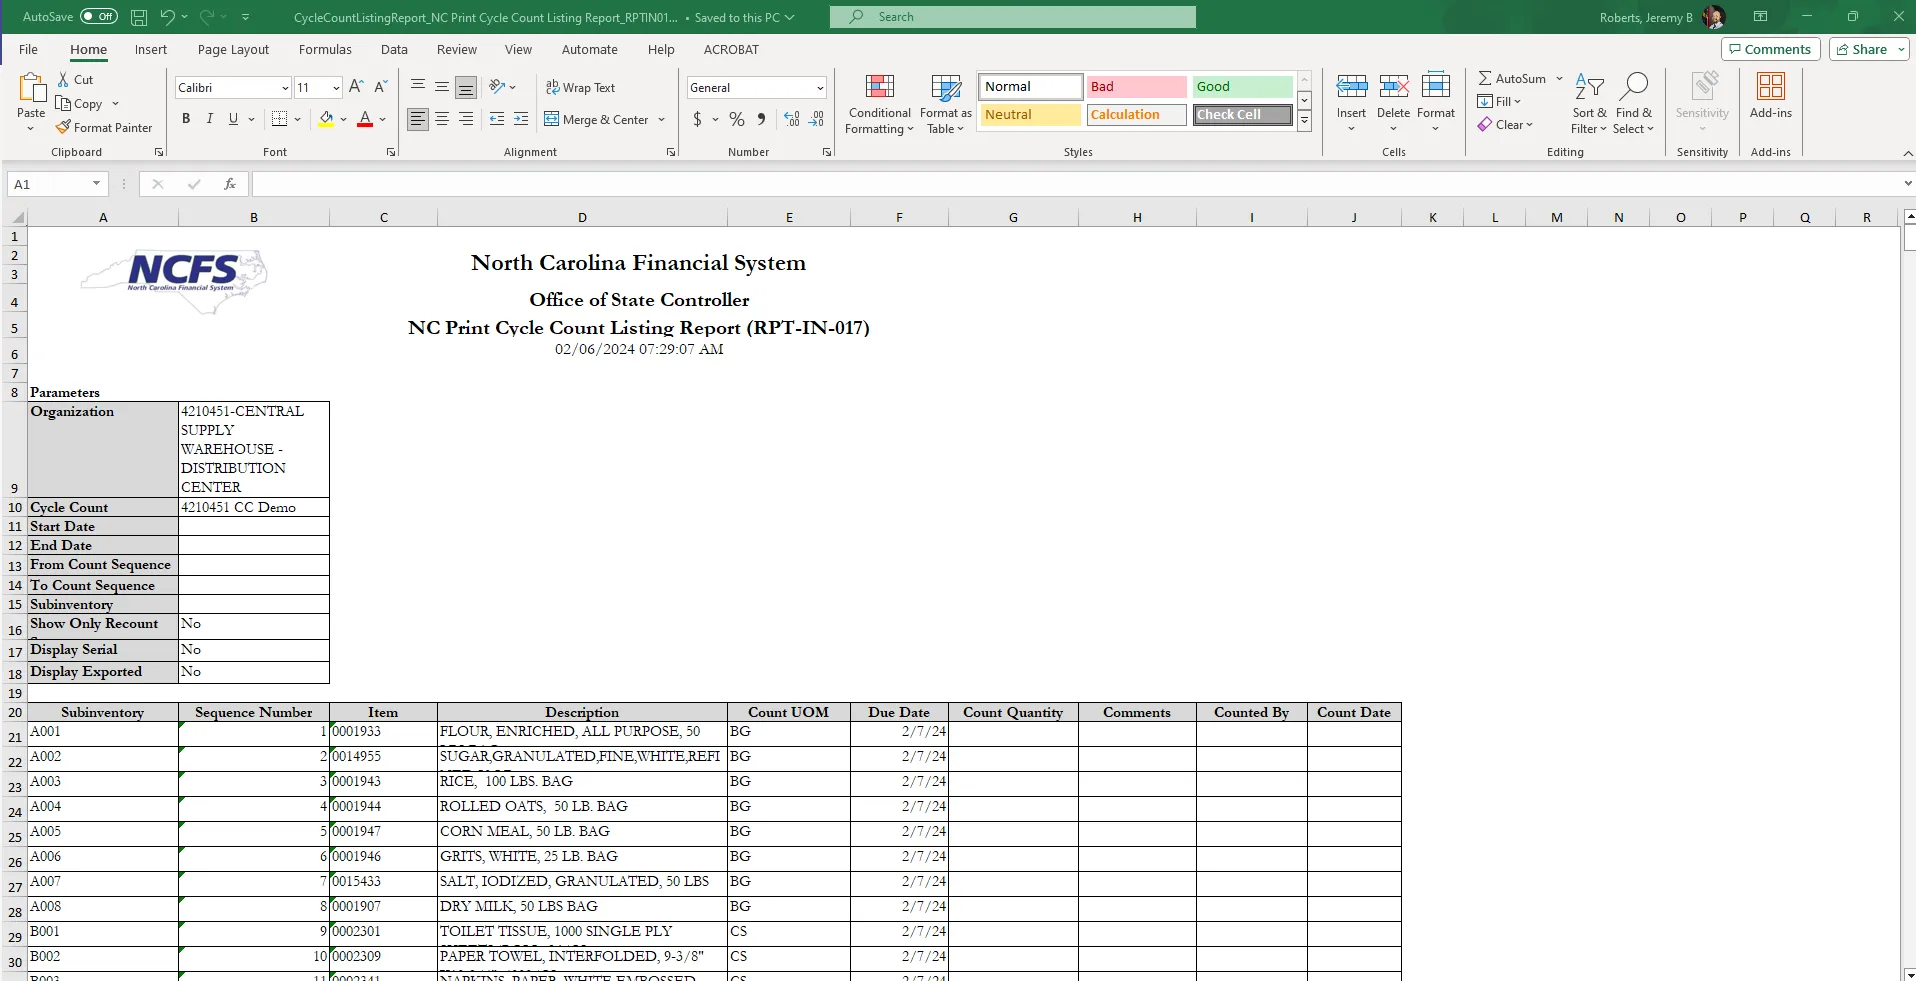
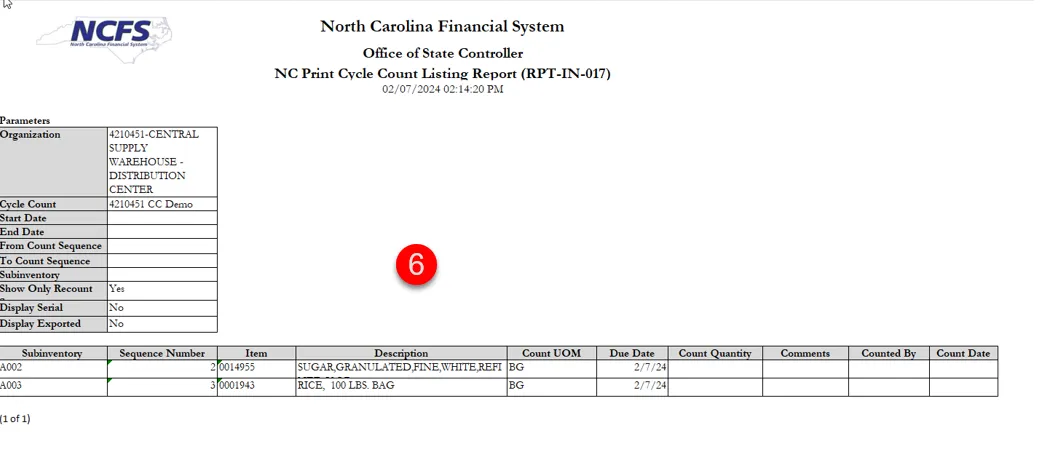
Step 50. The FBR NC Print Cycle Count Listing Report (RPT-IN-017) will download.
- The warehouse staff can print and start counting inventory items and mark down Count Quantity’s, Comments, Counted By and Count Date.
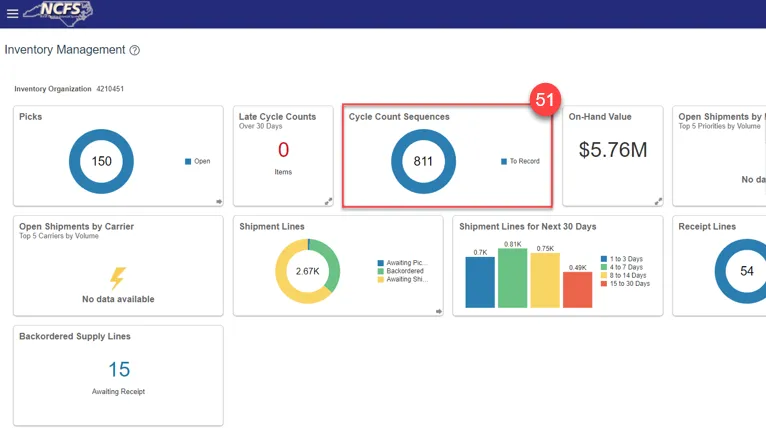
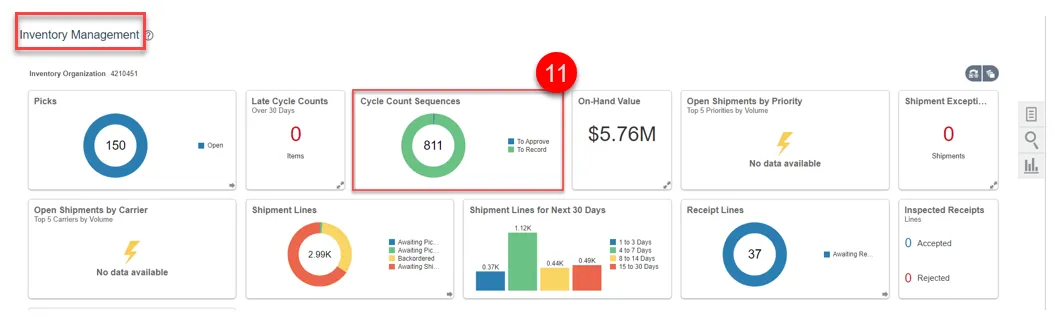
Step 51. The Inventory Management Dashboard will now show Cycle Count Sequences.
Record Count Sequences
There are 11 steps to complete this process.
Step 1. Warehouse physically counts the warehouse inventory item counts and records them on the NC Print Cycle Count Listing Report sheets.
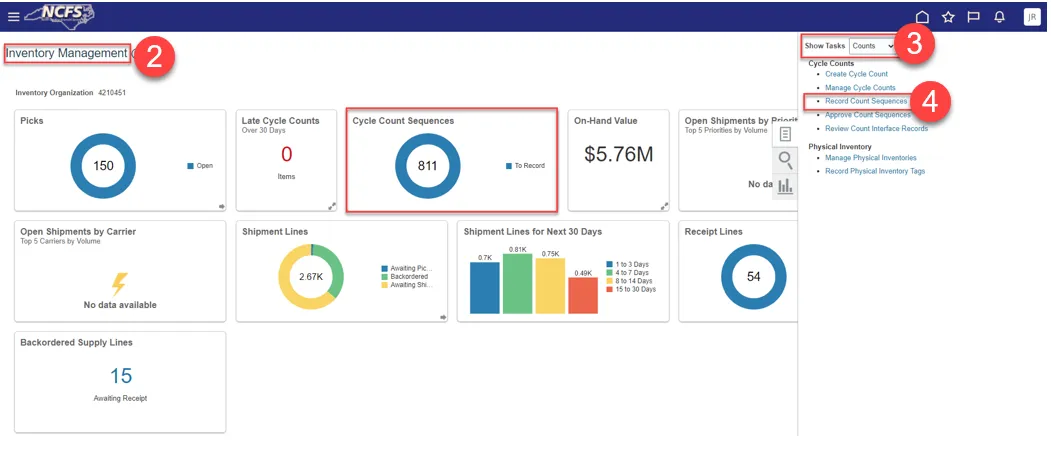
Step 2. Navigate to Inventory Management.
Step 3. Select Counts under Show Tasks.
Step 4. Select Record Count Sequences.
Step 5. Select the Count Name from the drop-down list.
Step 6. Click Search.
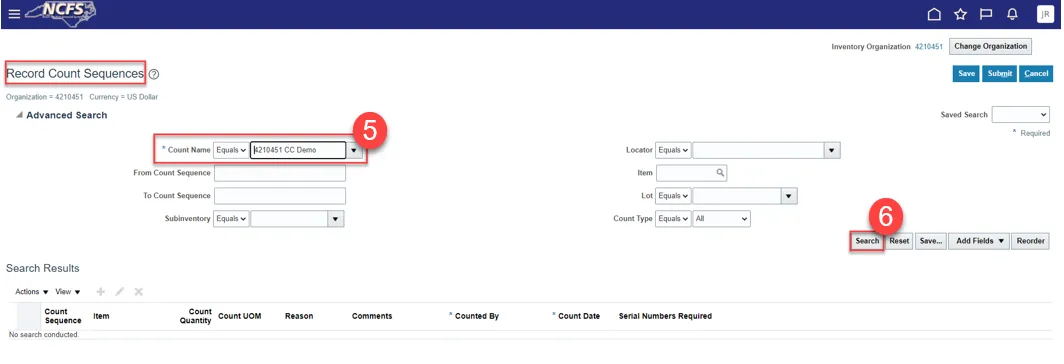
Step 7. The Record Count Sequences will appear.
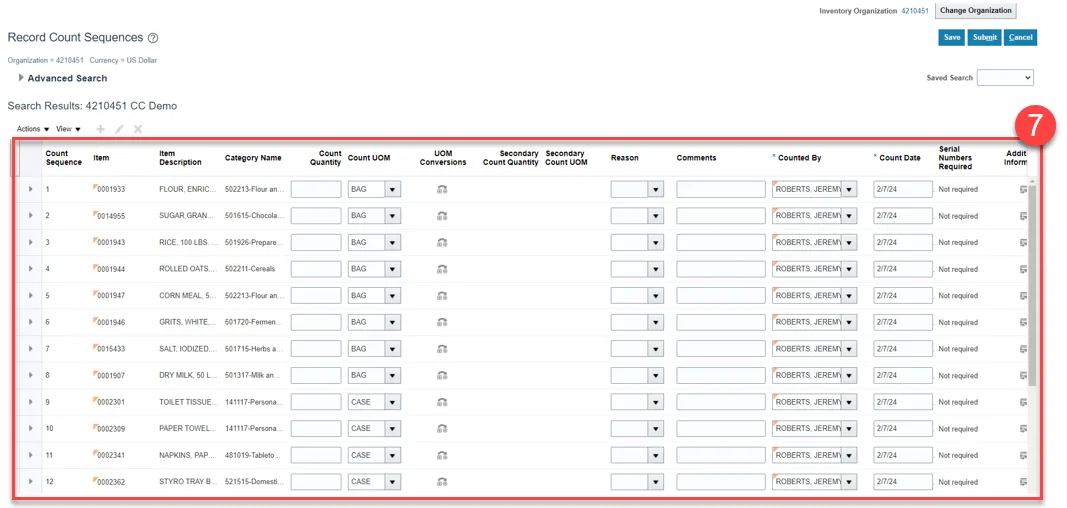
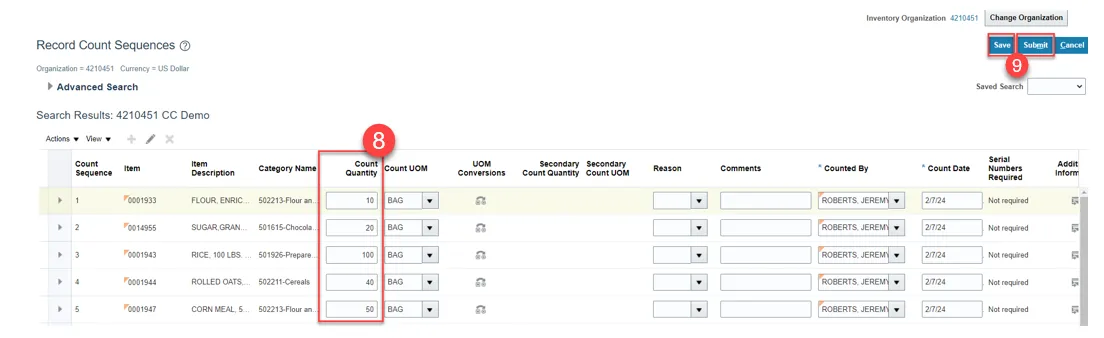
Step 8. Enter Count Quantity recorded from the FBR NC Print Cycle Count Listing Report sheet.
Step 9. Click Save and then click Submit.
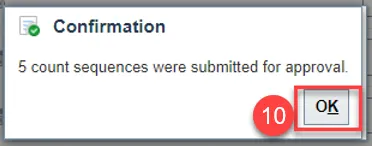
Step 10. A Confirmation pop-up window will appear letting you know how many count sequences were submitted for approval. Click OK.
Step 11. You will be redirected to the Inventory Management Dashboard. You can see the number of Cycle Count Sequences waiting approval.
Approve Count Sequences
There are 10 steps to complete this process.
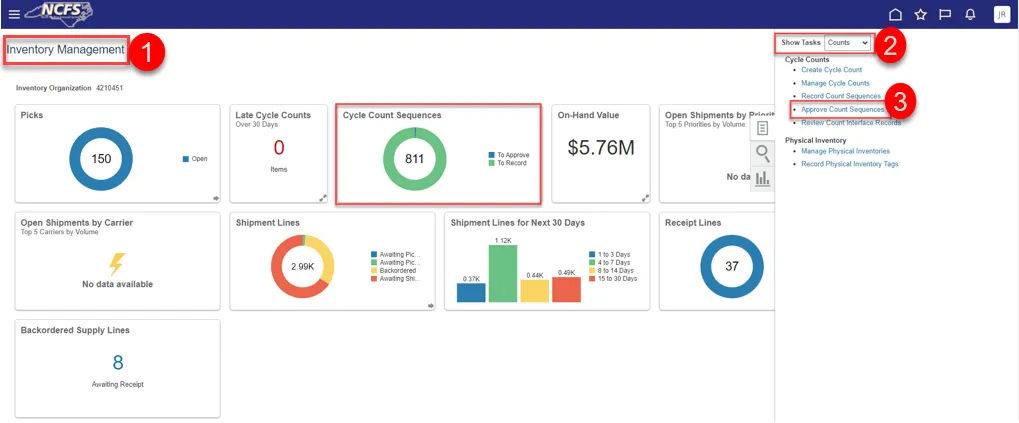
Step 1. Navigate to Inventory Management.
Step 2. Select Counts under Show Tasks.
Step 3. Select Approve Count Sequences.
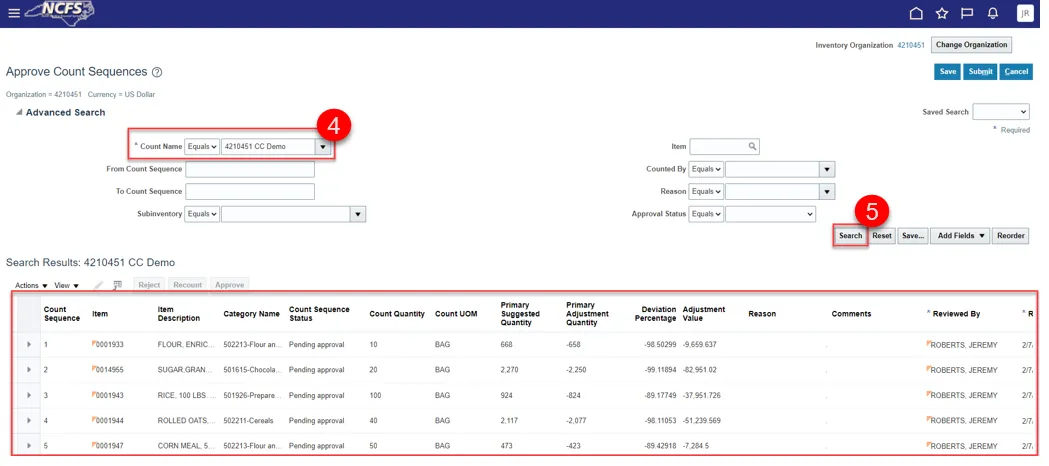
Step 4. Select the Cycle Count name from the Count Name drop-down list.
Step 5. Click Search.
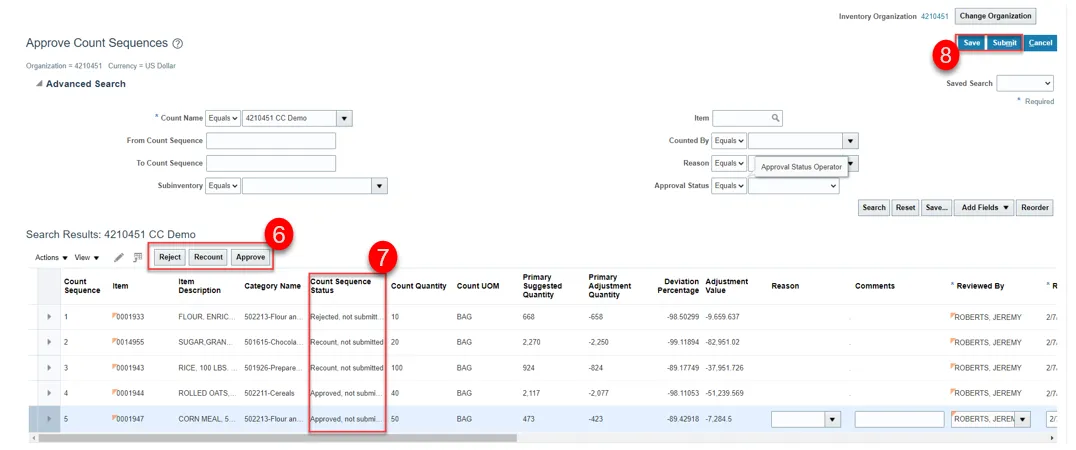
Step 6. Click the appropriate line desired and select one of the three options: Reject, Recount, Approve.
- Reject, will not make any changes in the system. **WE DO NOT RECOMMEND**
- Recount, will request a recount of the item based on the deviation percentage being too high or too low.
- Approve, approves the new count quantity.
Step 7. Select the appropriate Action and the Count Sequence Status will update.
Step 8. Click Save and Submit.
Step 9. A Confirmation pop-up window will appear letting you know how many count sequences were processed for each Count Sequence Status.
Step 10. Click OK.

Review Inventory Item Quantity Updates
There are 13 steps to complete this process.
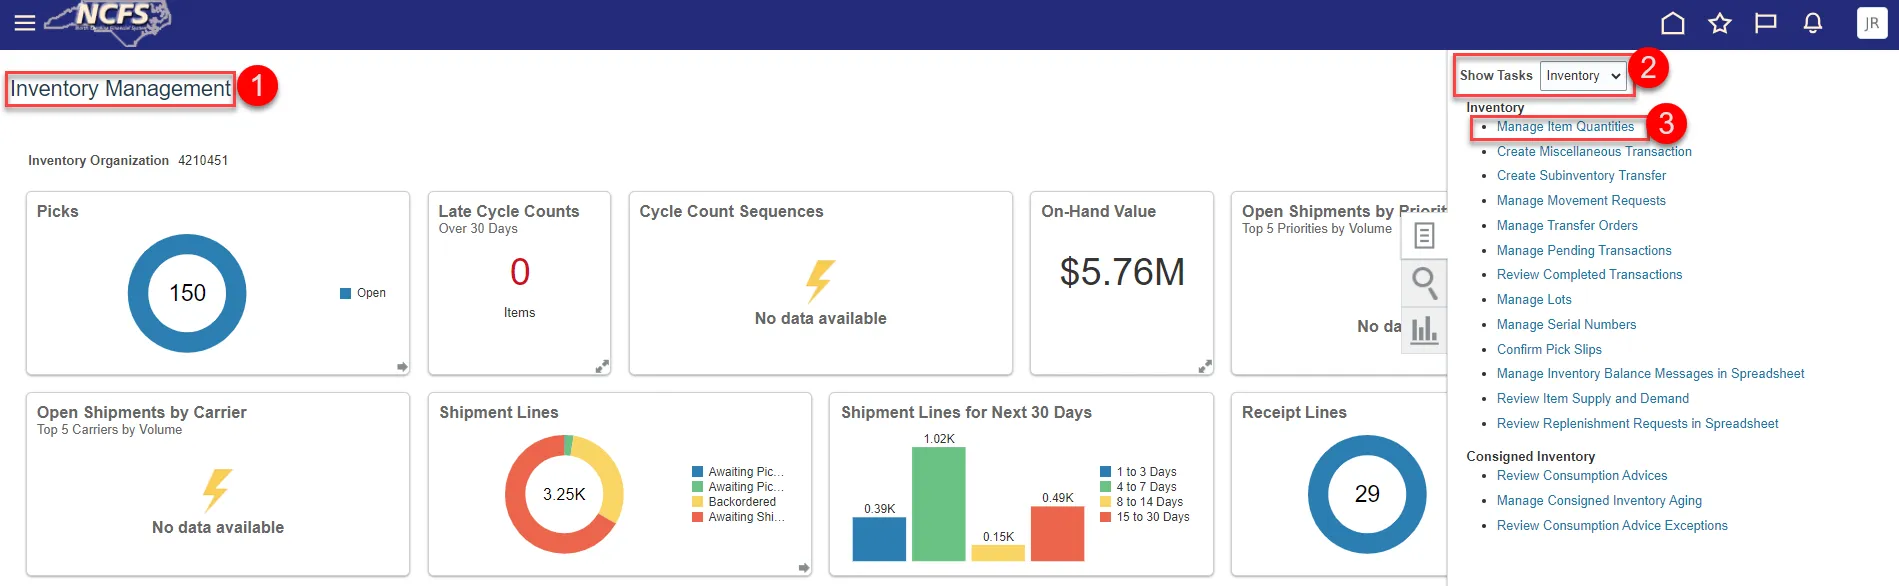
Step 1. Go to Inventory Management.
Step 2. Select Inventory from Show Tasks menu.
Step 3. Select Manage Item Quantities.
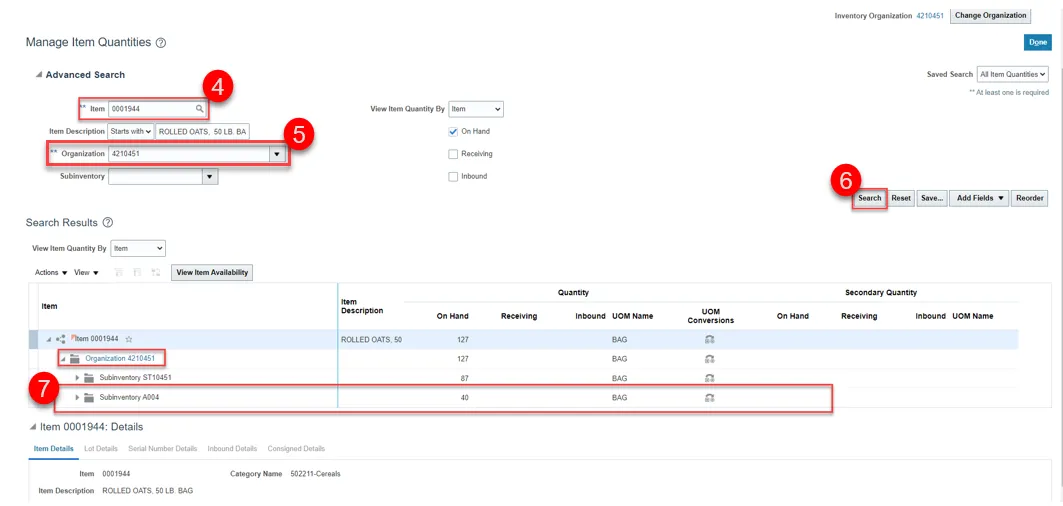
Step 4. Enter Item number in the Item field.
Step 5. Enter the Organization number in the Organization field the cycle count was performed for.
Step 6. Click Search.
Step 7. Review the item quantity for approved cycle count sequence status.
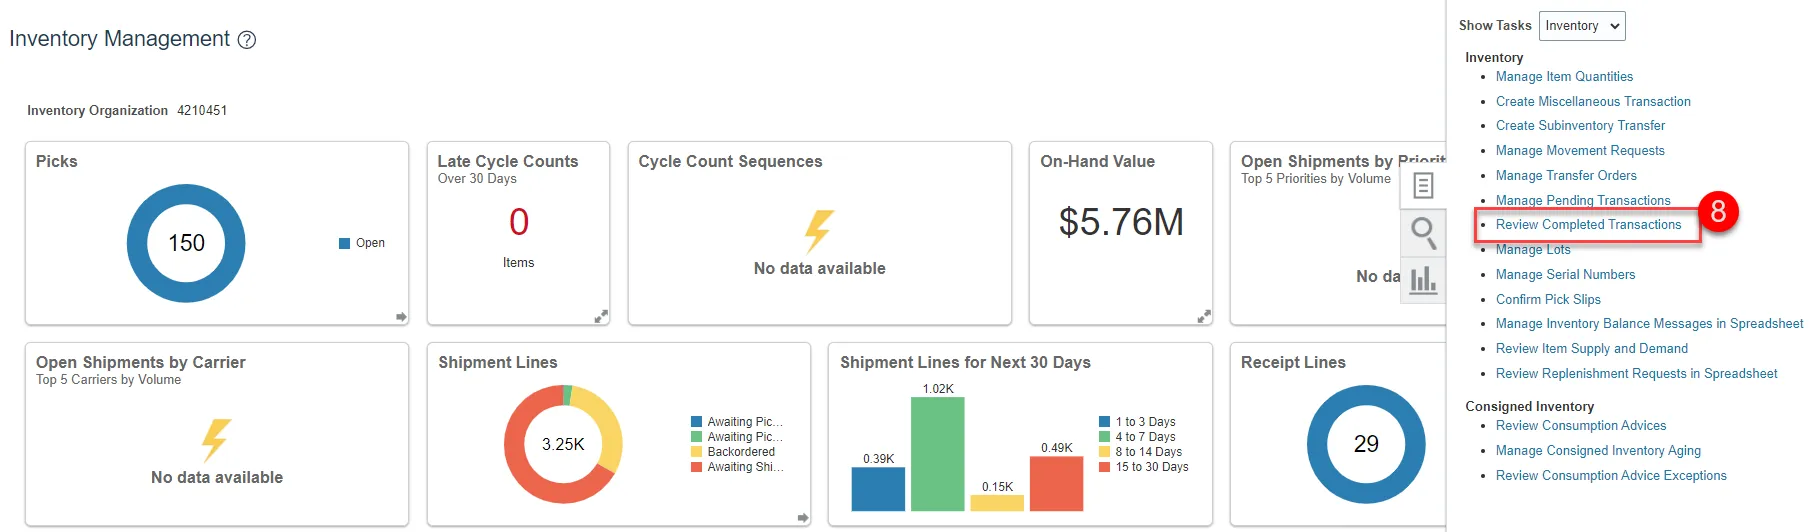
Step 8. Go to Review Completed Transactions.
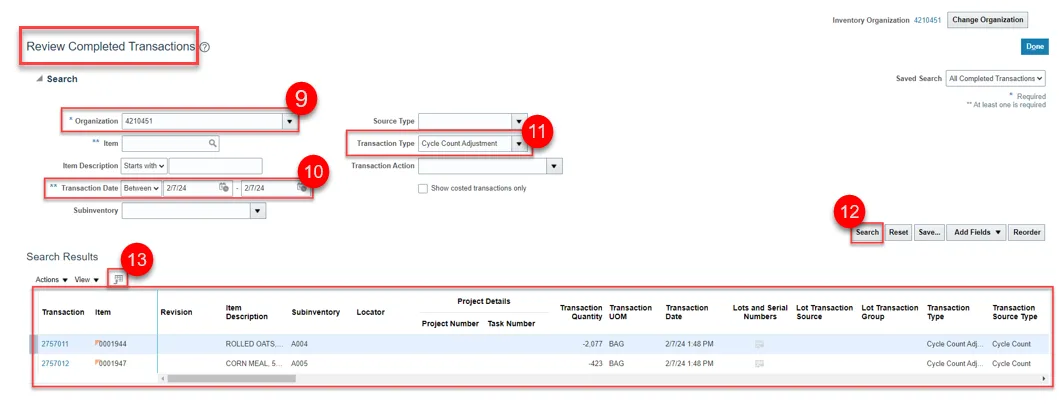
Step 9. Enter Organization number in the Organization field.
Step 10. Select Date Range.
Step 11. Select Transaction Type as Cycle Count Adjustment.
Step 12. Click Search to see the details of updates.
Step 13. Click the Download to Excel button to pull data in Excel Spreadsheet.
Recount Inventory Items from Cycle Count
There are 6 steps to complete this process.
Step 1. To Recount an item, run the FBR NC Print Cycle Count Listing Report.
Step 2. Enter Organization number in Organization field.
Step 3. Select the Cycle Count Name in the Cycle Count drop-down list.
Step 4. Select the Show Only Recount Sequences option.
Step 5. Click Submit.
Step 6. Review the report output to see the items for recount.
Cancel a Cycle Count
There are 12 steps to complete this process.
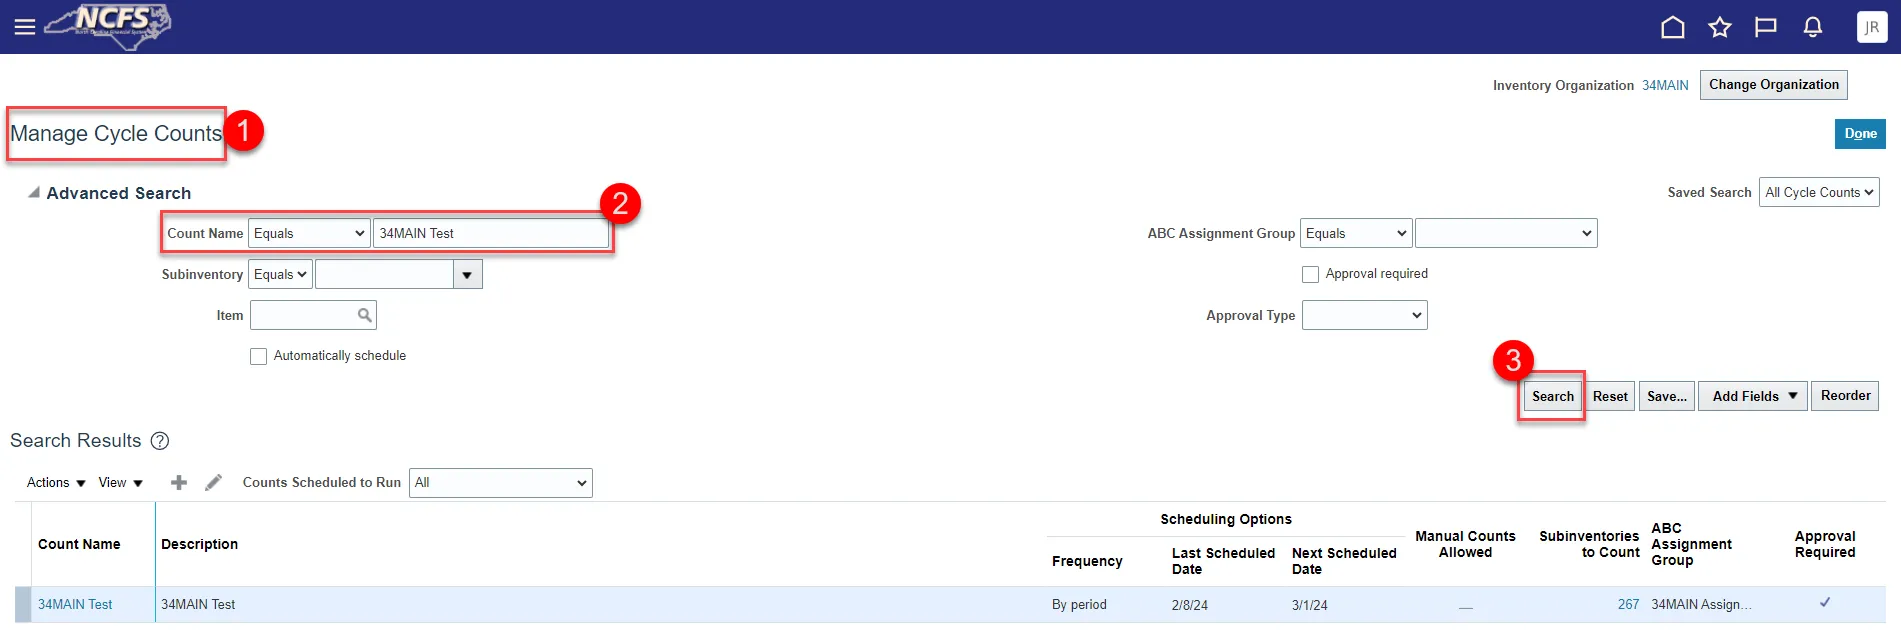
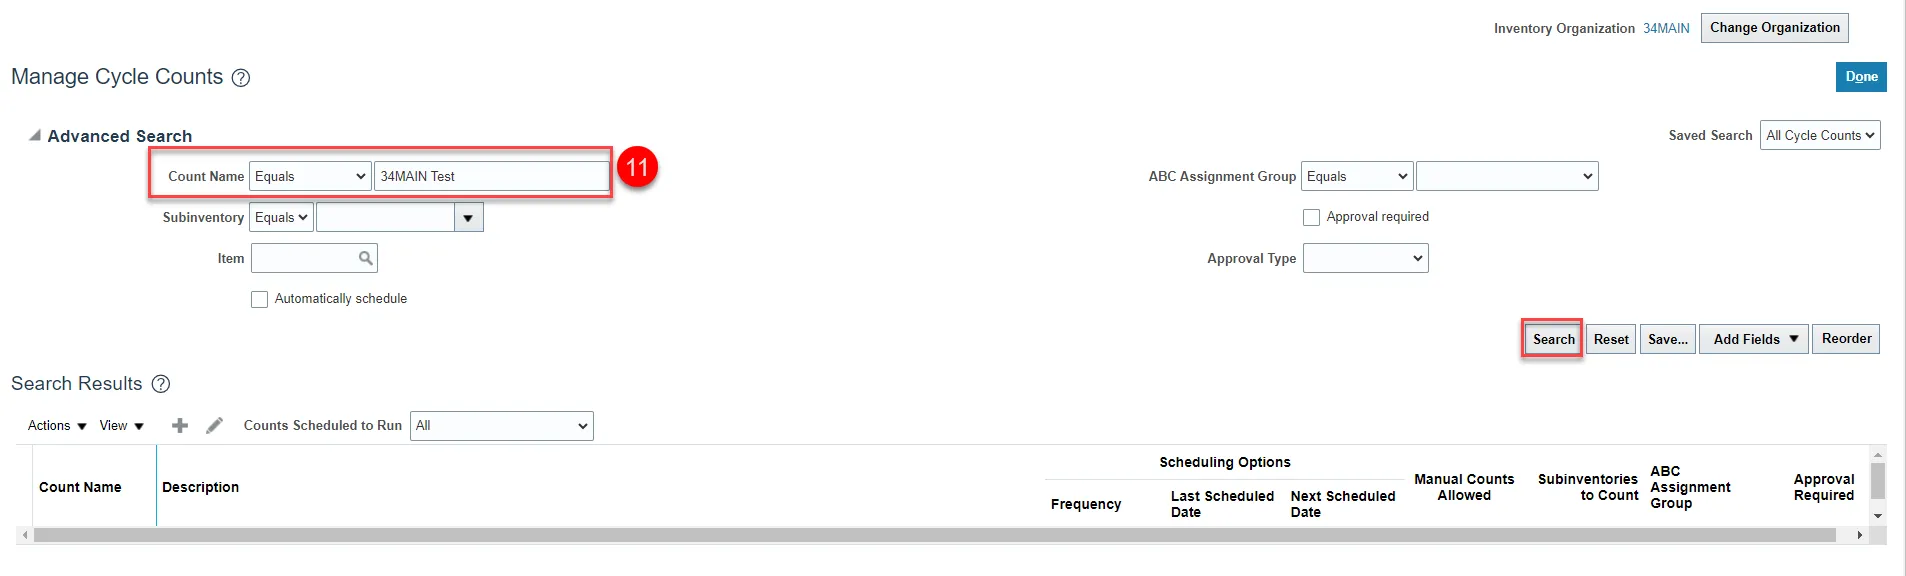
Step 1. Navigate to the Manage Cycle Counts screen.
Step 2. Enter the Cycle Count name in the Count field.
Step 3. Click Search.
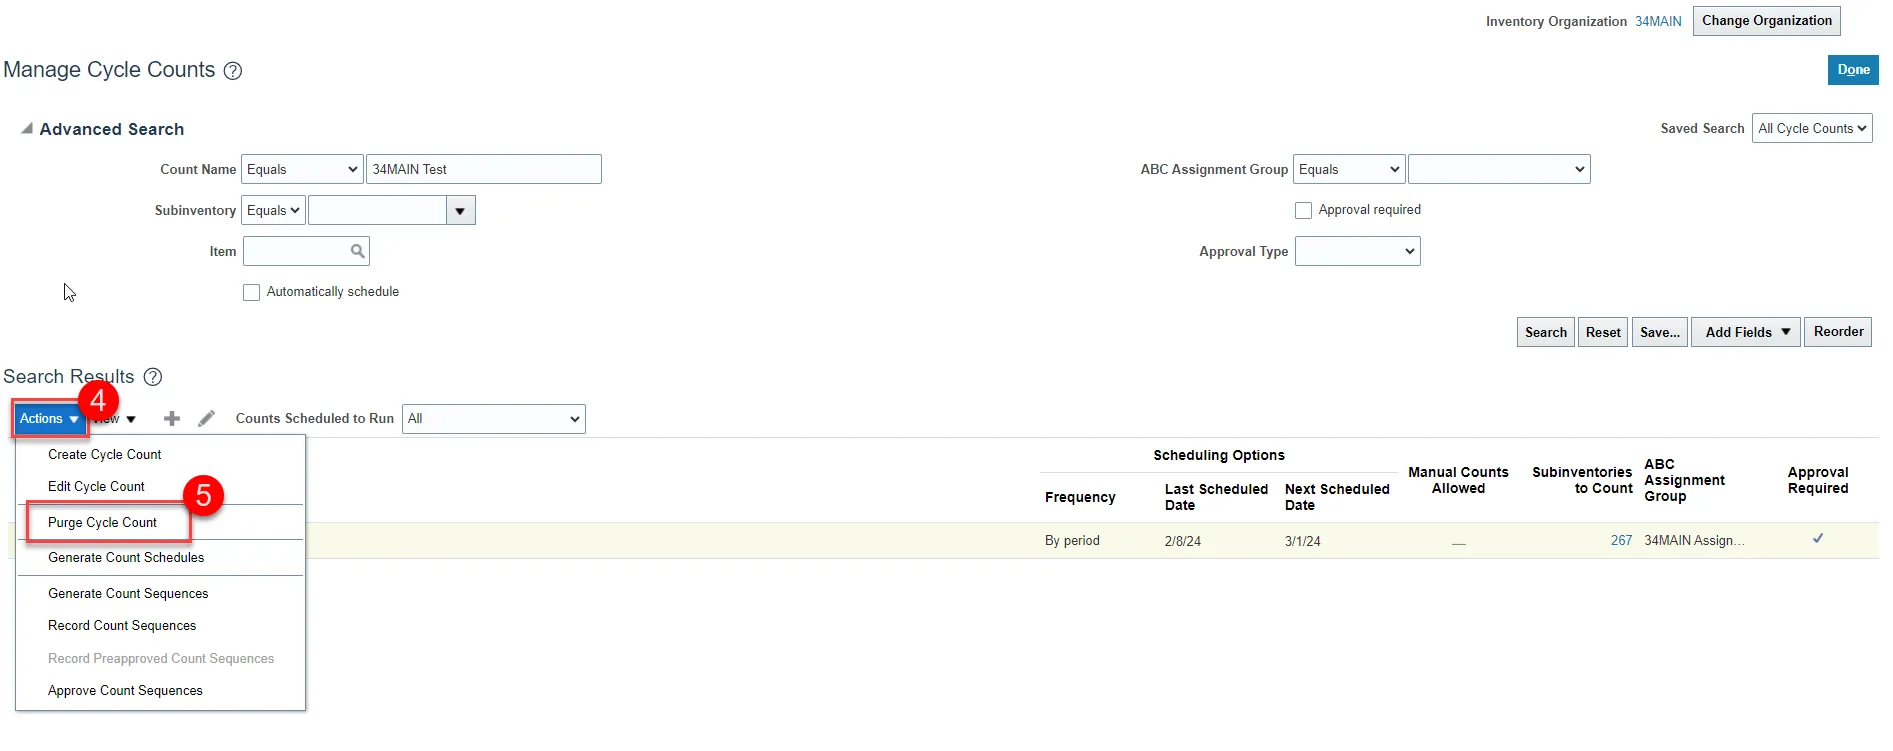
Step 4. Select the Cycle Count row and click the Actions drop-down list.
Step 5. Click Purge Cycle Count.
Step 6. A Purge Cycle Count window will appear for the selected cycle count.
Step 7. Click the check box for Include count definition.
Step 8. Click OK.

Step 9. A warning window will appear, click Yes.

Step 10. An Information window will appear, click OK.
Step 11. Navigate back to the Manage Cycle Counts and search for the cancelled cycle count name.
Step 12. The cycle count has been cancelled.
NC Cycle Count Variance Report (RPT-IN-003)
There are 1 step to complete this process.
Step 1. This report shows the count variance for the Cycle Count.

Wrap-Up
This QRG explains how to setup and manage Inventory ABC classes, Assignment groups, and Classification Sets for the entire warehouse organization in NCFS.
Additional Resources
- Virtual Instructor-Led Training (vILT)
- Quick Reference Guides (QRG)