Purpose
The purpose of this Quick Reference Guide (QRG) is to explain how to install the ADFDI application for the North Carolina Financial System (NCFS).
Introduction and Overview
This QRG provides General Ledger (GL) Journal Entry users step-by-step instructions for installing the Application Development Framework Desktop Integration (ADFDI) application in the NCFS. The NCFS GL module allows users to create journal entries outside of NCFS by creating and uploading entries using a Microsoft Excel spreadsheet. The ADFDI Add-In must be installed for users to integrate transactions in NCFS via Microsoft Excel. Financial process areas have tasks that interact with the spreadsheet upload features which allows users to upload transactions in bulk with excel spreadsheets. All end users should have the ADFDI Install feature available for download under the Tools Group of the Navigator Menu. If this feature is not available, please contact the system administrator for assistance.
User Tip
The ADFDI must be installed first to utilize NCFS’ spreadsheet upload capability.
Key Terms
| Key Terms & Acronyms | Description |
|---|---|
| Application Development Framework Desktop Integration (ADFDI) | ADFDI enables desktop integration with MS Excel spreadsheets to enter journal entries via Excel. |
User Tip
All first-time users should ensure at log-in, the browser cache is empty prior to initiating the log-on sequence.
ADFDI Install
To install the ADFDI plug-in, please follow the steps below. There are 10 steps to complete this process.
Step 1. Click the Navigator icon found in the left corner of the home page.
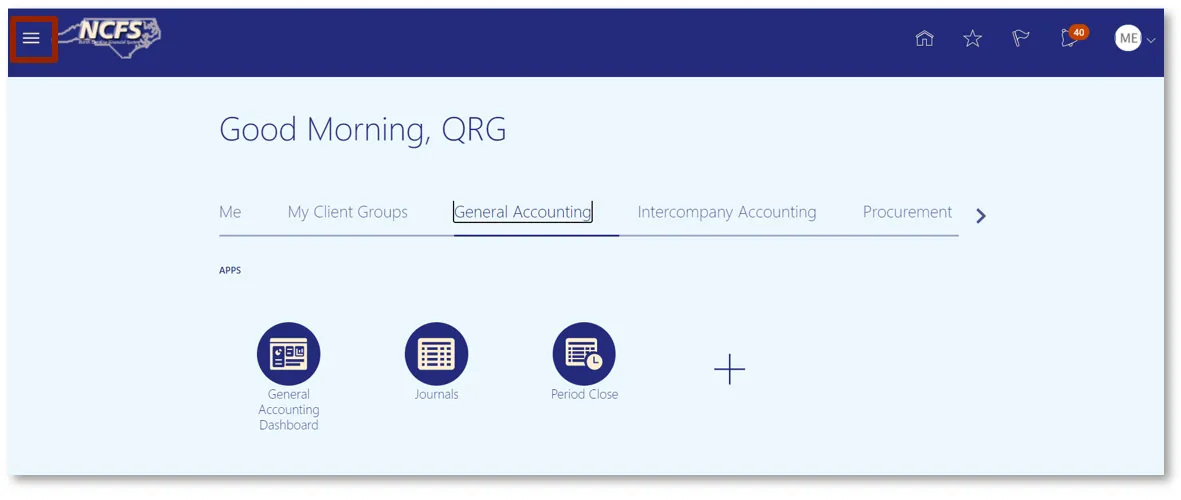
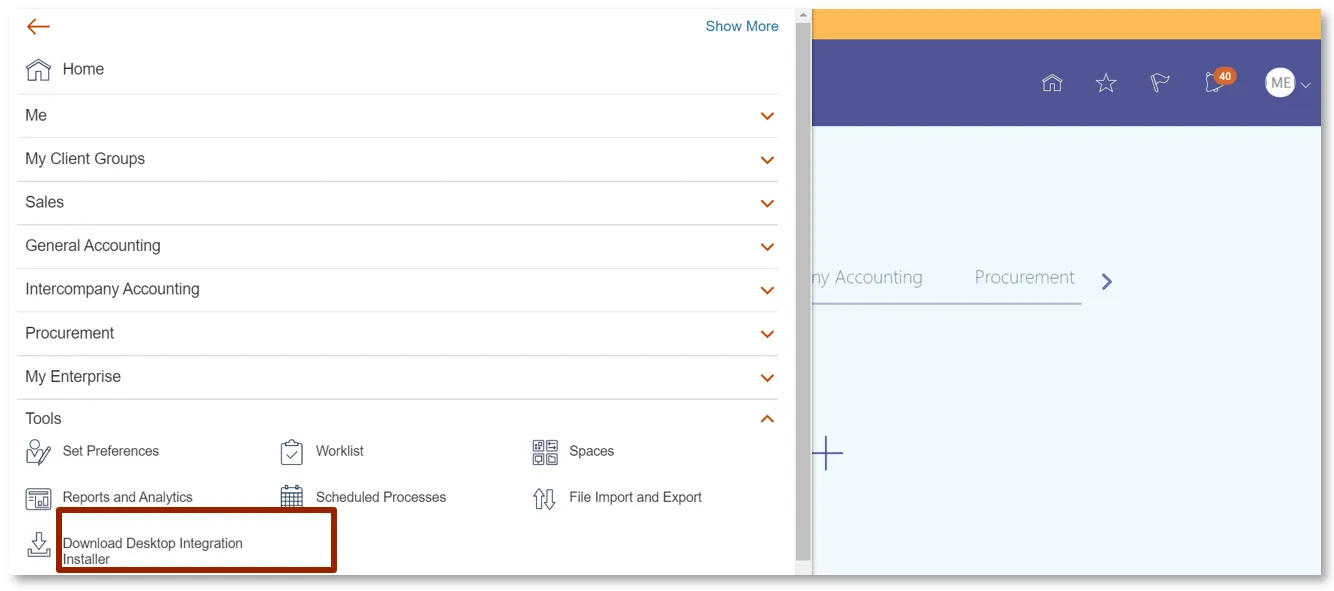
Step 2. Navigate to the Tools Group and click the Download Desktop Integration Installer.
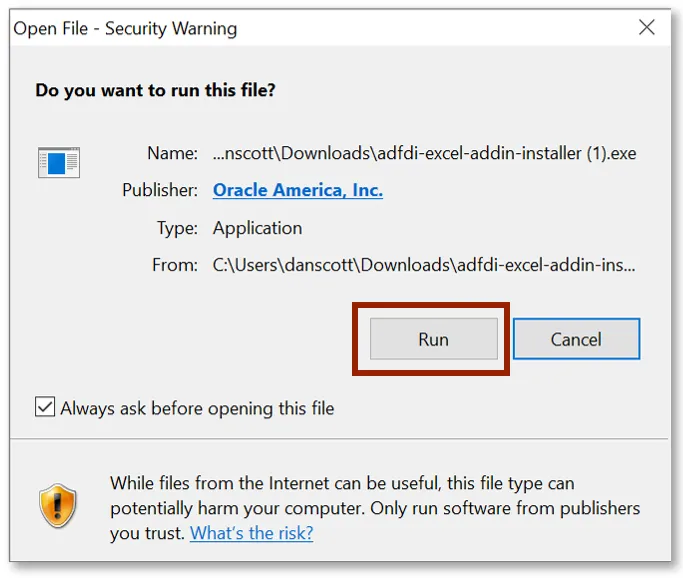
Step 3. Click the Run option to install.
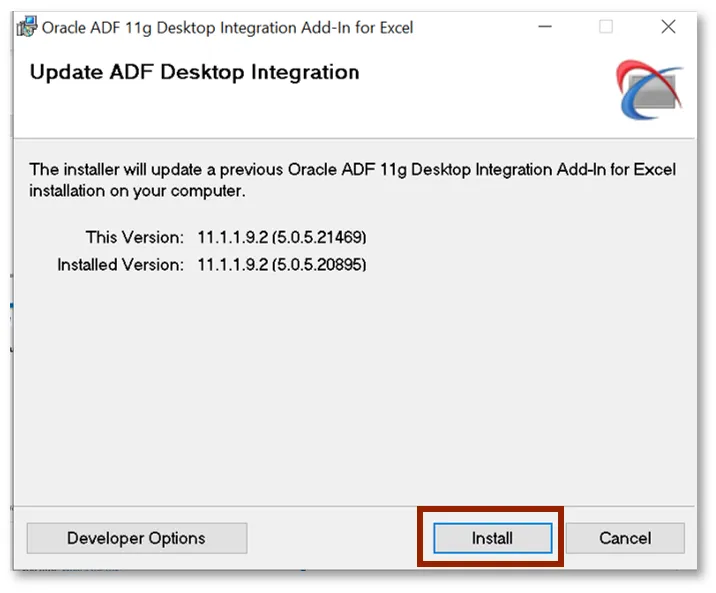
Step 4. Click the Install option.
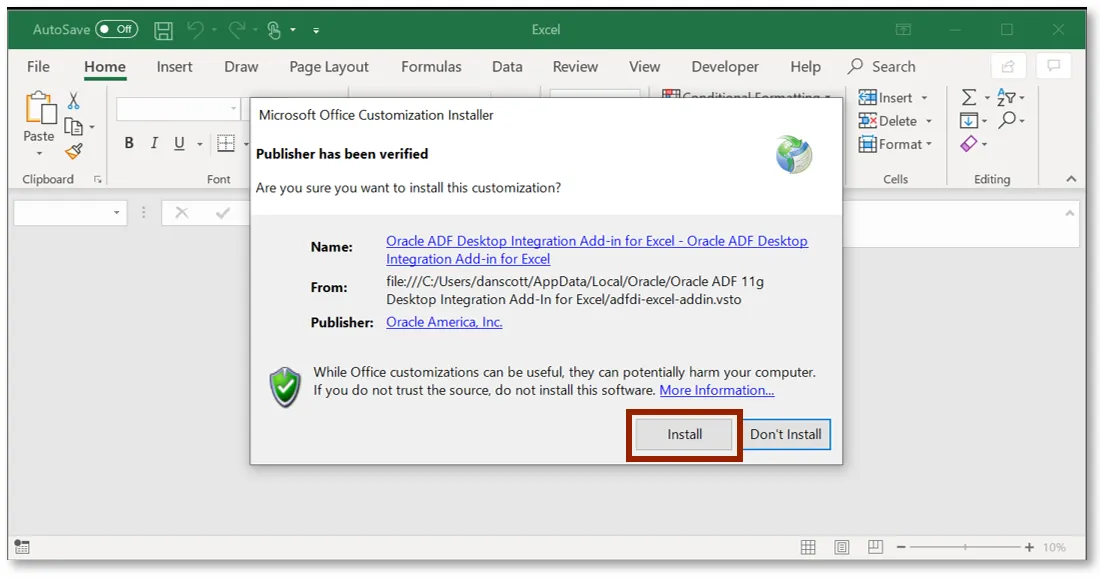
Step 5. After successful download, open Microsoft Excel to complete the additional setup steps. A popup appears verifying that Add-in installation. Click the Install option.
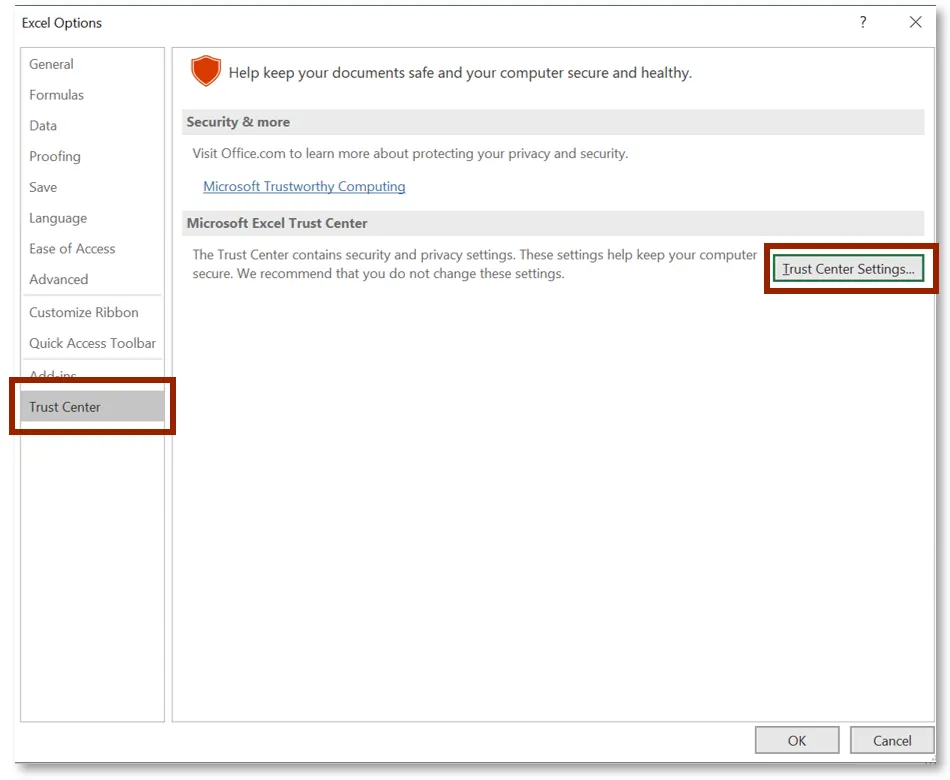
Step 6. Click Trust Center and then click Trust Center Settings.
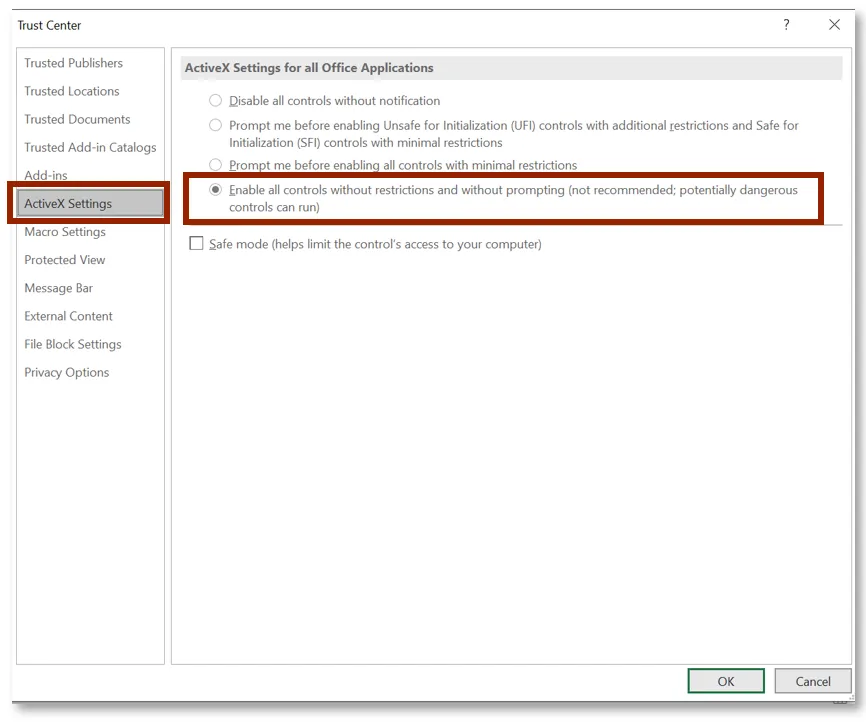
Step 7. Click the ActiveX Settings option. Select the Enable all controls without restrictions and without prompting option.
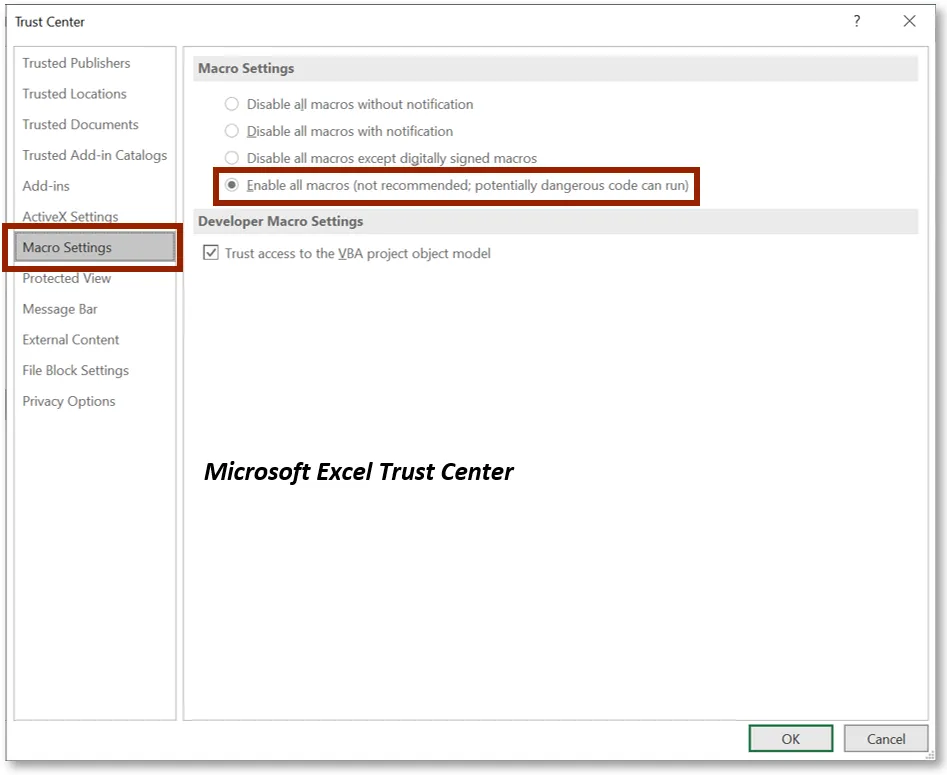
Step 8. Select the Macro Settings option. Select the Enable all macros and the Trust access to the VBA project object model options.
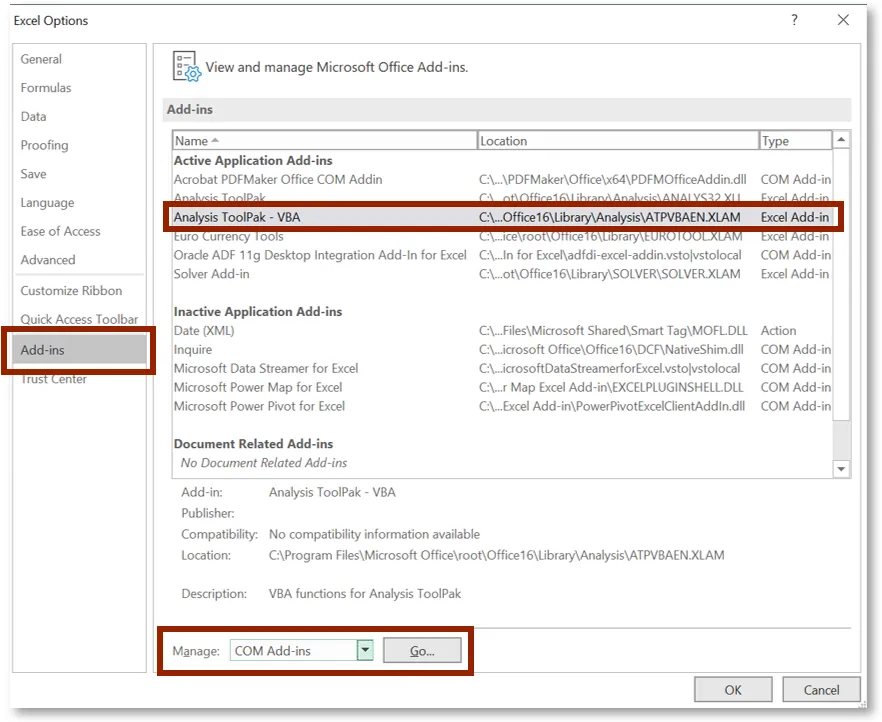
Step 9. Navigate back to Excel Options and select the Add-Ins options. Click Analysis Toolpak – VBA and COM Add-Ins at the bottom of the page, then select Go.
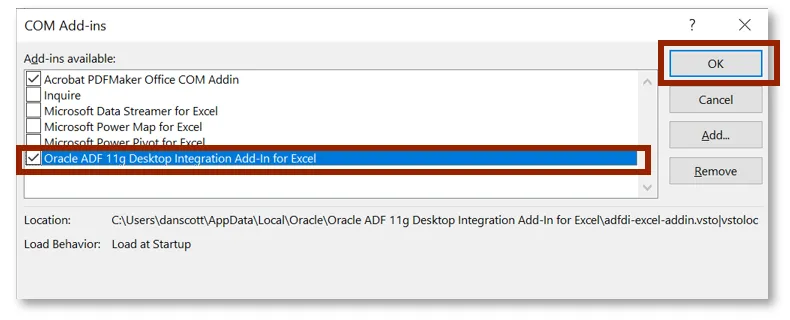
Step 10. Select the Oracle ADF 11g Desktop Integration for Excel check box, then click OK.
User Tip
It is suggested that users who repeatedly use NCFS’ spreadsheet upload functionality should update their ADFDI plugin after each NCFS Oracle patch upgrade by performing the steps in this guide to avoid any interruption in the use of their system.
Wrap Up
NCFS has quarterly updates, and this may cause the plug-in to be updated (if necessary) quarterly. The user will be able to complete the upload process when needed after the installation process and the additional setup tasks for Microsoft Excel are complete. The ADFDI requires the user to log in again prior to completing the spreadsheet upload tasks. Upon completion of the steps above, users can use the NCFS Spreadsheet Upload functionality with the ADFDI plugin installed into MS Excel. Users can create and upload a single or multiple journal entries/transfers using the spreadsheet upload functionality.
Additional Resources
- Instructor Led Training (ILT)