Purpose
The purpose of this Quick Reference Guide (QRG) is to explain how journal entries are made via spreadsheet upload in the North Carolina Financial System (NCFS).
Introduction and Overview
This QRG provides step-by-step instructions on how General Ledger (GL) Journal Entry users enter journal entries via NCFS Spreadsheet Upload functionality. A journal entry is the record of a financial transaction recorded (entered) into a journal. NCFS provides the capability for users to prepare journals via spreadsheet (outside the system) for later upload to the system. Prior to being able to access the North Carolina Financial System (NCFS) spreadsheet, the Application Development Framework Desktop Integration (ADFDI) plug-in must first be installed. Please reference our “Installing Application (ADFDI)” QRG for more information on how to download and install ADFDI plug-in on the device. The NCFS spreadsheet allows users to enter a single journal or multiple journals at a time. This spreadsheet must be downloaded initially from NCFS and will require the user to log in to allow the template to prepopulate. However, once this template is saved to the user's computer, it can be accessed and completed via Microsoft Excel. Once complete, the user must log in to NCFS from the spreadsheet to upload the journal to the system. Entering journals via Spreadsheet Upload is broken down into three distinct sections: accessing, entering, and uploading journal entries.
User Tip
The ADFDI plug-in must be installed on your computer prior to using the spreadsheet upload functionality.
Key Terms
| Key Terms & Acronyms | Description |
|---|---|
| Application Development Framework Desktop Integration (ADFDI) | ADFDI enables desktop integration with MS Excel spreadsheets to enter journal entries via Excel. |
| Spreadsheet Upload | Journals can be entered via Spreadsheet Upload. Users can enter a single or multiple transaction into NCFS. |
Information Needed to Complete this Process
- Microsoft Excel
- Oracle Cloud Financials
- ADFDI Install
- Financial transaction data for bulk upload
Outputs of this Process
- Completed Journal Entry
User Tip
All first-time users should ensure at log-in that the browser cache is empty prior to initiating the log-on sequence.
Accessing the NCFS Spreadsheet
To access the NCFS Spreadsheet, please follow the steps below. There are 5 steps to complete this process.
Step 1. Access the NCFS Home Page and click the General Accounting icon.
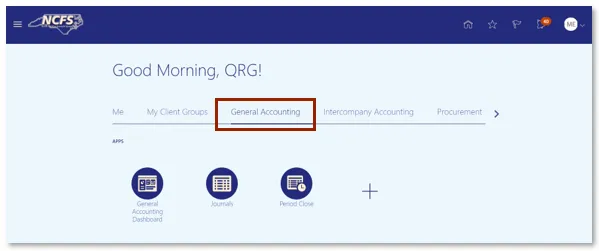
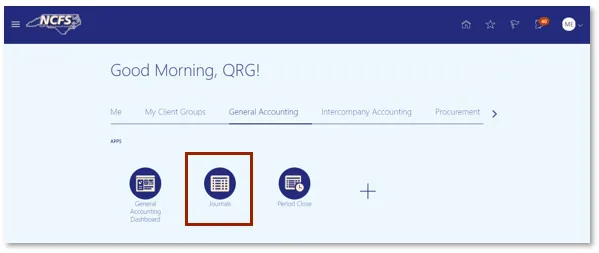
Step 2. Click the Journals app.
User Tip
Users also can Create Journals via Spreadsheet by navigating via the General Accounting Dashboard.
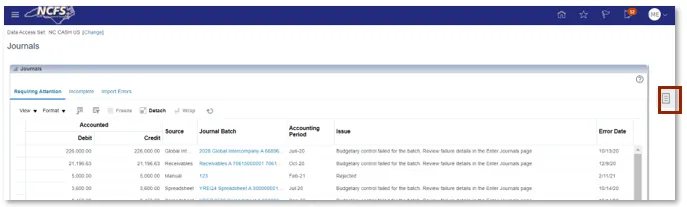
Step 3. Click the Tasks icon to open the task list.
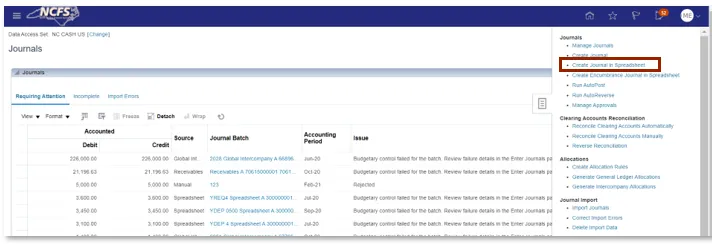
Step 4. From the task list, click Create Journal in Spreadsheet under the Journal section.
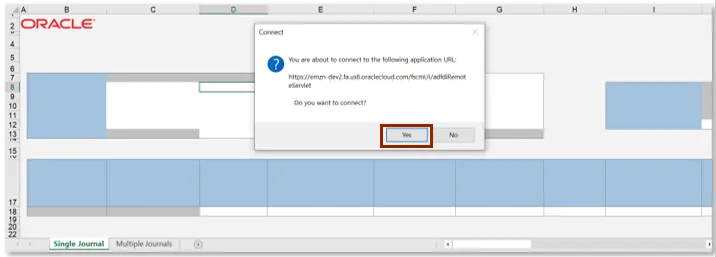
Step 5. The Connect pop-up appears. Click Yes. When prompted, enter a NCFS User ID and NCFS Password.
User Tip
Pop-up Blockers should be turned off for the NCFS System.
Entering Journals
Follow the steps below to enter a journal via the spreadsheet. There are 4 steps to complete this process.
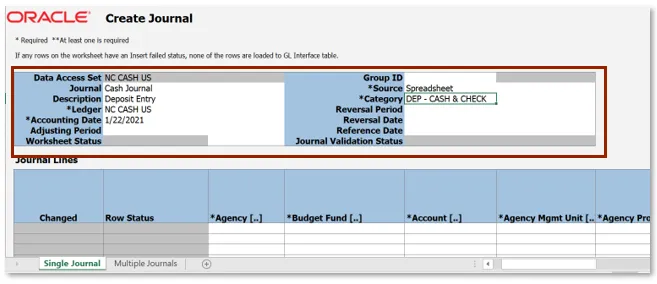
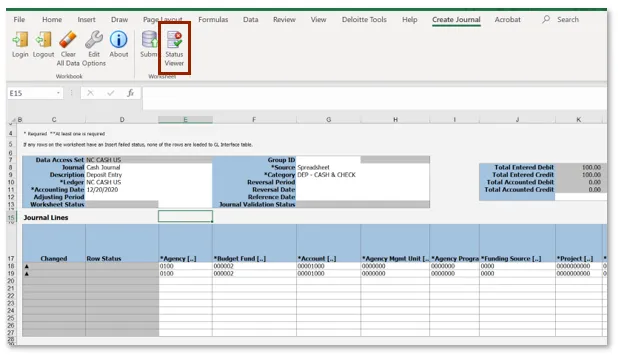
Step 1. After accessing the Journal Entry spreadsheet, enter the Journal, Description, Ledger, Accounting Date, and Category.
User Tip
Users can double click on the category to pull up the search options.
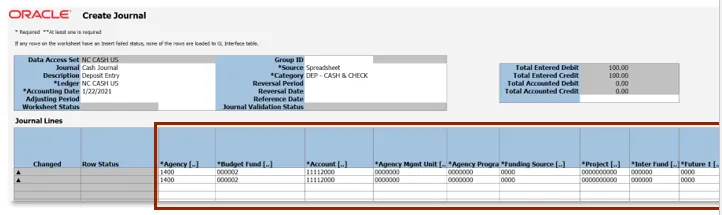
Step 2. Enter the appropriate Agency, Budget Fund, and Account. The remaining chart of account fields should be defaulted to zero.
User Tip
Users can double click on the agency. This allows the search options for all the Chart of Account segments to appear.
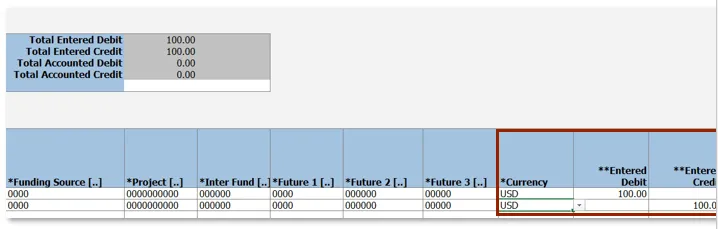
Step 3. Click the Currency drop-down arrow the select USD. Enter the amount in either the Entered Debit or Entered Credit column as applicable for each line.
Step 4. Enter the Line Description, Line Descriptive Flexfield Context, and Line Descriptive Flexfield Values. These are not system required fields; however, they are required according to the State business process.

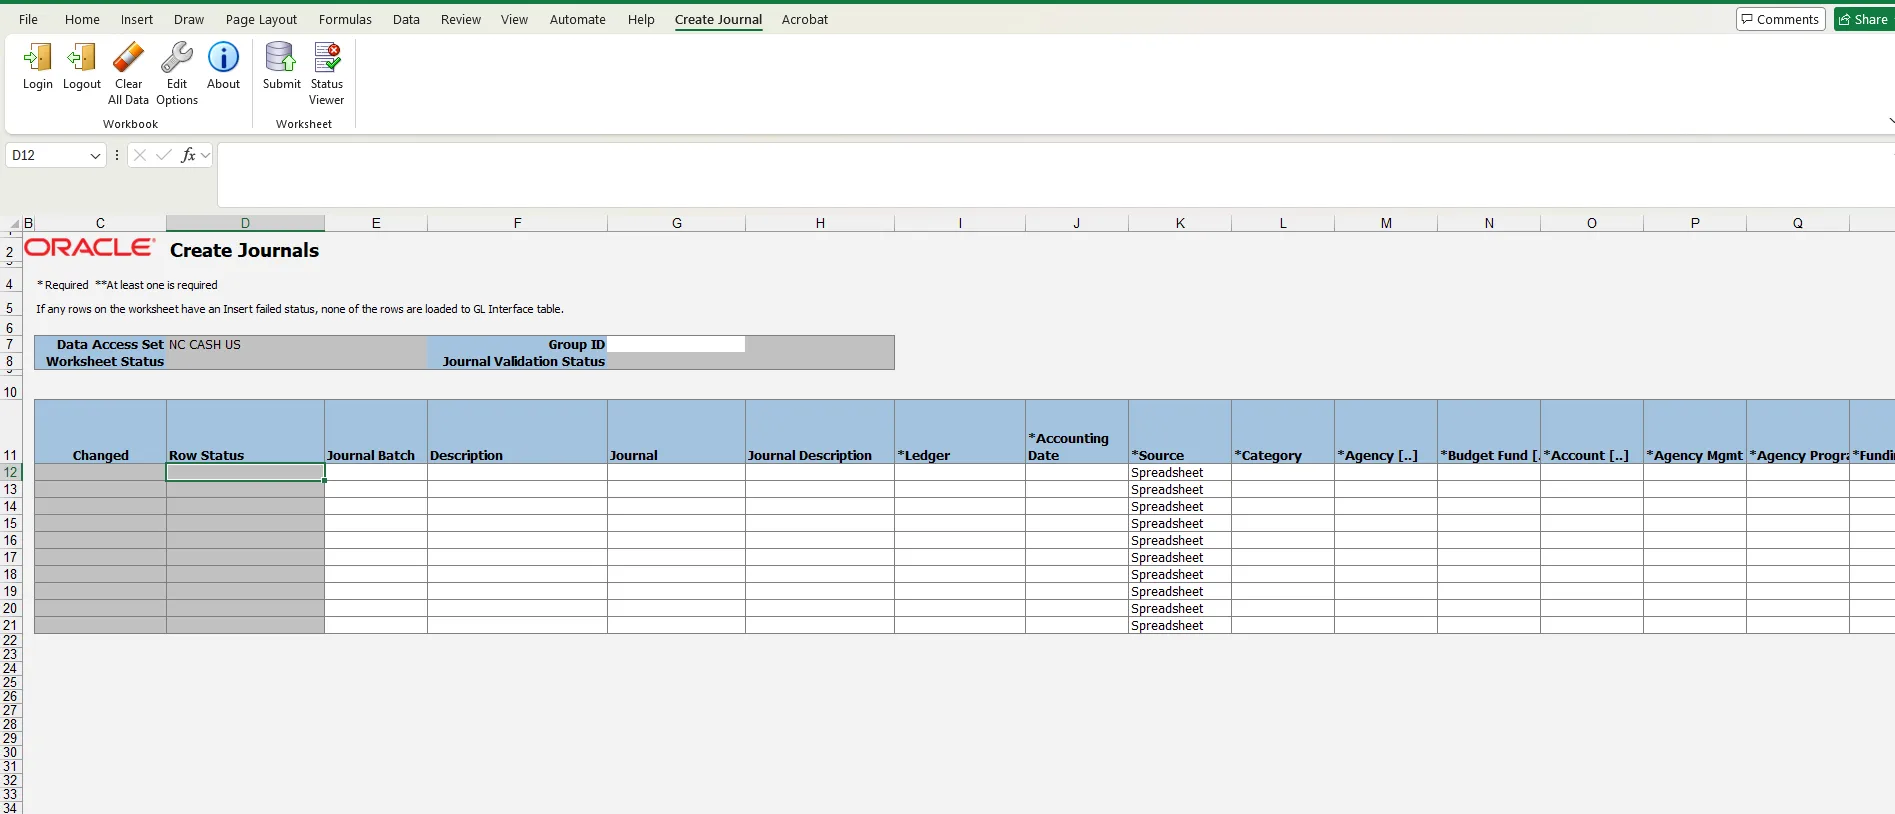
Multiple Journals
Multiple Journals can be entered using the Journal Spreadsheet. To enter multiple journals using the journal spreadsheet, select the Multiple Journals sheet from the bottom of the spreadsheet.
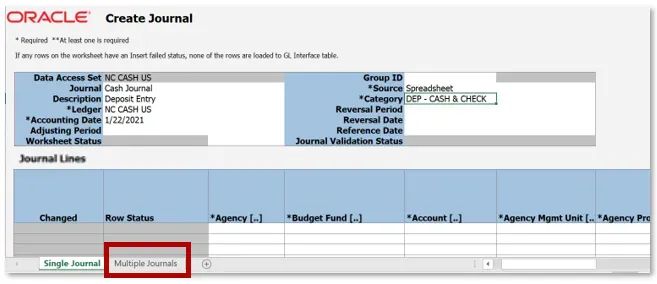
Then enter each journal batch using a unique journal name for each journal. Once the unique name for the journal has been entered use steps 2-4 of Entering Journals to complete the entries.
User Tip
Each journal batch must have 2 lines one for a debit and one for the corresponding credit.
Uploading Journals
Follow the steps below to upload a journal via the spreadsheet. There are 3 steps to complete this process.
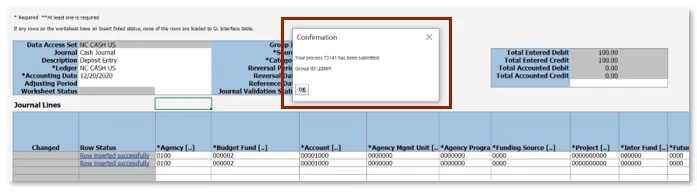
Step 1. Click the Submit button in the Create Journal menu bar to submit the journal(s).
Step 2. The Submission Options pop-up displays. Selected the desired Submission Option, Import Descriptive, Flexfields, and Other Options. Then click Submit.
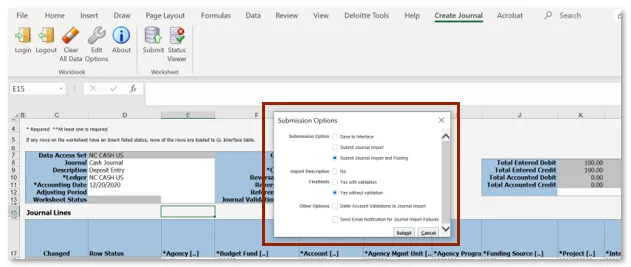
Step 3. Click OK.
Wrap Up
Once the journal has been submitted it must be approved before it is eligible for posting. Users can search for the uploaded journal by querying the Journal Name from the Manage Journals screen. If the entry is rejected, the users will receive a rejection notification that includes the reason for the rejection. If the Journal is rejected, the user can edit, complete, and request approval for the journal or delete the journal. Users can confirm the spreadsheet upload in the manage journals screen in the General Accounting Module.
Additional Resources
- Instructor Led Training (ILT)