Purpose
The purpose of this Quick Reference Guide (QRG) is to provide a step-by-step explanation of how to manage grant authorizations in Budgets in the North Carolina Financial System (NCFS).
Introduction and Overview
This QRG covers the process of managing initial grant authorizations in Budgets using the Application Development Framework Desktop Integration (ADFDI) spreadsheet.
Manage Grant Authorization in Budgets
To Manage Grant Authorization in Budgets, please follow the steps below. There are 17 steps to complete this process.
Step 1. Log in to the NCFS portal with your credentials to access the system.
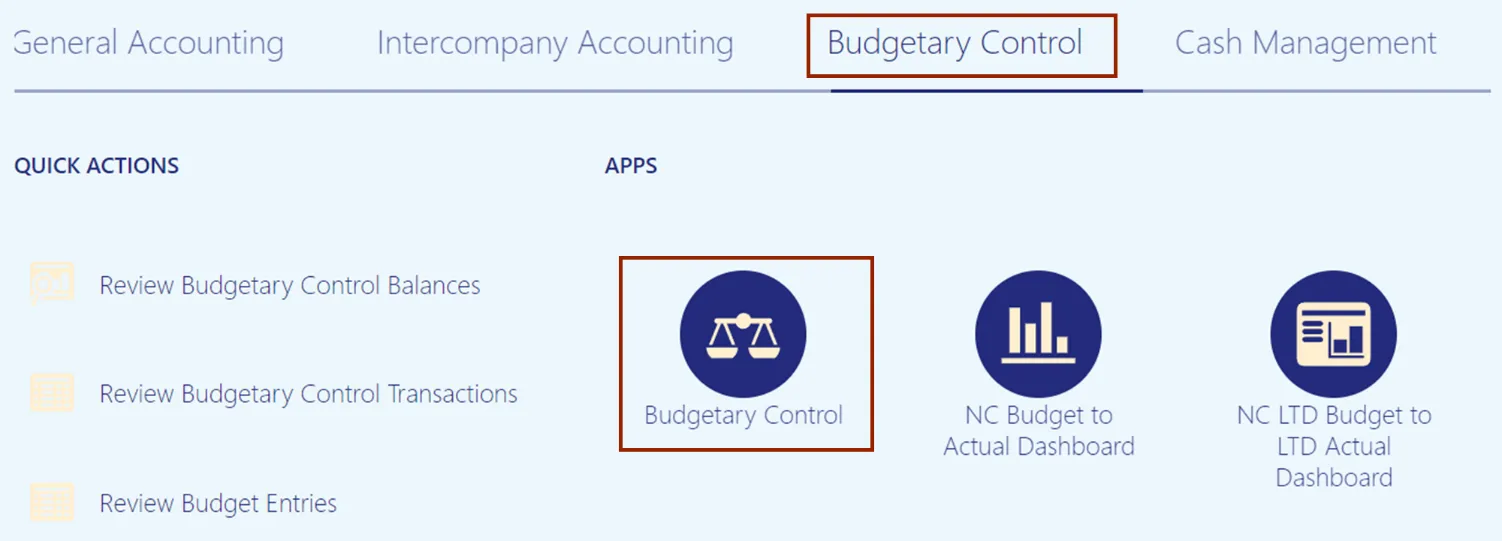
Step 2. Click the Budgetary Control tab. Click the Budgetary Control app.
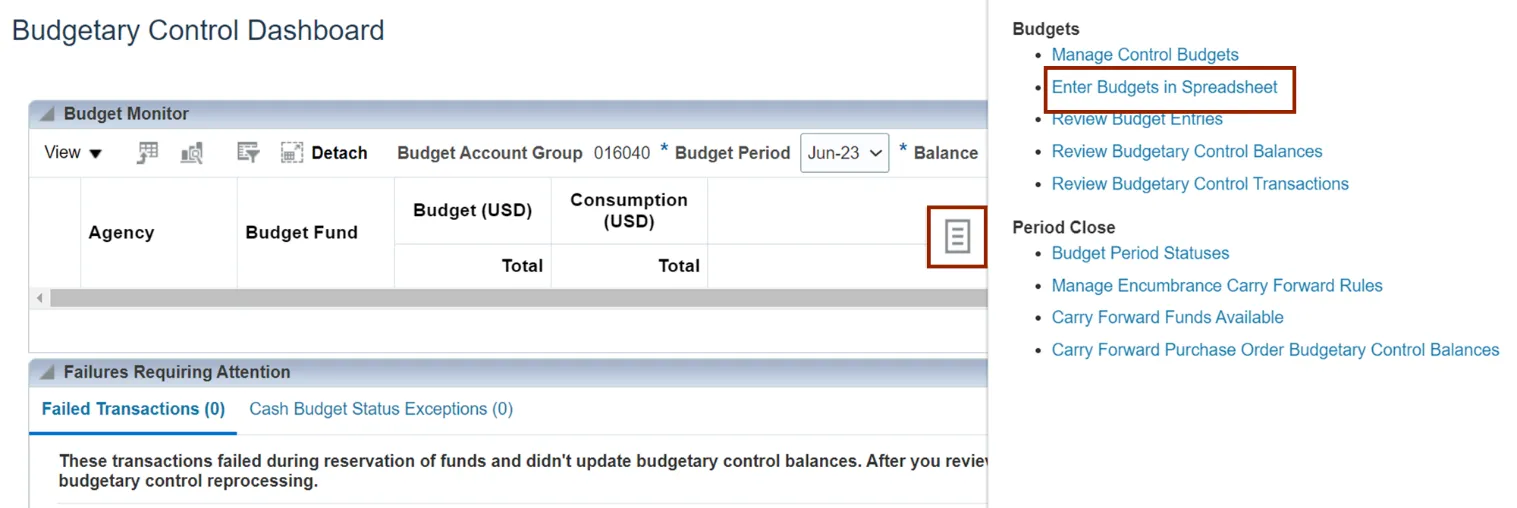
Step 3. The Budgetary Control Dashboards page opens. Click the Tasks icon. Under Budgets, select Enter Budgets in Spreadsheet.
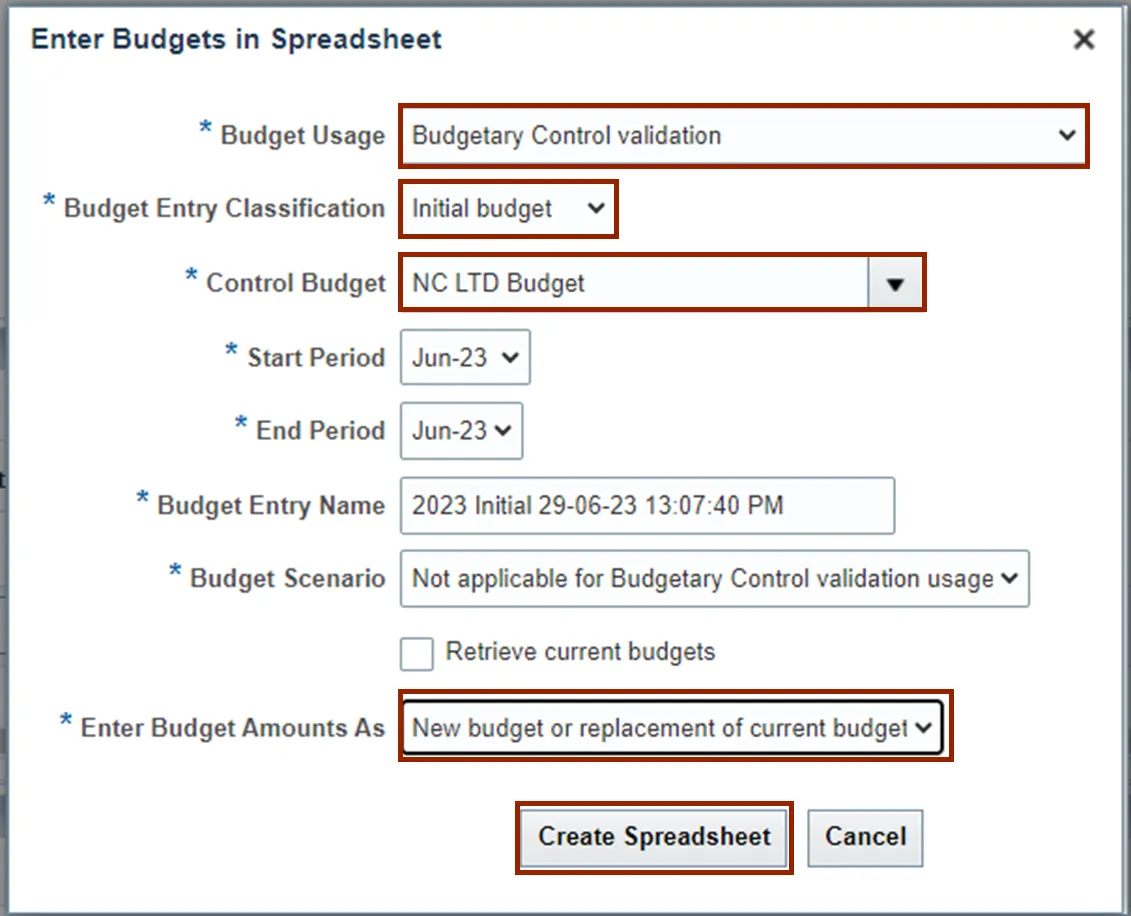
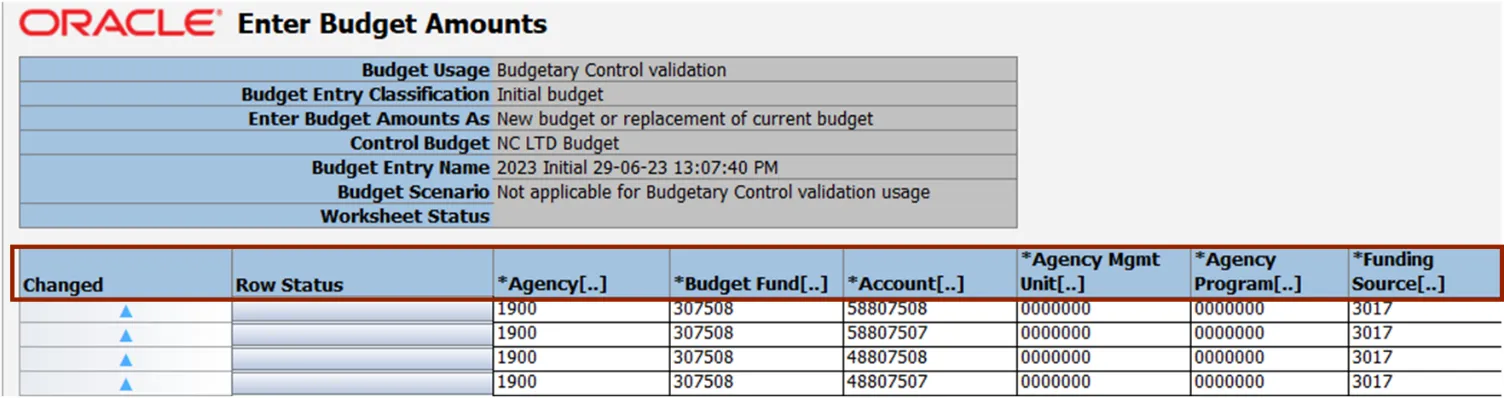
Step 4. On the Enter Budgets in Spreadsheet window, enter the appropriate fields.
In this example, we choose *Budget Usage as Budgetary Control validation, *Budget Entry Classification as Initial Budget, *Control Budget as NC LTD Budget.
The following fields will be auto populated once the Control Budget field is selected: Start Period, End Period, Budget Entry Name, and Budget Scenario. Then, enter *Budget Amounts as New Budget or replacement of current budget. Furthermore, click the Create Spreadsheet button.
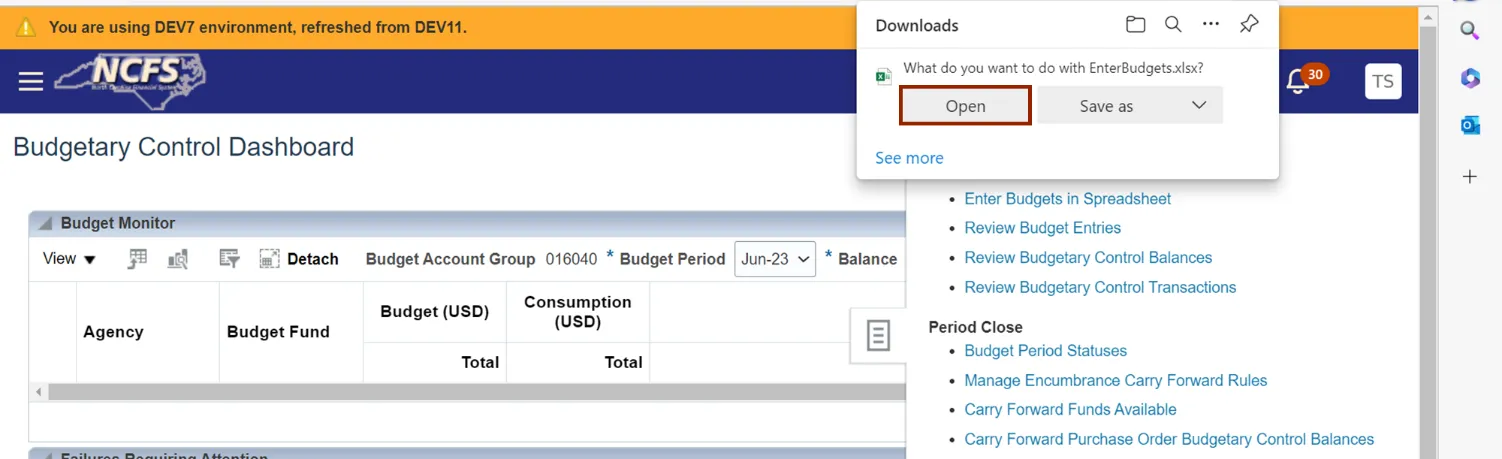
Step 5. On the Budgetary Control Dashboard page, the Downloads pop-up appears. On the Downloads pop-up, click the Open button.
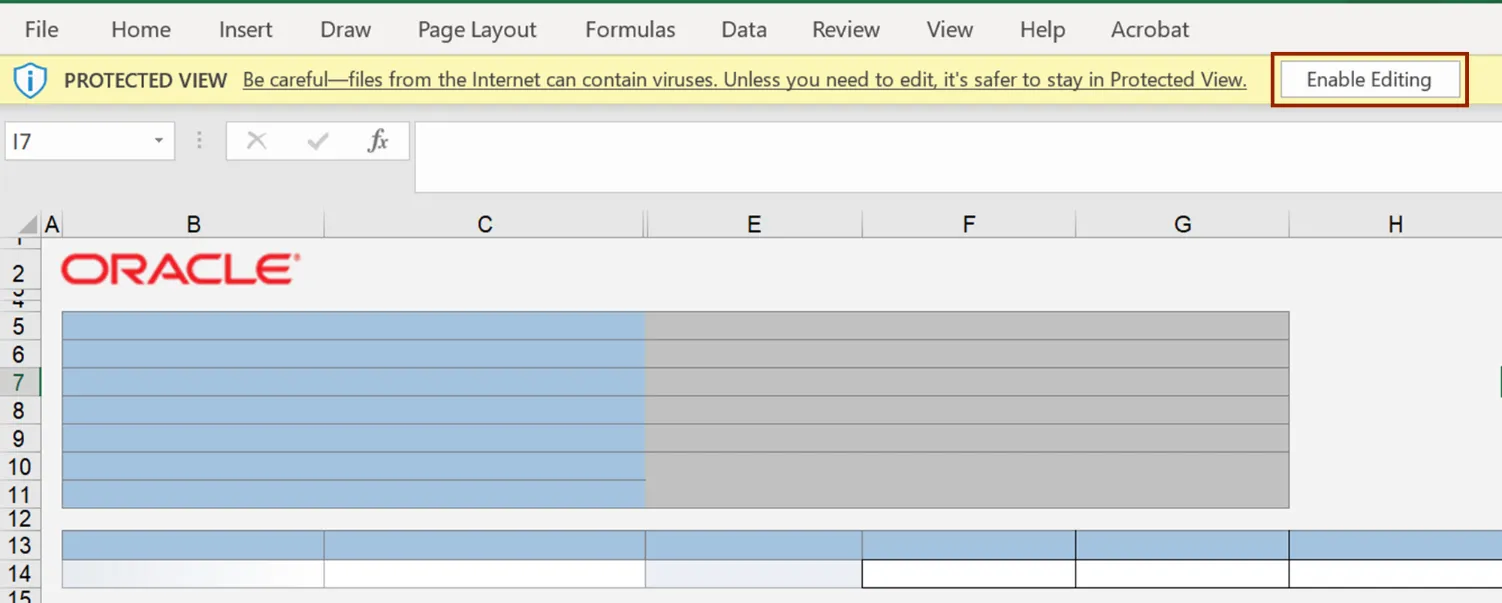
Step 6. The Excel sheet appears. Click the Enable Editing button.
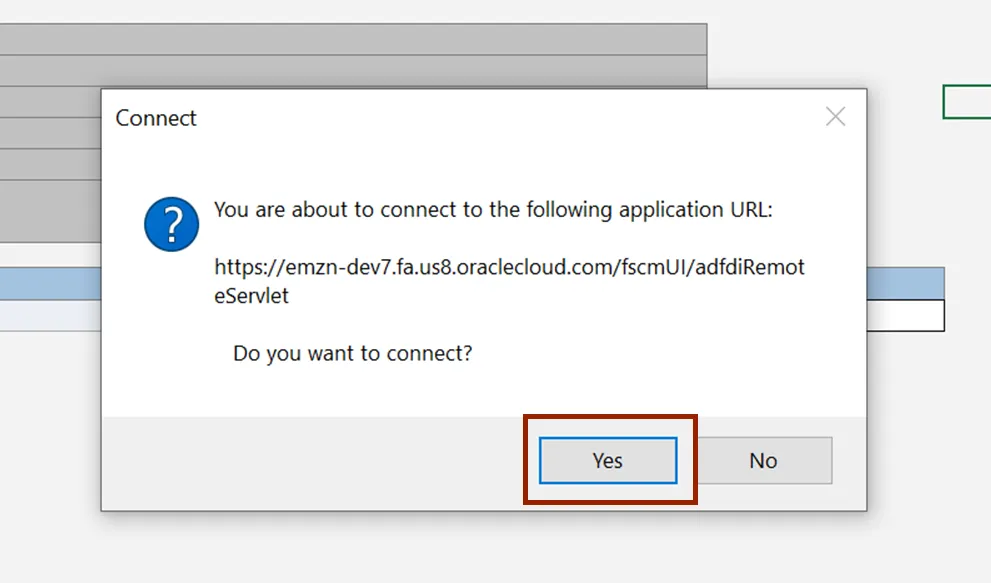
Step 7. On the Connect pop-up, click the Yes button.
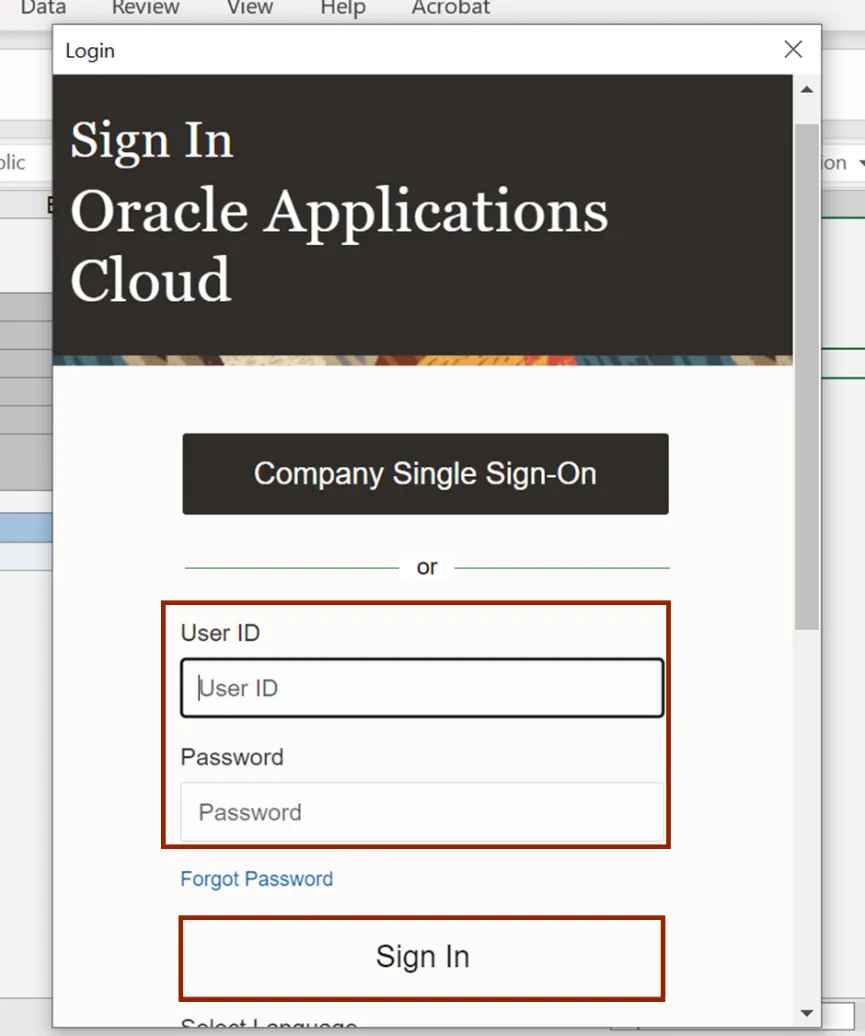
Step 8. On the Sign in pop-up, enter User ID and Password. Then, click the Sign In button.
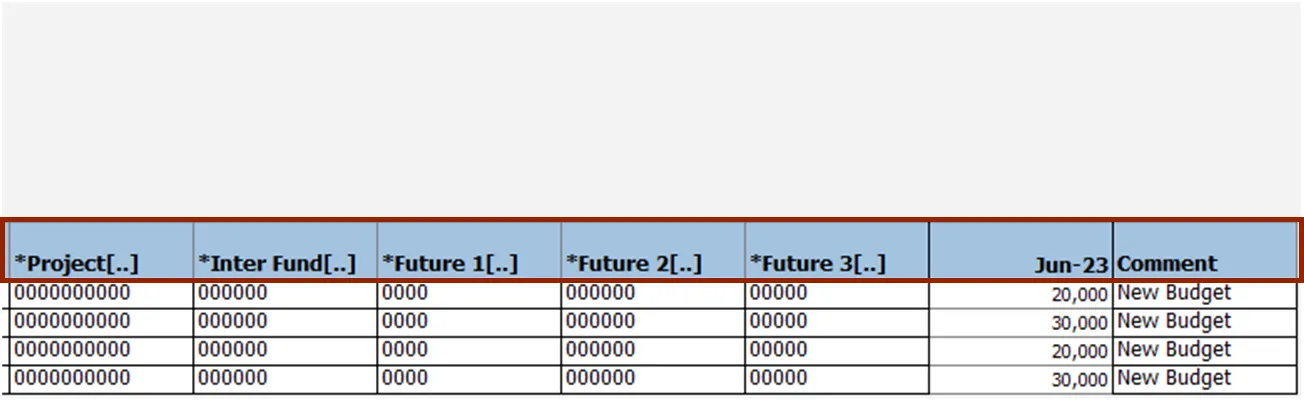
Step 9. The Spreadsheet opens. Enter the Budget values as required.
Step 10. Scroll to the right and enter the budget amount. In the Comment column mention a comment if required.
In this example, we choose to write New Budget in the Comment fields.
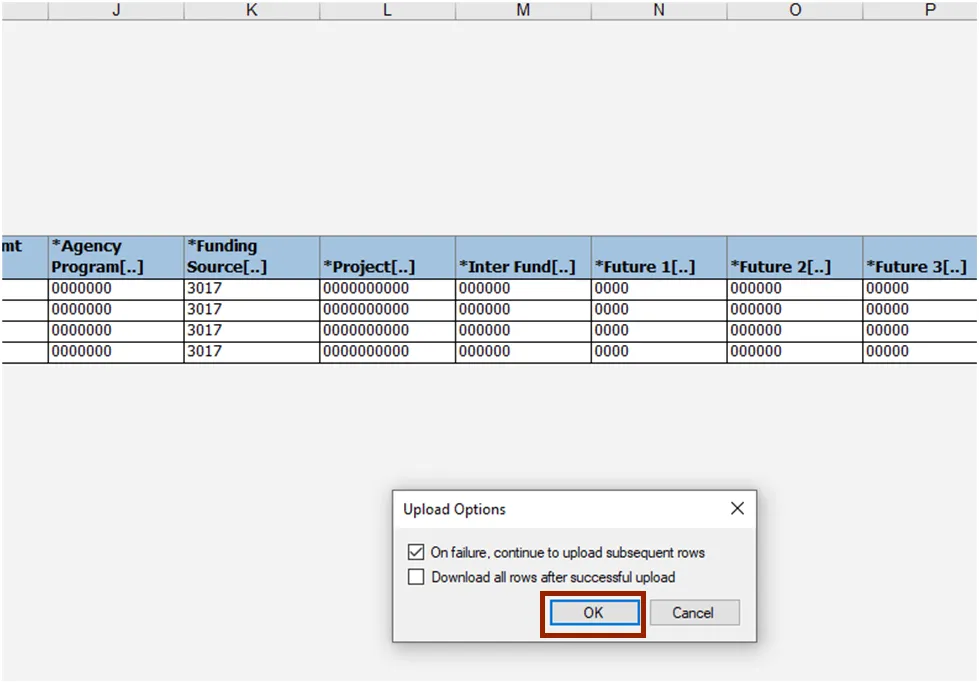
Step 11. Under the Enter Budget Amounts tab on top of the sheet, click the Submit button.

Step 12. On the Upload Options pop-up, click the OK button.
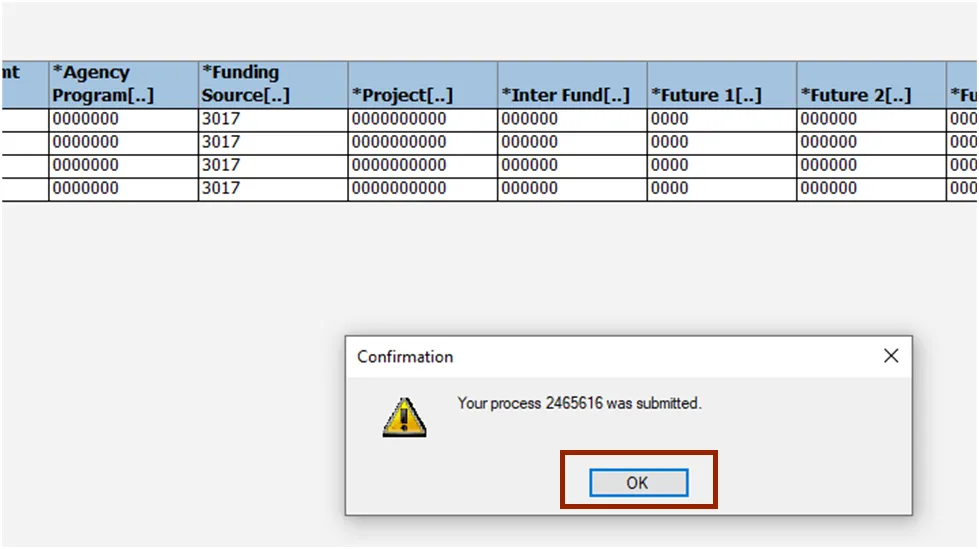
Step 13. The Confirmation pop-up appears, which indicates that the process was submitted. Click the OK button.
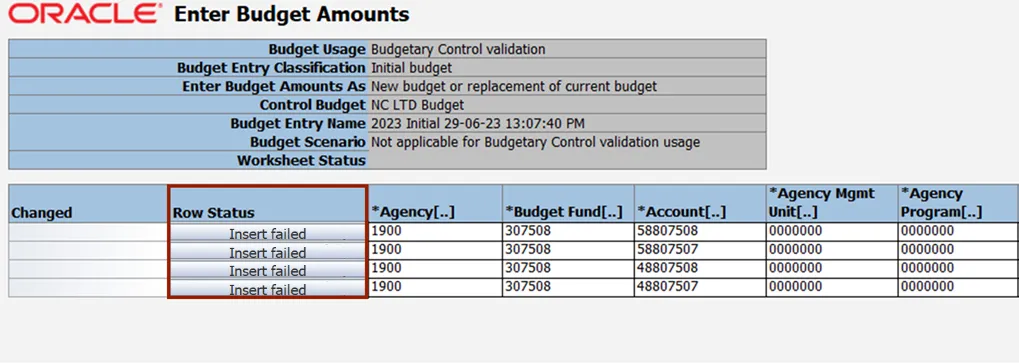
Step 14. (a) The Row Status fields get updated to Row Inserted Successfully.
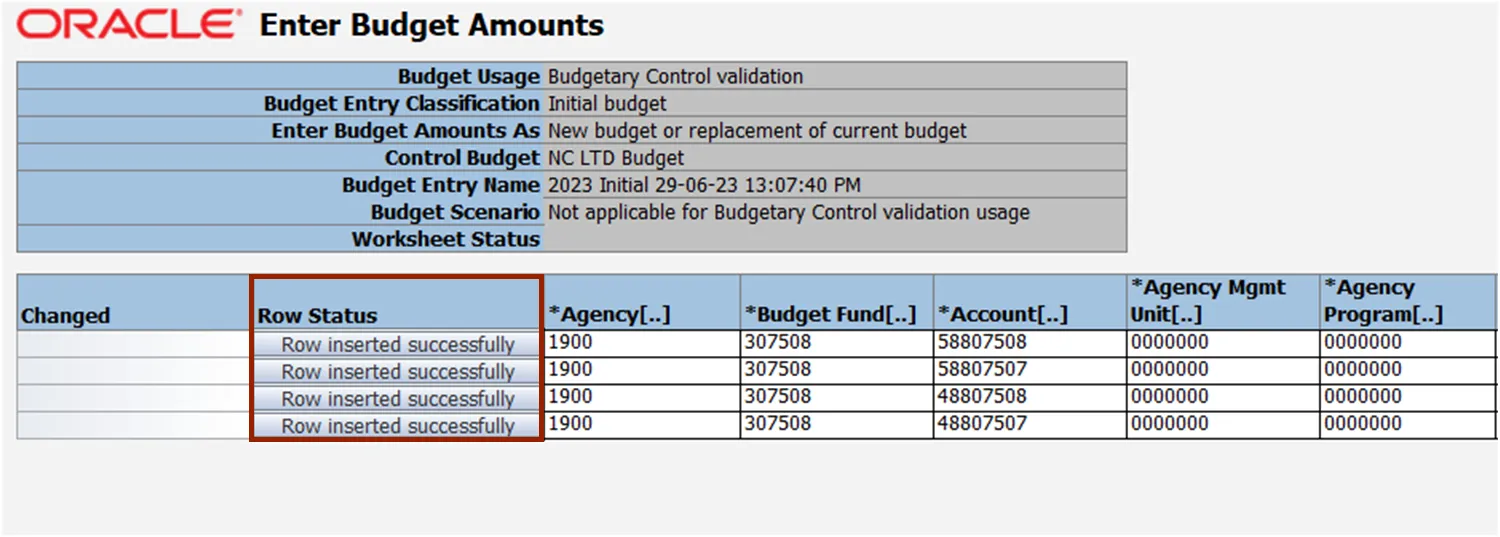
Step 14. (b) Alternatively, if the Row Status fields reflect Insert Failed, validate all segments, and enter the correct values after validation. Then repeat the submit process. (Step 11 -13).
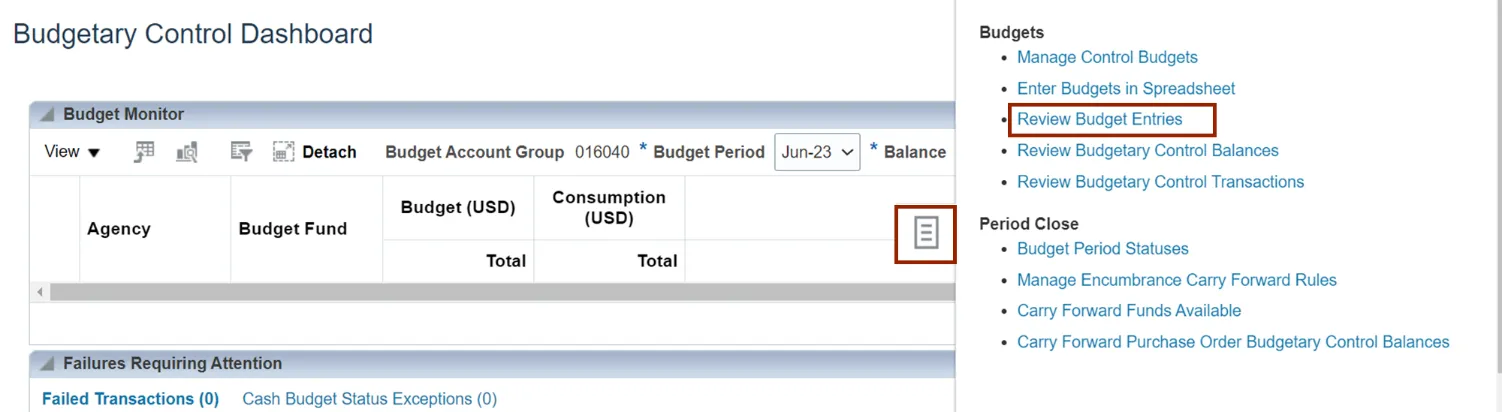
Step 15. Navigate back to the Budgetary Control Dashboard page. Click the Tasks icon. Under Budget, click Review Budget Entries.
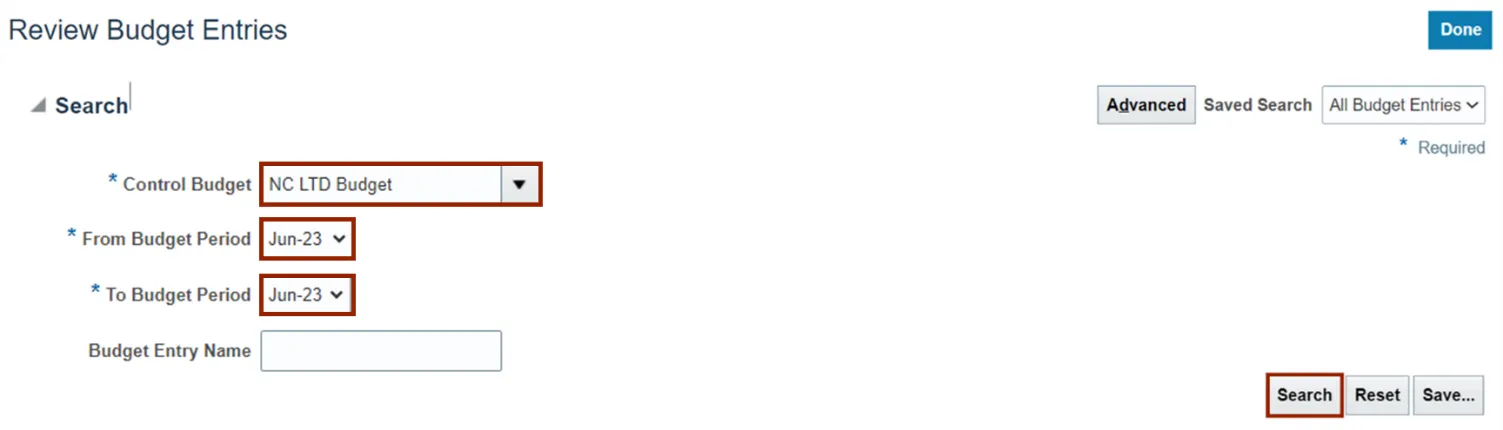
Step 16. In the Search section, enter the *Control Budget as NC LTD Budget, *From Budget Period as Aug-21, and *To Budget Period as Jun-22. Click the Search button.
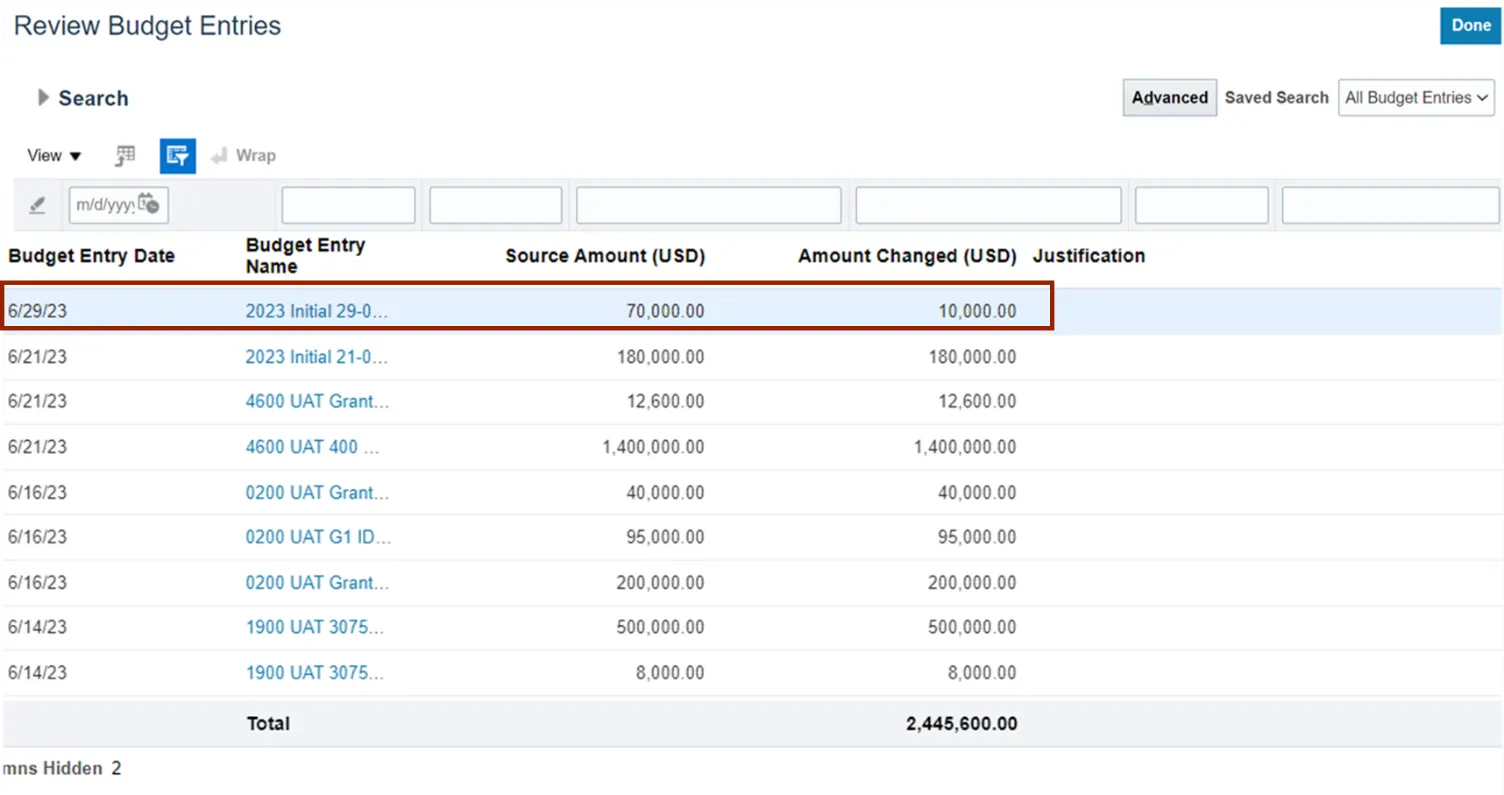
Step 17. The newly added budget entries can be viewed here.
Wrap-Up
Manage Grant Authorization in Budgets using the steps above.
Additional Resources
- Virtual Instructor-Led Training (vILT)