Purpose
The purpose of this Quick Reference Guide (QRG) is to provide a step-by-step explanation on how to setup and maintain Budget in the North Carolina Financial System (NCFS).
Introduction and Overview
This QRG covers the process of setting up Budget and maintaining it by:
- Updating the tracking option in Control Budget.
- Adding a year in NC CASH US Calendars.
- Add a year in NC CASH ANNUAL calendars for Funds checking control budgets.
- Adding biennium year to control budget (NC Appropriations, Authorized and NC LTD).
- Adding biennium year to control budget (Funds-Checking CB).
Update Tracking Option in Control Budget (Advisory)
To update Tracking Option in Control Budget please follow the steps below. There are 15 steps to complete this process.
Step 1. Log in to the NCFS portal with your credentials to access the system.
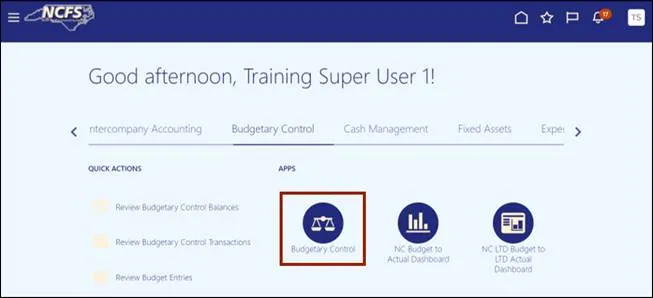
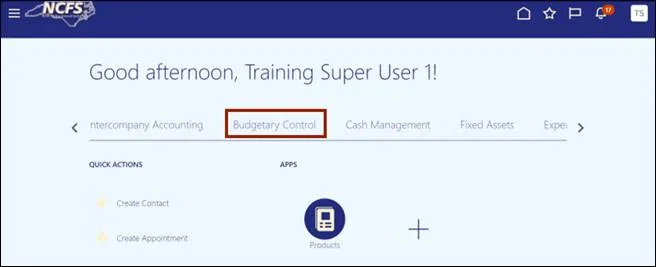
Step 2. On the Home page, click the Budgetary Control tab.
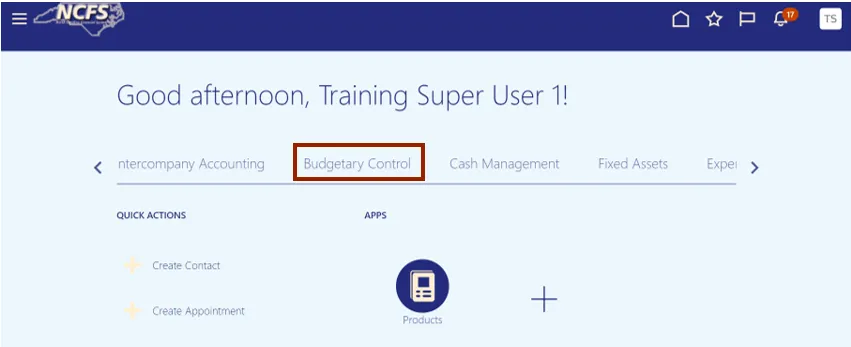
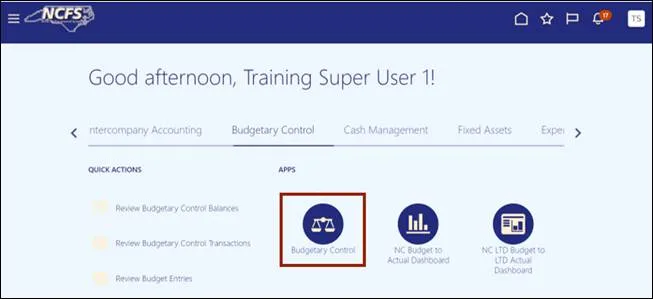
Step 3. Click the Budgetary Control app.
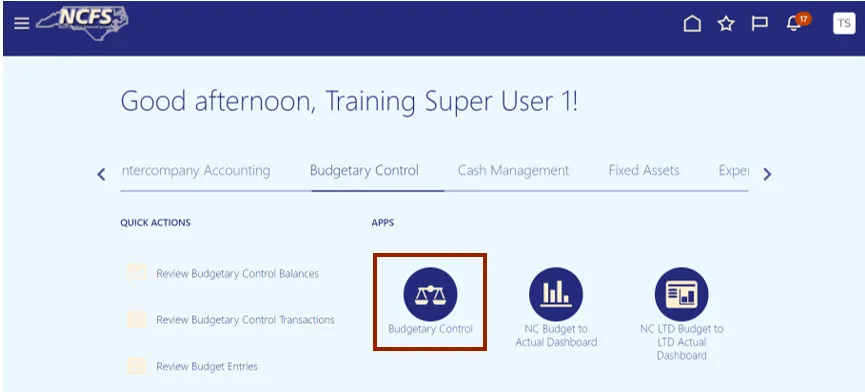
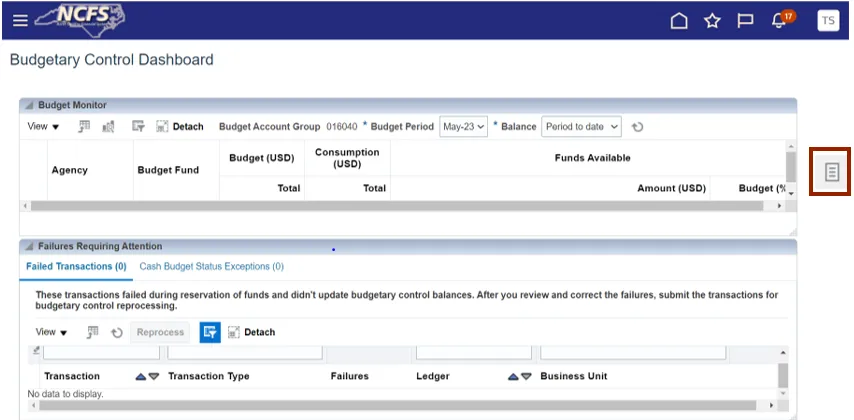
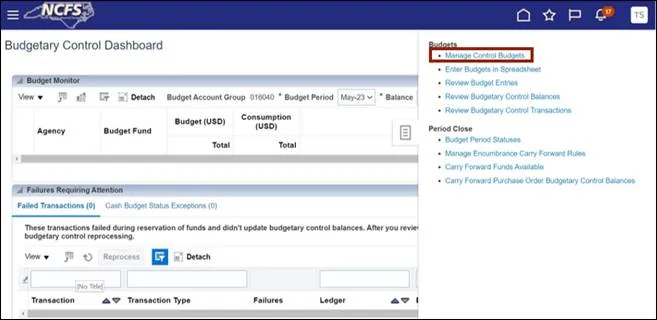
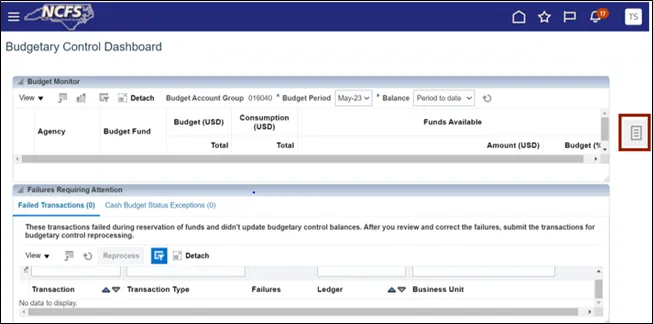
Step 4. The Budgetary Control Dashboard page opens. Click the Tasks icon.
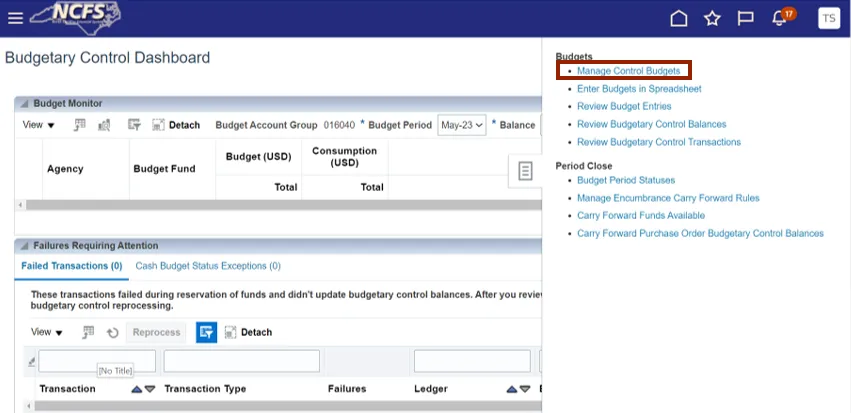
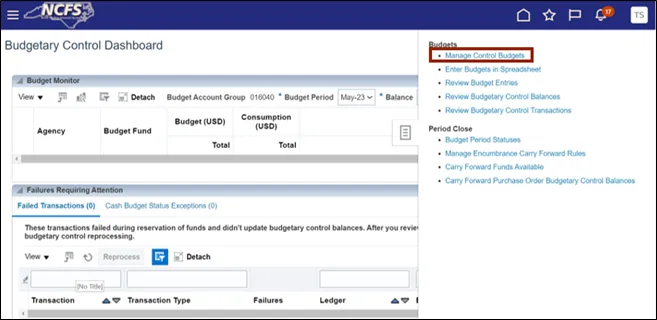
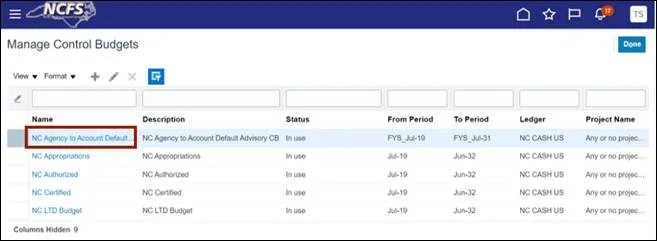
Step 5. Under the Budgets section, click Manage Control Budgets.
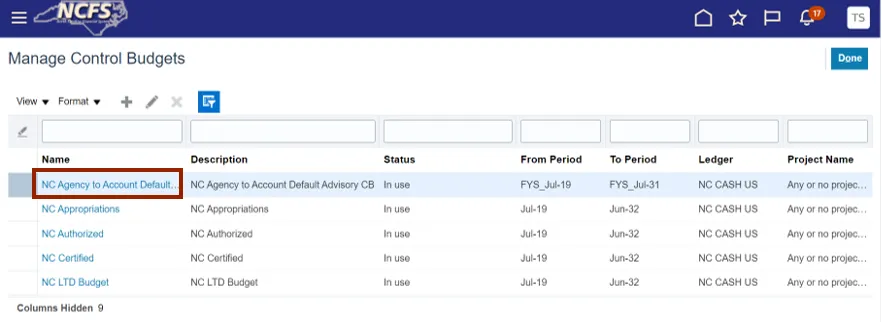
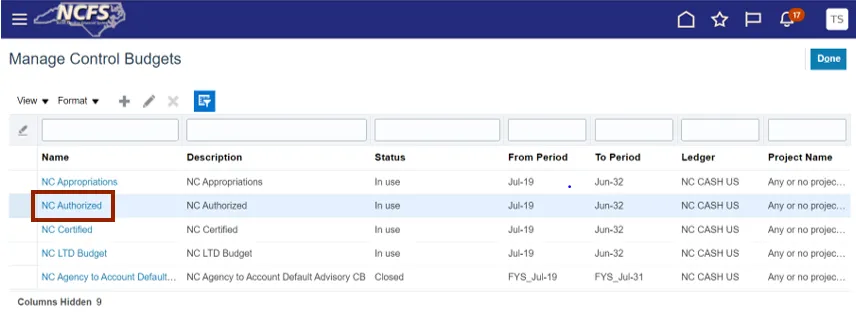
Step 6. The Manage Control Budgets page opens. Under the Name column, select the appropriate Budget.
In this example, we choose the NC Agency to Account Default Advisory CB.
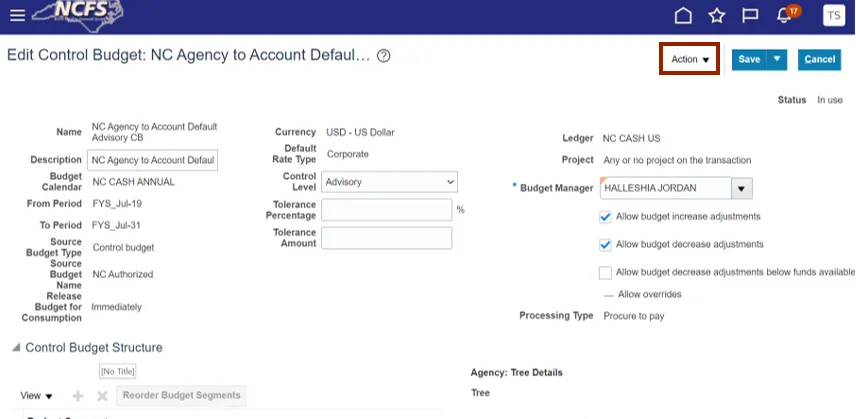
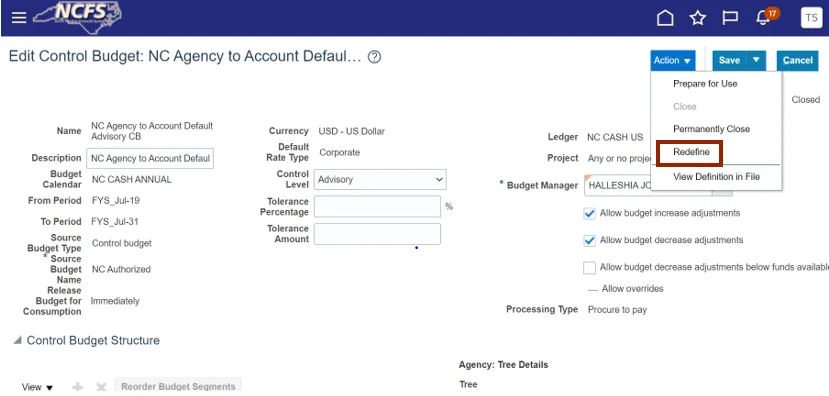
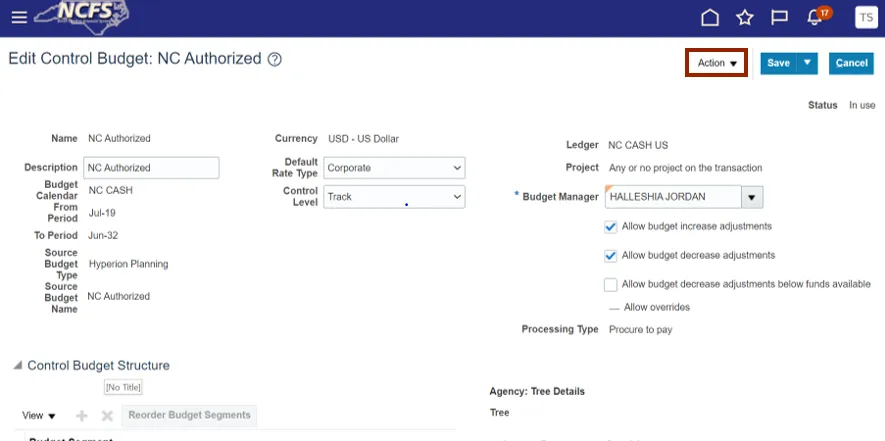
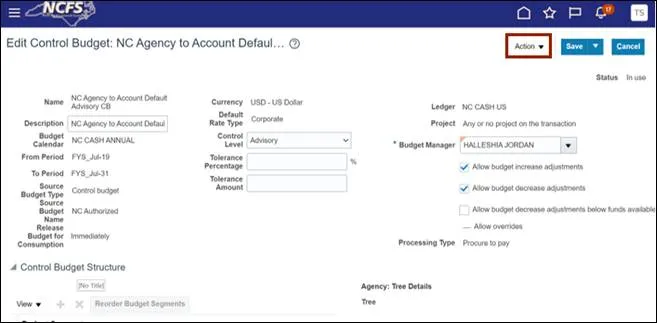
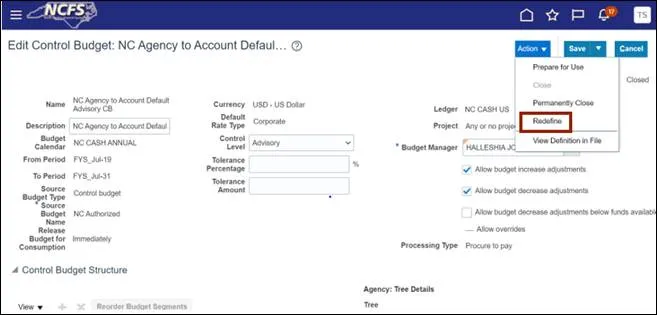
Step 7. The Edit Control Budget: NC Agency to Account Default Advisory CB page opens. Select the Action drop-down choice list.
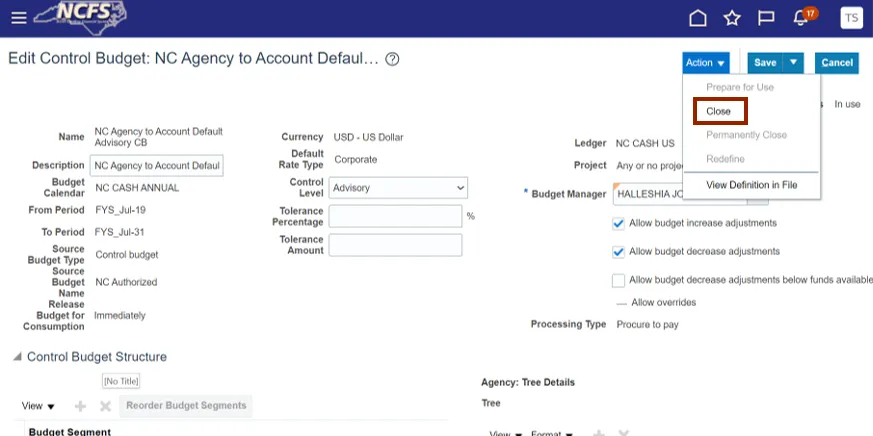
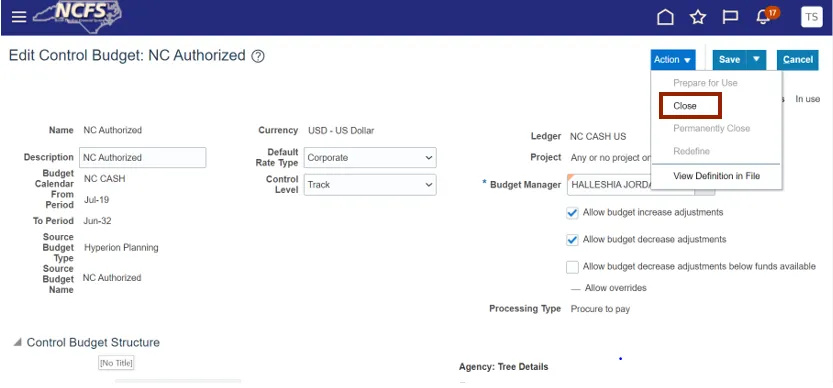
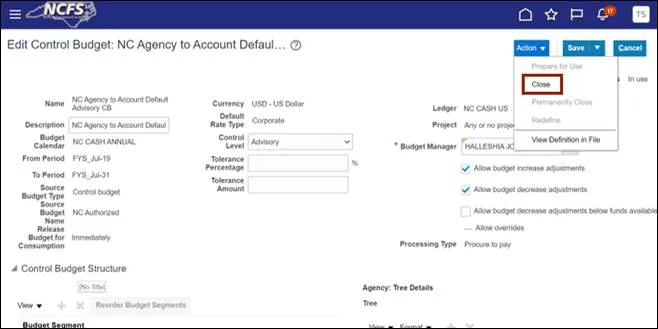
Step 8. On the Action drop-down choice list, select Close.
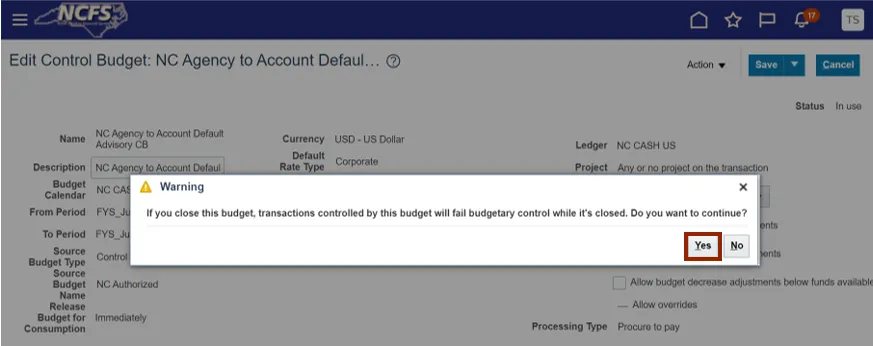
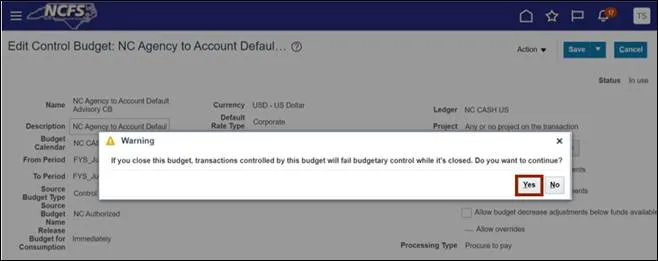
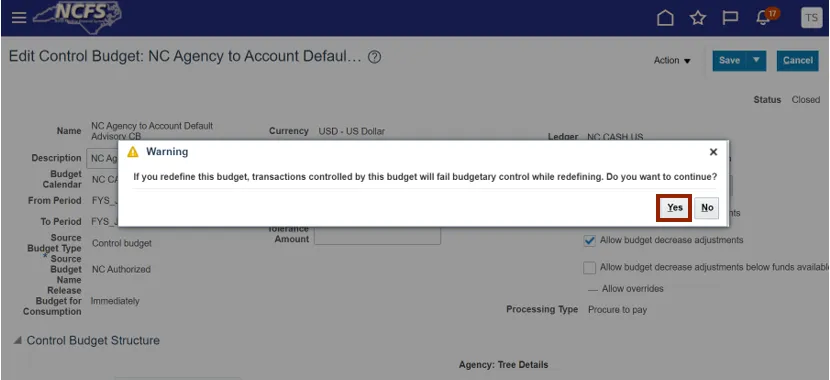
Step 9. A Warning pop-up appears. Click the Yes button.
Step 10. Click the Action drop-down choice list and select the Redefine option.
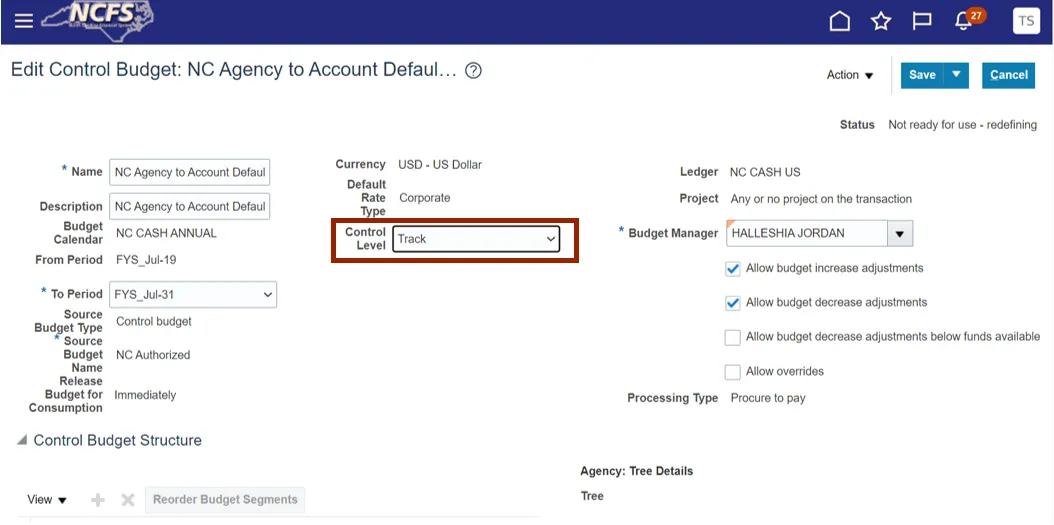
Step 11. Select the relevant information for the Control Level field.
In this example, we choose Track from the drop-down choice list.
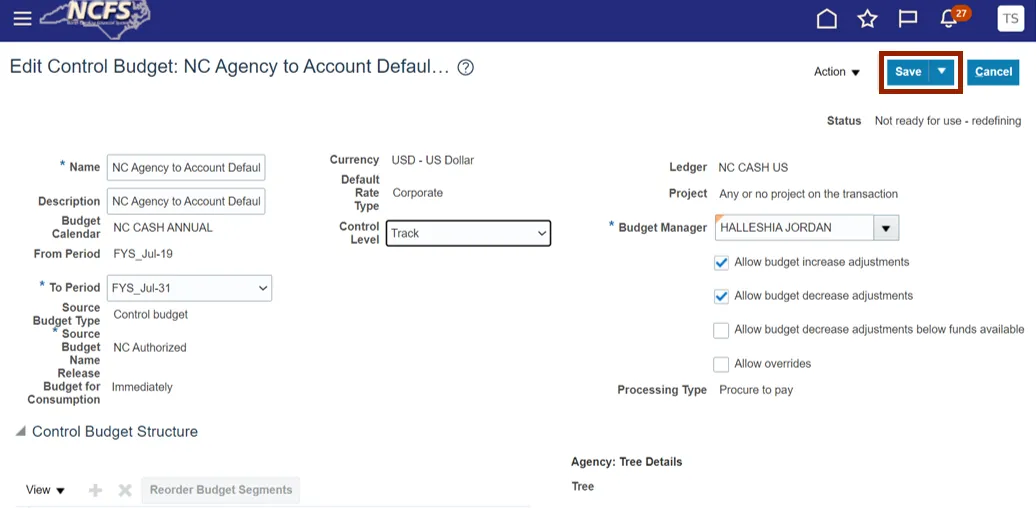
Step 12. Click the Save button.
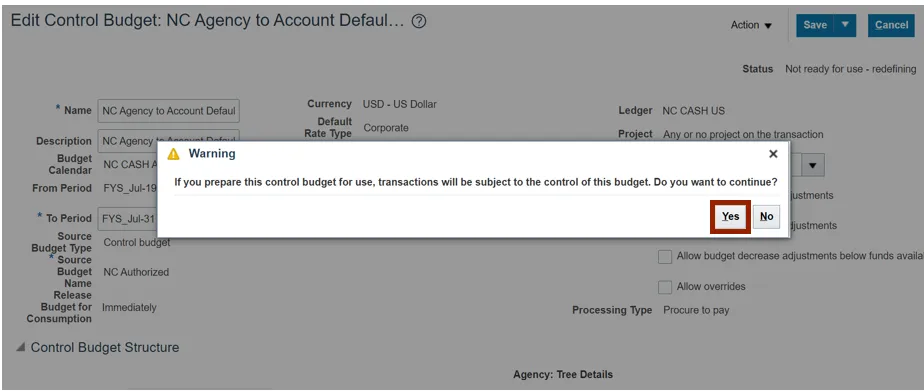
Step 13. Click the Action drop-down choice list, then select Prepare for Use.
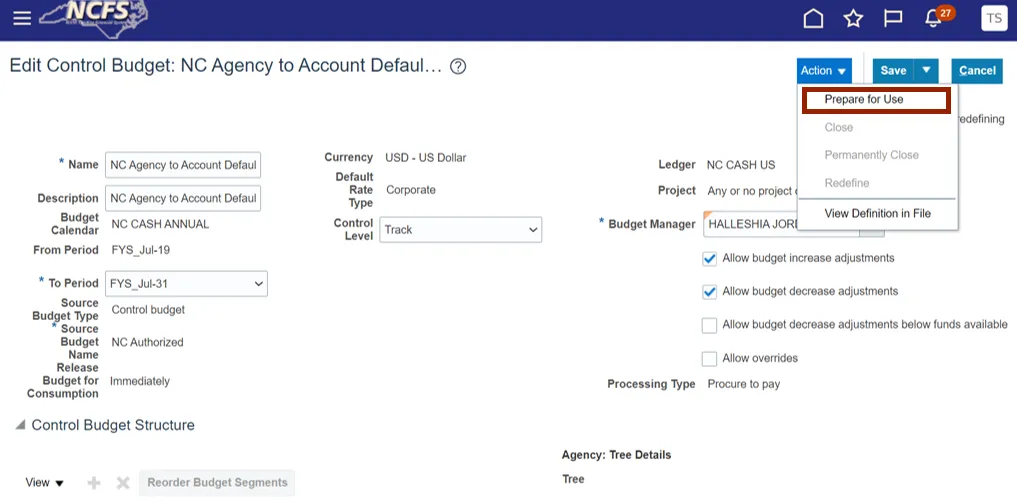
Step 14. A Warning pop-up appears. Click the Yes button.
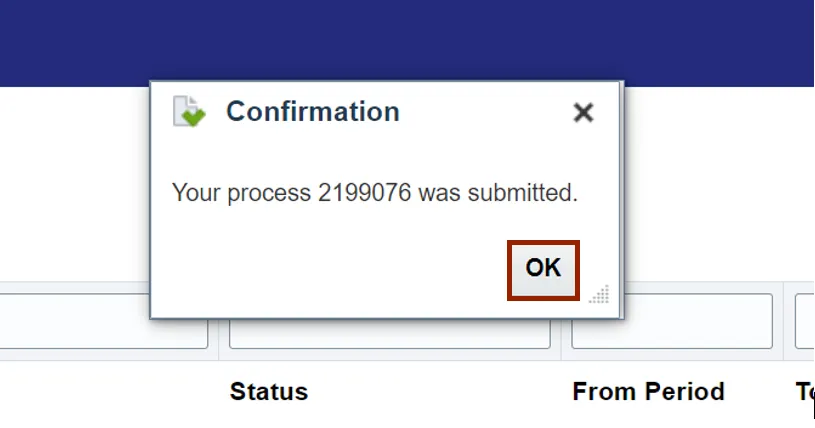
Step 15. A Confirmation pop-up appears. Click the OK button. You are re-directed to the Manage Control Budgets page.
Add a Year in NC CASH US Calendars for Certified and Authorized Budget
To Add a Year in NC CASH US Calendars for Certified and Authorized Budget, please follow the steps below. There are 10 steps to complete this process.
Step 1. Log in to the NCFS portal with your credentials to access the system.
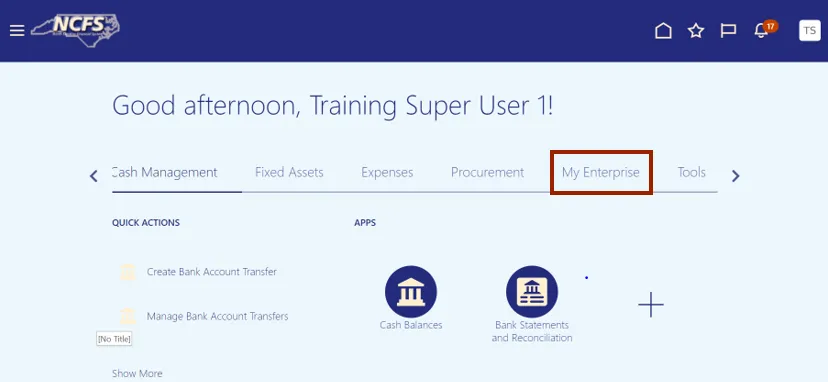
Step 2. On the Home page, click the My Enterprise tab.
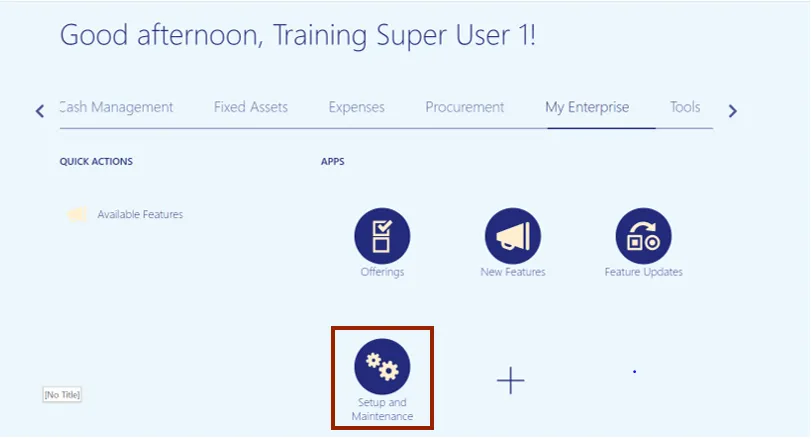
Step 3. Click the Setup and Maintenance app.
Step 4. The Setup: Financials page appears. On the Search Tasks field, enter Manage Budget Calendars.
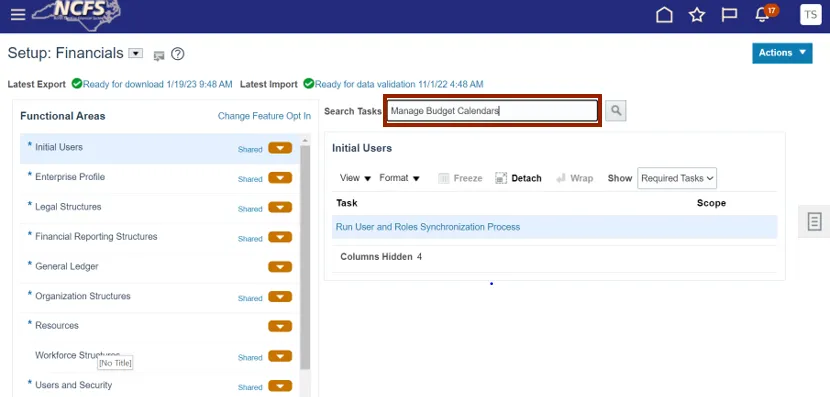
Step 5. Click the Search icon.
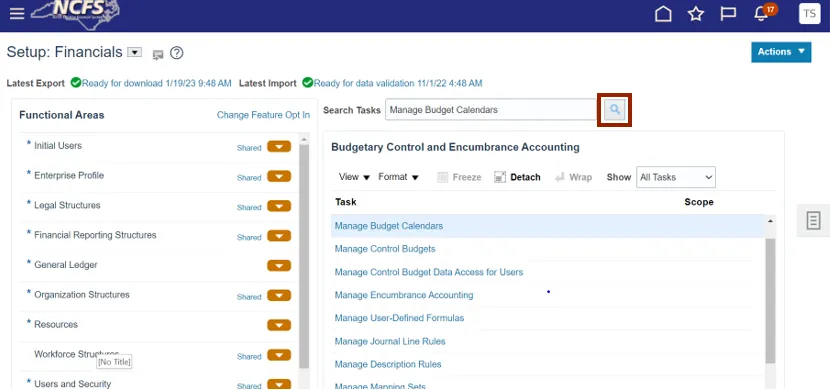
Step 6. Under the Task section, select Manage Budget Calendars.
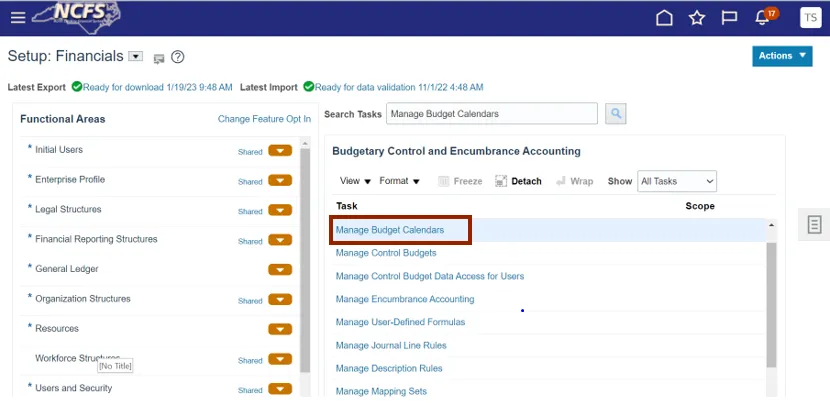
Step 7. The Manage Accounting Calendars page opens. Click NC CASH.
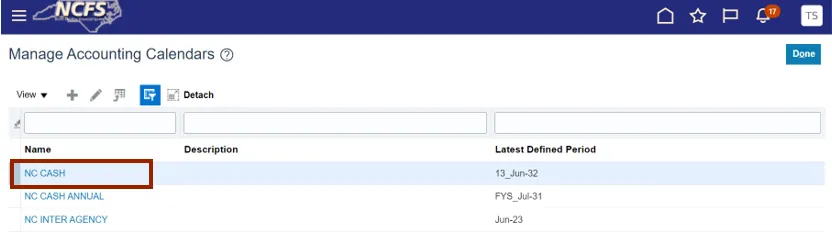
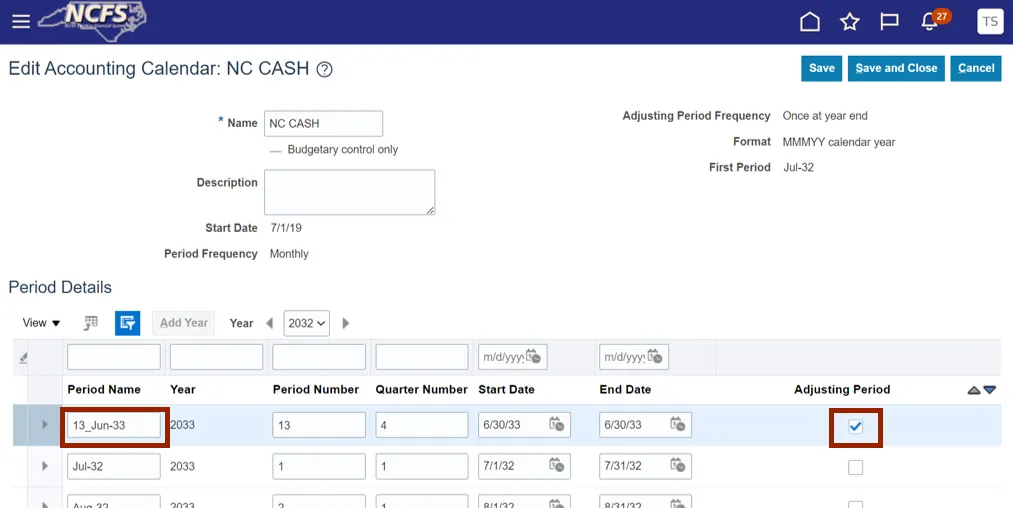
Step 8. On the Edit Accounting Calendar: NC CASH page appears. Click the Add Year button under the Period Details section.
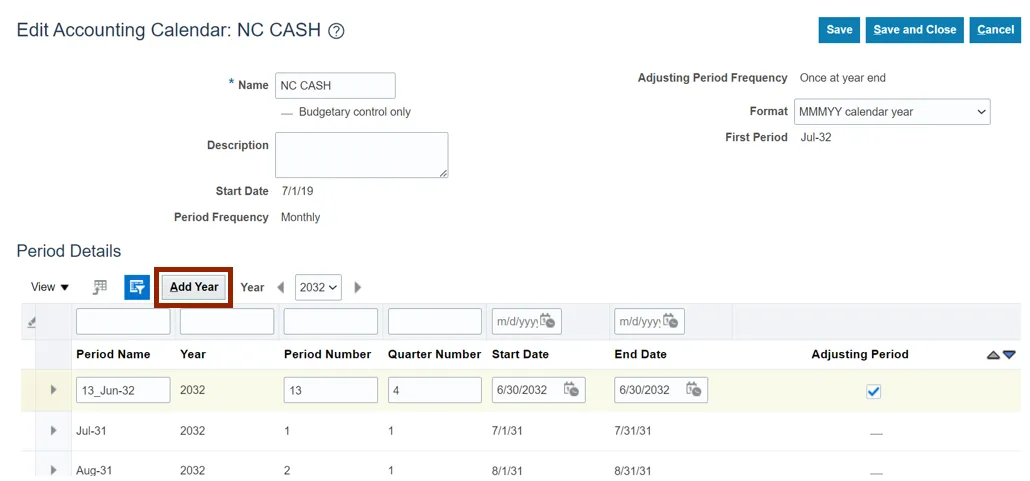
Step 9. A new period will appear in the Period Details section. The Adjusting Period check box will be automatically enabled for the new period.
In this example, we choose 13_Jun-33 as the default adjusting period.
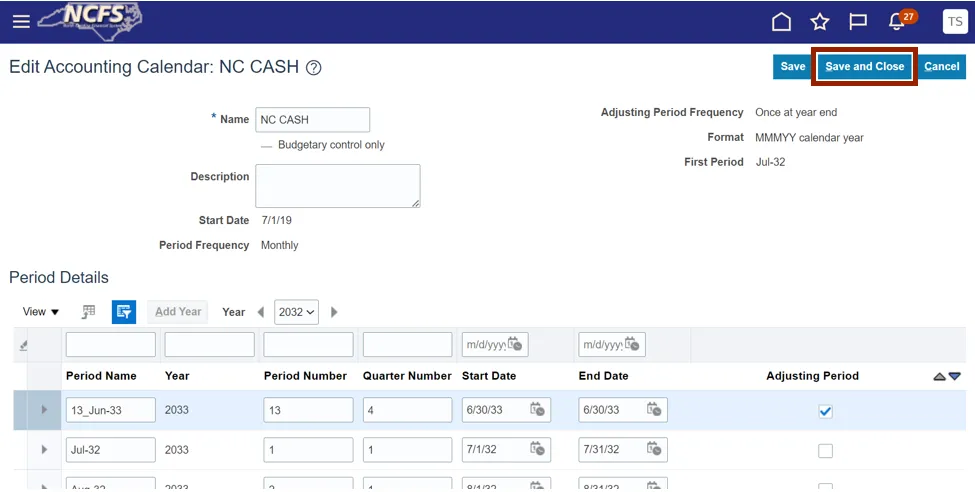
Step 10. Click the Save and Close button.
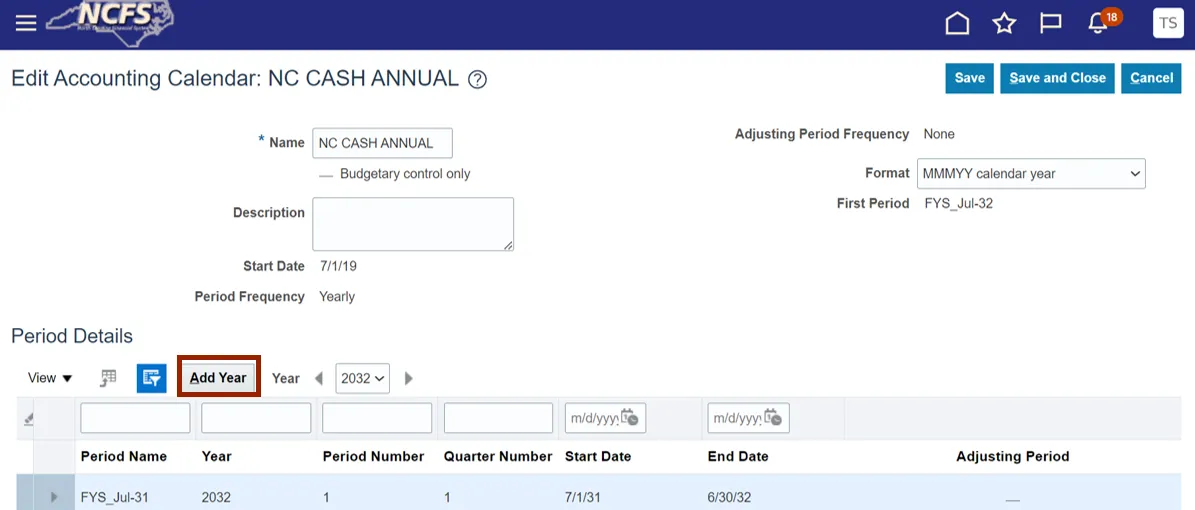
Add a Year in NC CASH ANNUAL Calendars for Funds Checking Control Budgets
To Add a year in NC CASH ANNUAL Calendars for Funds Checking Control Budgets, please follow the steps below. There are 4 steps to complete this process.
Step 1. Follow steps 1-6 from above.
Step 2. The Manage Accounting Calendars page opens. Click NC CASH Annual.
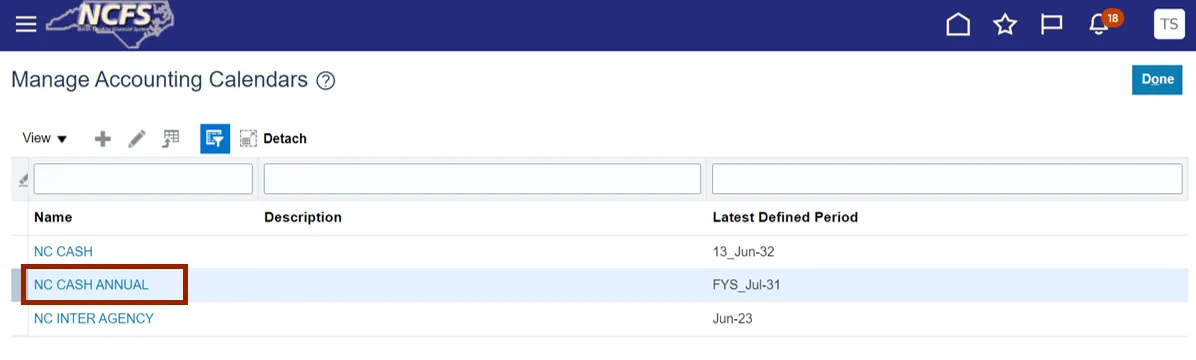
Step 3. The Edit Accounting Calendar: NC CASH ANNUAL page opens. Click the Add Year button under the Period Details section.
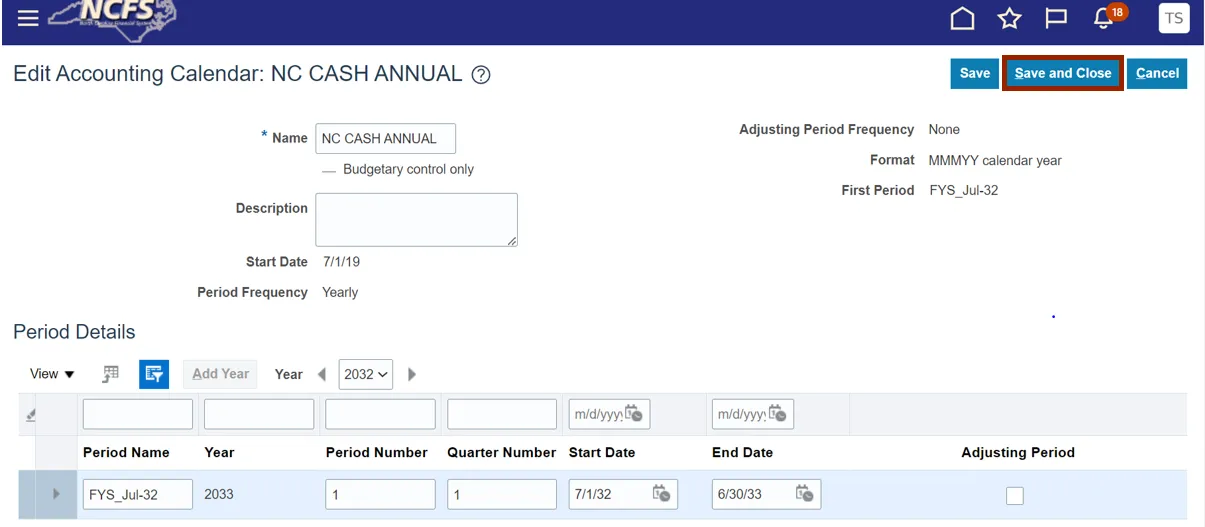
Step 4. A new year is added under the Period Details section. Click the Save and Close button.
Add Biennium Year to Control Budget (NC Appropriations, Authorized NC Certified and NC LTD)
To add biennium year to control budget (NC Appropriations, NC Authorized NC Certified and NC LTD), please follow the steps below. There are 16 steps to complete this process.
Step 1. Log in to the NCFS portal with your credentials to access the system.
Step 2. On the Home page, click the Budgetary Control tab.

Step 3. Click the Budgetary Control app.
Step 4. The Budgetary Control Dashboard page opens. Click the Tasks icon.
Step 5. Under the Budgets section, click Manage Control Budgets.
Step 6. The Manage Control Budgets page opens. Under the Name section, select NC Authorized. NC Appropriations, NC Certified, and NC LTD Budget can also be selected as per requirement.
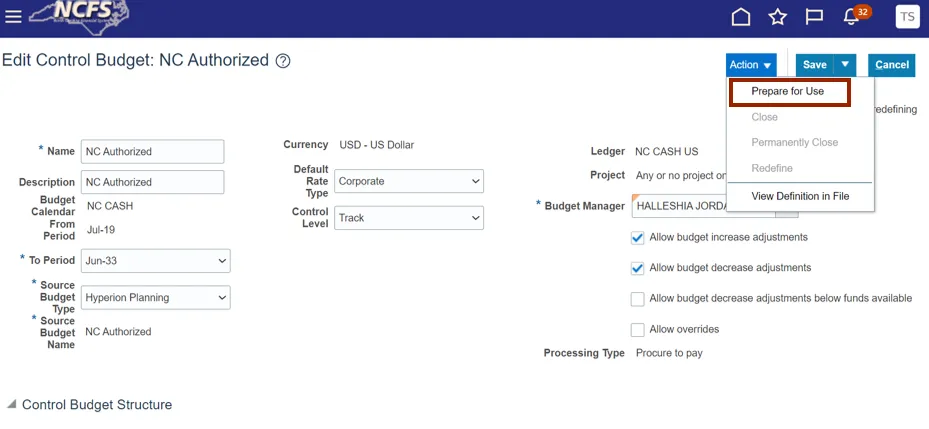
Step 7. The Edit Control Budget: NC Authorized page opens. Click the Action drop-down choice list.
Step 8. Select the Close option from the Action drop-down choice list.
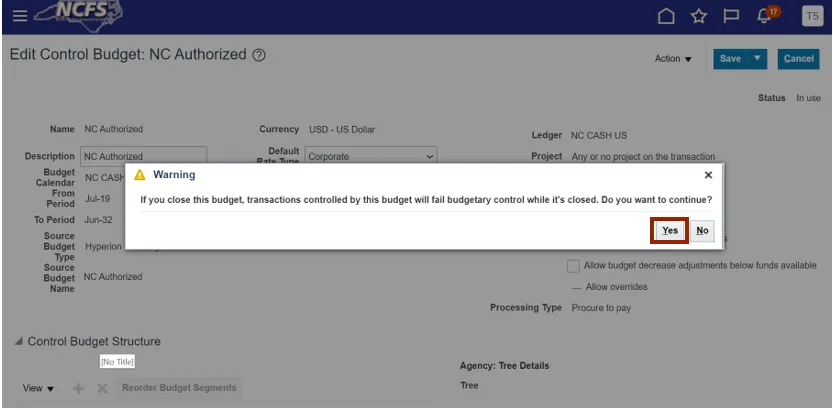
Step 9. A Warning pop-up appears. Click the Yes button.
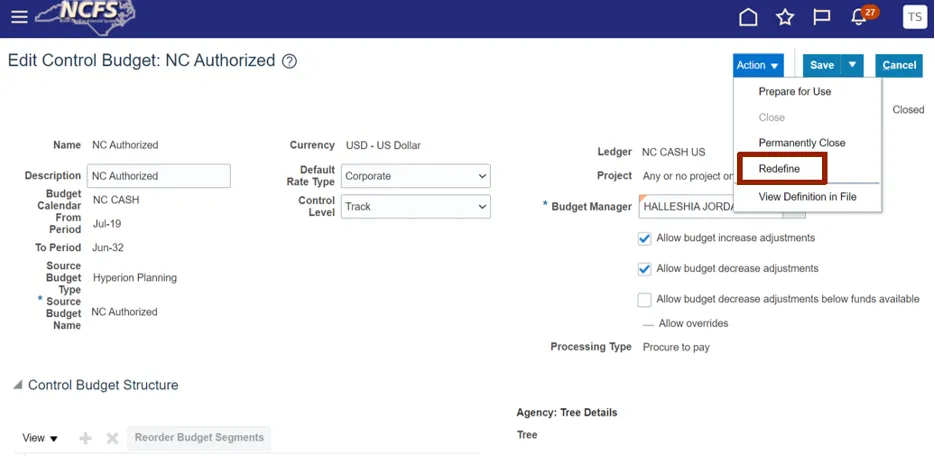
Step 10. Click the Action drop-down choice list again and select the Redefine option.
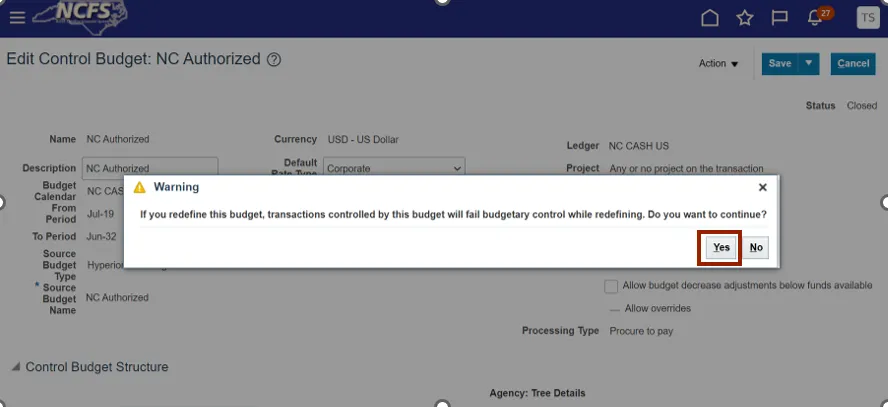
Step 11. A Warning pop-up appears. Click the Yes button.
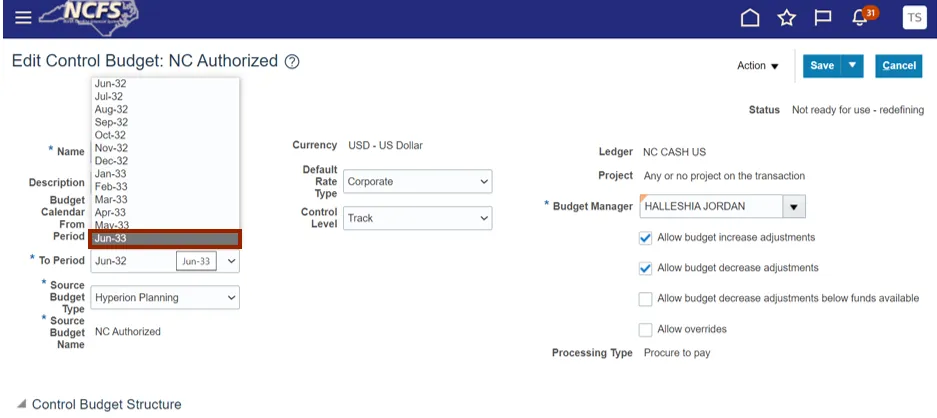
Step 12. Select the most recent period from the *To Period drop-down choice list.
In this example, we choose Jun-33.
Step 13. Click the Action drop-down choice lists again and select the Prepare for Use option.
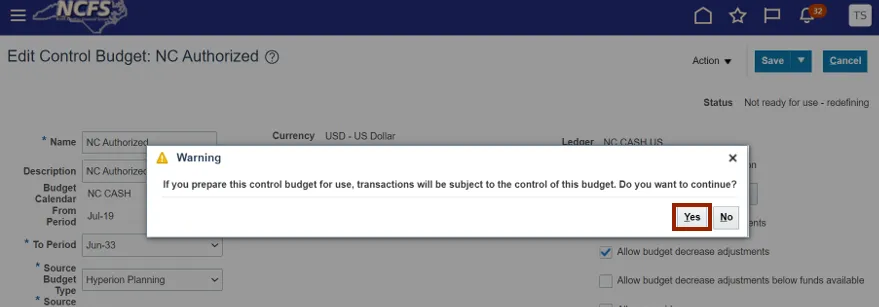
Step 14. A Warning pop-up appears. Click the Yes button.
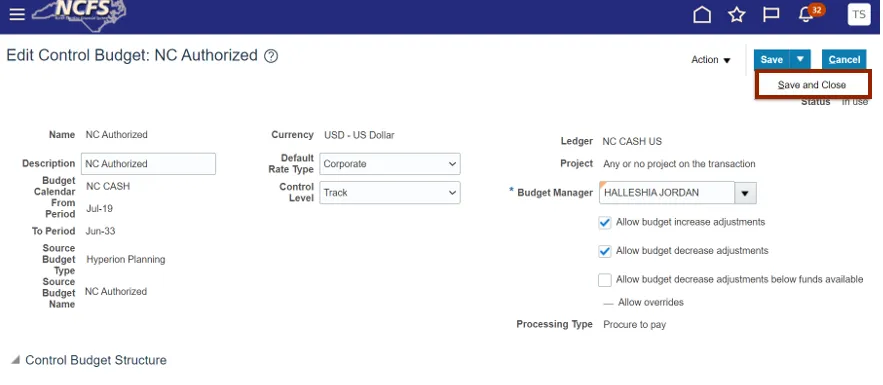
Step 15. Click the Save and Close from the Save button.
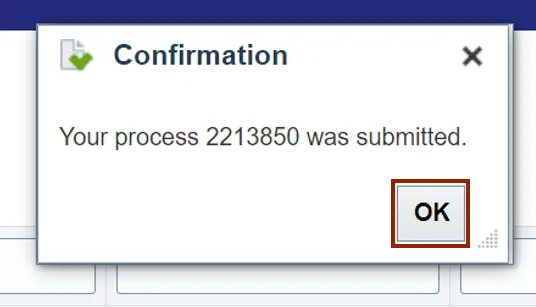
Step 16. A Confirmation pop-up appears. Click the OK button.
Note: The steps shown here are for NC Authorized budget. The same steps can be followed for NC Appropriations, NC Certified, and NC LTD Budgets respectively by selecting the required budget in Step #5.
Add Biennium Year to Control Budget (Funds-Checking CB)
To add biennium year to control budget (Funds-Checking CB), please follow the steps below. There are 19 steps to complete this process.
Step 1. Log in to the NCFS portal with your credentials to access the system.
Step 2. On the Home page, click the Budgetary Control tab.
Step 3. Click the Budgetary Control app.
Step 4. The Budgetary Control Dashboard page opens. Click the Tasks icon.
Step 5. Under the Budgets section, click Manage Control Budgets.
Step 6. The Manage Control Budgets page opens. Under the Name column, select the appropriate Budget.
In this example, we choose NC Agency to Account Default Advisory CB.
Step 7. The Edit Control Budget: NC Agency to Account Default Advisory CB page opens. Click the Action drop-down choice list.
Step 8. Select the Close option from the Action drop-down choice list.
Step 9. A Warning pop-up appears. Click the Yes button.
Step 10. Click the Action drop-down choice list again and select the Redefine option.
Step 11. A Warning pop-up appears. Click the Yes button.
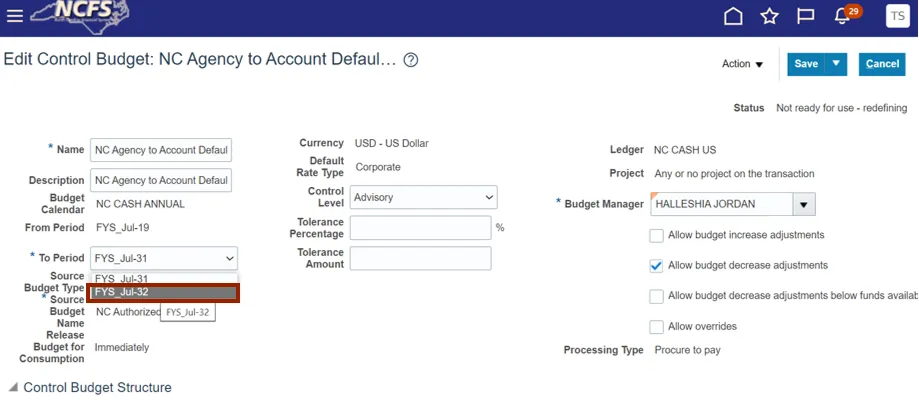
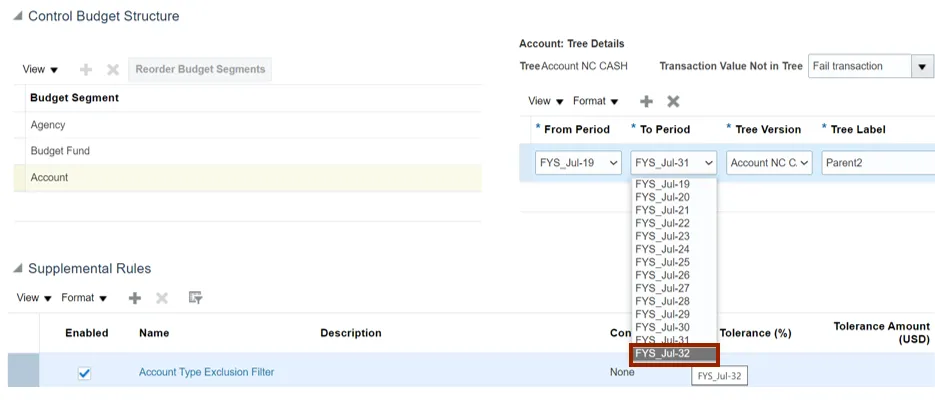
Step 12. Select the most recent period from the *To Period drop-down choice list.
In this example, we choose FYS_Jul-32.
Step 13. In the Control Budget Structure section, Click the Account tab.
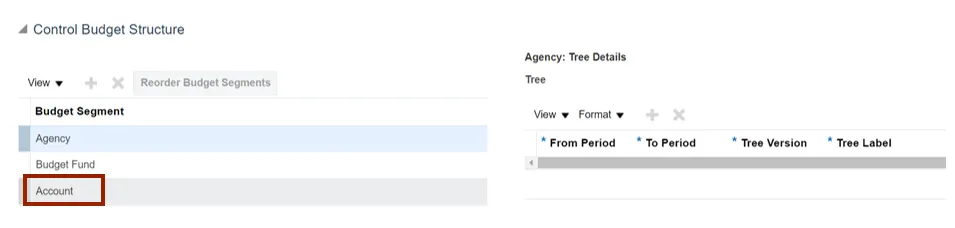
Step 14. A new line appears under the Agency: Tree Details section. Click the *To Period tab to activate it.
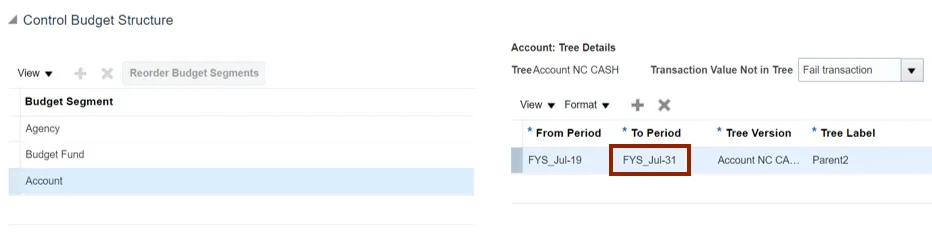
Step 15. Choose the most recent period from the *To Period drop-down choice list.
In this example, we choose FYS_Jul-32.
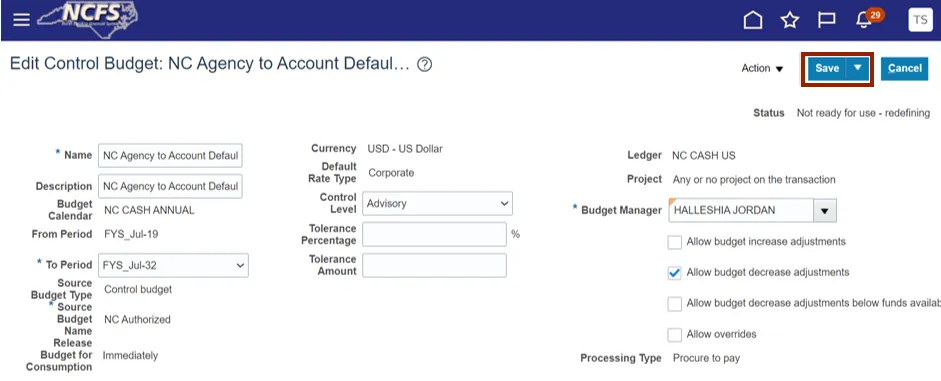
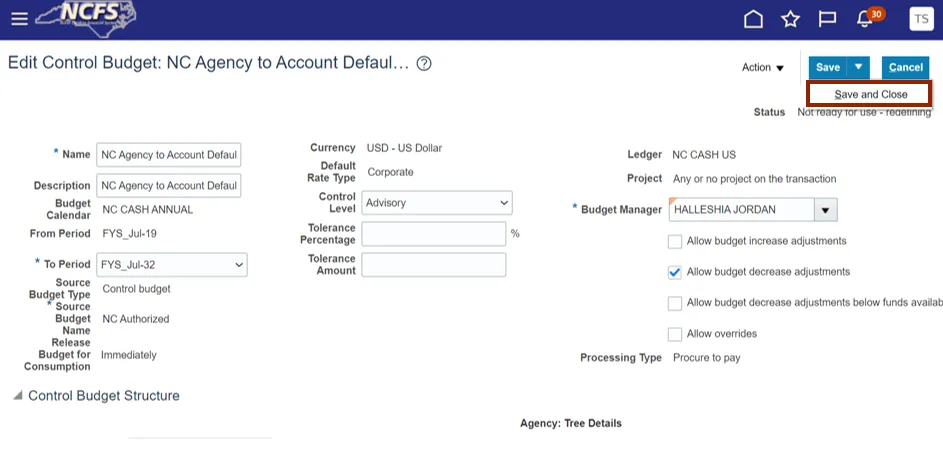
Step 16. Click the Save button.
Step 17. Click the Action drop-down choice list again and select the Prepare for Use option.
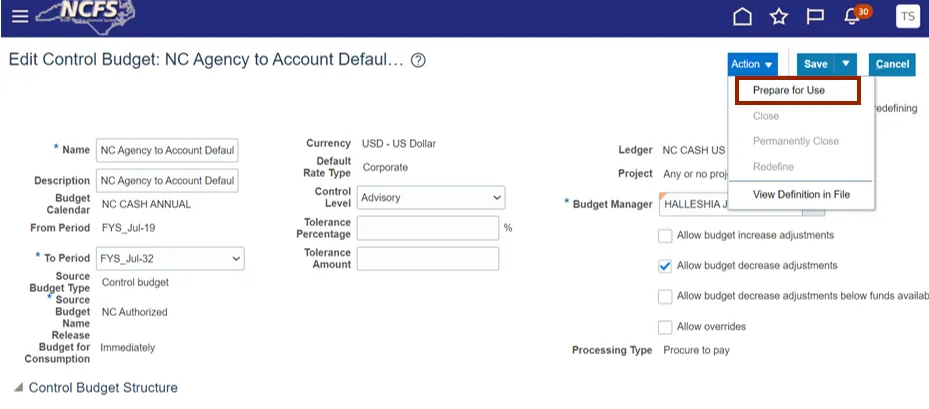
Step 18. Click the Save and Close from the Save button.
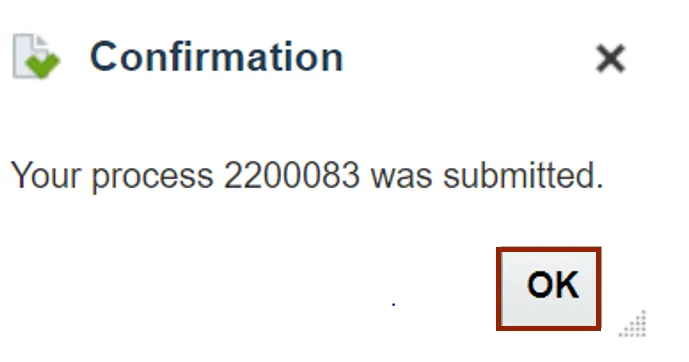
Step 19. A Confirmation pop-up appears. Click the OK button. You are re-directed to the Manage Control Budgets page.
Wrap-Up
Setup Budget Periods using the steps above, by updating tracking option in Control Budget, adding years in NC Cash US Calendars and NC Cash Annual calendars for Funds checking control budgets, and biennium year to control budgets (NC Appropriations, NC Authorized, NC Certified, NC LTD, and Funds-Checking CB).