Purpose
The purpose of this Quick Reference Guide (QRG) is to provide a step-by-step guide of how to access AR Reports in the North Carolina Financial System (NCFS).
Introduction and Overview
Accounts Receivable (AR) reports are available on-demand to meet various business needs. In NCFS, users can access a range of reports, which are categorized into two types: Standard and Customized.
Access Standard AR Reports
The following are the steps to access Standard Reports. There are 16 steps to complete this process.
Step 1. Click the Company Single Sign-On (SSO) button.
Step 2. Enter your @dac.nc.gov email address.
Step 3. Click Next, then enter password.
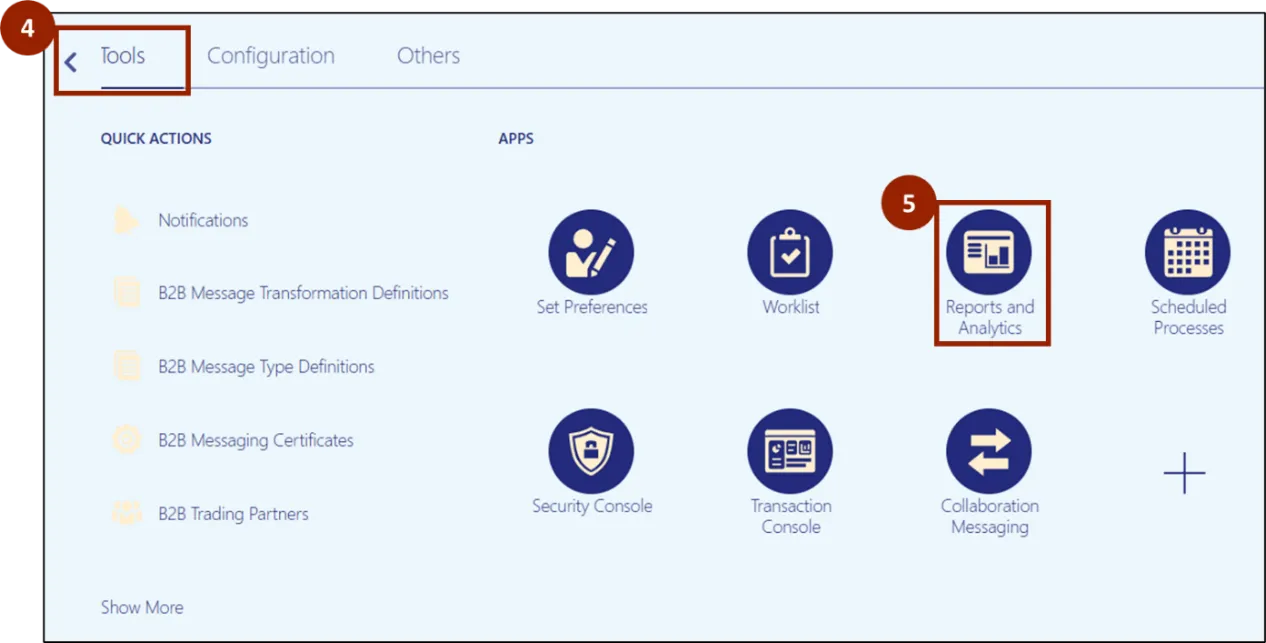
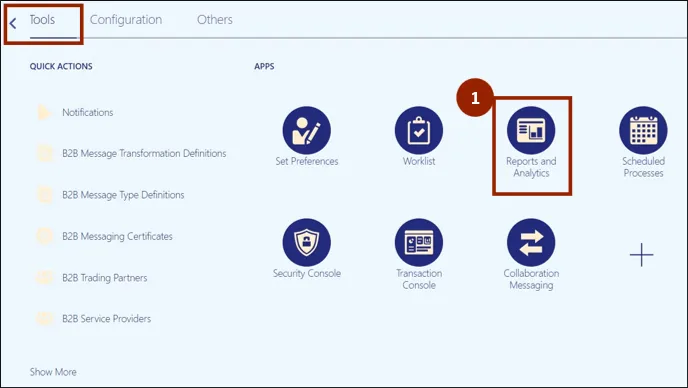
Step 4. On the Home page, select the Tools tab.
Step 5. Click Reports and Analytics application.
Step 6. Click the Browse Catalog button.

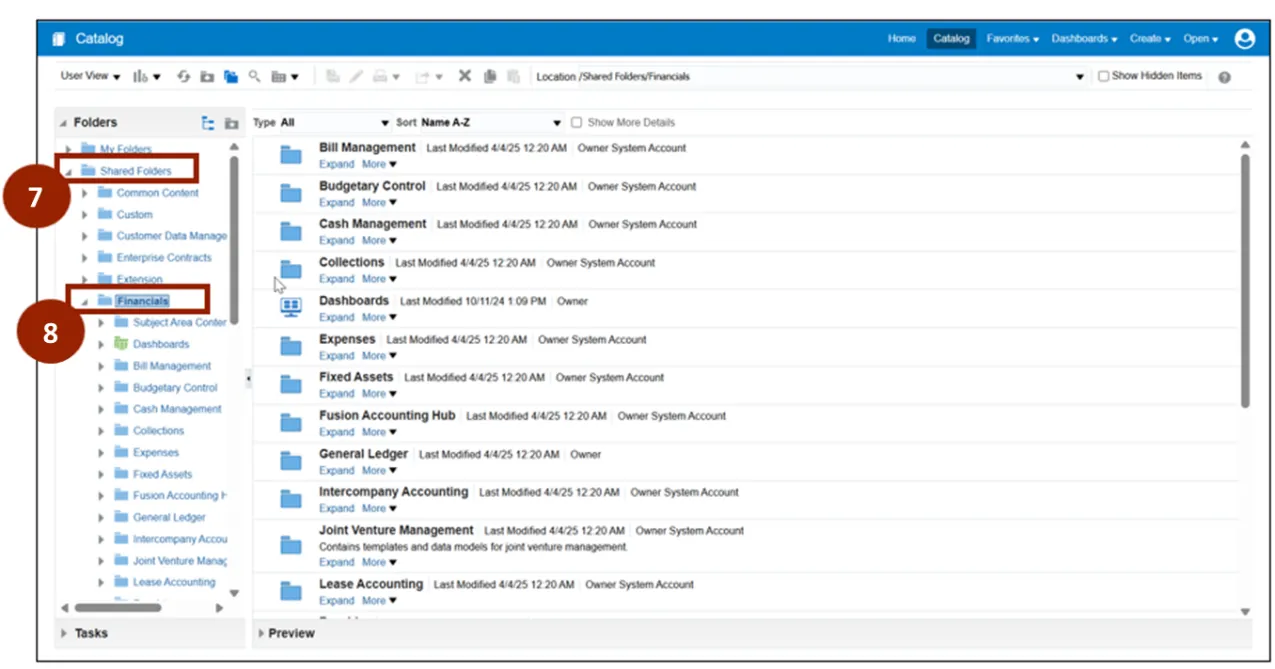
Step 7. Navigate to Shared Folders.
Step 8. Select Financials.
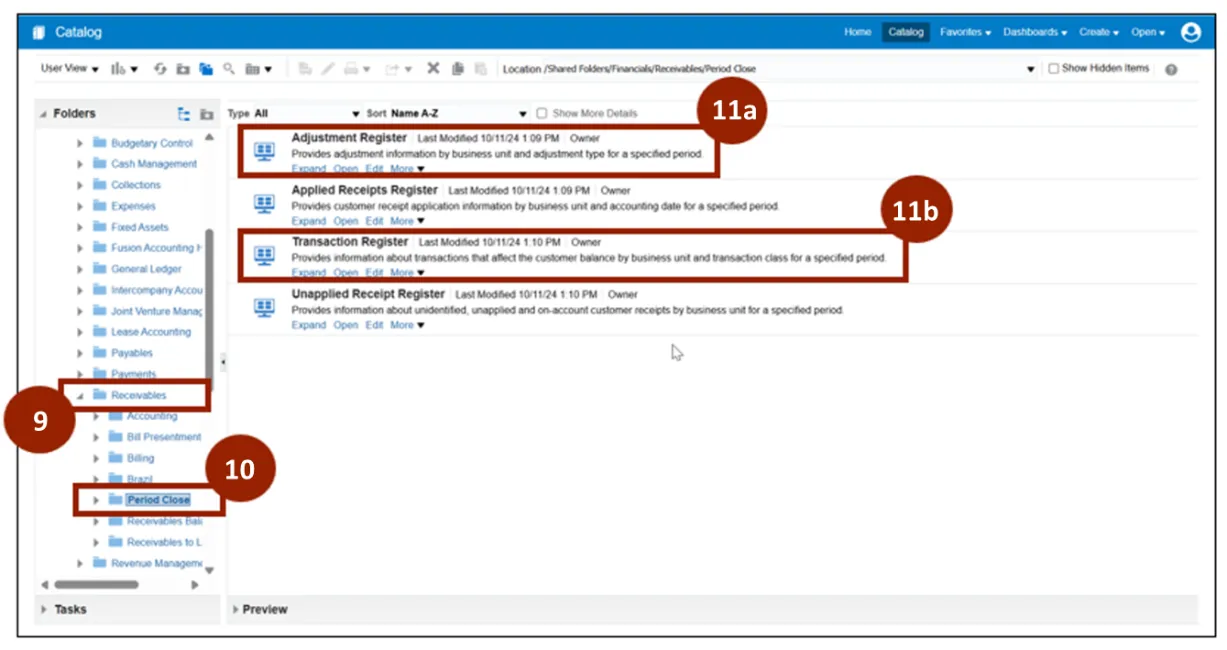
Step 9. Click Receivables.
Step 10. Select Period Close.
Step 11. Click Either.
Step 12. Adjustment Register or
Step 13. Transaction Register to open the desired report.
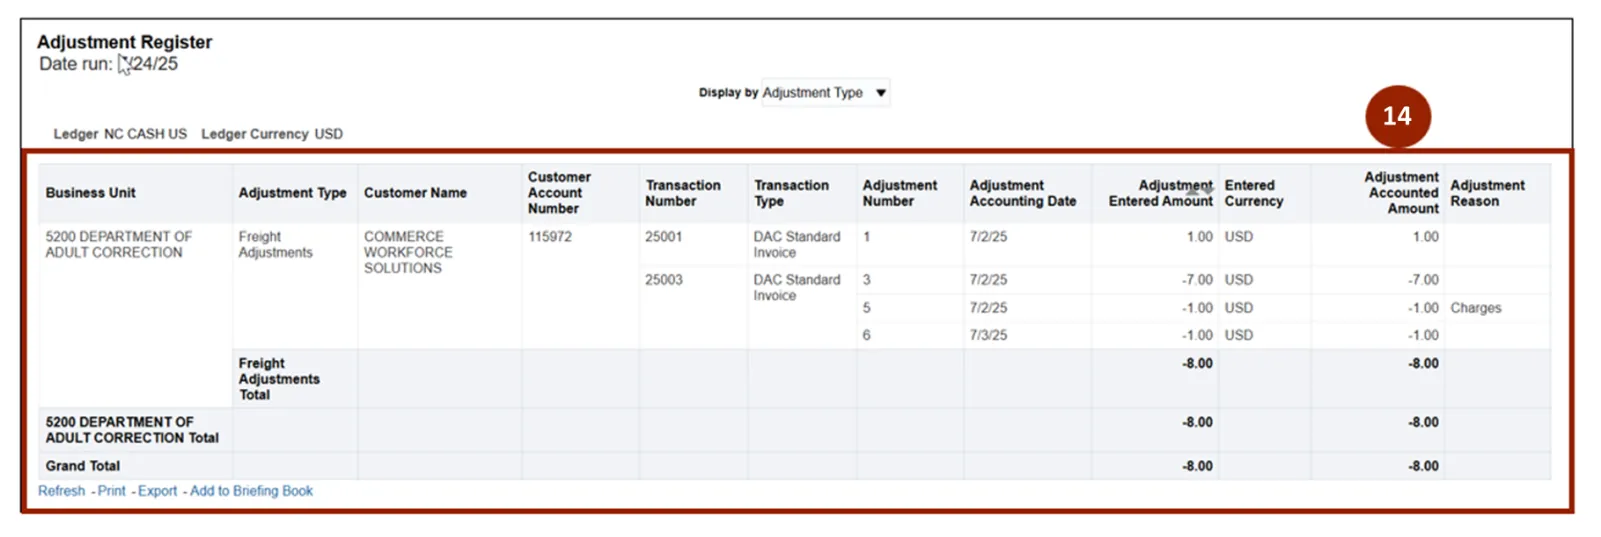
Step 14. Select the parameters. All required parameters are identified by an *.
Step 15. Click Apply.
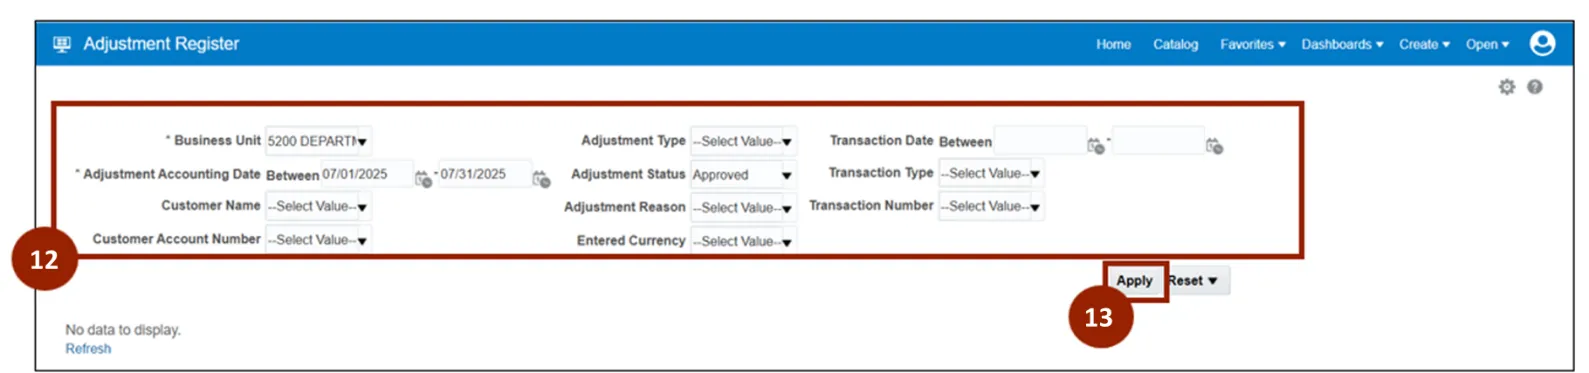
Step 16. The selected register opens.
Access a Customized Report
The following are the steps to access Customized Reports. There are 28 steps to complete this process.
Step 1. In the Tools tab, click the Reports and Analytics application.
Step 2. Click the Browse Catalog.

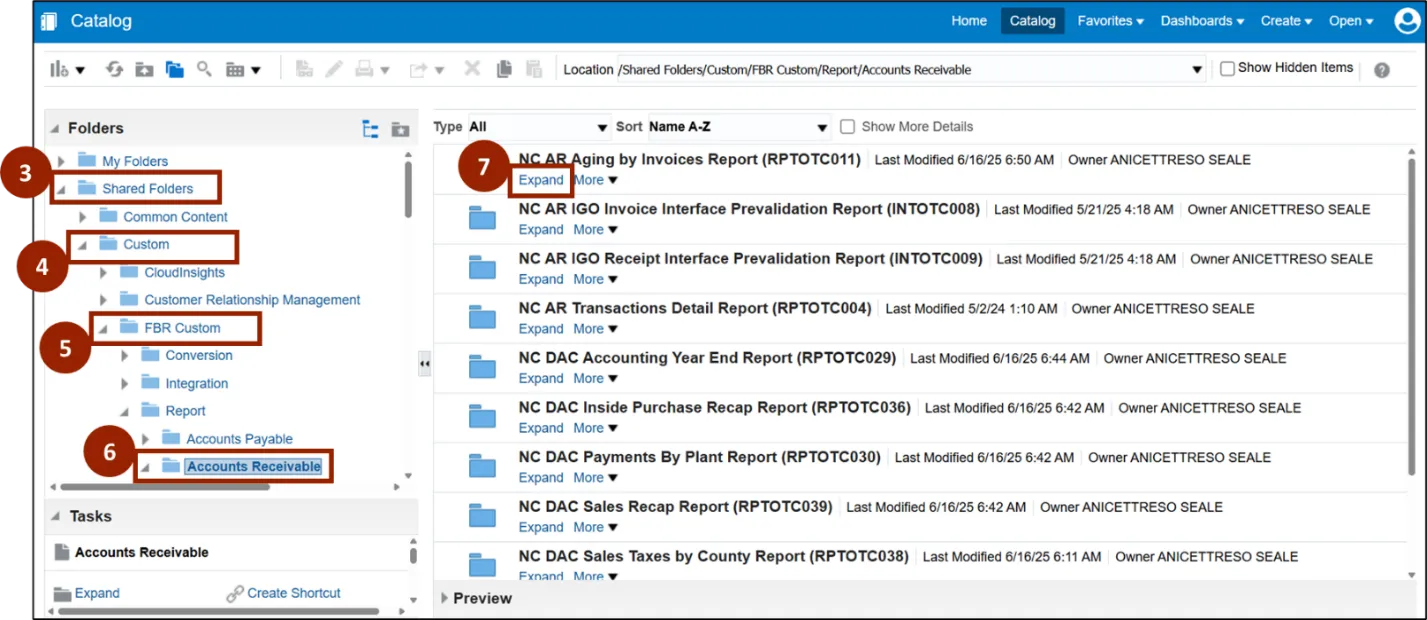
Step 3. Navigate to Shared Folders.
Step 4. Select Custom.
Step 5. Click FBR Custom.
Step 6. Under the Report folder, select Accounts Receivables to view the list of AR Custom Reports.
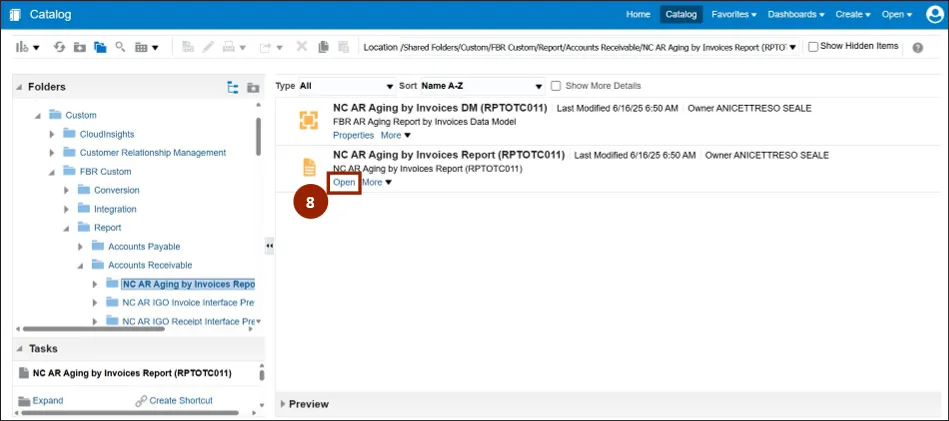
Step 7. Click the Expand link to expand the report view.
Step 8. Click the Open link to open the report.
NOTE: The report can be downloaded immediately or scheduled for download later, once the process is fully completed.
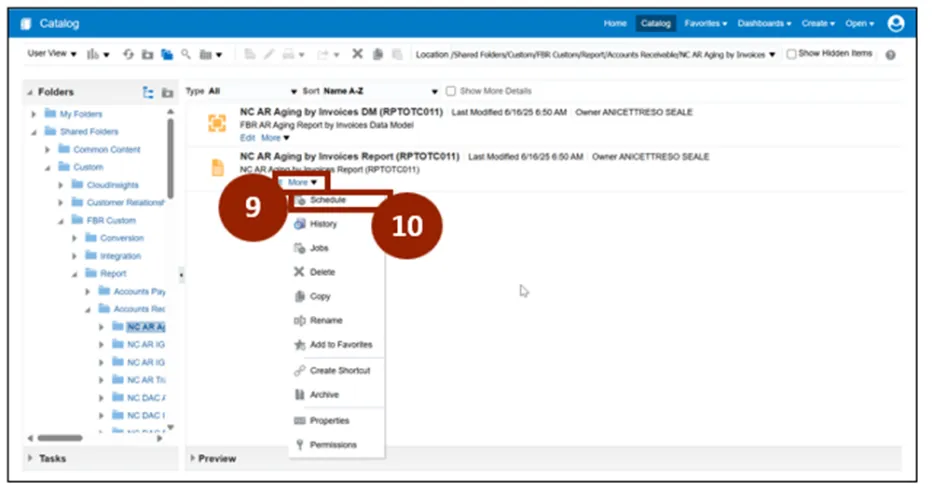
Step 9. To schedule the download for later, click More.
Step 10. Select Schedule to schedule the report download.
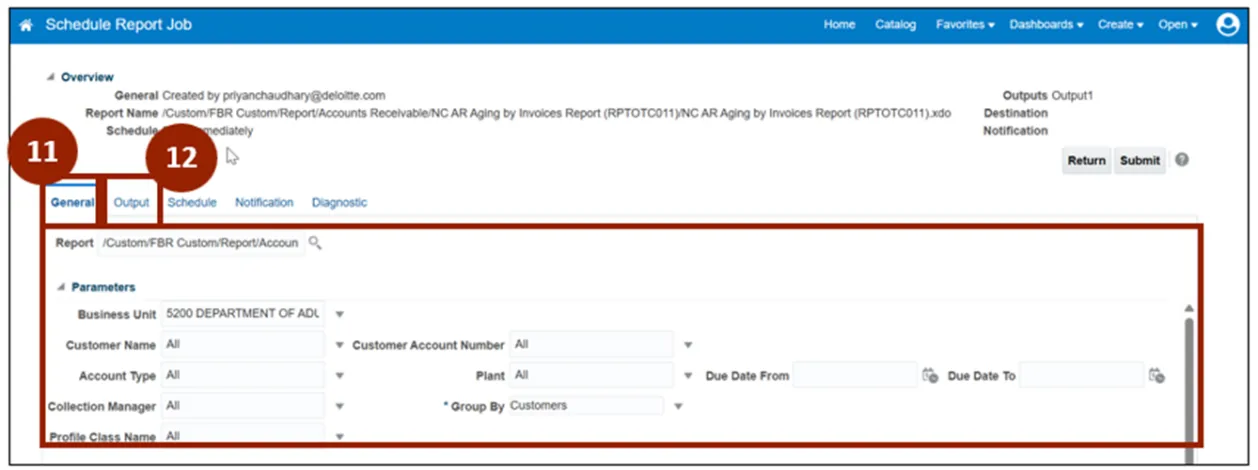
Step 11. In the General tab, fill in the required parameters.
- Business Unit
- Group By
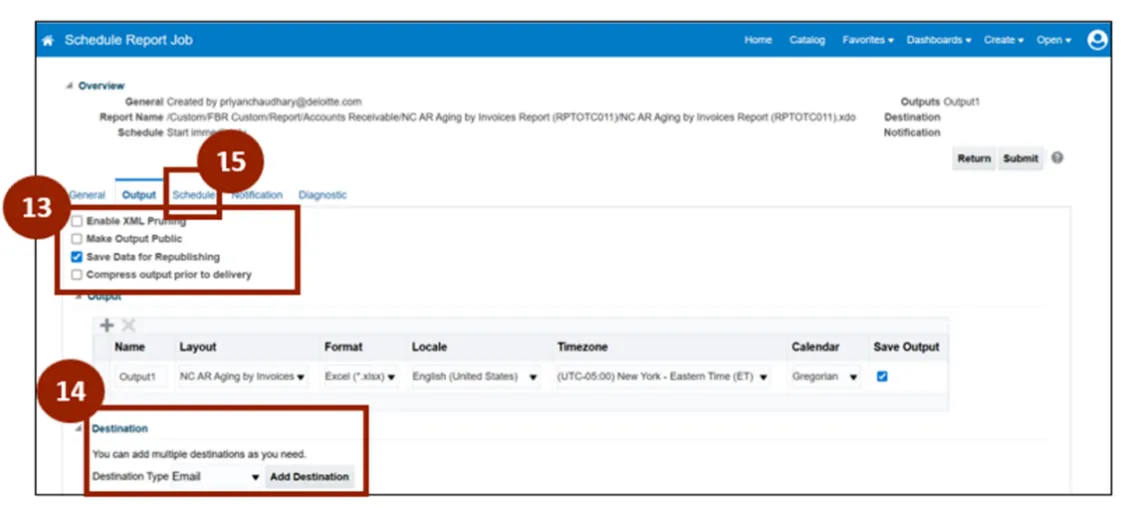
Step 12. Click the Output tab.
Step 13. In the Output tab, select the option Save Data for Republishing.
Step 14. Choose the destination type from the available options: Email, Printer, or Content Server.
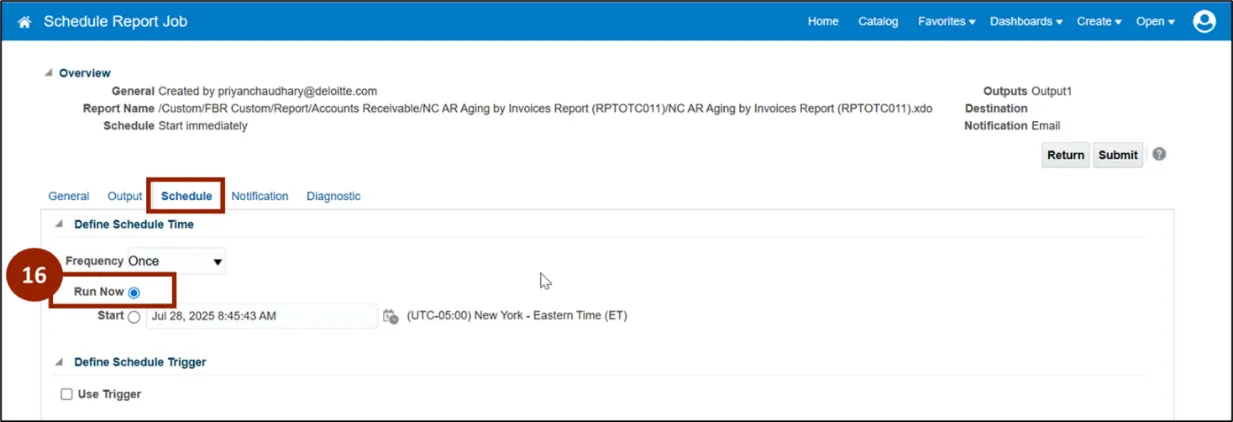
Step 15. Click the Schedule tab.
Step 16. In the Schedule tab, select the Run Now option if you’d like to run the report now (this is optional).
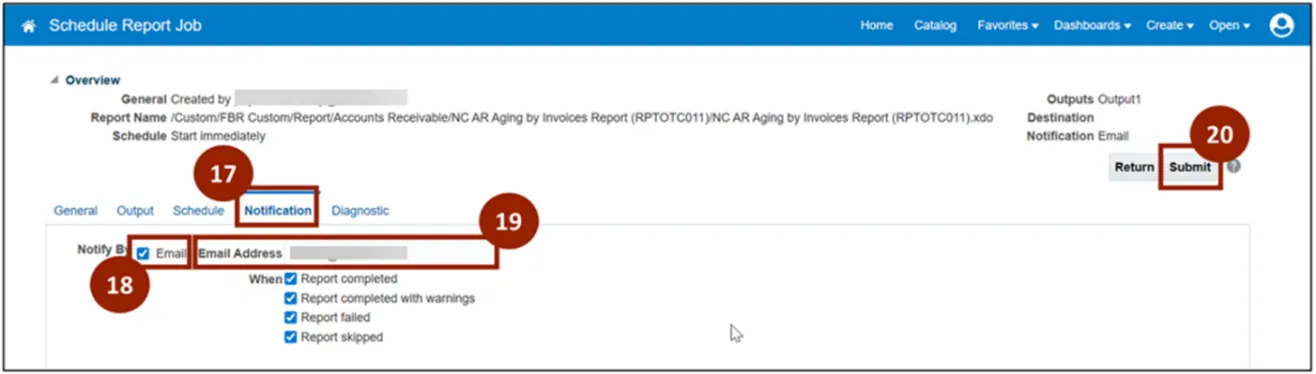
Step 17. Click the Notification tab.
Step 18. Check the Email checkbox to be notified by email.
Step 19. Enter the email address where you want to receive the notification.
Step 20. Click Submit.
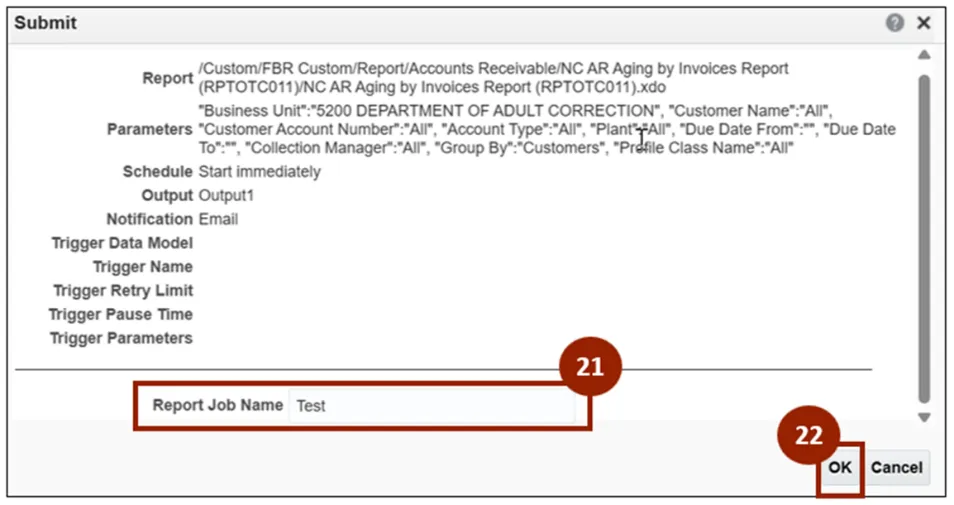
Step 21. Enter the Report Job Name.
Step 22. Click OK.
Open Scheduled Report
To open a report after it has been scheduled.
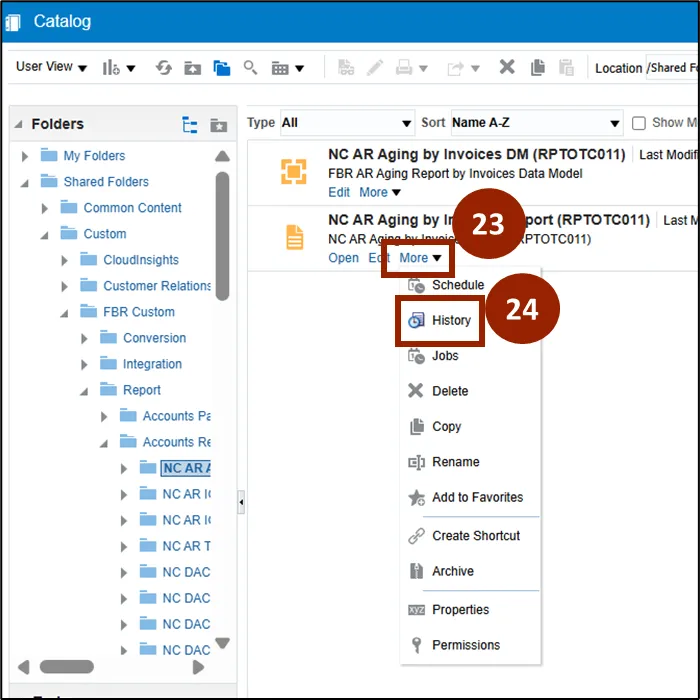
Step 23. From desired report in the Report Catalog list, click the More dropdown.
Step 24. Select History.
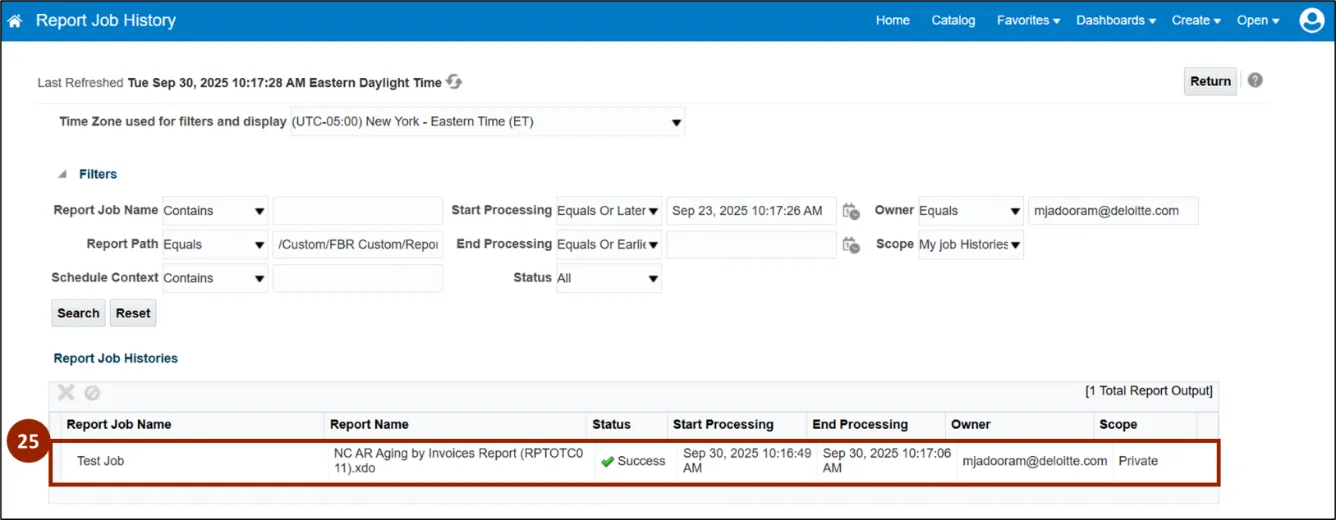
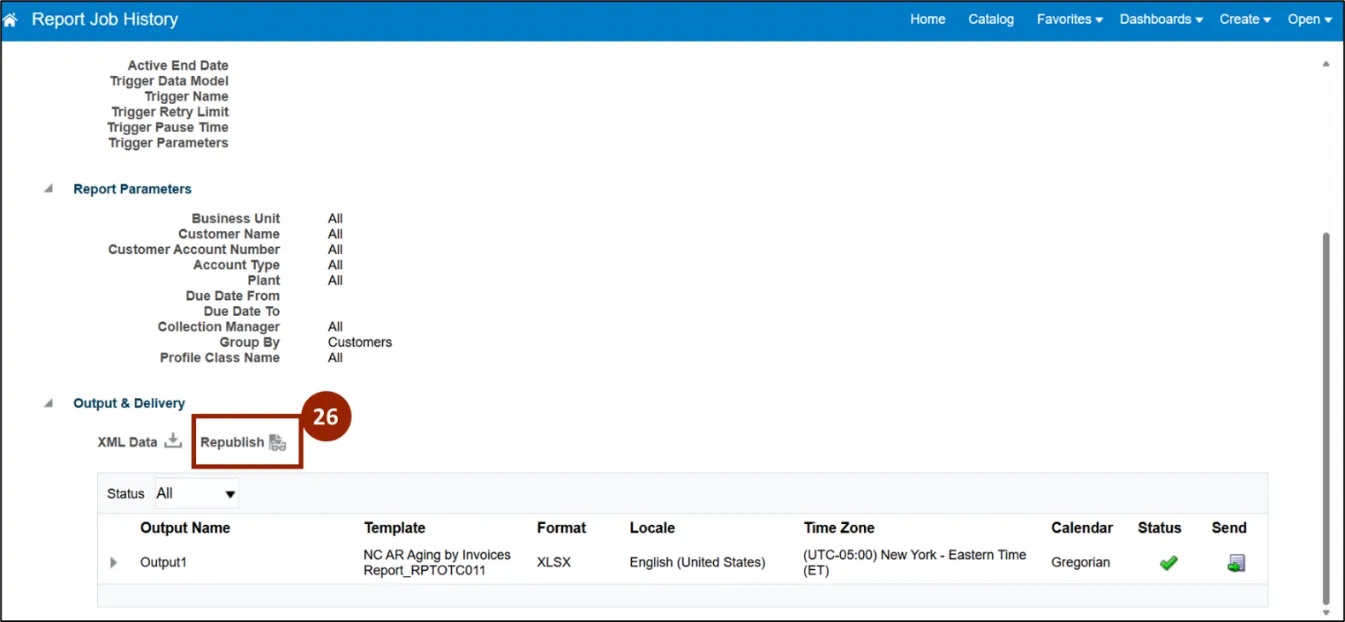
Step 25. In the Report Job History page, click the name of the Report Job link.
Step 26. In the Output & Delivery section, click Republish.
Step 27. On the right-hand side of the page, click the Excel icon.
Step 28. Select the desired report format from the drop-down to download the report.

Wrap-Up
NCFS users can Access AR Seeded Reports by following the steps outlined above.
Additional Resources
- Instructor Led Training (ILT)
- AR109 – AR Reporting (Coming Soon)
- Web-based Training (WBT)
- MFG100: Introduction to NCFS Manufacturing (Coming Soon)
- MFG101: The Journey Through NCFS Manufacturing (Coming Soon)