Purpose
The purpose of this Quick Reference Guide (QRG) is to provide a step-by-step guide of how to manage collections in the North Carolina Financial System (NCFS).
Introduction and Overview
This QRG covers the process for navigating the collections manager dashboard in NCFS, including accessing key tasks and items available to collectors.
Overview of Collections Dashboard
To manage collections in NCFS, please follow the steps below. There are 11 steps to complete this process.
Step 1. Click the Company Single Sign-On (SSO) button.
Step 2. Enter your @dac.nc.gov email address.
Step 3. Click Next, then enter password.
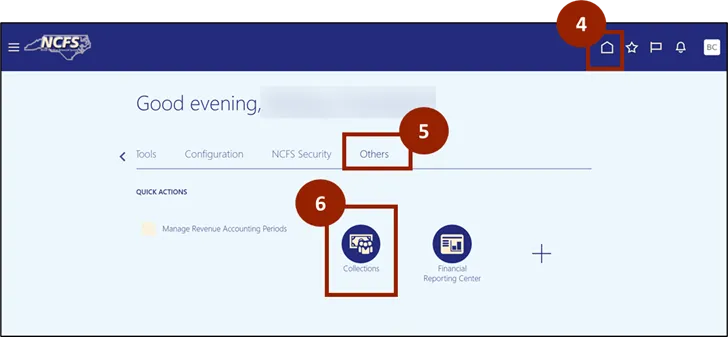
Step 4. Navigate to the Home page.
Step 5. While on the Home screen, navigate to the Others tab.
Step 6. In the Others tab, click on Collections.
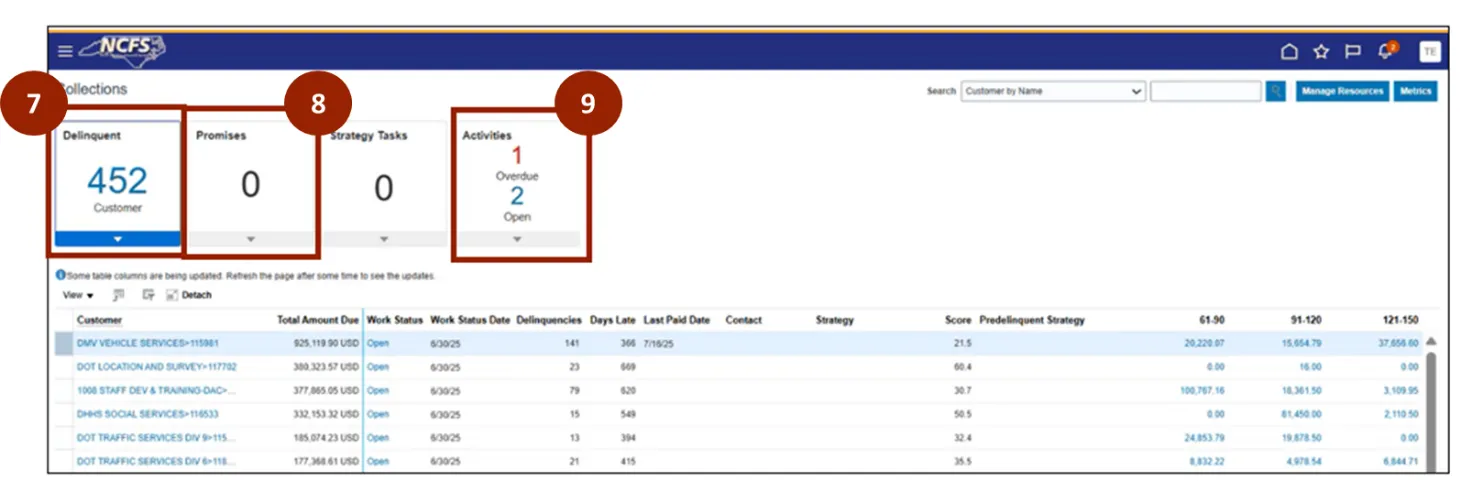
Step 7. In the Delinquent section, you can view delinquencies on the dashboard (Collections Overview).
Step 8. In the Promises section, you can create promises to pay.
Step 9. In the Activities section, you can track and monitor collection activities.
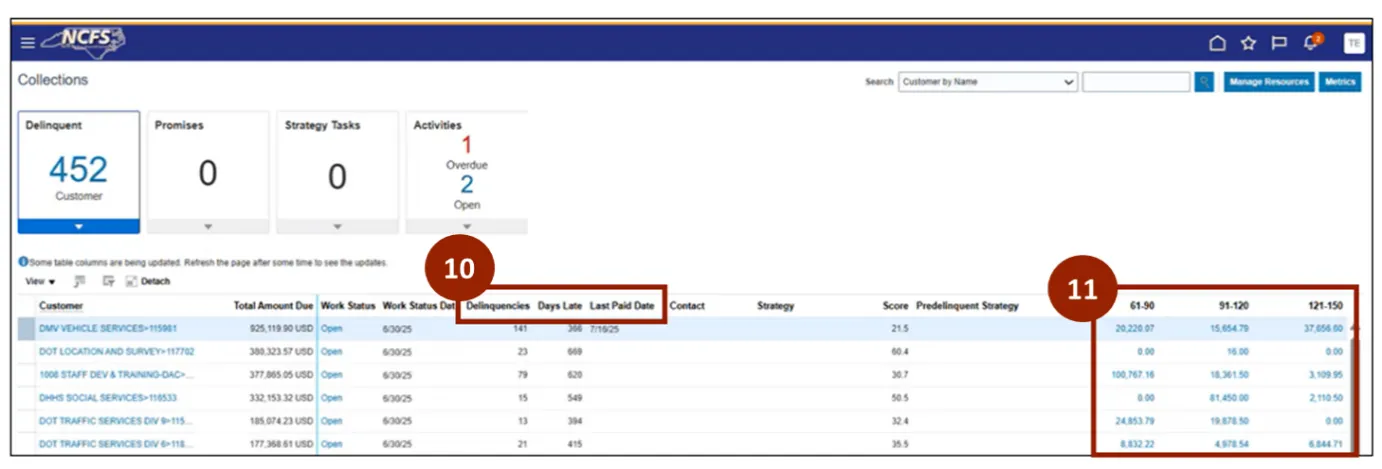
Step 10. In the Delinquencies, Days Late, and Last Paid Due columns, you can review delinquencies, days late, and payments received.
Step 11. In the number columns, you can view the past due amount from customers.
Overview of Collections Manager
Once you are logged in to NCFS, follow these steps. There are 6 steps to complete this process.
Step 1. Begin from the Home page, or click the Home icon.
Step 2. On the Home page, select the Others tab.
Step 3. Within the Others tab, select Collections.

Step 4. Click on Manage Resources.

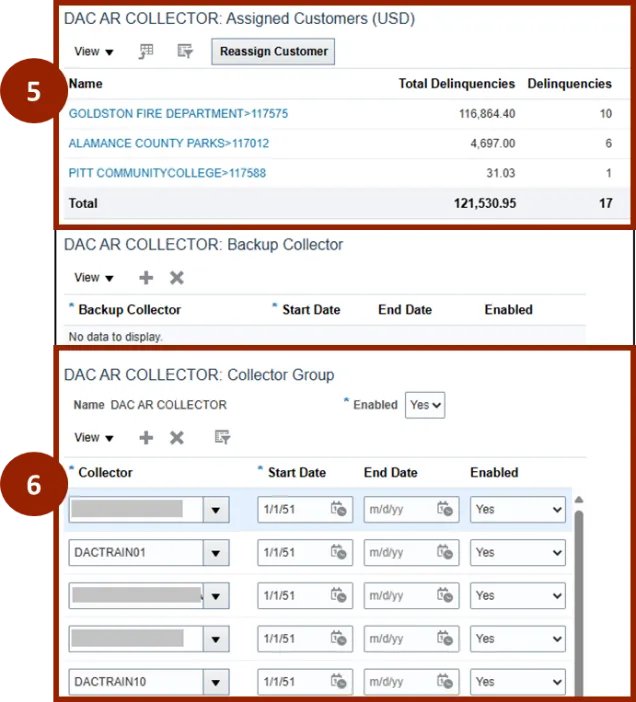
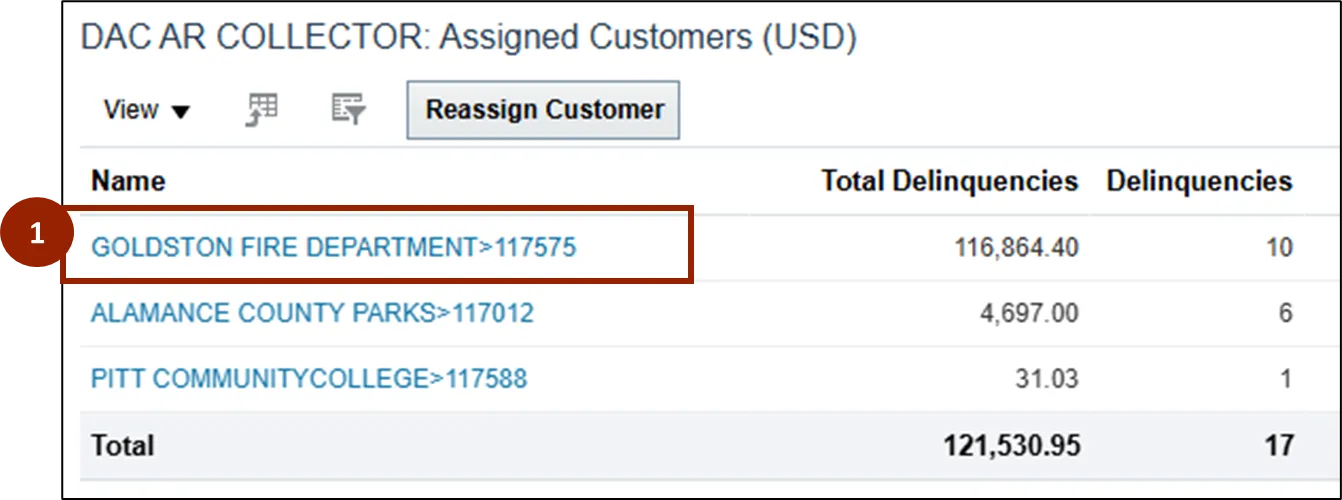
Step 5. Customers can be found in the Assigned Customers section.
Step 6. The DAC AR Collector section displays all collectors assigned to the group.
Note: Once added to the collector group, the Collector has visibility to all customers.
Collections Manager – Customer Overview
There are 3 steps to complete this process.
To navigate to the Customer page within the Collections Manager:
Step 1. Click on the Customer Name.
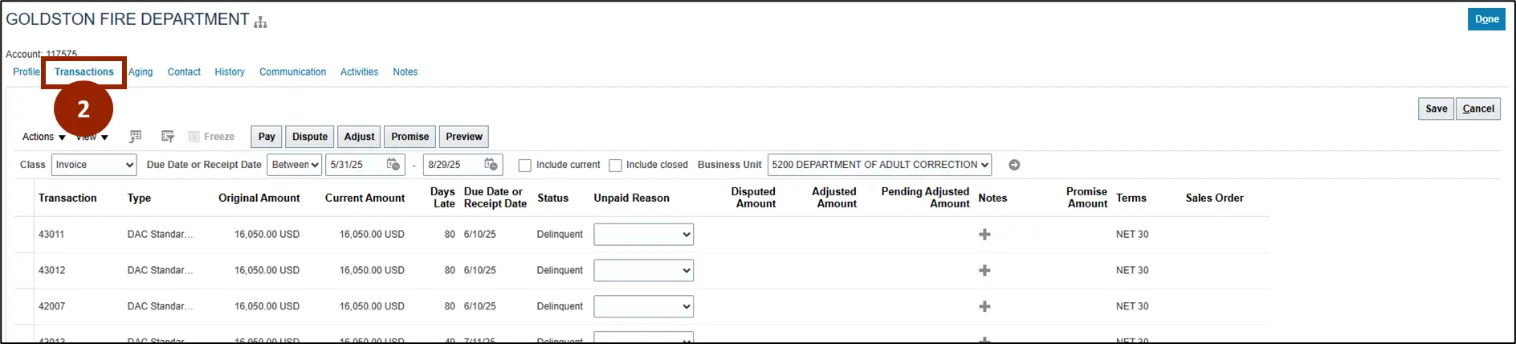
Step 2. The Customer page will automatically open on the Transactions tab.
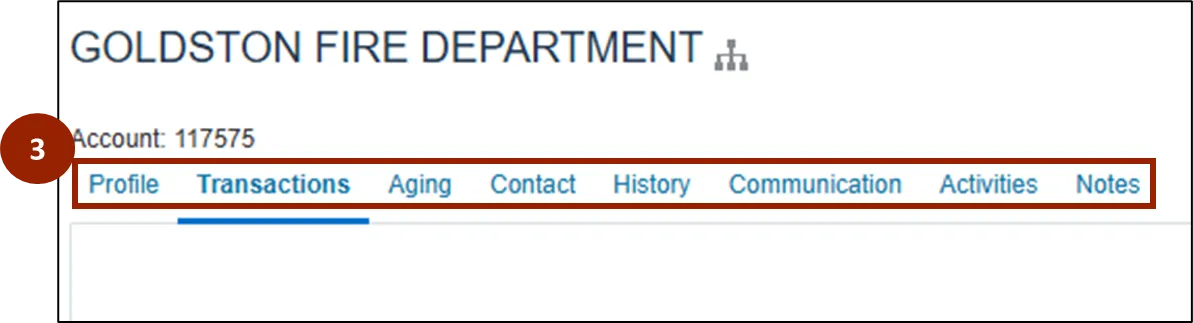
Step 3. The following tabs are available within the Customer page:
- Profile
- Transactions
- Aging
- Contact
- History
- Communication
- Activities
- Notes
Customer Overview - Profile
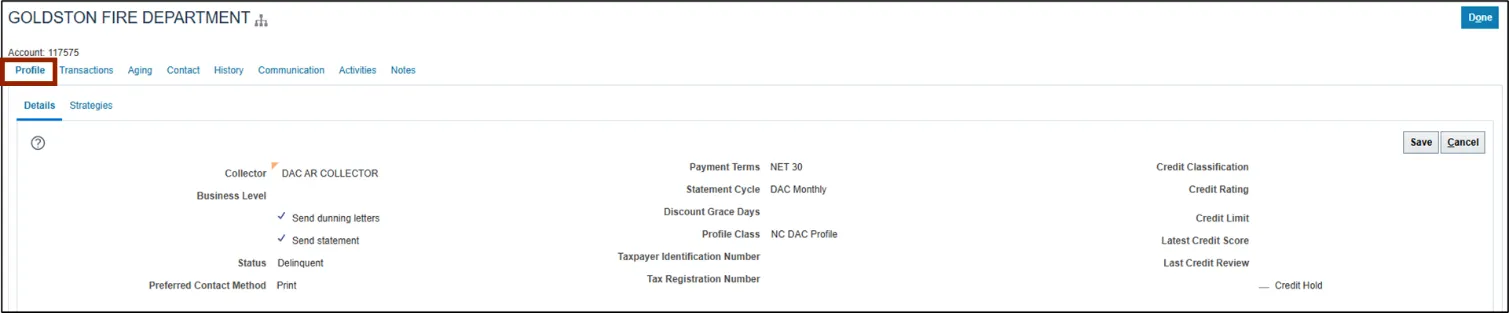
To begin, navigate to the Profile tab on the Customer page of the Collections Manager.
Within the Profile tab of the Customer page, Collectors will find important customer information that provides insight into a customer’s background, contact preferences, and risk level at a glance. This tab focuses on high-level data rather than transactional details.
Customer Overview - Transactions
To begin, navigate to the Transactions tab on the Customer page of the Collections Manager.
Within the Transactions tab of the Customer page, Collectors have quick access to customer information, such as outstanding balances, payment history, and other relevant transactions details.
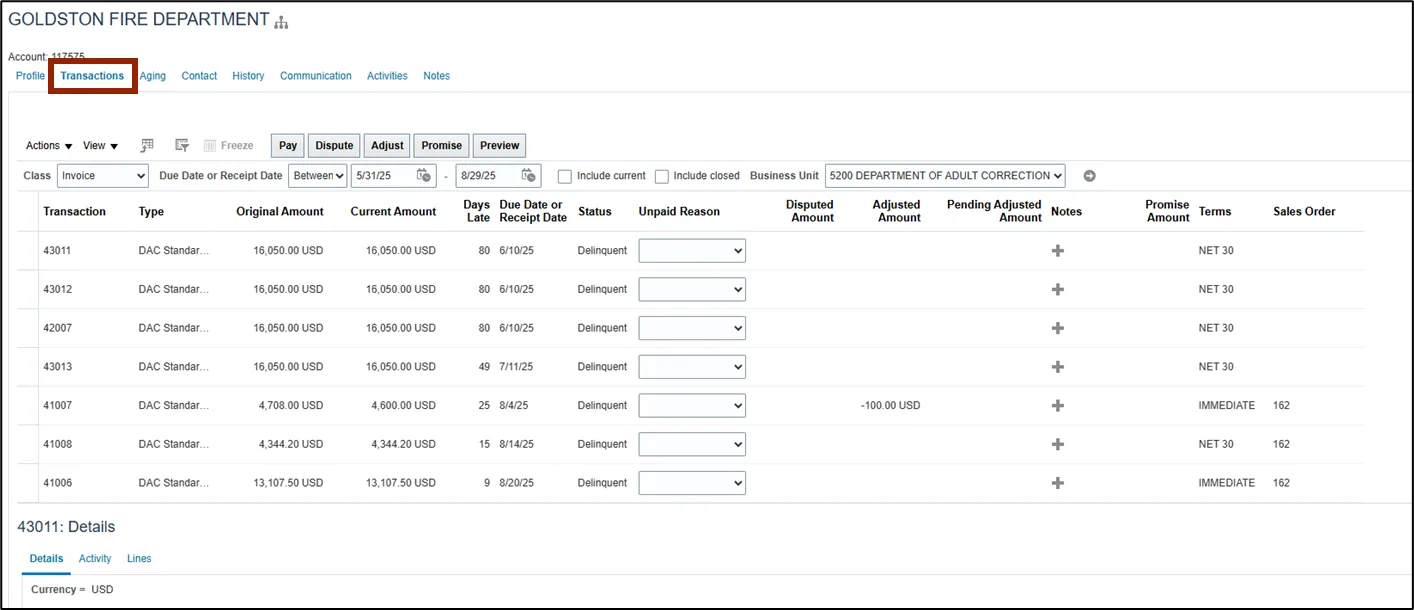
On the Transactions tab on the Customer page, transactions from the past 90 days automatically display. Transactions clearly display information such as the Current Amount Due, Days Late, and Sales Order number.
To show transaction older than 90 days, there are 3 steps to complete this process.
Step 1. Adjust the date range.
Step 2. Click the gray arrow to highlight all transactions currently due or delinquent.

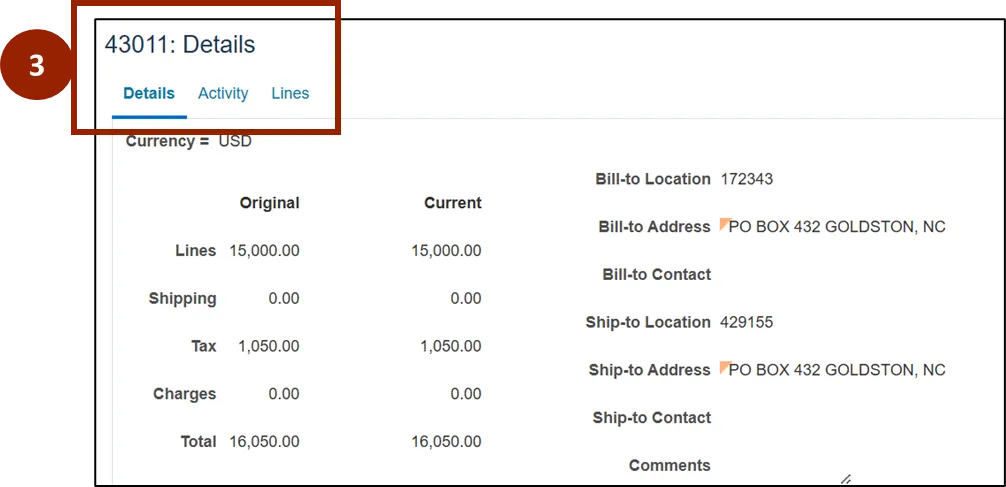
Step 3. Scroll down to the Details section of the Transactions tab to view more details about each transaction.
• The Details tab contains fields with bill-to information, ship-to information, and related charges.
• The Activity tab indicates whether the customer has made a payment or adjustment for this transaction.

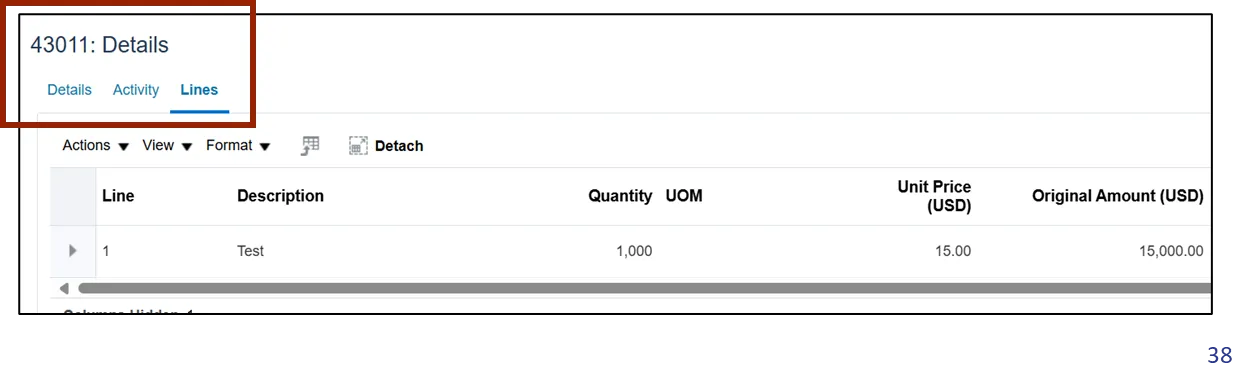
• The Lines tab displays the number of lines in the transaction and includes the unit of measurement, unit price, and original amount.
Transactions – Make a Payment
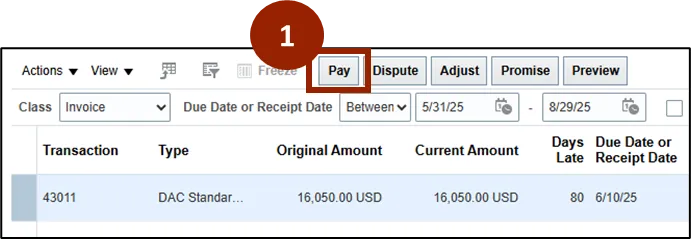
To add payment to a customer’s account, follow the steps below. There are 7 steps to complete this process.
Step 1. Click the Pay button within the transactions tab on the Customer page.
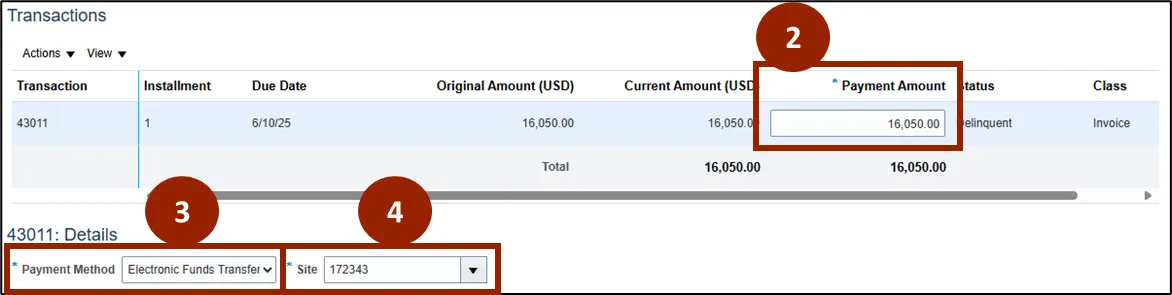
Step 2. Input the payment amount in the Payment Amount field.
Step 3. Select the payment method in the Payment Method drop-down.
Step 4. Select the site from the Site drop-down.
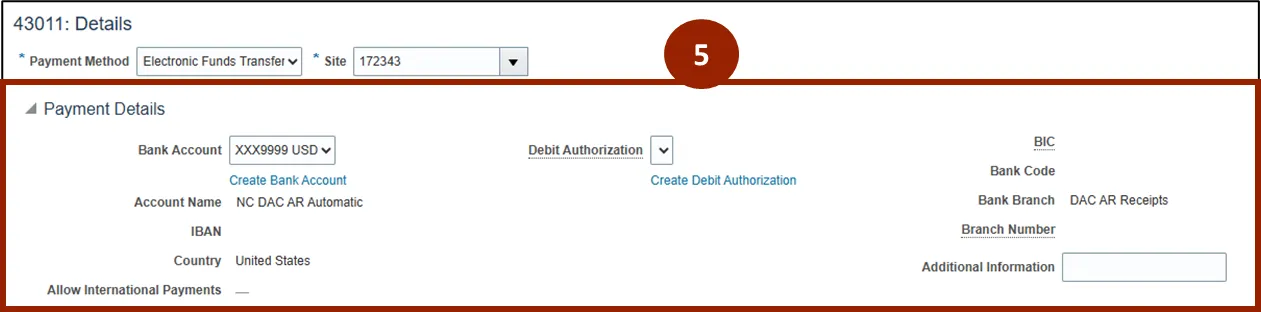
Step 5. If the payment selected is Electronic Funds Transfer, Payment Details will populate for review, including bank account information and debit authorization.
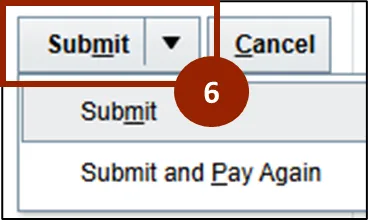
Step 6. Click Submit or, to make another payment, select Submit and Pay Again from the Submit drop-down.
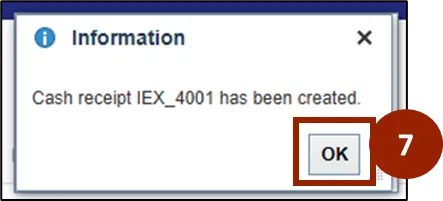
Step 7. In the confirmation message, select OK.
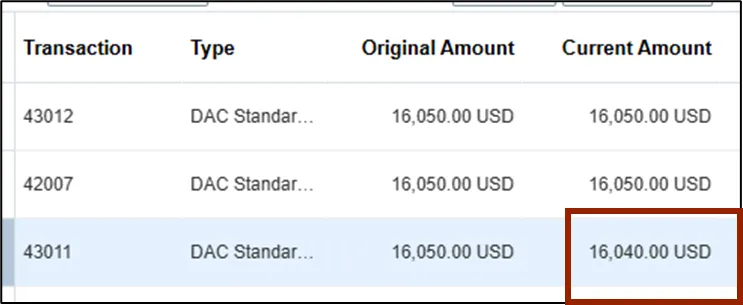
The payment is reflected in a couple of areas within the Transactions tab of the Customer page.
• The Current Amount column in the Transactions table is adjusted to reflect the payment.
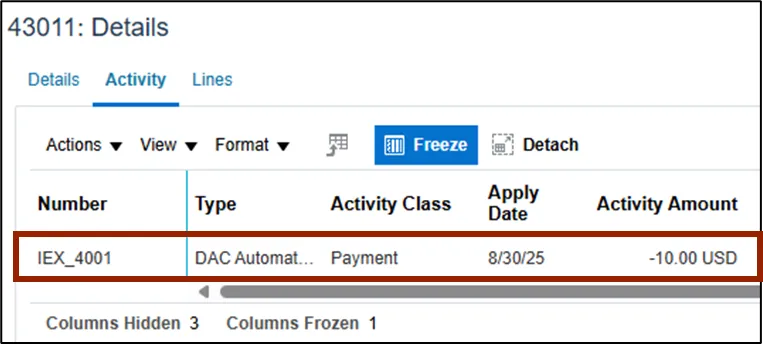
• The transaction appears in the Activity tab of the Details section.
Transactions – Make an Adjustment
To make an adjustment to a customer’s account, follow the steps below. There are 10 steps to complete this process.
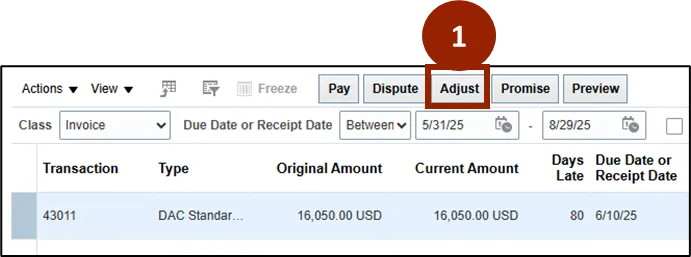
Step 1. Click the Adjust button within the transactions tab on the Customer page.
Step 2. Select the Plus (+) icon
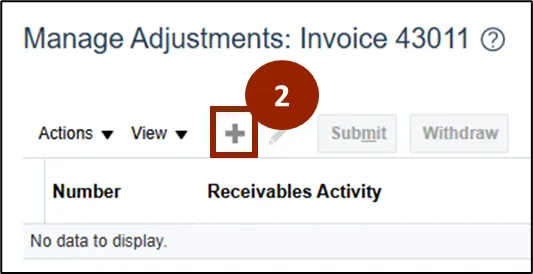
Step 3. A Create Adjustment window appears.
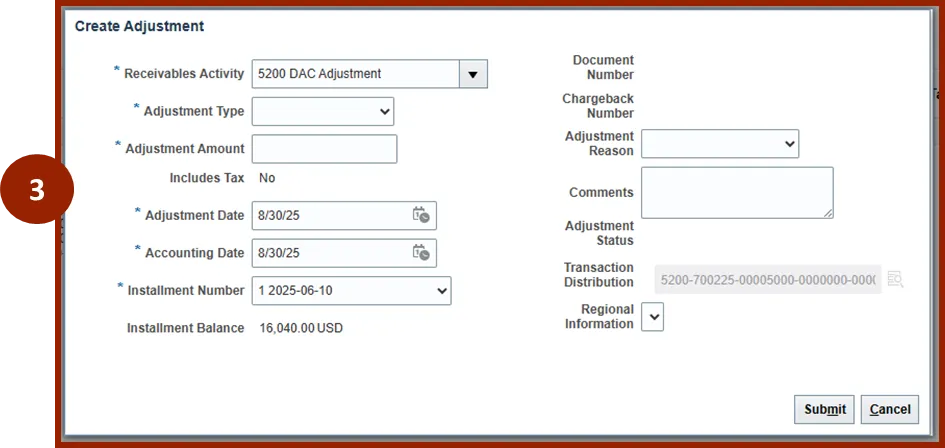
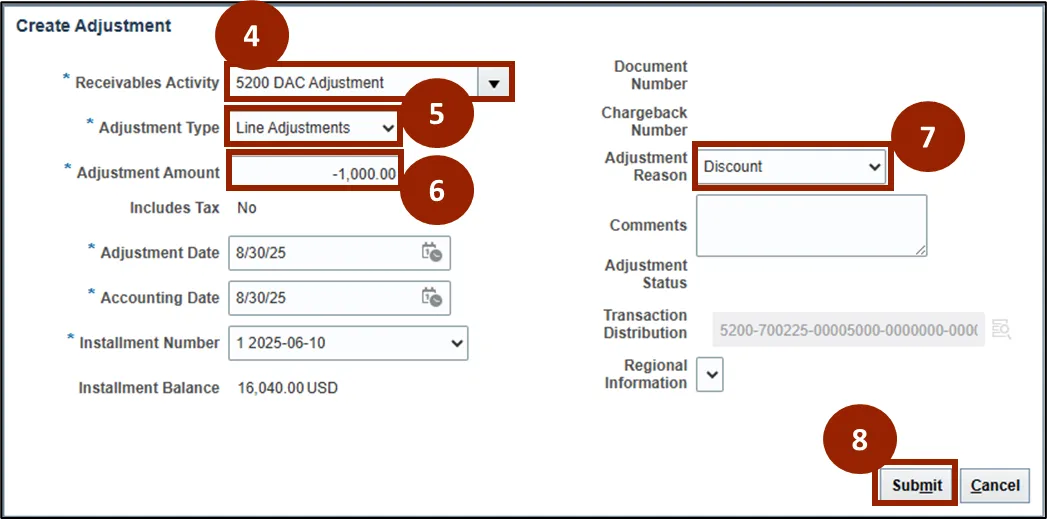
Step 4. In Receivables Activity, select 5200 DAC Adjustment.
Step 5. In Adjustment Type, select Line Adjustments.
Step 6. In Adjustment Amount, input a negative value (e.g. -1000.00).
Step 7. Select the Adjustment Reason from the drop-down.
Step 8. Click Submit when complete.
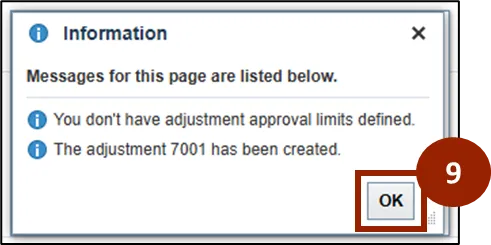
Step 9. Select OK in the Information box pop-up.
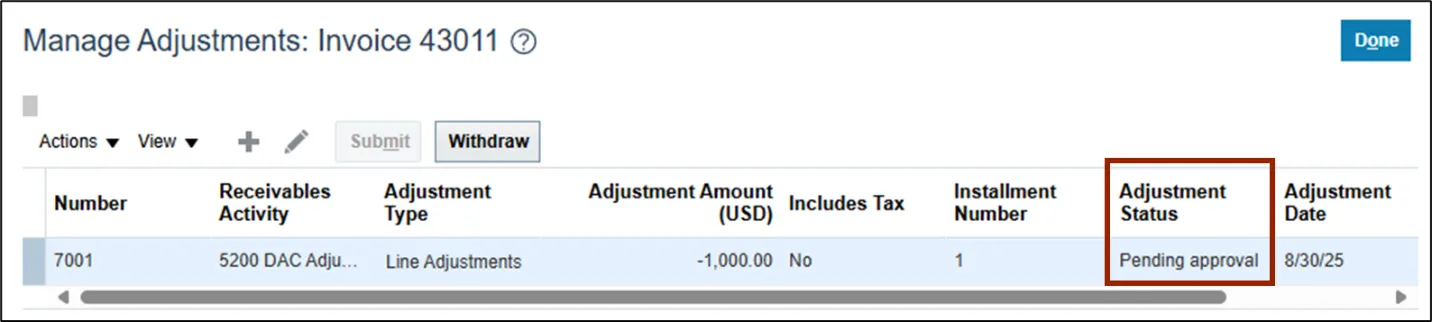
Step 10. The adjustment is reflected in a couple of areas within the Transactions tab of the Customer page.
• The adjustment will be displayed in the Manage Adjustments table, and the status will say Pending Approval.
• The Pending Adjusted Amount column in the Transactions table on the main Transactions tab reflects the pending adjustment amount.

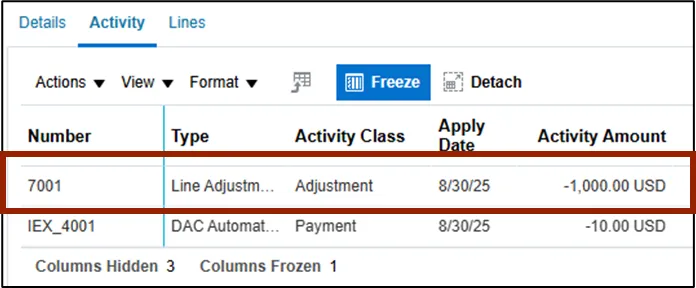
• The adjustment appears in the Activity tab of the Details section.
Transactions – Add Transaction Note
To add a note to a transaction, follow the steps below. There are 7 steps to complete this process.
Step 1. Click the Plus (+) icon at the end of the specific transaction row.

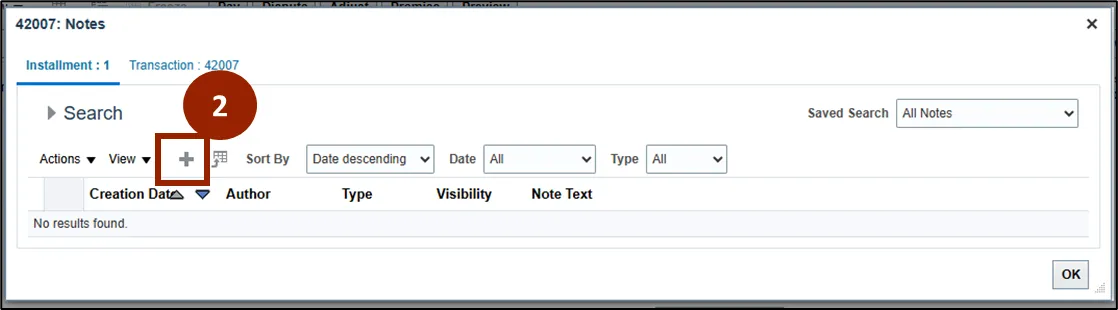
Step 2. In the Search window, click the Plus (+) icon.
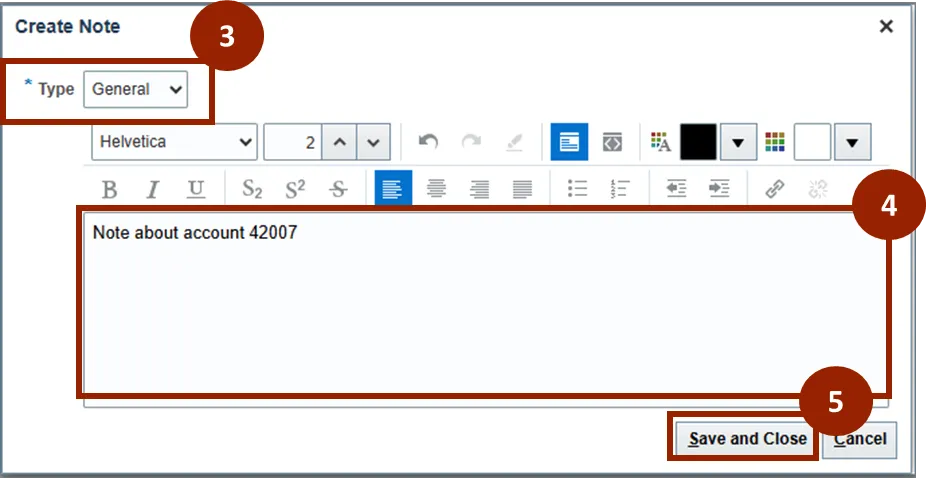
Step 3. Select the note Type from the drop-down.
Step 4. Add the note details.
Step 5. Click Save and Close.
Step 6. In the Notes window, click OK.
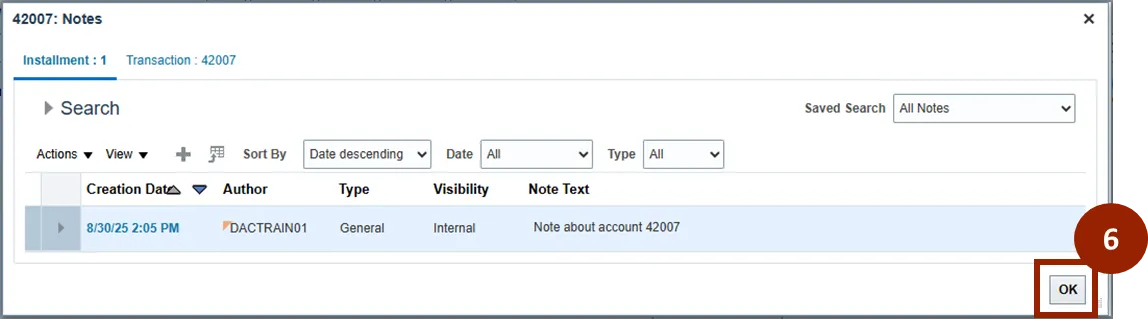
Step 7. The Note icon will appear to indicate there is a note associated with the transaction
Note: You can view the note at any time by selecting the Note icon.

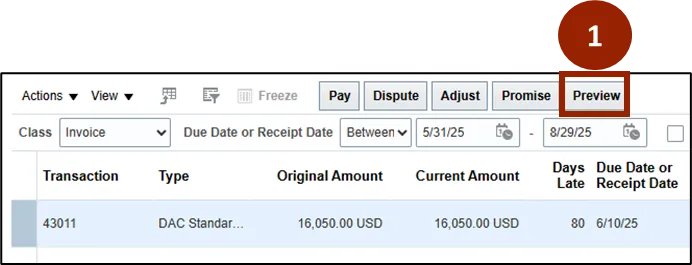
Transactions – Preview Invoice
To preview an invoice, follow the steps below. There are 2 steps to complete this process.
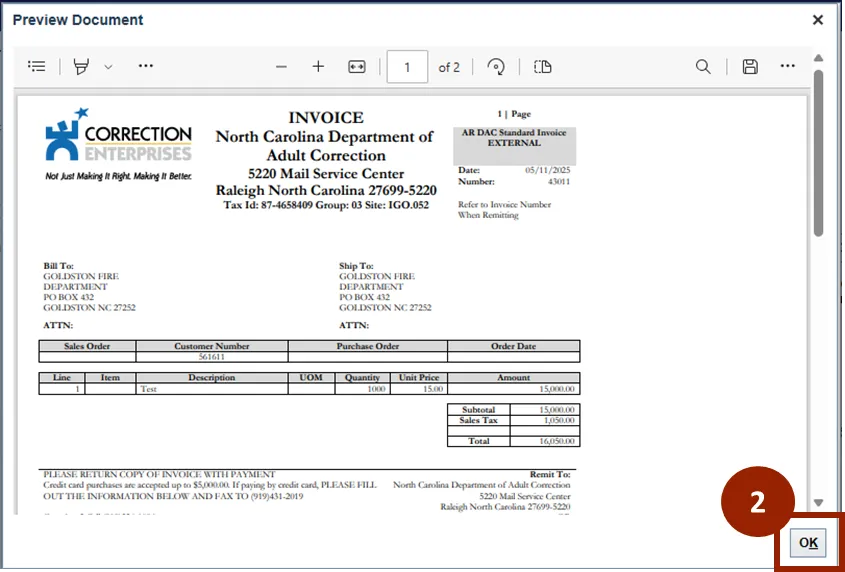
Step 1. Click the Preview button within the transactions tab on the Customer page.
Step 2. When done, click OK.
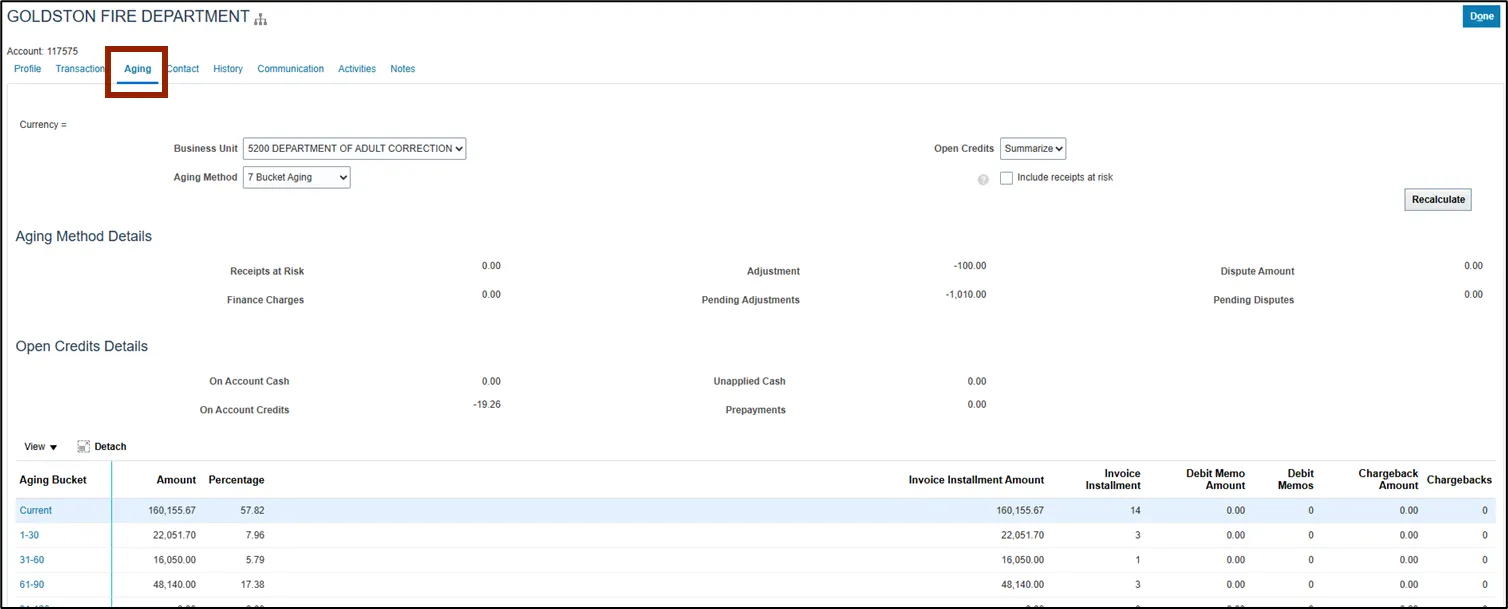
Customer Overview – Aging
To begin, navigate to the Aging tab on the Customer page of the Collections Manager.
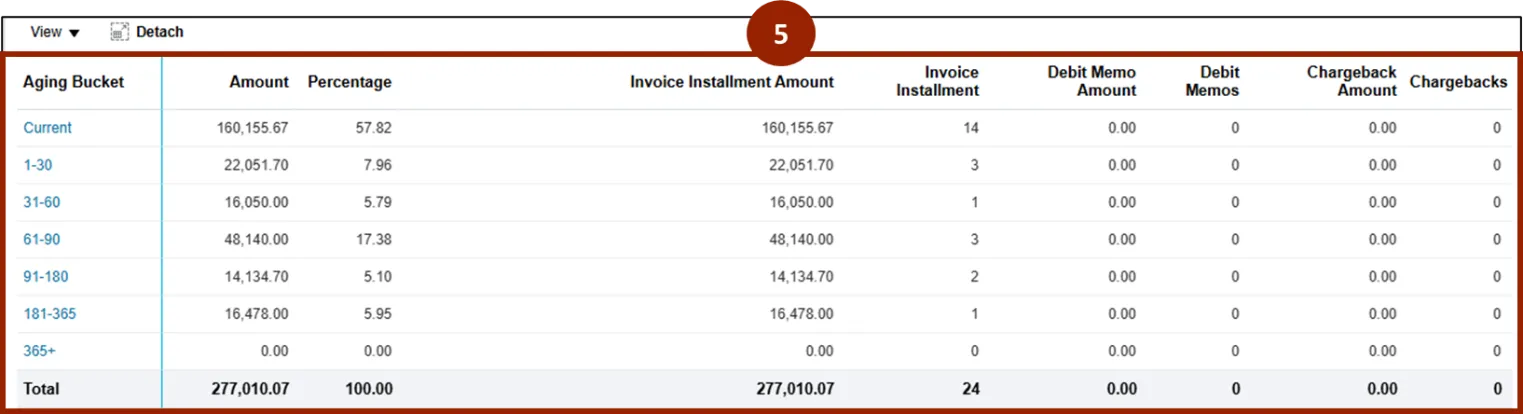
Within the Aging tab of the Customer page, Collectors can see a breakdown of the customer’s outstanding receivables, categorized by how long they have been overdue.
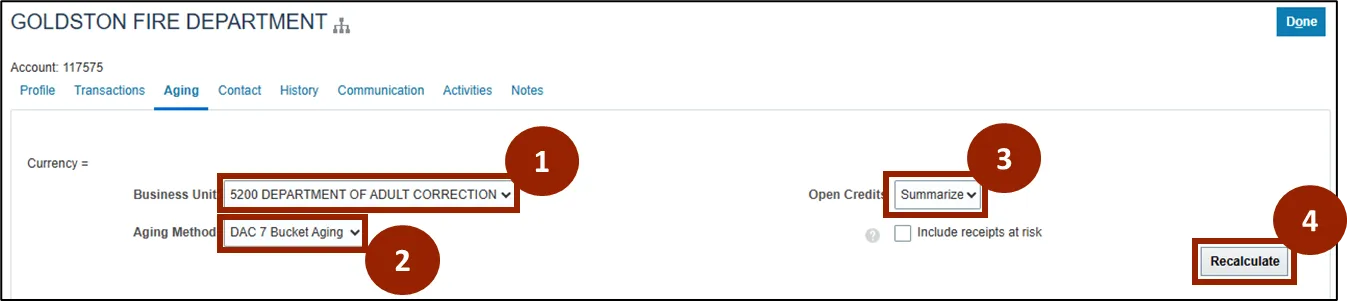
To customize the aging information displayed, follow the steps below. There are 5 steps to complete this process.
Step 1. Select 5200 Department of Adult Correction within the Business Unit Field.
Step 2. Select DAC 7 Bucket Aging within the Aging Method field.
Step 3. Select the desired option within the Open Credits field.
Step 4. Click Recalculate.
Step 5. The options selected will be applied to the Aging Bucket table and you will be able to see information such as Invoice Installment Amount, Invoice Installment number, and Debit Memo Amount for each aging bucket.
Customer Overview – Contact
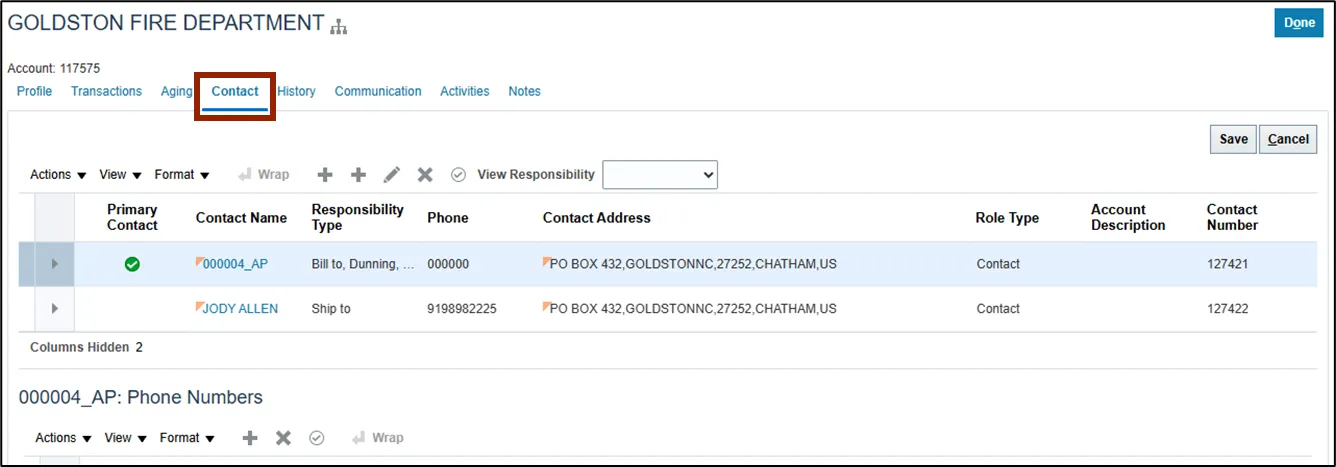
To begin, navigate to the Contact tab on the Customer page of the Collections Manager.
Within the Contact tab of the Customer page, Collectors have quick access to all relevant contacts associated with a customer account. This tab centralizes communication details, making it easier to reach out for collections, dispute resolution, or general account inquiries.
Contact – Create New Contact
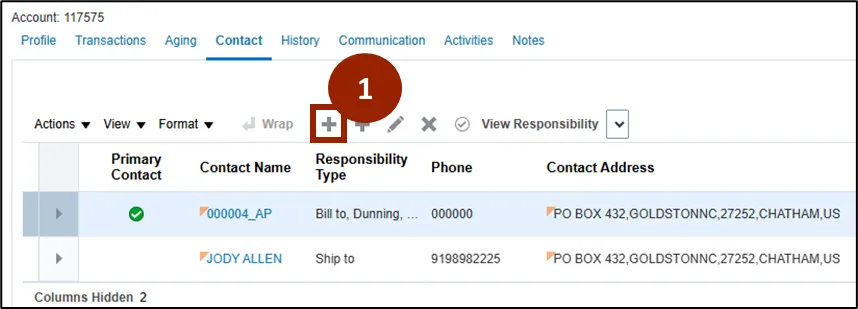
To create a new contact, follow the steps below. There are 7 steps to complete this process.
Step 1. Click the Plus (+) icon in the table of contacts within the Contact tab within the Customer page.
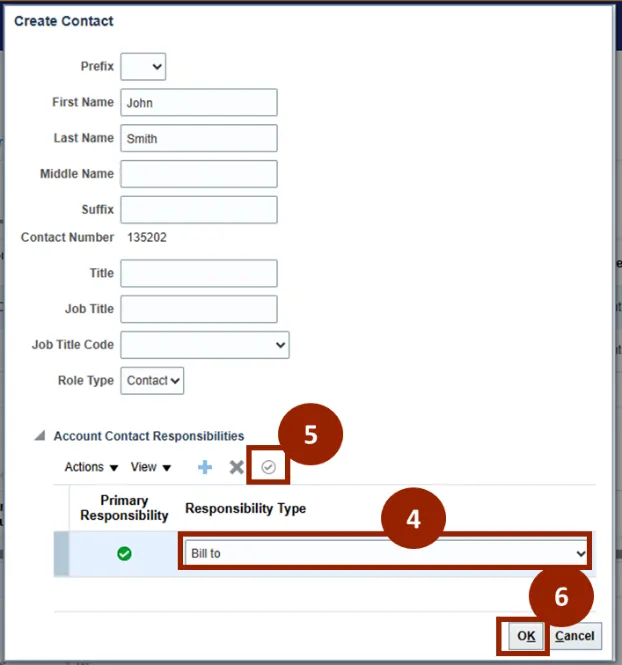
Step 2. In the Create Contact window, fill out relevant contact details.
Step 3. To assign responsibility to the contact, click the Plus (+) icon in the Account Contact Responsibilities section.
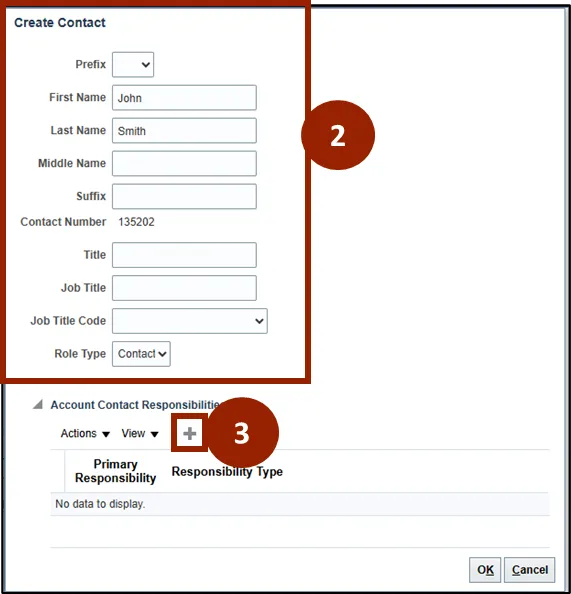
Step 4. Select the appropriate responsibility type from the drop-down (e.g. Bill to).
Step 5. Select the encircled checkmark to assign that responsibility as the contact’s primary responsibility.
Note: A green encircled checkmark will appear next to the primary responsibility.
Step 6. Click OK.
Step 7. The new contact will appear in the table of contacts.

Contact – Manage Contacts
To manage an existing contact, follow the steps below. There are 5 steps to complete this process.
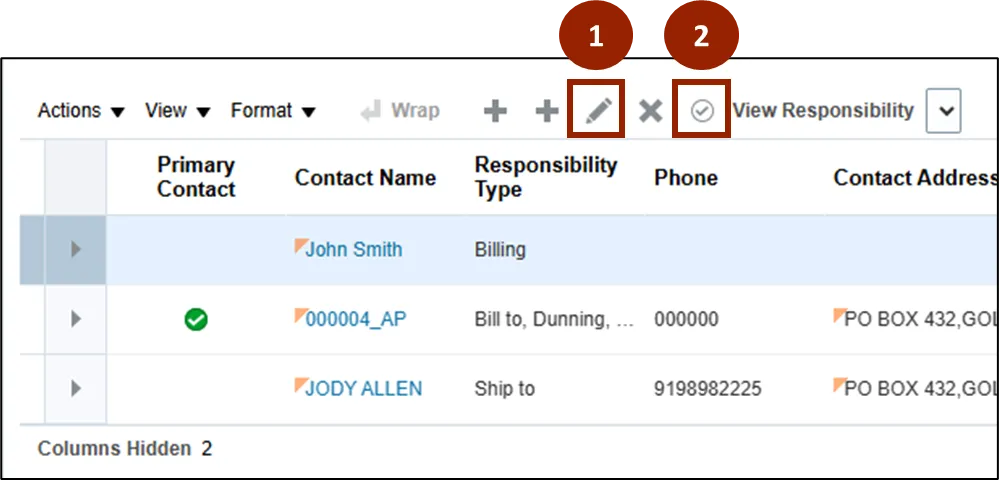
Step 1. Click the Edit (pencil) icon to edit contact information within the Contact tab within the Customer page.
Step 2. Click the encircled checkmark to mark contact as the Primary Contact.
Note: Once marked, the Primary Contact will reflect a green encircled checkmark.
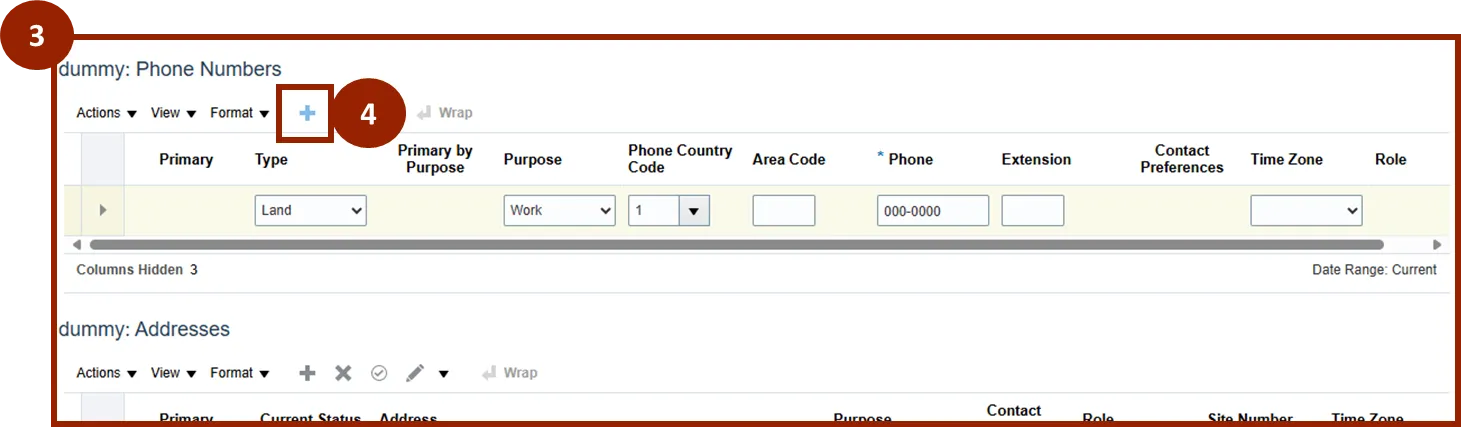
Step 3. To add a Phone Number, Address, or E-Mail to a contact, scroll down to the respective sections.
Step 4. Click the Plus (+) icon in the appropriate table to add the new contact information.
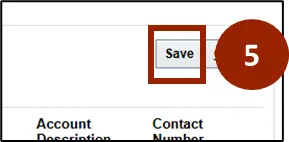
Step 5. Click Save in the upper right-hand corner to save the information to the contact.
Customer Overview – History
To begin, navigate to the History tab on the Customer page of the Collections Manager.
Within the History tab of the Customer page, Collectors can see a chronological record of all significant interactions, activities, and changes related to the customer’s account.
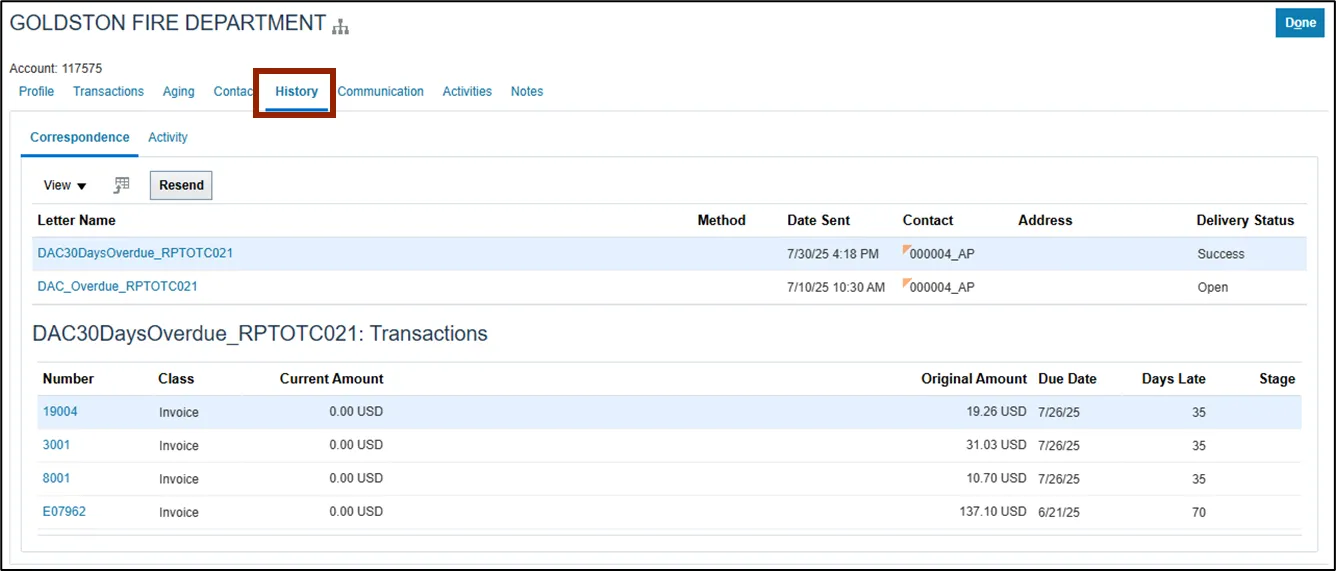
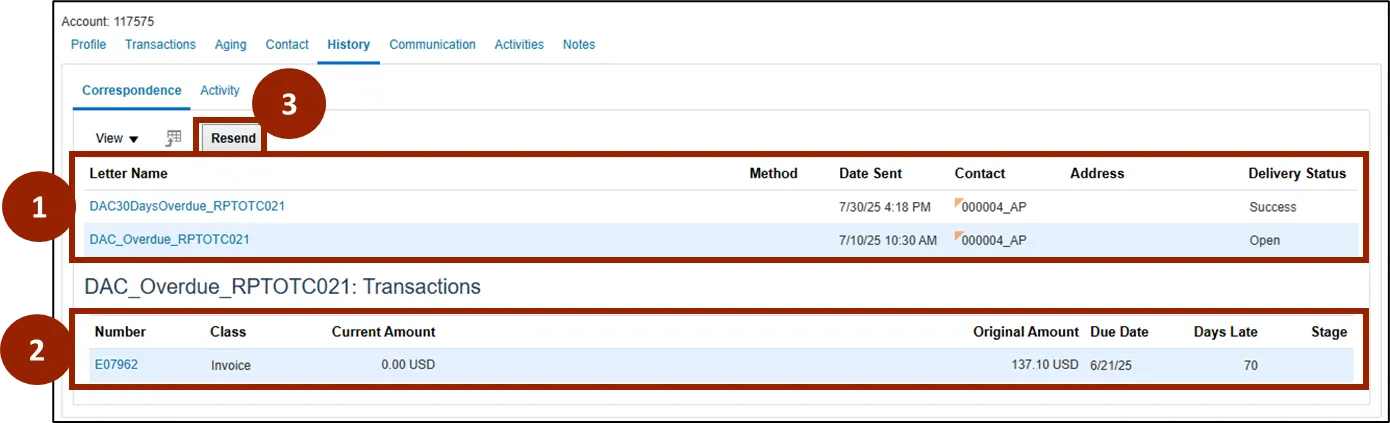
History – Correspondence
There are 3 steps to complete this process.
On the Correspondence tab:
Step 1. View all Dunning Letters sent, including Letter Name, Date Sent, Contact, and Delivery Status.
Step 2. Select the Letter Name to see the Transactions included in that specific dunning letter.
Step 3. Select Resend to send the dunning letter again.
History – Activity
There are 2 steps to complete this process.
On the Activity tab:
Step 1. View a full transaction history for the customer, including all receipts and adjustments created.
Step 2. To see more than the last 30 days of transactions, adjust the date range and select the gray arrow to update the table.

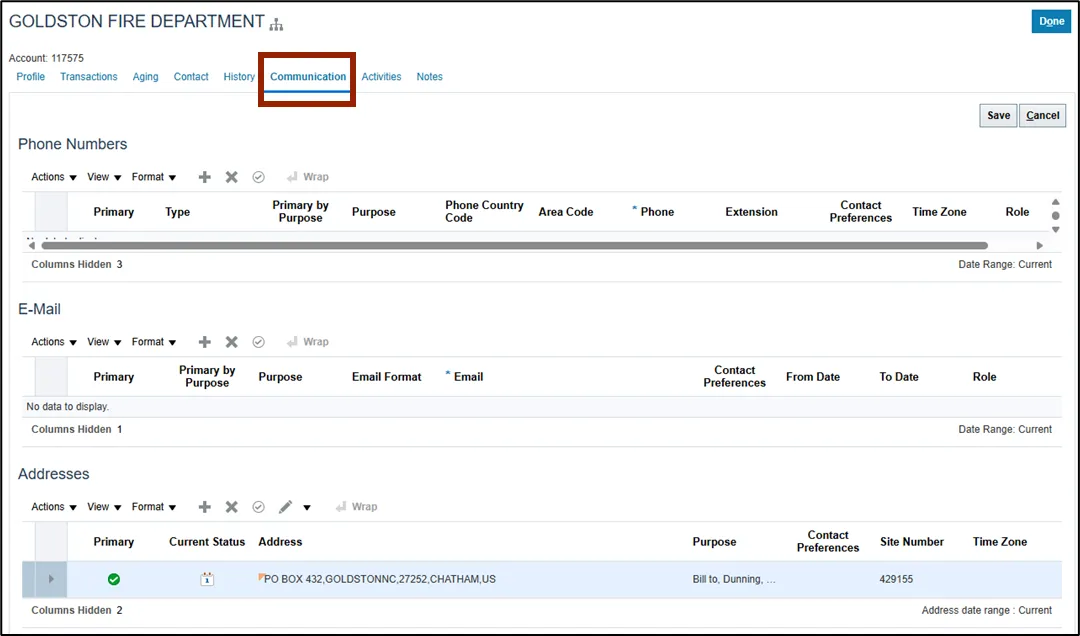
Customer Overview – Communication
To begin, navigate to the Communication tab on the Customer page of the Collections Manager.
Within the Communication tab of the Customer page, Collectors can see all phone numbers, e-mail addresses, and physical addresses associated with the Customer account.
Customer Overview – Activities
To begin, navigate to the Activities tab on the Customer page of the Collections Manager.
Within the Activities tab of the Customer page, Collectors can manage existing tasks and schedule follow-ups related to the Customer’s account. This helps ensure timely completion of critical activities.

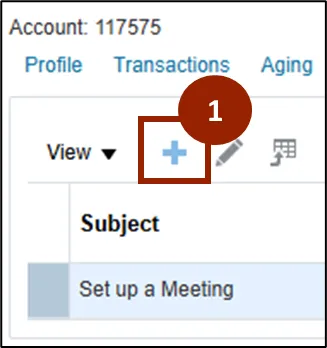
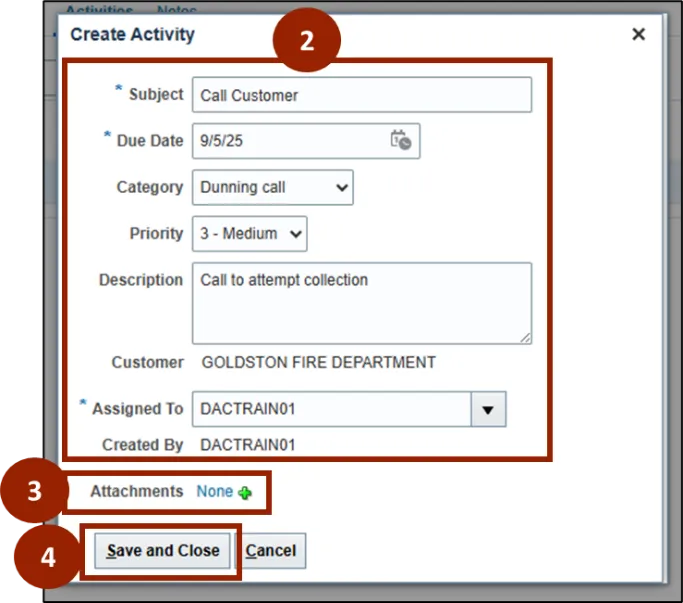
Activities – Add a new Activity
To add a new activity to a customer account, follow the steps below. There are 4 steps to complete this process.
Step 1. Click the Plus (+) icon.
Step 2. Input all relevant and required information.
Step 3. Add attachments if necessary.
Step 4. Click Save and Close.
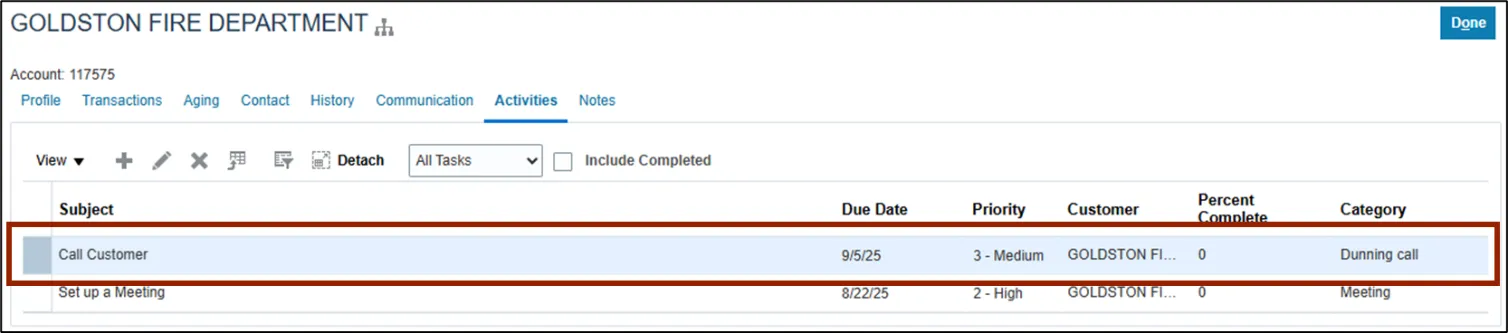
The activity is reflected in the table in the Activities tab of the Customer page.
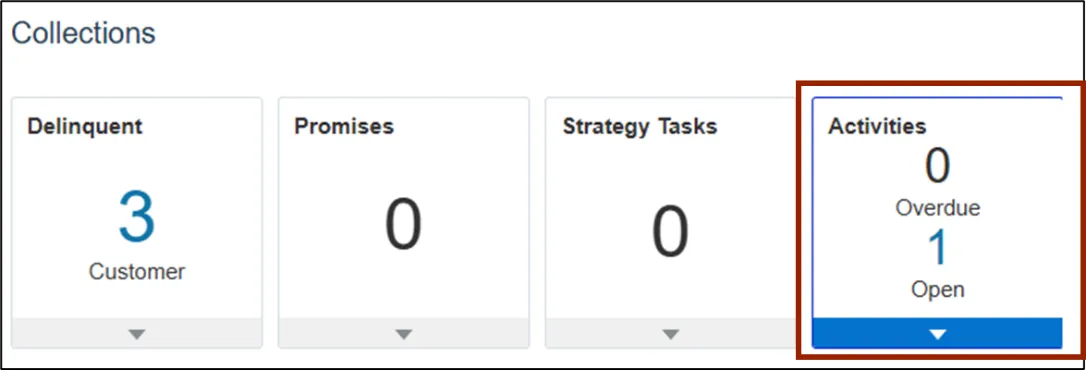
Collections Dashboard – Activities
You can also see Activity information in the dashboard on the Collections home page.
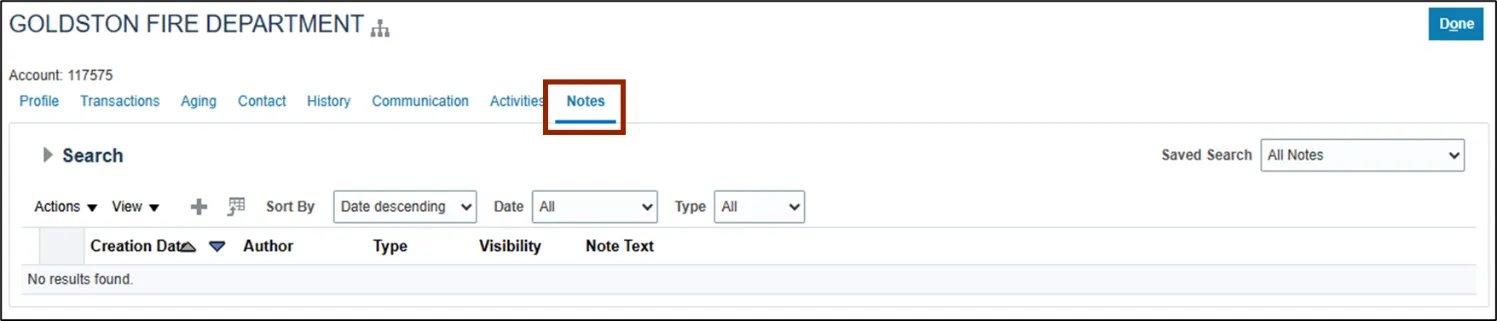
Customer Overview - Notes
To begin, navigate to the Notes tab on the Customer page of the Collections Manager.
Within the Notes tab of the Customer page, Collectors can document important details within the Customer’s account. This feature allows Collectors to document important information, interactions, and collection efforts related to a specific customer, enabling comprehensive tracking and management of the customer relationship.
Notes – Add a New Customer Note
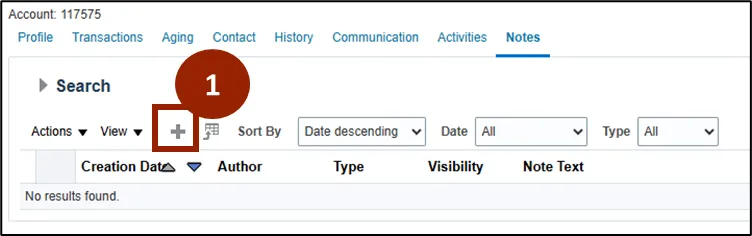
To add a new note to a Customer account, follow the steps below. There are 5 steps to complete this process.
Step 1. Click the Plus (+) icon.
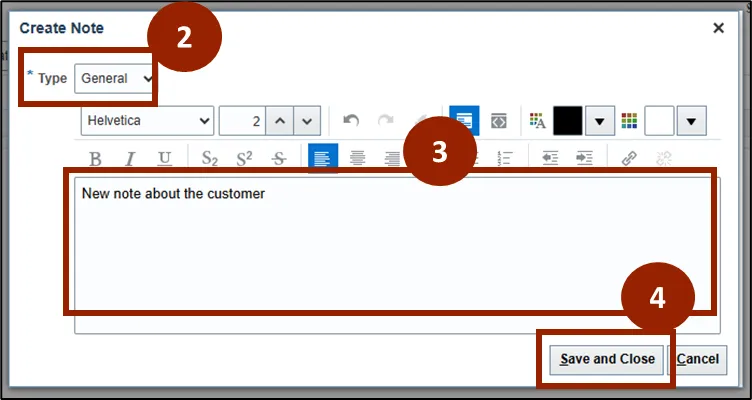
Step 2. Select the note Type from the drop-down.
Step 3. Add note information.
Step 4. Click Save and Close.
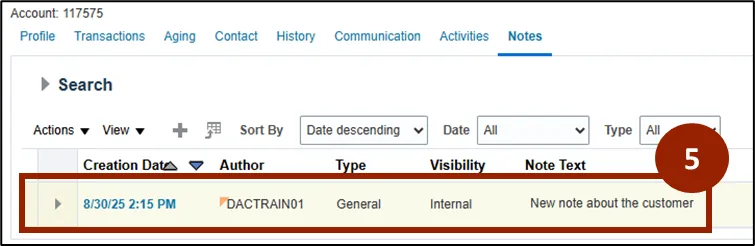
Step 5. The note will appear in the Notes tab.
Wrap-Up
NCFS users can manage collections by navigating the Collections Manager dashboard. Where they can access key tasks, review customer information, and complete collection activities efficiently.
Additional Resources
- Instructor Led Training (ILT)
- AR109: Manage Collections (Coming Soon)