Purpose
The purpose of this Quick Reference Guide (QRG) is to provide a step-by-step guide of how to review and validate returns in the North Carolina Financial System (NCFS).
Introduction and Overview
The process of reviewing and validating a return is used when a customer returns a product or requests a credit for a product that was damaged during delivery.
Return Orders
A return order is created when a shipped item needs to be returned by the customer. Return orders can be created in two ways:
1. Referenced Return Order: Initiate a return directly from an existing shipped order. Select the relevant line(s) and use the return option. Specify the quantity, return type, and (optionally) a reason. The system references the original order and updates the order type accordingly.
2. Unreferenced Return Order: If no original order is available, create a new return order by entering customer details and adding unreferenced return lines. Specify item and quantity.
When processing a return order, select the appropriate return line type based on the business scenario. NCFS offers three return line types, each with a distinct outcome:
- Return for credit only: Only credit is issued; no physical item is returned.
- Once submitted, order line status updates to “Awaiting Billing”.
- Return the item only: Only the item is returned; no credit is issued.
- Once submitted, the return order status updates to "Awaiting Receiving”.
- After inventory team receives the item, the status changes to "Delivered" and sales order line closes.
- Return for credit and return the item: Both item return and credit issuance.
- Once submitted, the return order status updates to "Awaiting Receiving".
- After inventory team receives the item, the status changes to "Delivered" and then “Awaiting Billing”.
Review and Validate Returns – Navigate to Sales Order
There are 11 steps to complete this process.
Step 1. Click the Company Single Sign-On (SSO) button.
Step 2. Enter your @dac.nc.gov email address.
Step 3. Click Next, then enter password.
Step 4. On the Home page, select the Order Management tab.
Step 5. Click Order Management App.

Note: The Order Management Overview screen displays information visually, providing data for DAC. As orders are created and progress, the diagrams and values will populate on this screen. If it is a new instance, this screen displays with minimal information.
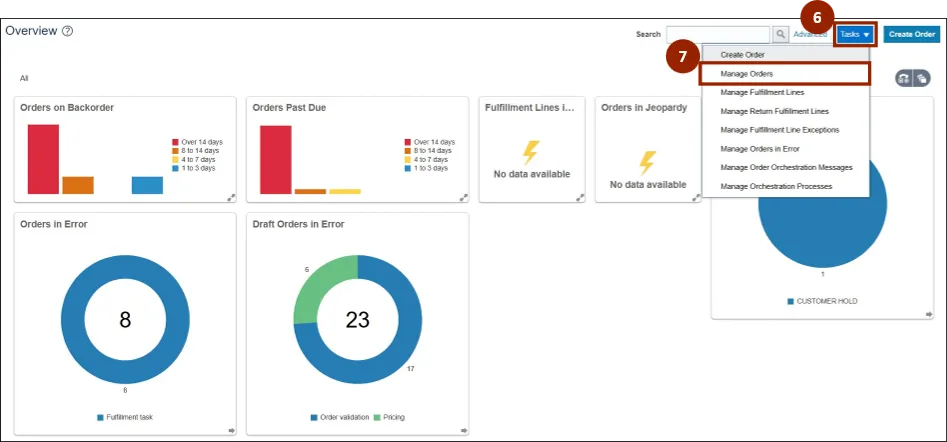
Step 6. Click the Tasks drop-down menu.
Step 7. Select Manage Orders.
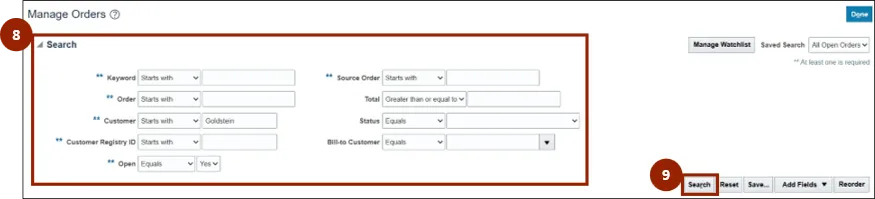
Step 8. Enter the search details for the desired sales order.
Step 9. Click Search.
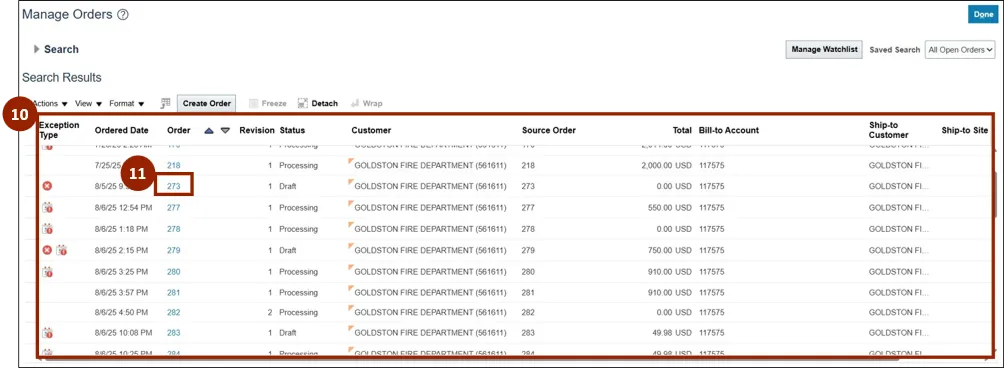
Step 10. From the Search results find the Order Number.
Step 11. Select and click on the Order Number.
Referenced Return Order
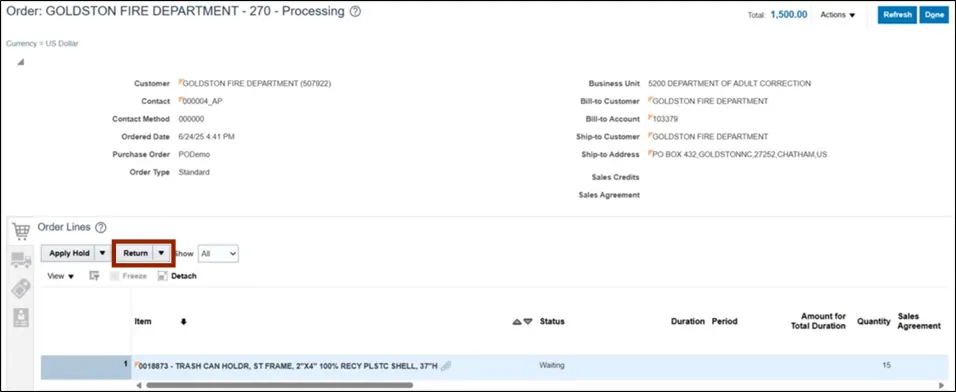
Items that have already been shipped are eligible for the return process. When an item meets the criteria for return, a Return button appears within the Order Lines section on the Order screen.
To process a referenced return, follow these steps. There are 11 steps to complete this process.
Step 1. Within the Order Lines table, select the desired item to return.
Step 2. Click the Return button.
Note: If returning all items within the order, the Return All option can be selected from the Return button drop-down list.

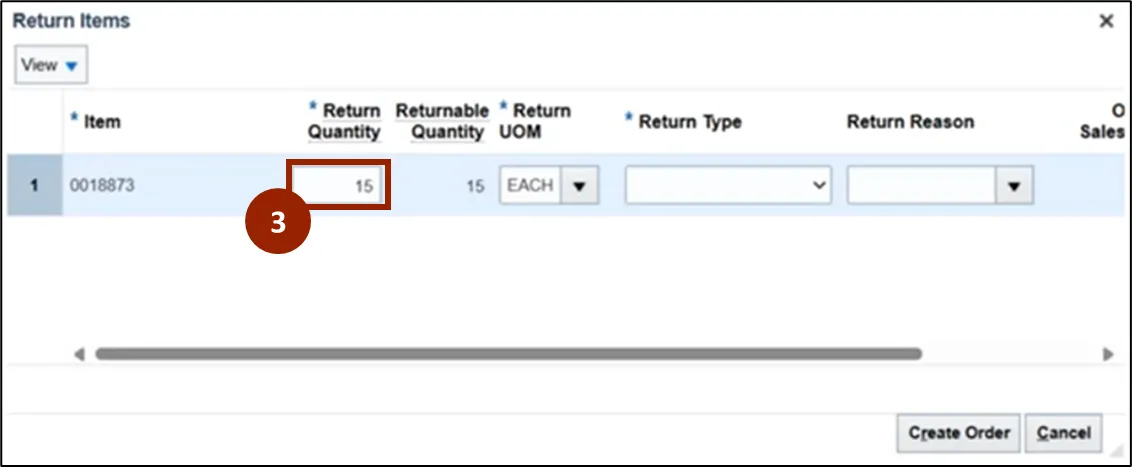
Note: The Return Items pop-up window displays, all unlocked fields may be adjusted.
Step 3. In the Return Quantity field, enter the number of items the customer needs to return.
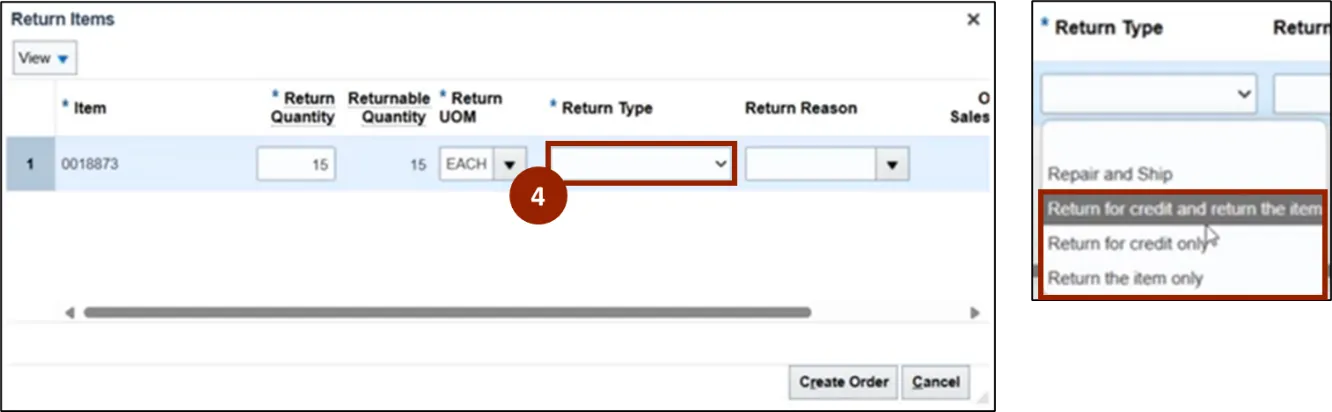
Step 4. In the Return Type drop-down field, select the desired return type.
Note: three return options display in the Return Type field list: Return for credit only, Return the item only, and Return for credit and return the item. The Repair and Ship option should only be selected when completing a Repair and Ship order.
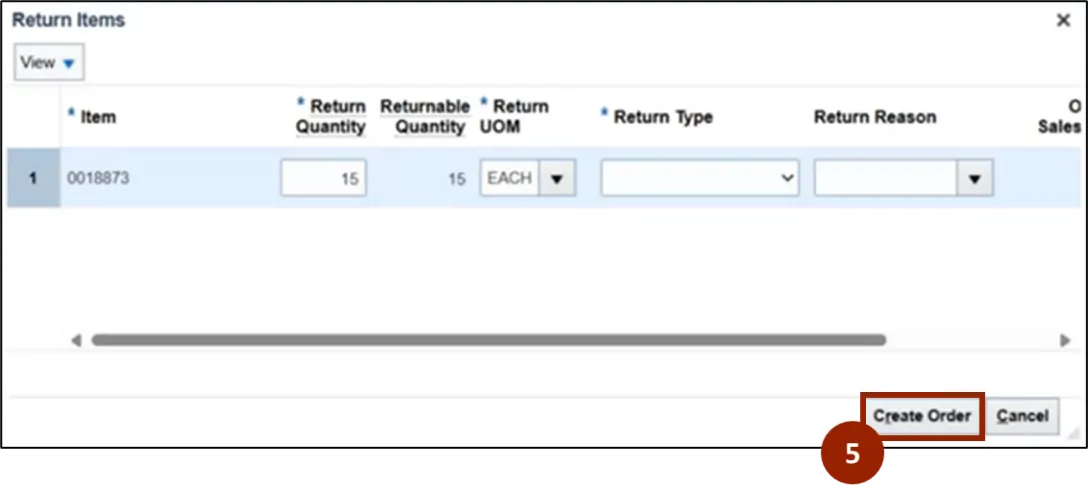
Step 5. Click the Create Order button.
Note: Once the Create Order button is clicked a new order is created and the Order screen changes to a Create Order screen.
The Order screen transitions to a Create Order screen, where a Total field displays the amount being returned. In the Order Lines section, each line item includes a link to the original order for easy reference.
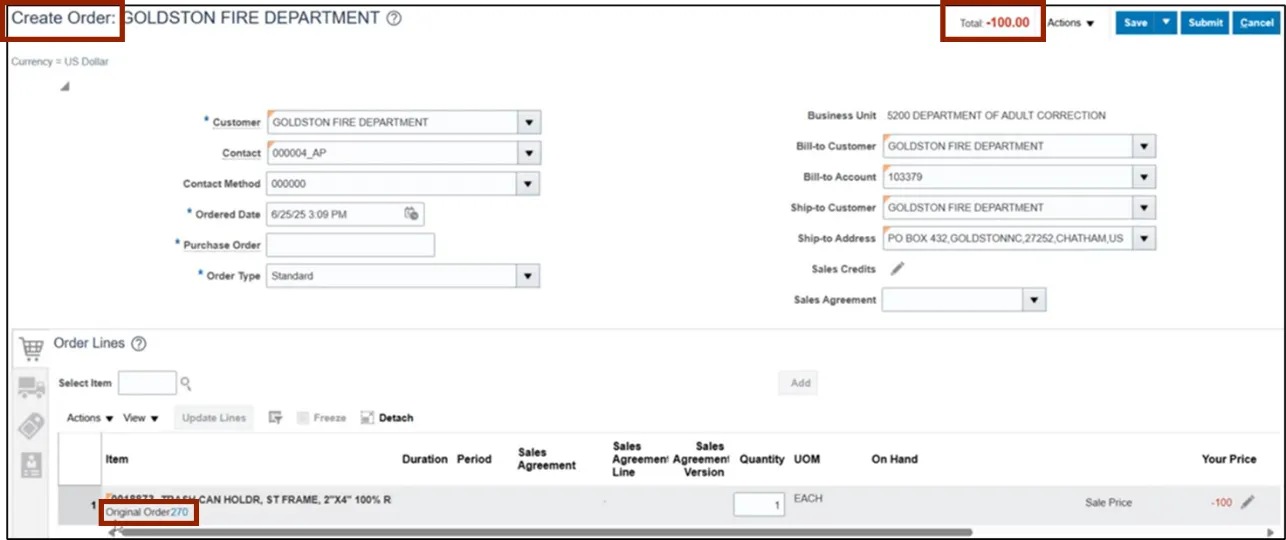
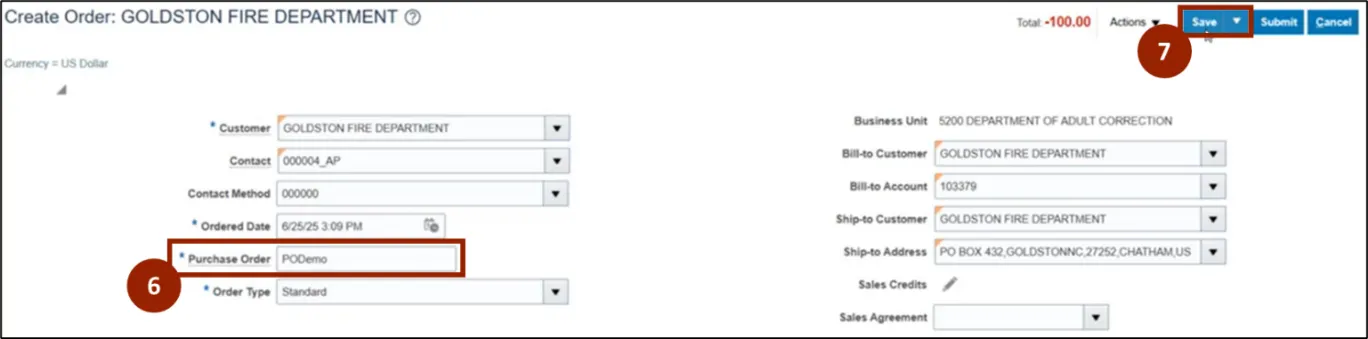
Step 6. In the Purchase Order field, enter a purchase order identifier.
Note: Since this derived from a standard order, the Order Type field is kept the same, this field will change to the appropriate order type once the order is saved or submitted.
Step 7. Click the Save button.
Note: A Warning pop-up window may appear with the message along with specific details related to the order selections. The notification states that the order type has been adjusted to return and to ensure all details are correct before submitting.
Step 8. Click OK.

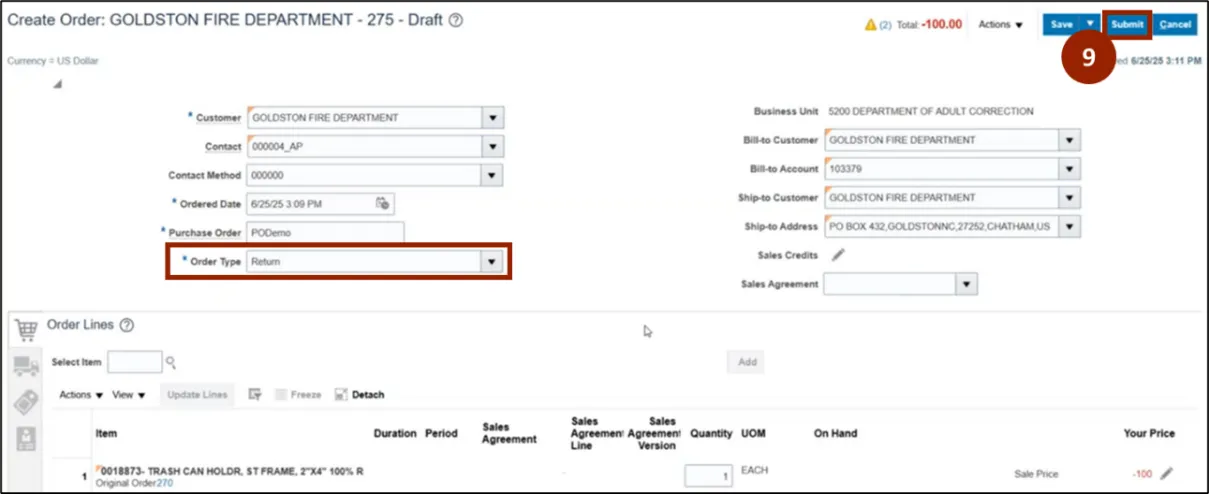
Note: NCFS automatically changes the Order Type field to the appropriate selection.
Step 9. Once all information has been verified, click Submit.
Step 10. On the Confirmation pop-up window, click OK.
Note: The Create Order screen transitions to an Order screen and a Truck icon displays, indicating that a return has been initiated and the status of the return is reflected in the Status column.
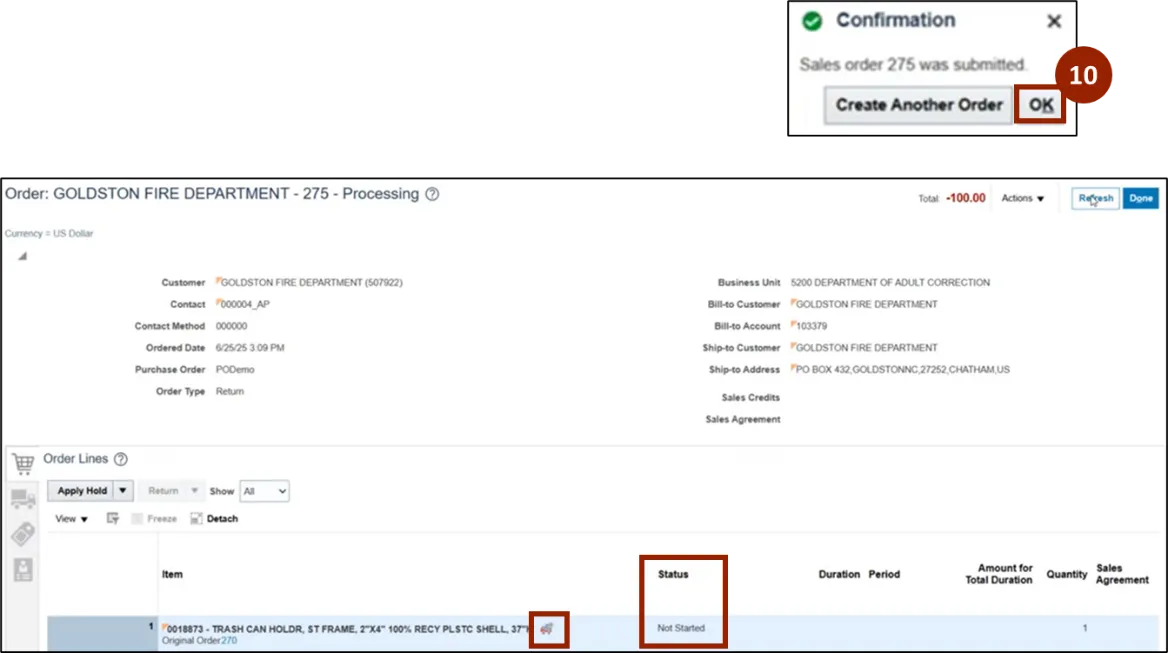
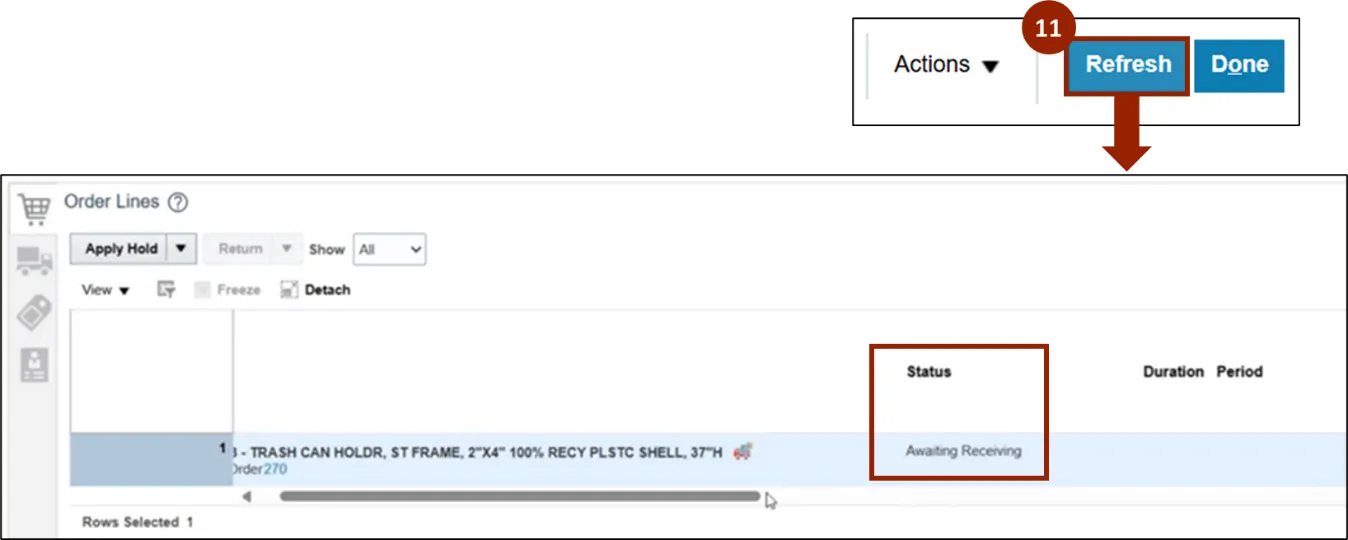
Step 11. Click the Refresh button to update the Order screen.
Unreferenced Return Order
If there is no return order to reference, the return order needs to be created. To create an unreferenced return order, from the Create Order screen, follow these steps. There are 9 steps to complete this process.
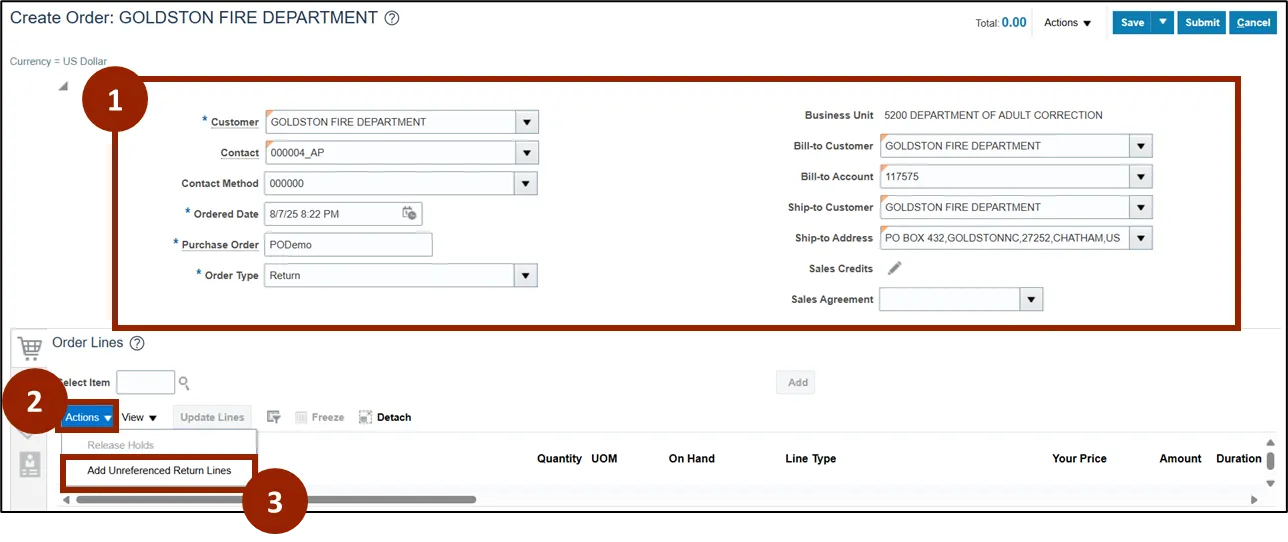
Step 1. Enter the Header Details such as Customer, Purchase Order Number and Order Type with Return selected.
Step 2. Click the Actions button.
Step 3. Select Add Unreferenced Return Lines.
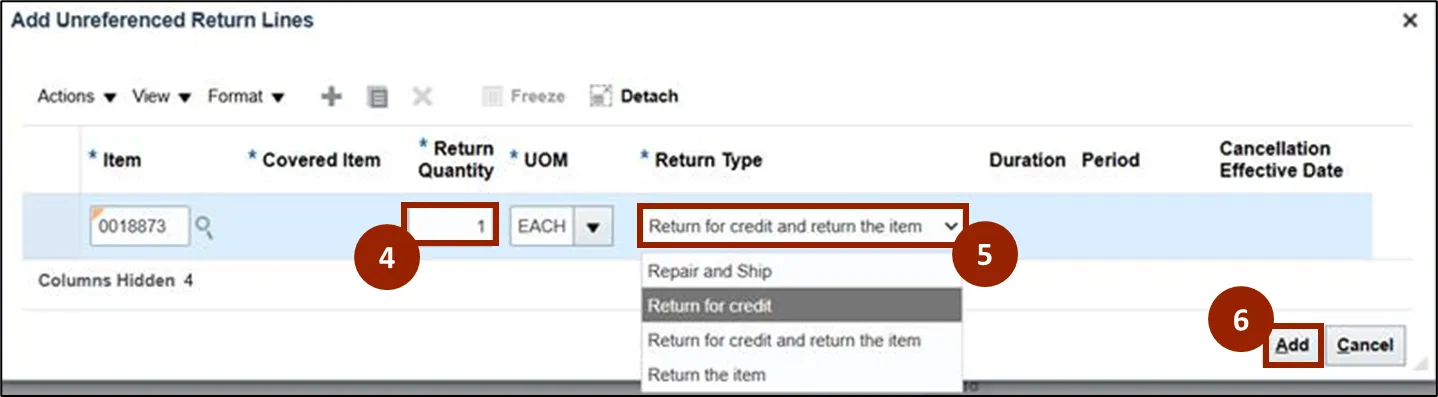
Step 4. In the Return Quantity field, enter the number of items the customer needs to return.
Step 5. In the Return Type drop-down field, select the desired return type.
Step 6. Click the Add button.
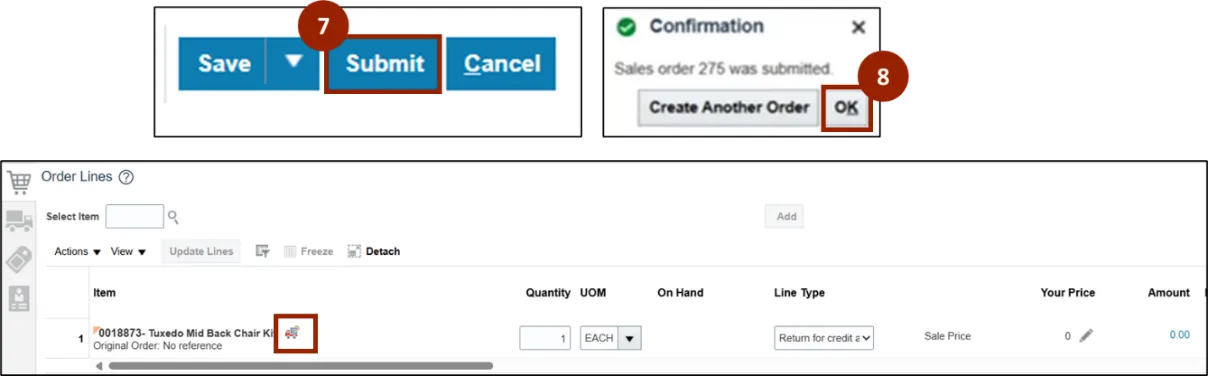
Step 7. Click the Submit button.
Step 8. On the Confirmation pop-up window, click OK.
Note: The Create Order screen transitions to an Order screen and a Truck icon displays, indicating that a return has been initiated with no reference to the original order.
Step 9. Click the Refresh button to update the Order screen.

Wrap-Up
NCFS users can review and validate returns orders by following the steps outlined above.
Additional Resources
- Instructor Led Training (ILT)
- Web-based Training (WBT)