Purpose
The purpose of this Quick Reference Guide (QRG) is to provide a step-by-step guide of how to issue a credit memo in the North Carolina Financial System (NCFS).
Introduction and Overview
This QRG covers the process to issue a credit memo in NCFS, including both creating a credit memo from an existing invoice and creating a standalone credit memo applied to an invoice.
Issue Credit Memo: From an Invoice
To issue a credit memo in NCFS, please follow the steps below. There are 20 steps to complete this process.
Step 1. Click the Company Single Sign-On (SSO) button.
Step2. Enter your @dac.nc.gov email address.
Step3. Click Next, then enter password.
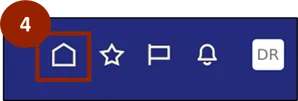
Step4. Navigate to the Home page.
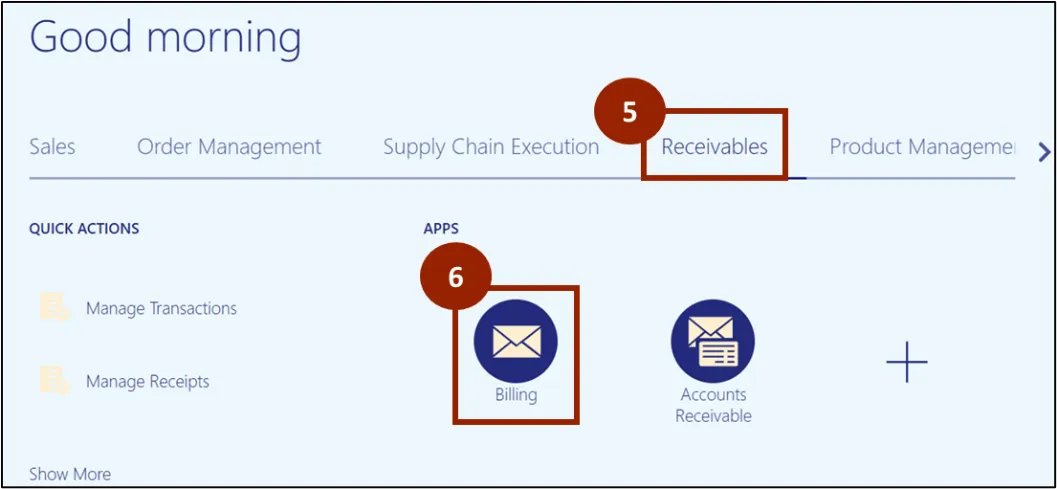
Step 5. While on the Home Screen, navigate to the Receivables tab.
Step 6. In the Receivables tab, click on Billing.
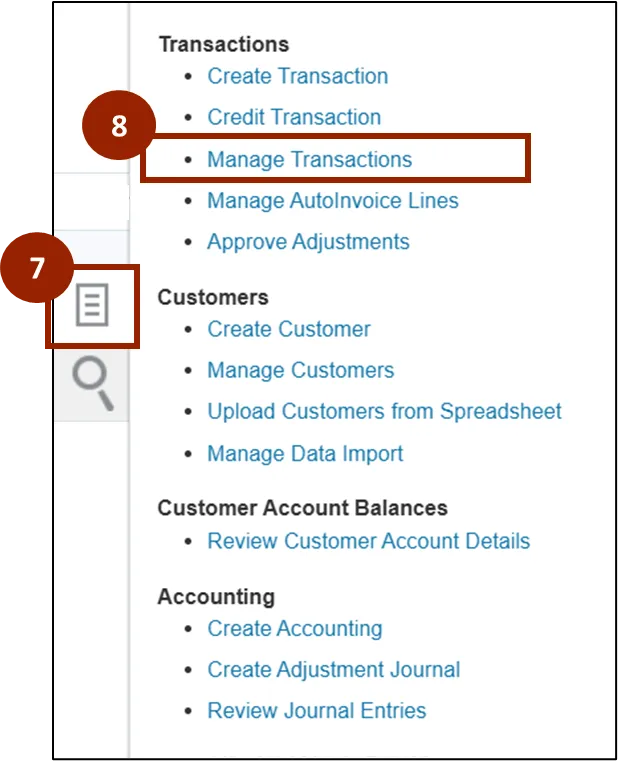
Step 7. Click the Task icon.
Step 8. Under the Transactions heading, click Manage Transactions.
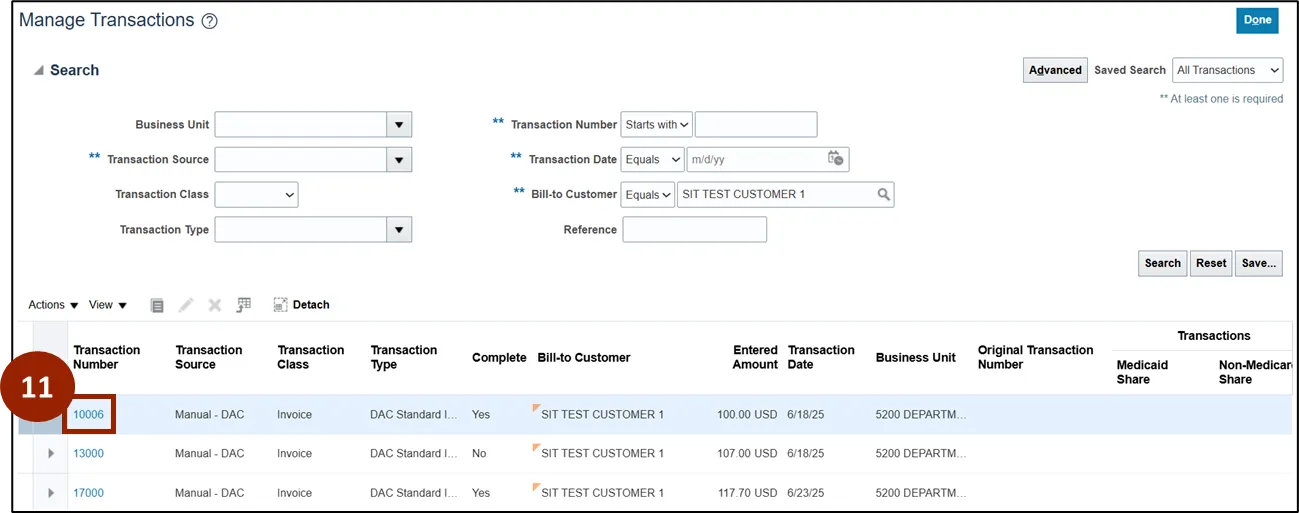
Step 9. In the Search section of the Manage Transactions screen, enter customer or transaction information within at least one of the fields marked with two asterisks (**) (i.e., Bill-to Customer = “SIT TEST CUSTOMER 1”).
Step 10. Click the Search button.
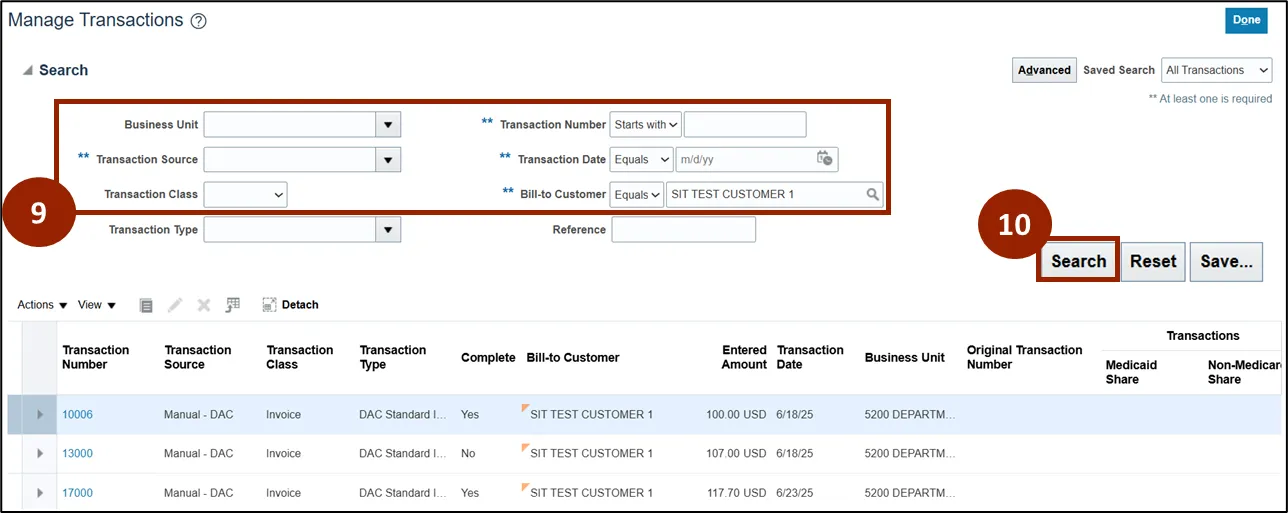
Step 11. Within the Transaction Number column of the search results, click the Transaction Number link.
Note: Clicking the Transaction Number link will open the Review Transaction screen for that record.
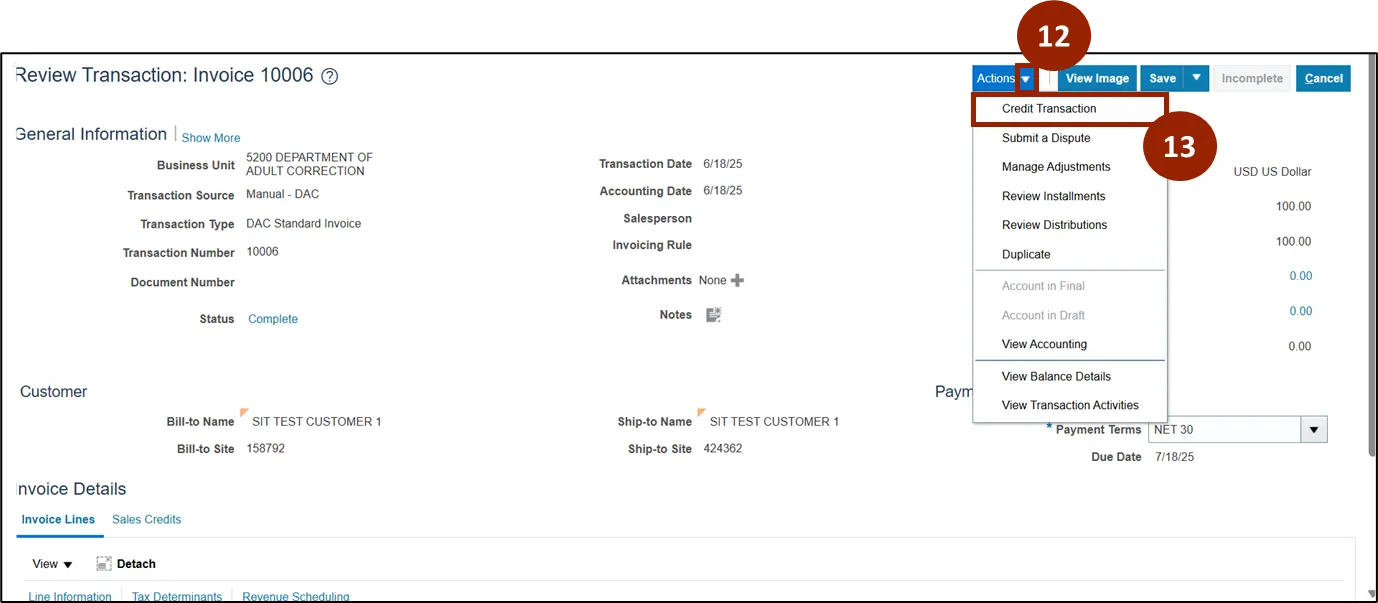
Step 12. Click the Actions drop-down.
Step 13. Within the Actions drop-down list, click Credit Transaction.
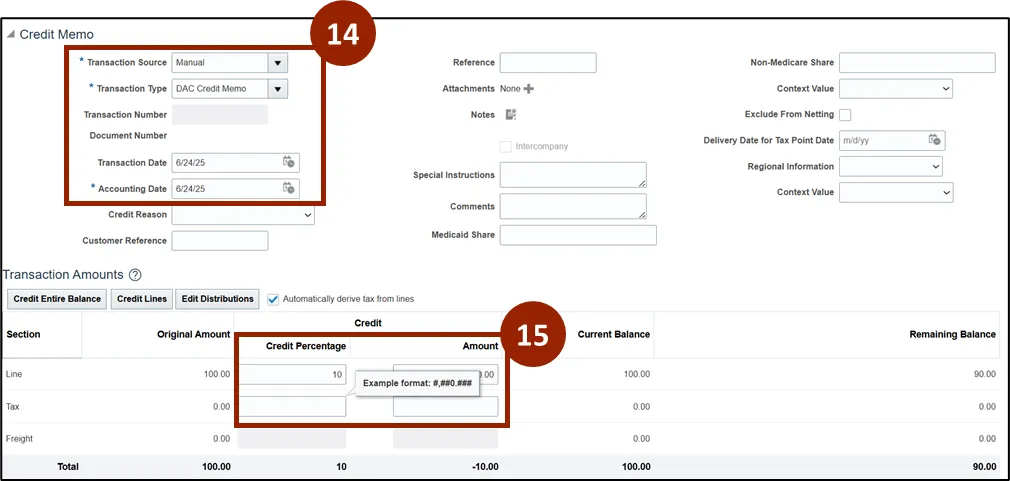
Step 14. Within the Credit Memo screen, enter the details for the Credit Memo within the required fields (*).
Step 15. Within the Credit column of the Transaction Amounts section, enter either the Credit Percentage or Credit Amount, as applicable.
Step Note: Only one field within the Credit column of the Transactions Amounts section needs to be completed before proceeding to the next step. Additionally, the Amount should be entered as a negative number.
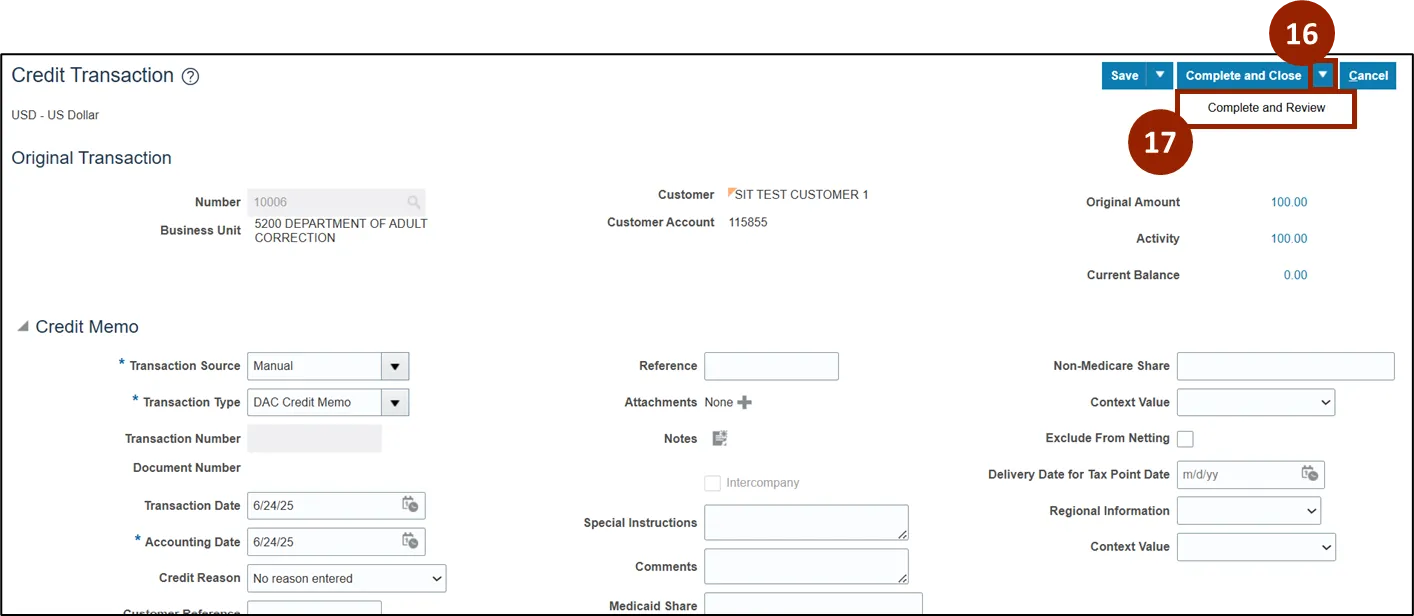
Step 16. Once all mandatory fields within the Credit Memo section are complete, click the Complete and Close drop-down.
Step 17. From the drop-down list, select Complete and Review.
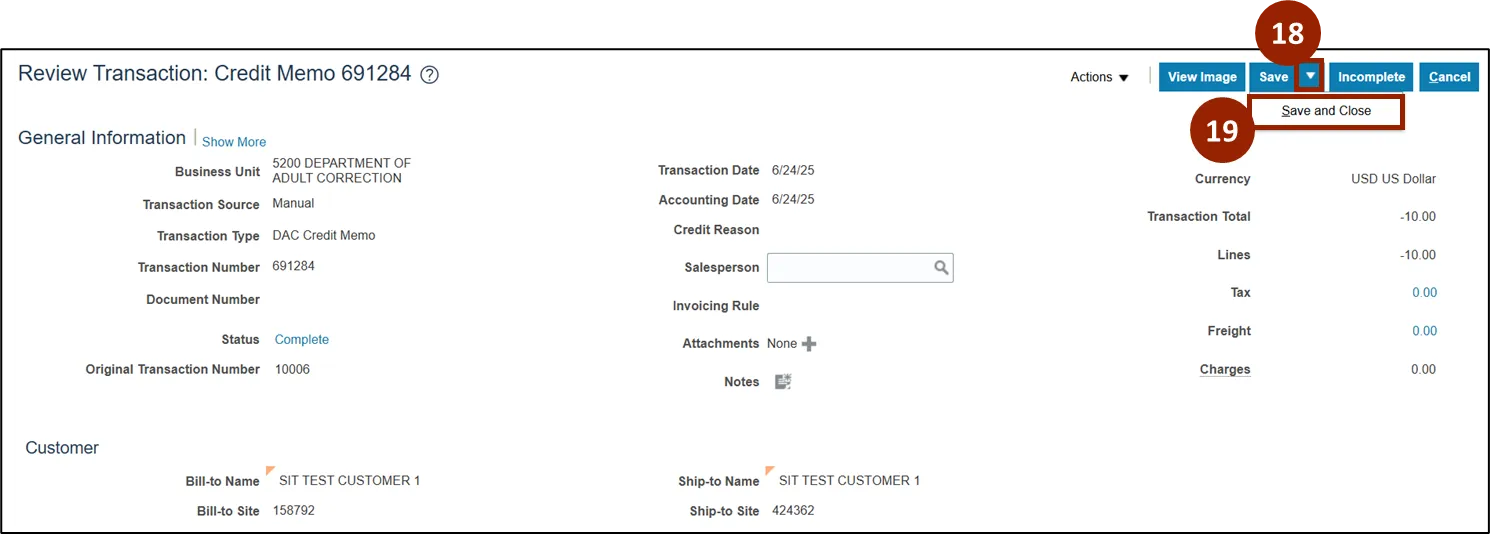
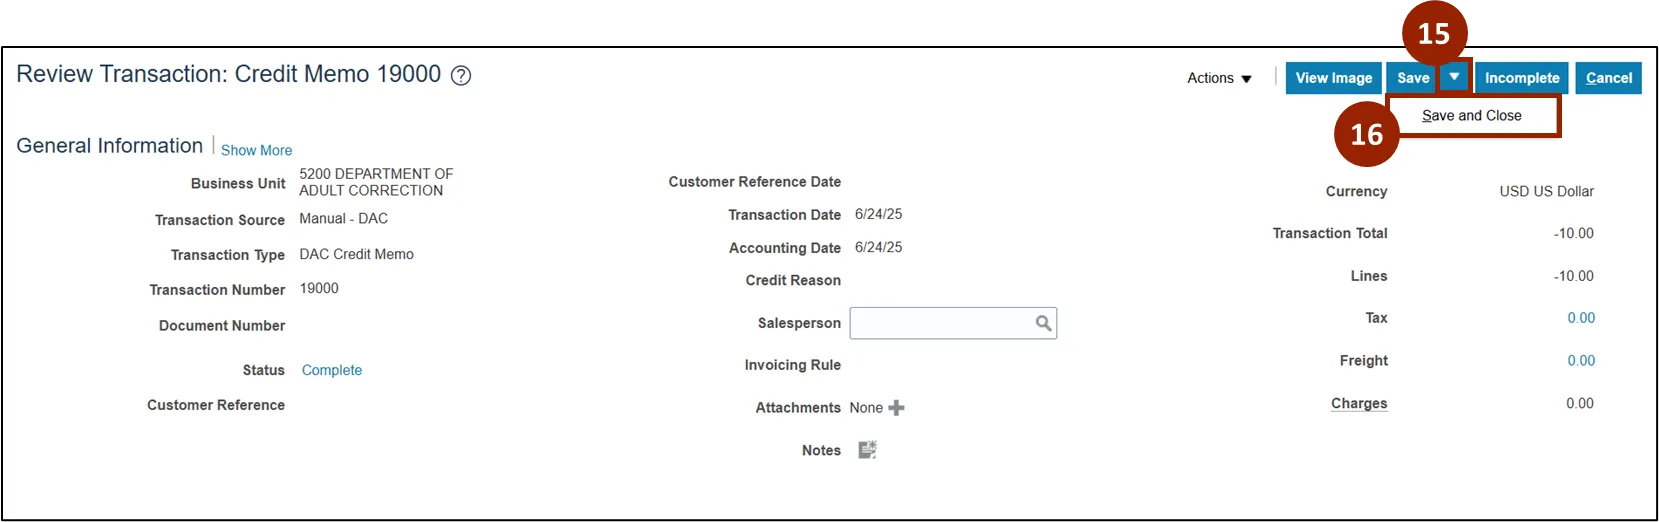
Step 18. Once all information displayed on the Review Transaction screen has been verified, click the Save drop-down.
Step 19. From the drop-down list, select Save and Close.
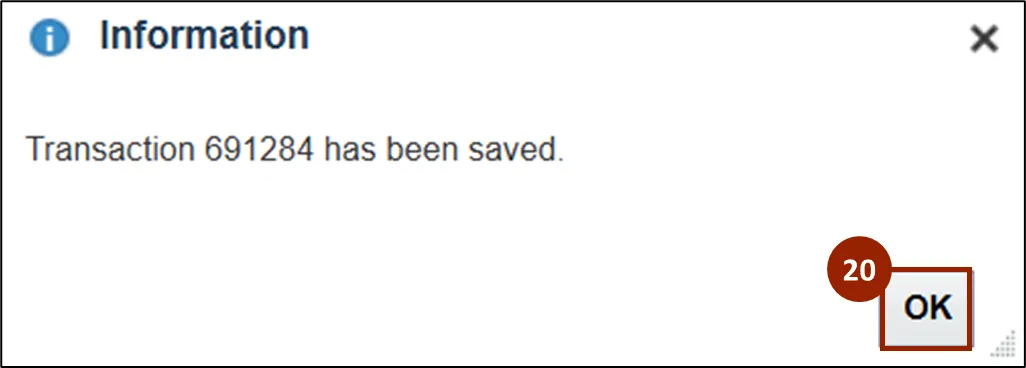
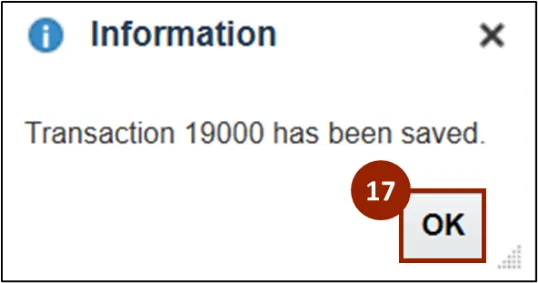
Step 20. Once saved, an Information pop-up confirmation message appears on screen, click OK to close the message.
Issue Credit Memo: Standalone
There are 17 steps to complete this process.
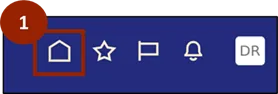
Step 1. Begin from the Home page, or click the Home icon.
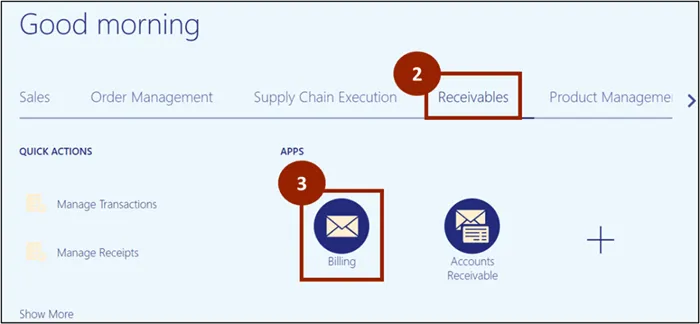
Step 2. While on the Home Screen, navigate to the Receivables tab.
Step 3. In the Receivables tab, click on Billing.
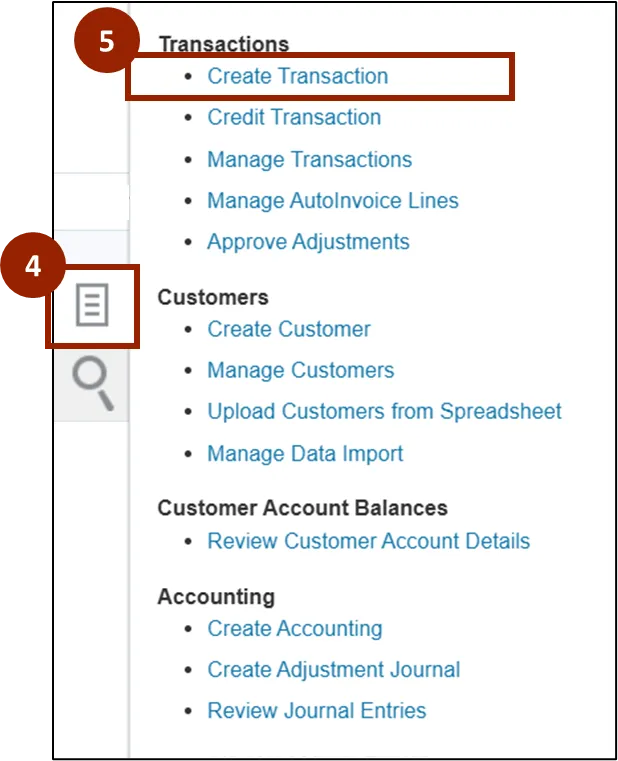
Step 4. Click the Task icon.
Step 5. Under the Transactions heading, click Create Transaction.
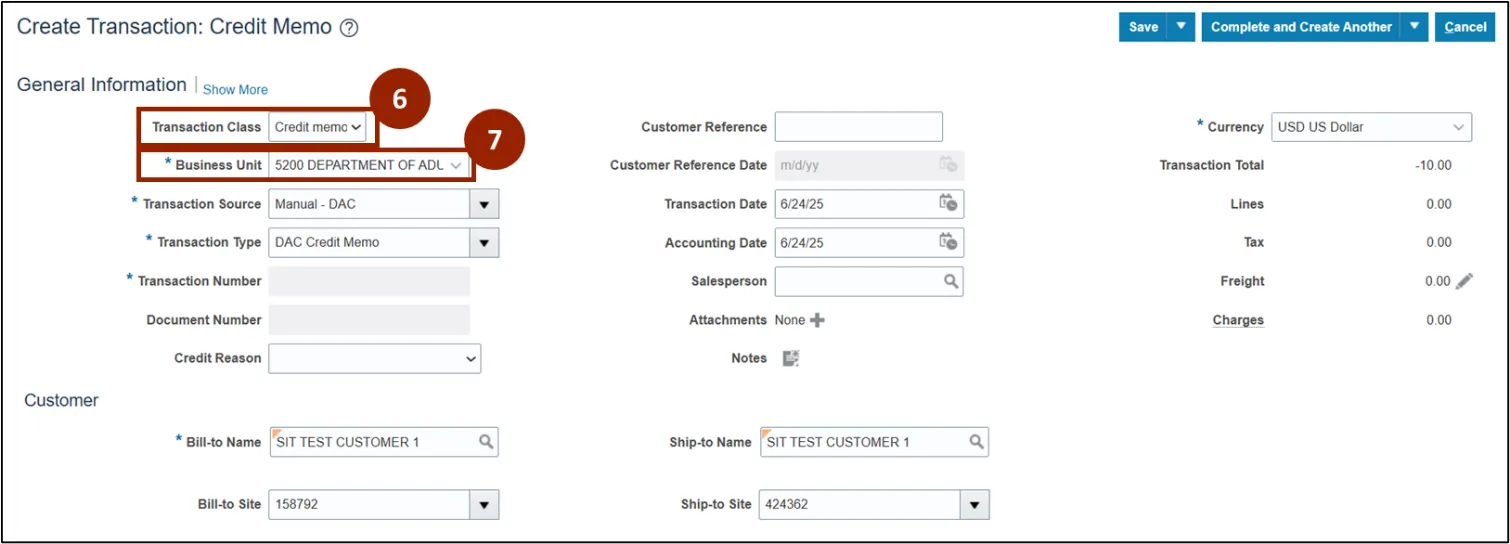
Step 6. Within the Transaction Class drop-down field, select Credit memo.
Step 7. Within the Business Unit drop-down field, select 5200 DEPARTMENT OF ADULT CORRECTION.
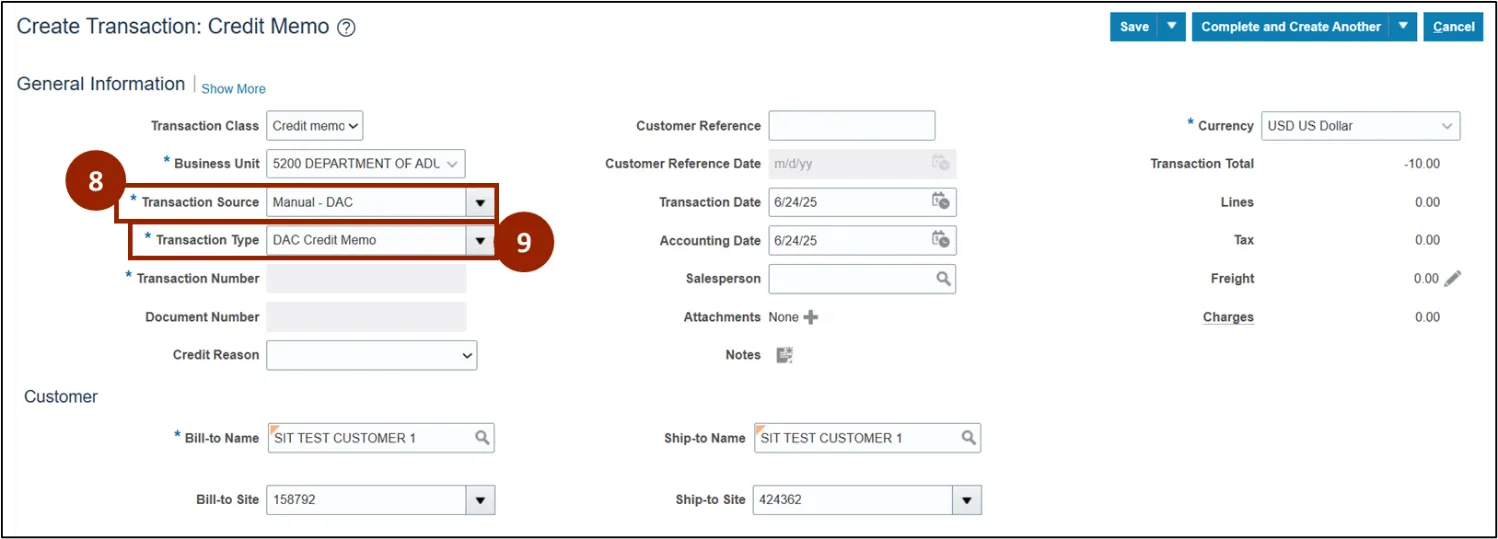
Step 8. Within the Transaction Source drop-down field, select Manual – DAC.
Step 9. Within the Transaction Type drop-down field, select DAC Credit Memo.
Step 10. In the Bill-To Name field, search and select a customer name (i.e., SIT TEST CUSTOMER 1).
Step 11. In the Ship-To Name field, search and select a customer name (i.e., SIT TEST CUSTOMER 1).
Note: If one of the above fields is selected before the other, it may auto-populate, and you can adjust as needed. Other fields, such as Bill-to Site and Ship-to Site, will also auto-populate.

Step 12. Within the Credit Memo Lines table, enter details within each of the required fields marked with an asterisk (*).
Note: To add multiple credit memo lines, populate the fields for each line. To add another credit memo line, click the Add (+) icon.

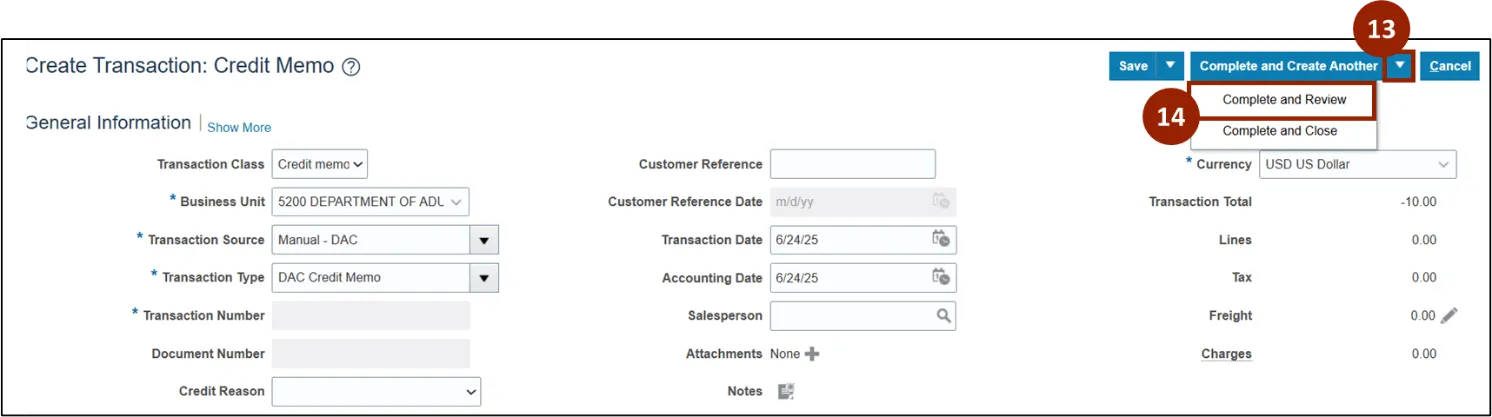
Step 13. Once all mandatory fields within the Create Transaction: Credit Memo screen are complete, click the Complete and Create Another drop-down.
Step 14. From the drop-down list, select Complete and Review.
Step 15. Once all information displayed on the Review Transaction screen has been verified, click the Save drop-down.
Step 16. From the drop-down list, select Save and Close.
Step 17. Once saved, an Information pop-up confirmation message appears on screen, click OK to close the message.
Wrap-Up
NCFS users can issue credit memos to adjust customer accounts, either from an existing invoice or as a standalone entry. This process helps ensure customer balances are accurate and properly documented in the system.
Additional Resources
- Instructor Led Training (ILT)
- AR108 – Manage Receipts and Cash Applications (Coming Soon)