Purpose
The purpose of this Quick Reference Guide (QRG) is to provide a step-by-step guide of how to Manage and Approve Receivables for Adjustments in the North Carolina Financial System (NCFS).
Introduction and Overview
This QRG covers the process of Manage and Approve Receivables Adjustments. This process provides information on how to create adjustments and the approval process for adjustments.
Manage Adjustments in Receivables
To approve expenses via the notification bell icon, please follow the steps below. There are 16 steps to complete this process.
Create Adjustments
Step 1. Log in to the NCFS portal using the Company Single Sign-On (SSO) button.
Step 2. Enter your @dac.nc.gov email address.
Step 3. Click Next, then enter your password.
NOTE: The system will automatically sign on using SSO and log in to NCFS. After the first login using SSO, future access may not require credentials. If SSO is not available, enter credentials manually within the Username and Password fields, then click Sign-In.
Step 4. Navigate to the Home page.
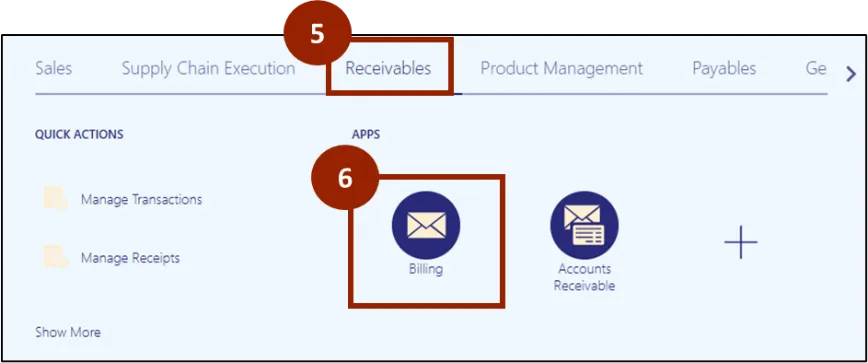
Step 5. Click on the Receivables tab.
Step 6. Click on Billing.
Step 7. On the Billing page, click the Search icon.

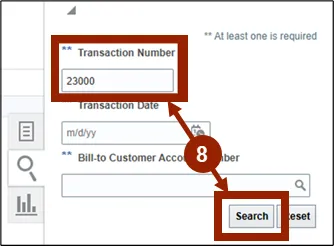
Step 8. Enter the Transaction Number and click Search.
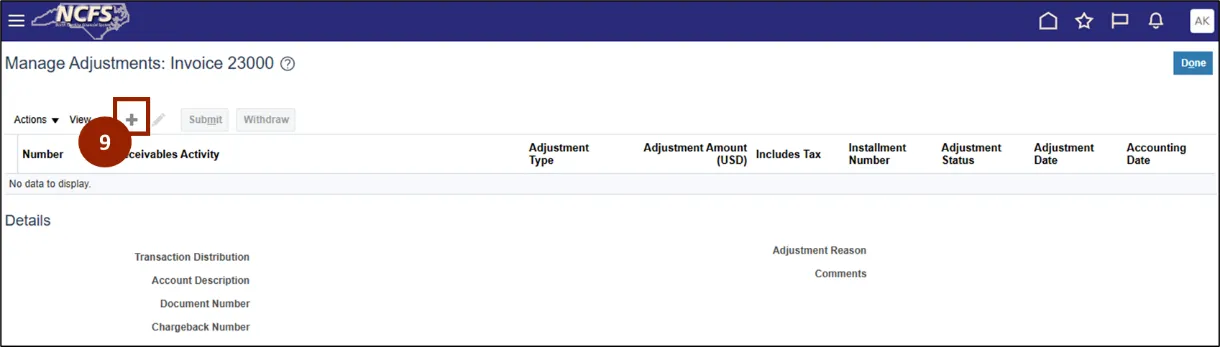
Step 9. Click the Plus (+) icon to create an adjustment.
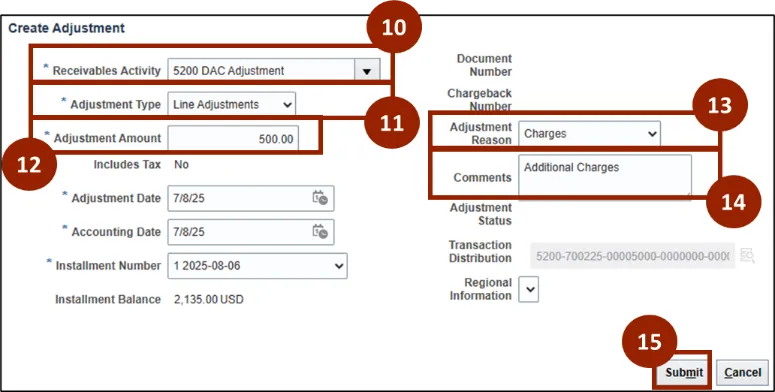
Step 10. Enter 5200 DAC Adjustment in the Receivables Activity field.
Step 11. Select Line Adjustment from the Adjustment type option.
Step 12. Enter the specific amount to be adjusted in the Adjustment Amount field.
Step 13. Provide the relevant reason for the adjustment in the Adjustment Reason field.
Step 14. Add any necessary comments or additional details in the Comment field.
Step 15. Click Submit.
Step 16. Once the adjustment is created, it is automatically routed to the designated approver for review.
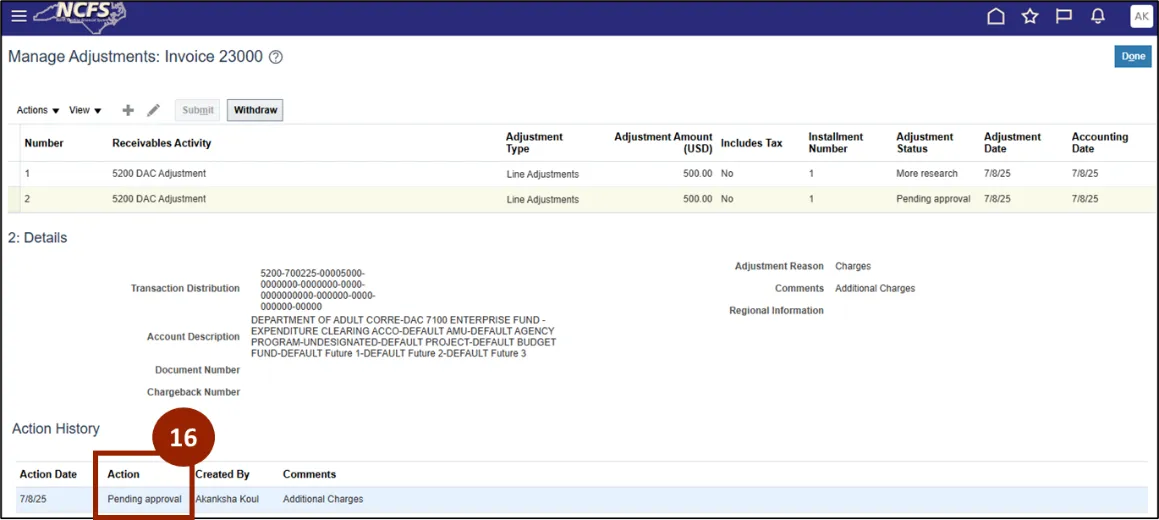
Approve Adjustments
All adjustments undergo a mandatory approval process to maintain control and accuracy. Once an adjustment is created, it is automatically routed to the designated approver for review. The invoice will only be updated to reflect the adjustment after it has been formally approved.
There are 8 steps to complete this process.
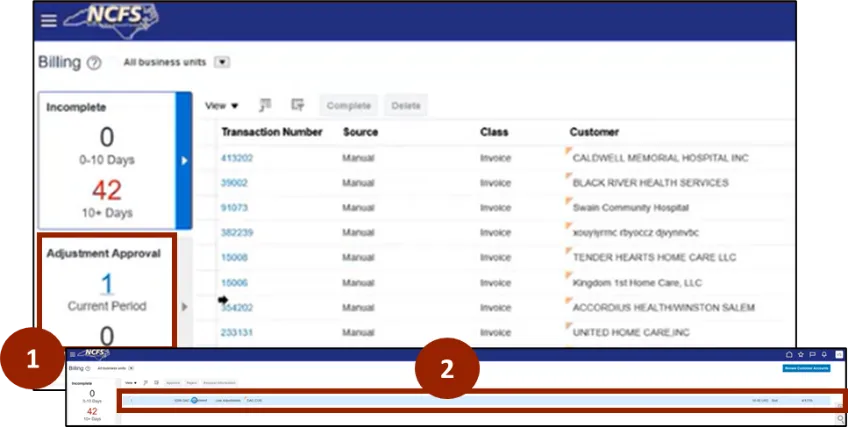
Step 1. Once On the Billing page, click the Adjustment Approval info tile.
Step 2. Click on the adjustment available.
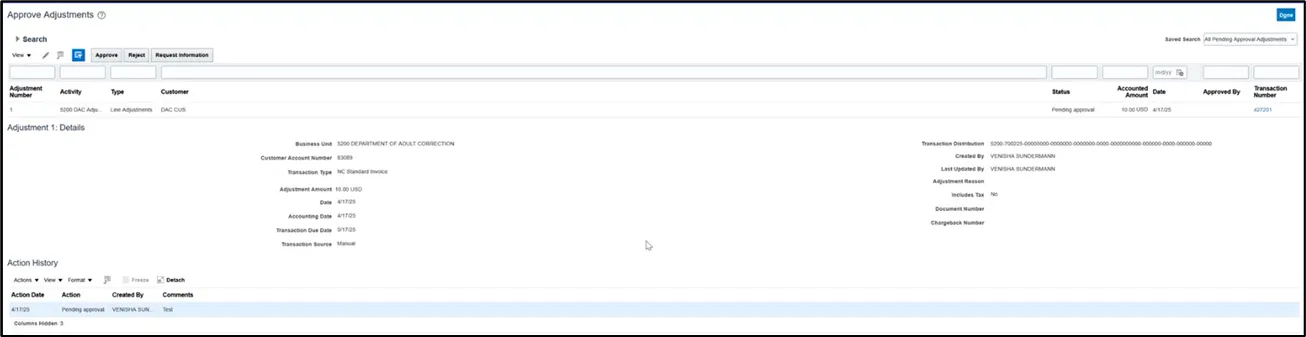
Step 3. Click the adjustment to view details.
Step 4. Click Approve to approve the adjustment.
Step 5. Click Reject to deny the adjustment.
Step 6. Click Request Information if additional details are needed for the specific adjustment.

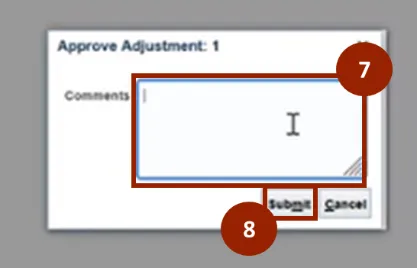
Step 7. When approving, rejecting, or requesting additional information, you can add comments in the comment box (optional).
Step 8. Click Submit.
Wrap-Up
NCFS users can reference the Manage and Approve Receivables Adjustments using the steps above.
Additional Resources
- Instructor Led Training (ILT)