Purpose
The purpose of this Quick Reference Guide (QRG) is to provide a step-by-step guide of how to Manage Auto Invoice Lines in the North Carolina Financial System (NCFS).
Introduction and Overview
This QRG covers the process of Manage Autoinvoice Lines. This process provides information on identifying errors, correcting them, uploading the updated data, and submitting the sales order for successful invoice creation.
Manage Autoinvoice Lines
To approve expenses via the notification bell icon, please follow the steps below. There are 19 steps to complete this process.
Step 1. Log in to the NCFS portal using the Company Single Sign-On (SSO) button.
Step 2. Enter your @dac.nc.gov email address.
Step 3. Click Next, then enter your password.
NOTE: The system will automatically sign on using SSO and log in to NCFS. After the first login using SSO, future access may not require credentials. If SSO is not available, enter credentials manually within the Username and Password fields, then click Sign-In.
Step 4. Navigate to the Home page.
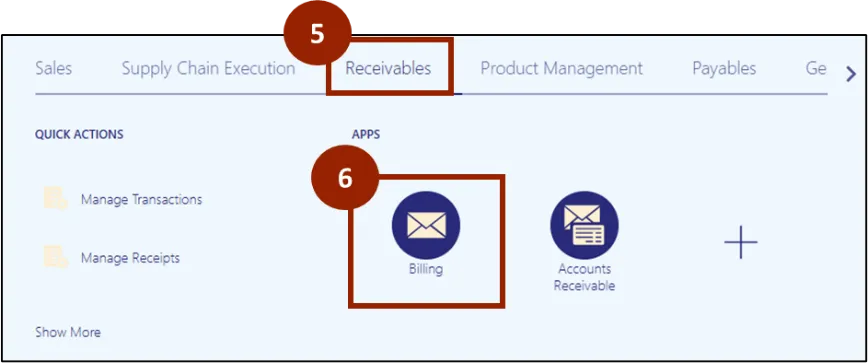
Step 5. Click on the Receivables tab.
Step 6. Click on Billing.
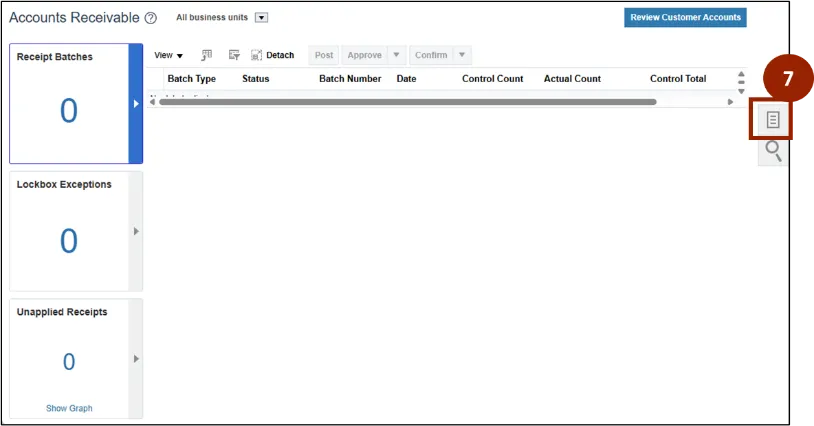
Step 7. On the Billing page, click the Task icon.
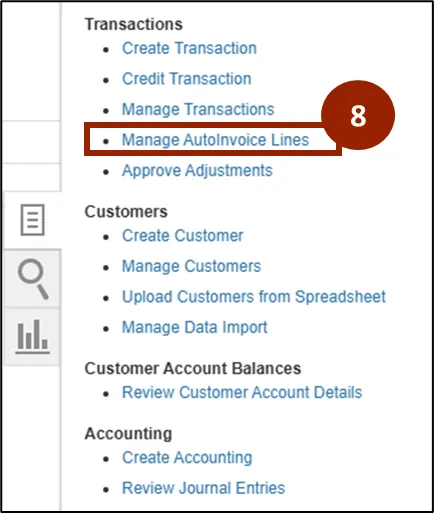
Step 8. Select the Manage AutoInvoice Lines option.
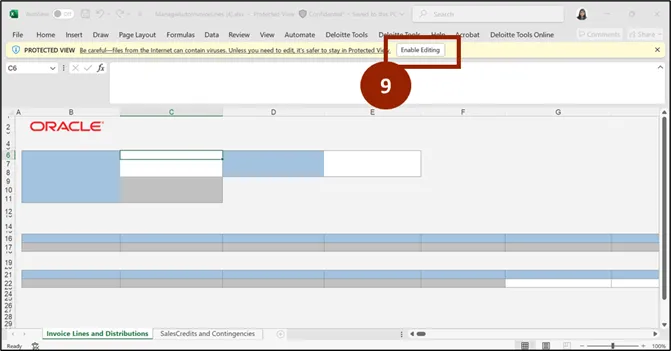
Step 9. When the Excel workbook opens, select Enable Editing in the yellow security banner.
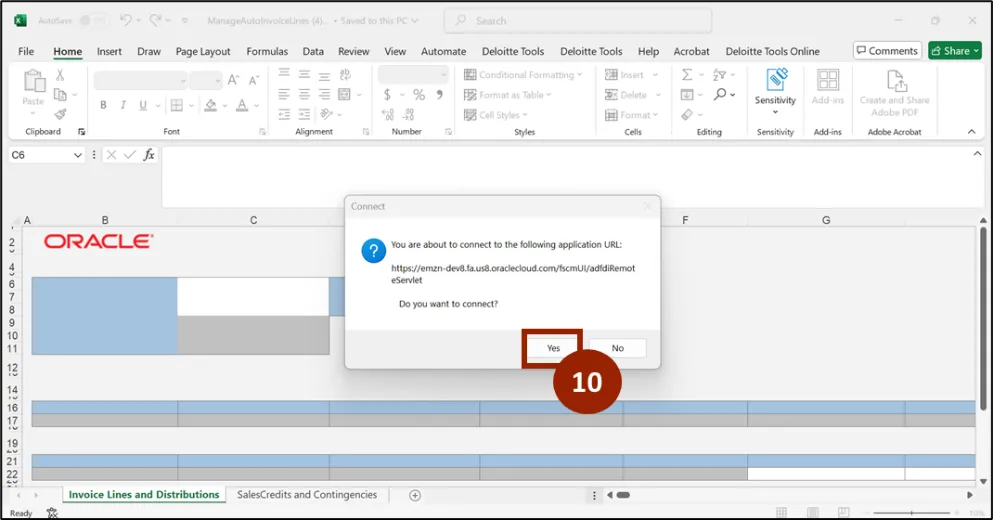
Step 10. A security pop-up appears asking whether you want to access the specified application URL. Click Yes.
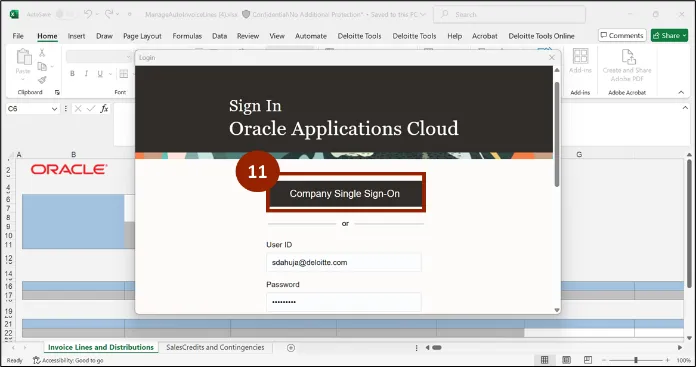
Step 11. When the Oracle sign-on page appears, enter your SSO username and password, then click Sign In.
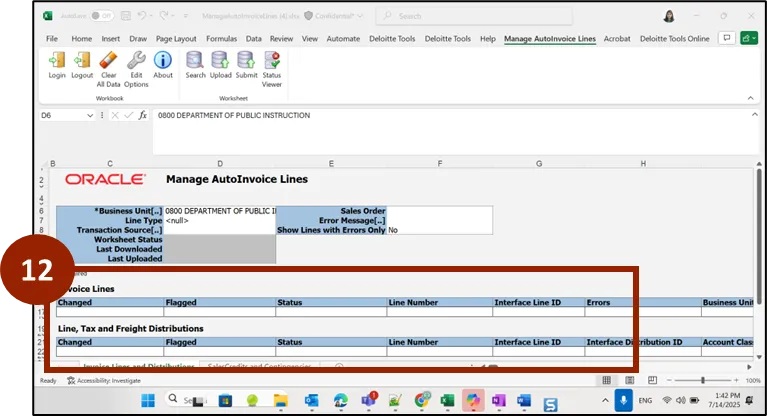
Step 12. The spreadsheet opens, and displays the Invoice Lines, Lines, Tax, and Freight Distributions.
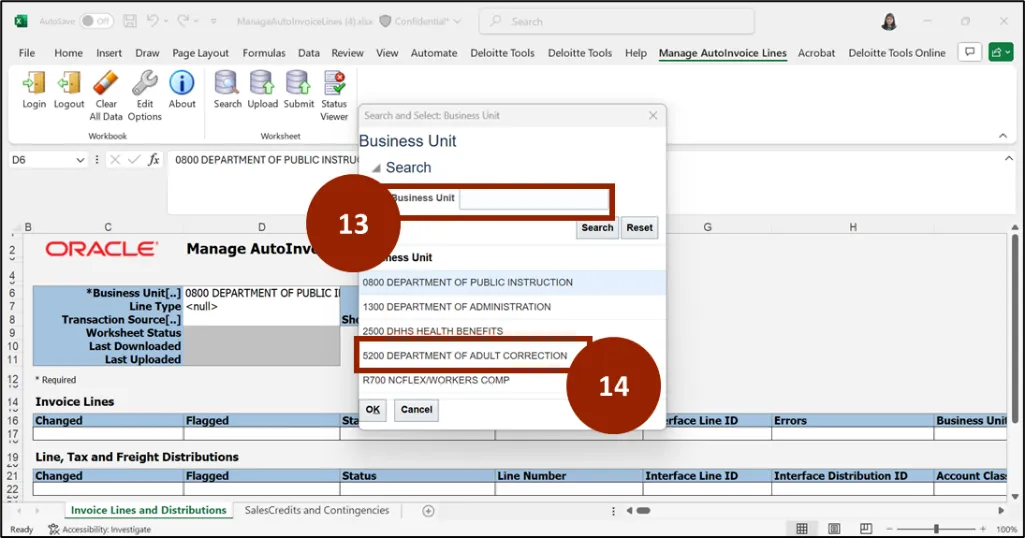
Step 13. Select the Business Unit field.
Step 14. From the drop-down, select 5200 – Department of Adult Correction to display any error lines for the relevant sales order.
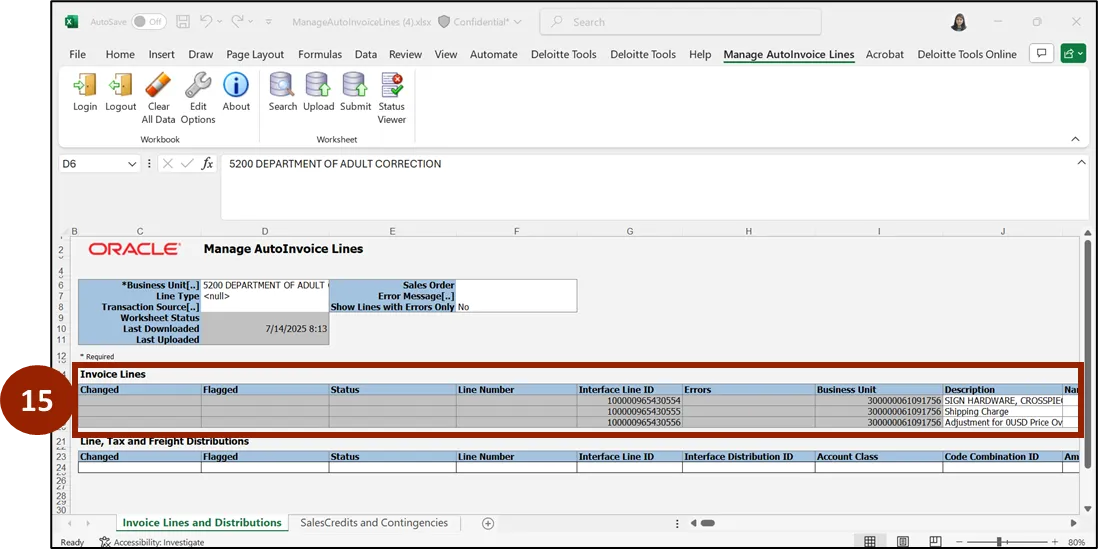
Step 15. The sheet displays the errors that must be resolved before the sales order can be converted into an invoice.
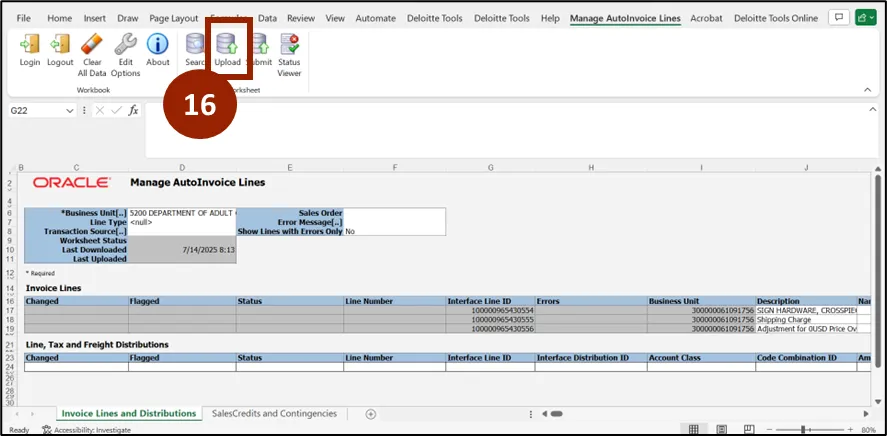
Step 16. After updating the errors, click Upload.
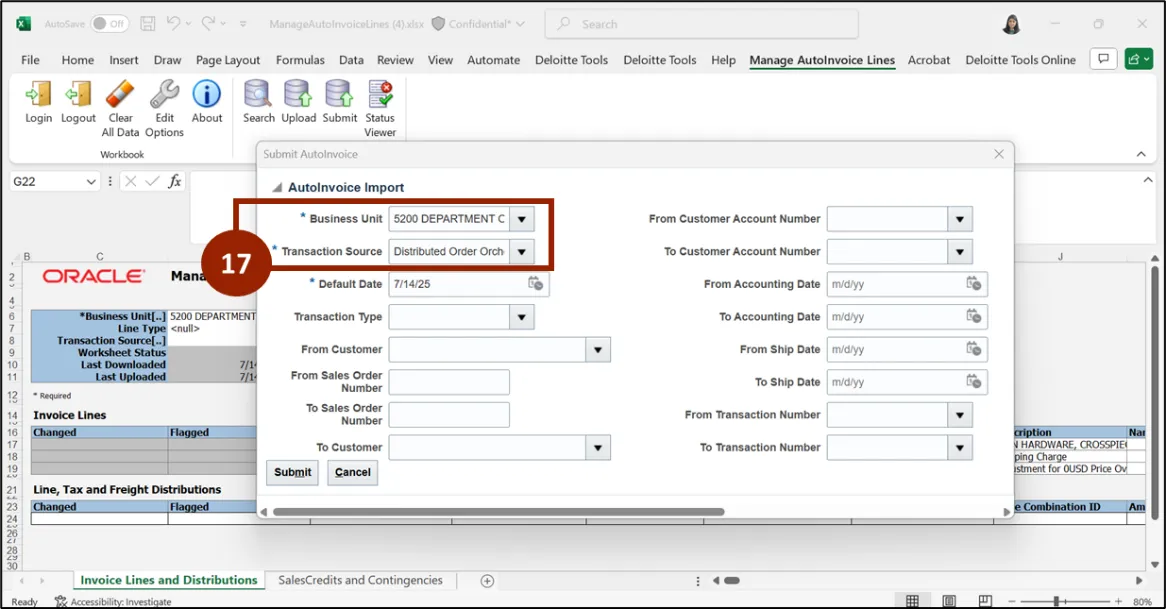
Step 17. To submit the AutoInvoice, select 5200 Department of Adult Correction as the Business Unit and Distributed Order Orchestration as the Transaction Source.
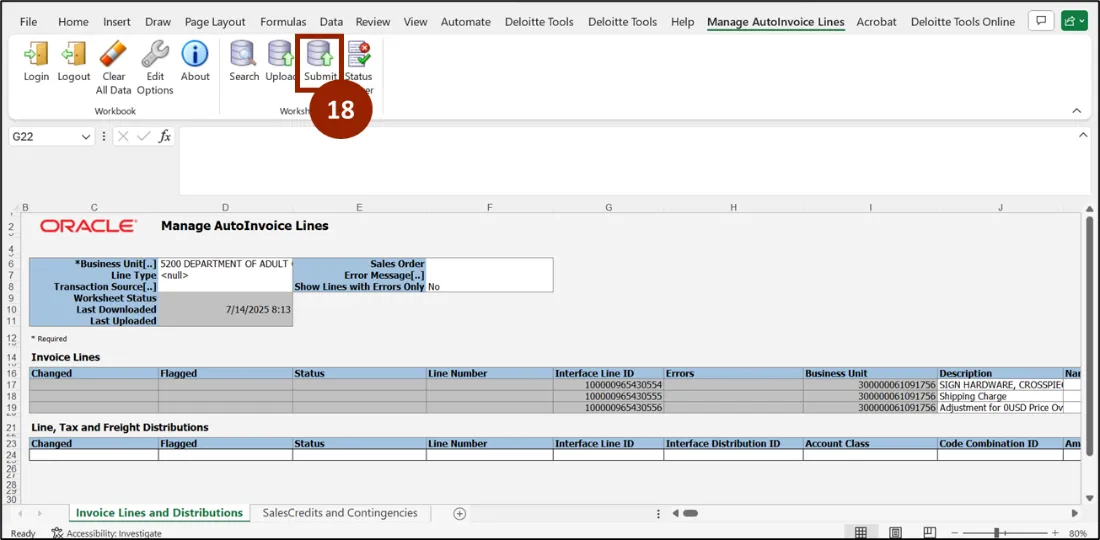
Step 18. Click Submit to finalize the sales order.
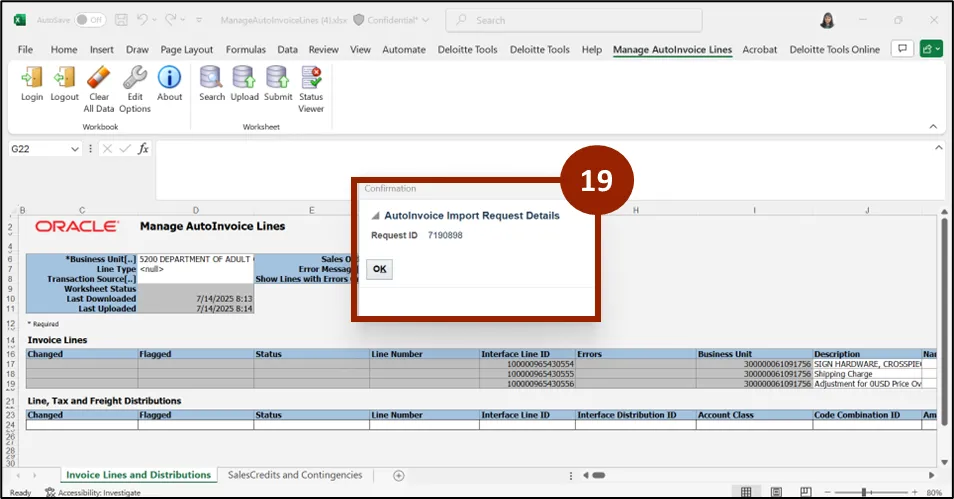
Step 19. A confirmation message will appear indicating successful submission. Select OK.
Wrap-Up
NCFS users can reference the Manage Autoinvoice Lines using the steps above.
Additional Resources
- Instructor Led Training (ILT)