Purpose
The purpose of this Quick Reference Guide (QRG) is to provide a step-by-step explanation on how to Mass Update the Inventory Item. This includes updating the item status to Active or Inactive for Inventory Items using a spreadsheet in the North Carolina Financial System (NCFS).
Introduction and Overview
This QRG explains how to mass update inventory items status to Active or Inactive. By updating the item status for an inventory item, certain transactions can or cannot be performed with the item. The Item Maintenance user role (NC Item Maintenance JR) will have access to update the Inventory Item Status via Spreadsheet. If an Item has previous inventory transaction activities of any kind, then the item cannot be disassociated, and the item status needs to be made as inactive in the Inventory Organization(s).
Updating the Inventory Item Status via Spreadsheet
To update an inventory item status in NCFS, please follow the steps below. There are 47 steps to complete this process.
Step 1. Log in to the NCFS portal with your credentials to access the system.
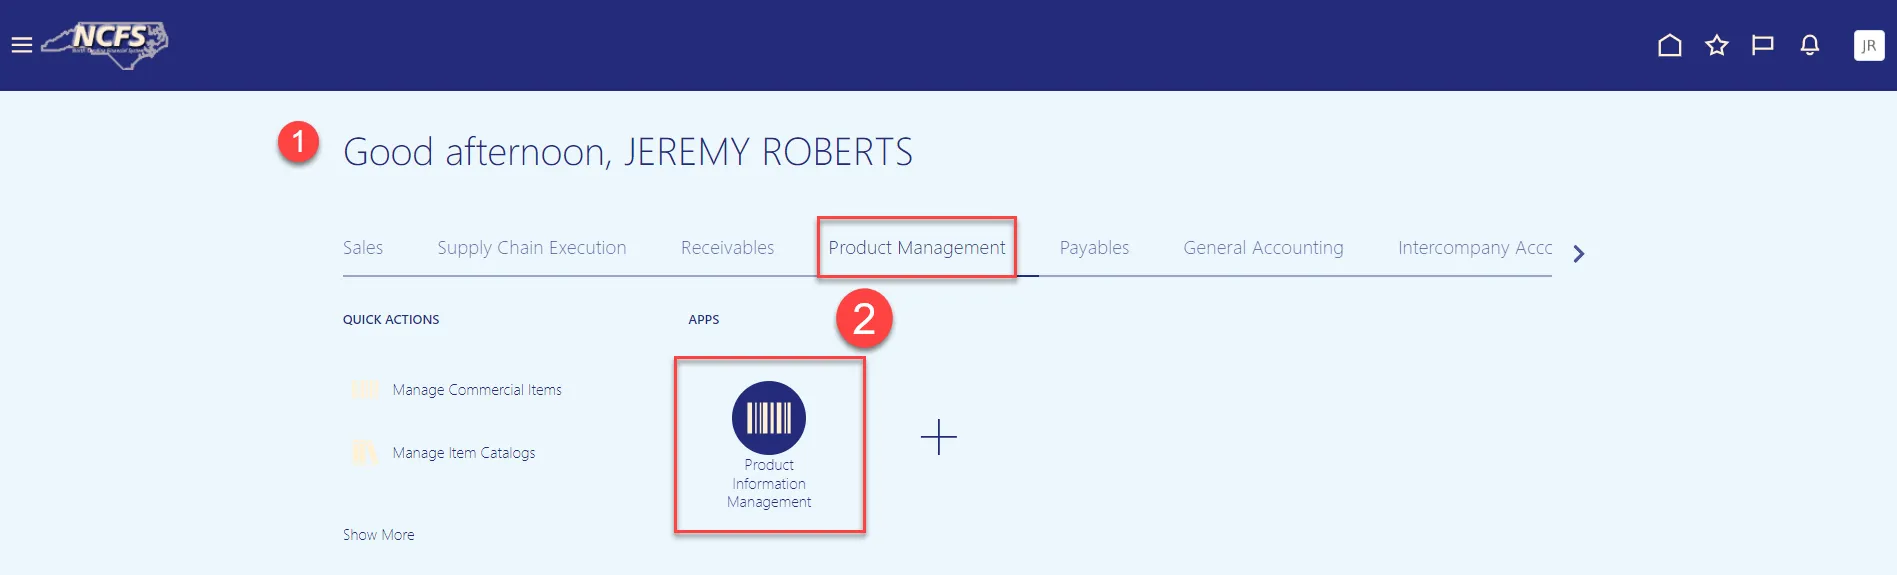
Step 2. On the Home page, under the Product Management tab, click the Product Information Management app.
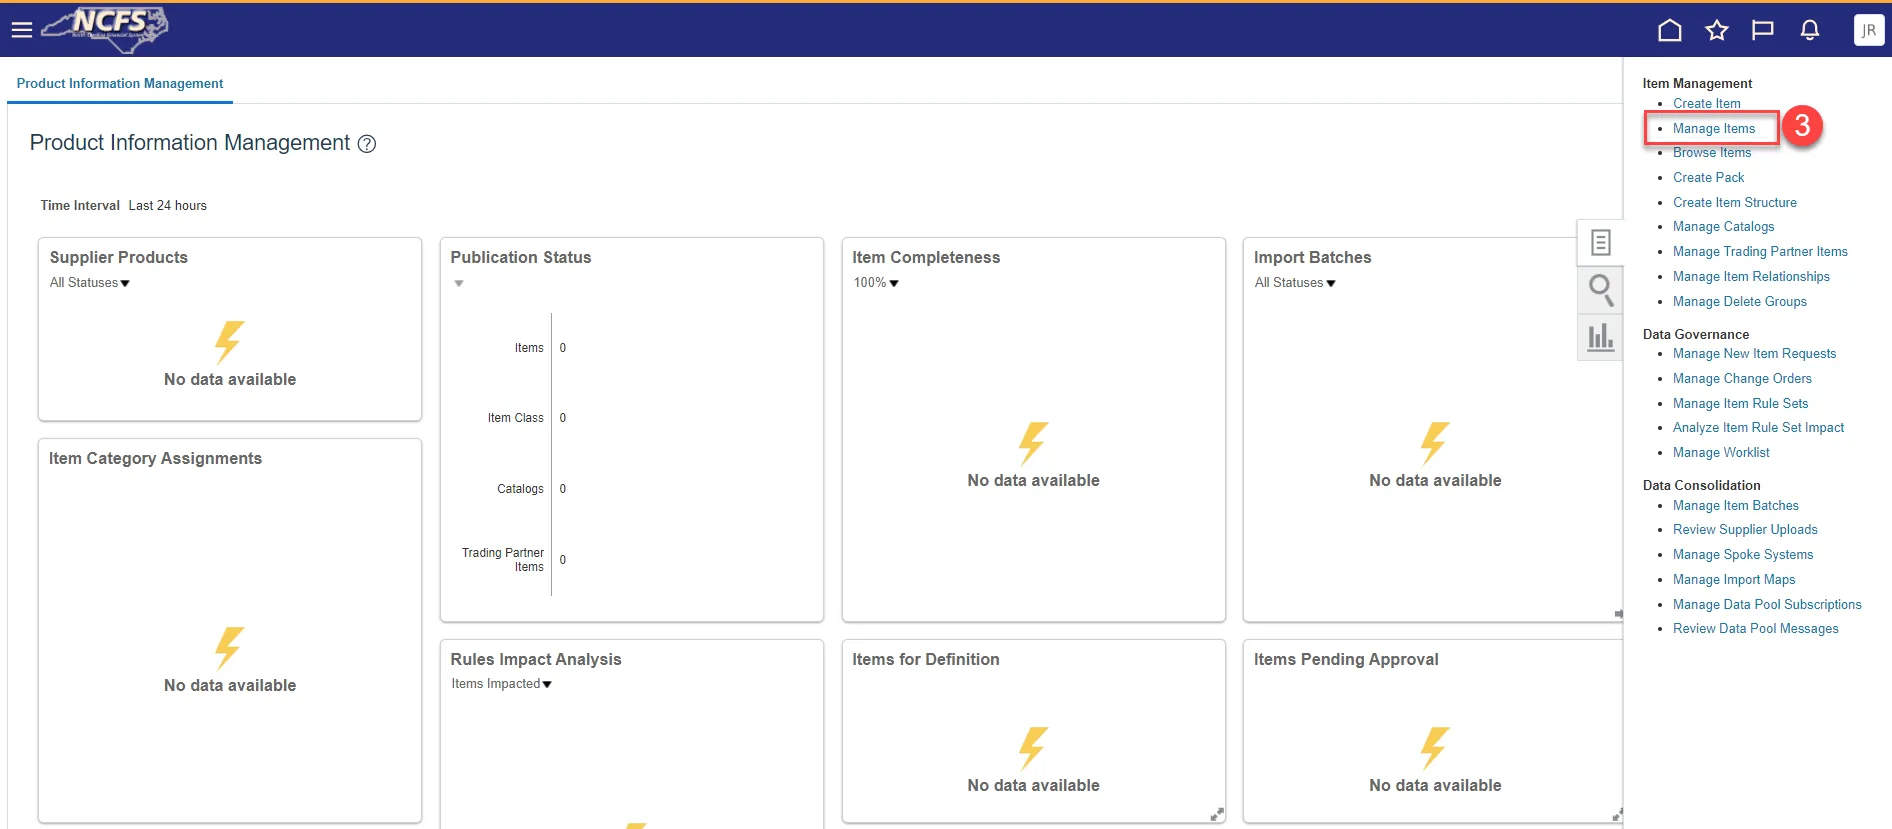
Step 3. Under the Tasks menu, click Manage Items.
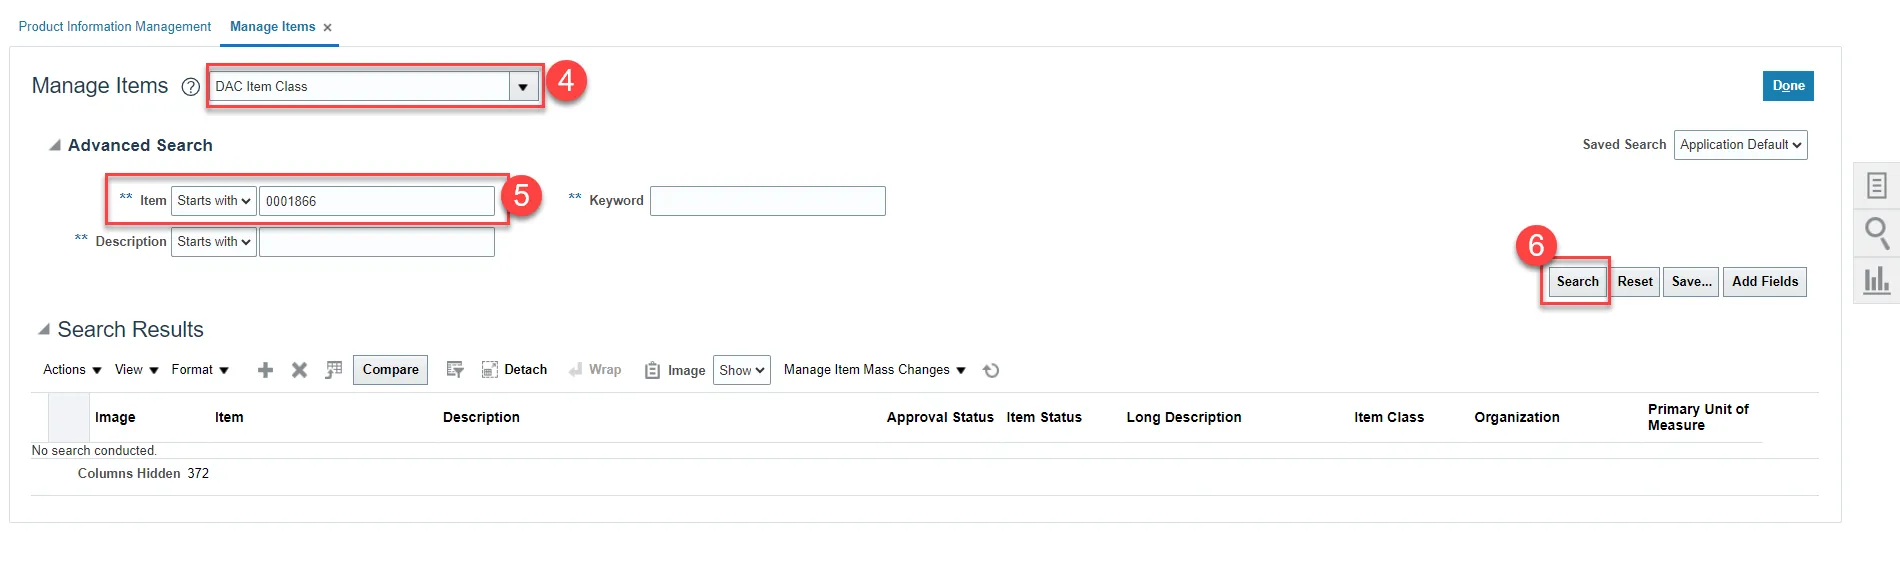
Step 4. Select the Item Class for your Business Unit.
Step 5. Enter Item number in the Item field.
Step 6. Click the Search button.
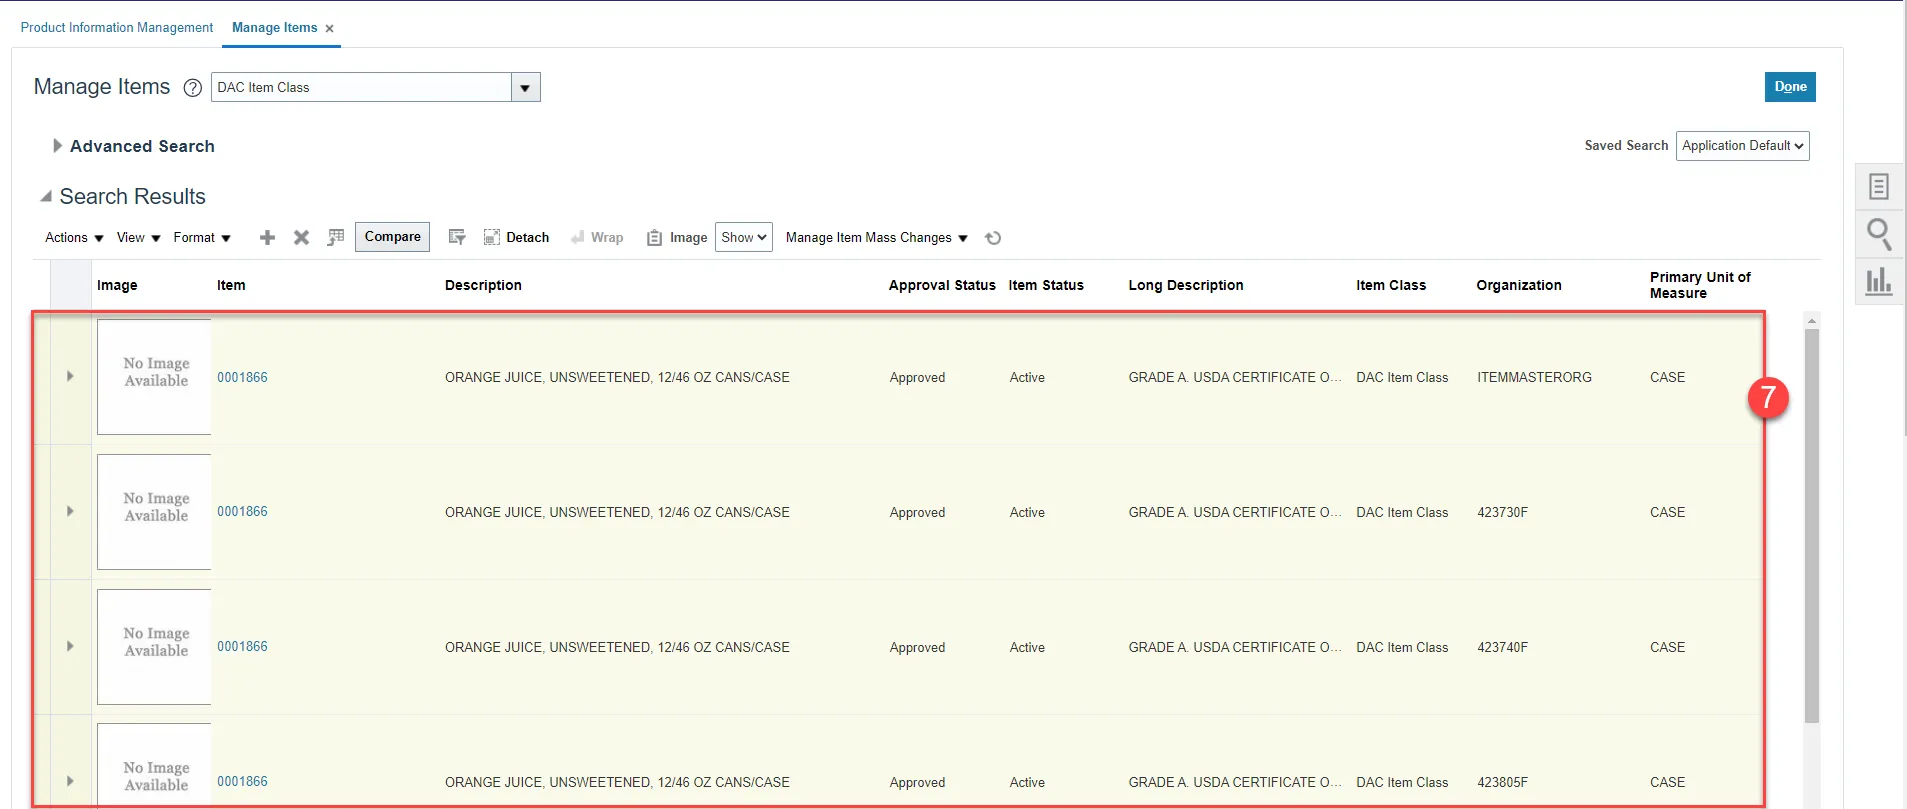
Step 7. Click on a row and to select all records. Use Ctrl+A on the keyboard.
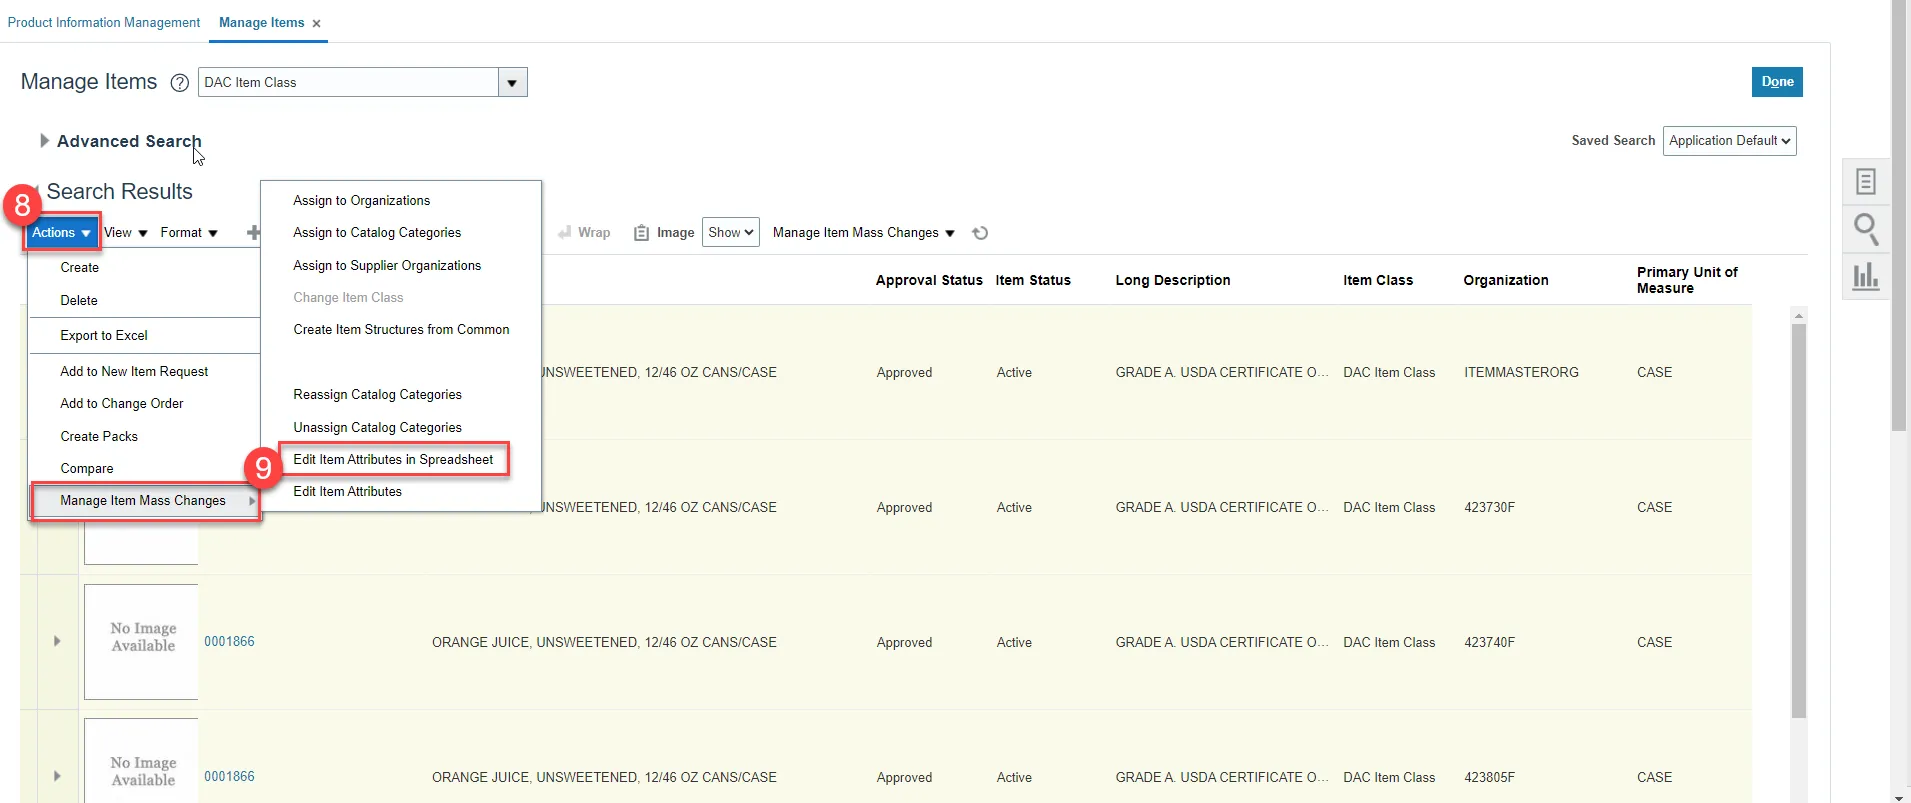
Step 8. Click on Actions.
Step 9. Select Manage Item Mass Changes and then select Edit Item Attributes in Spreadsheet.
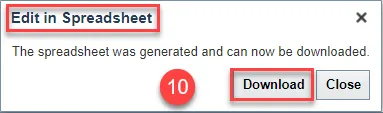
Step 10. An Edit in Spreadsheet window will appear. Click the Download button and save the spreadsheet to a local folder on your computer. DO NOT OPEN SPREADSHEET AT THIS STEP.
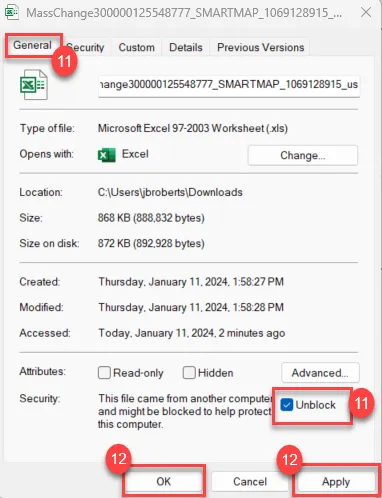
Step 11. Once the spreadsheet is downloaded, before opening the file, select the spreadsheet on your computer and right-click the file and select Properties.
Step 12. Under the General tab click the Unblock checkbox to unblock security.
Step 13. Click the Apply button and then click the OK button.
Step 14. Open the spreadsheet from your computer.
Step 15. Click Enable Content on the Excel spreadsheet if necessary.

Step 16. Work will now take place inside the Excel spreadsheet.
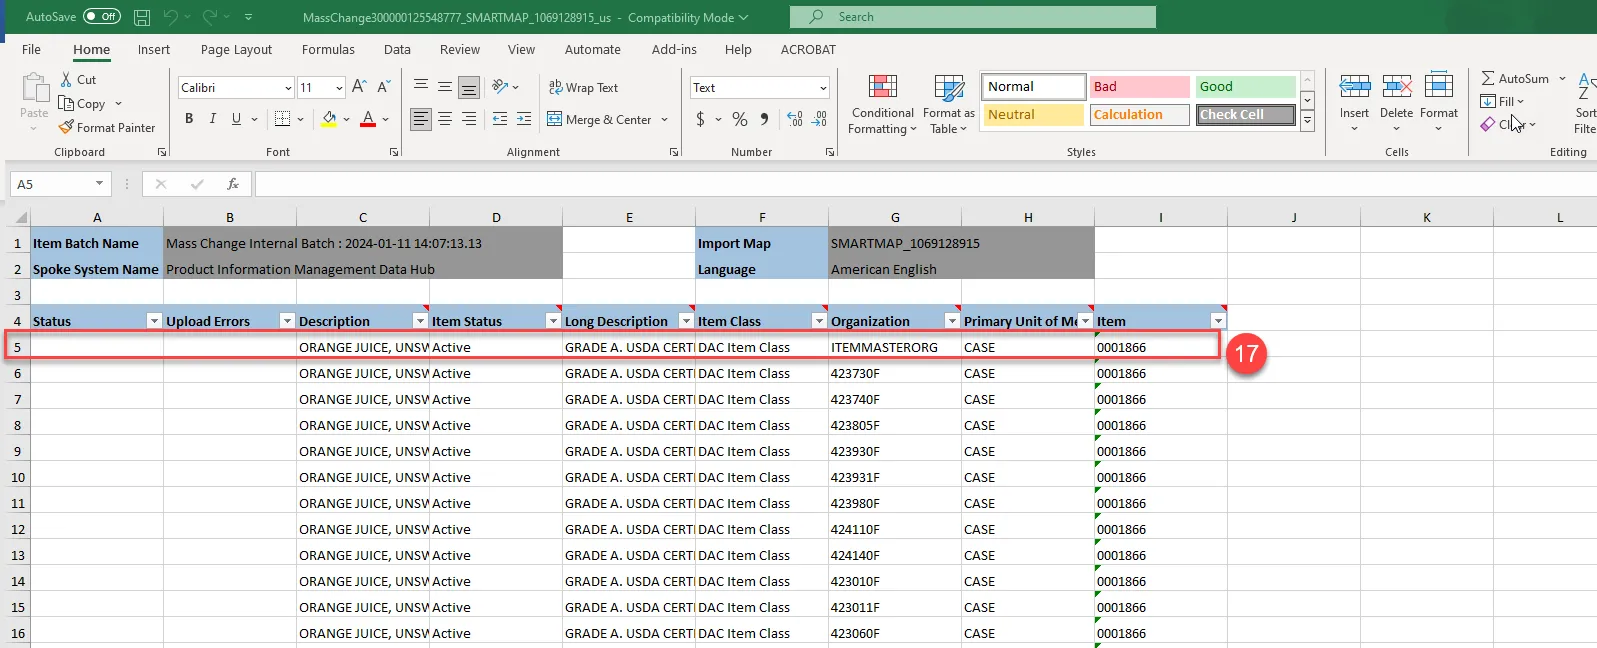
Step 17. Remove the rows for any Organizations you wish to keep the item status active for. If inactivating the item for all Organizations, remove the row for ITEMMASTERORG from the file which does not require item status update. By Right clicking on the row and selecting delete.
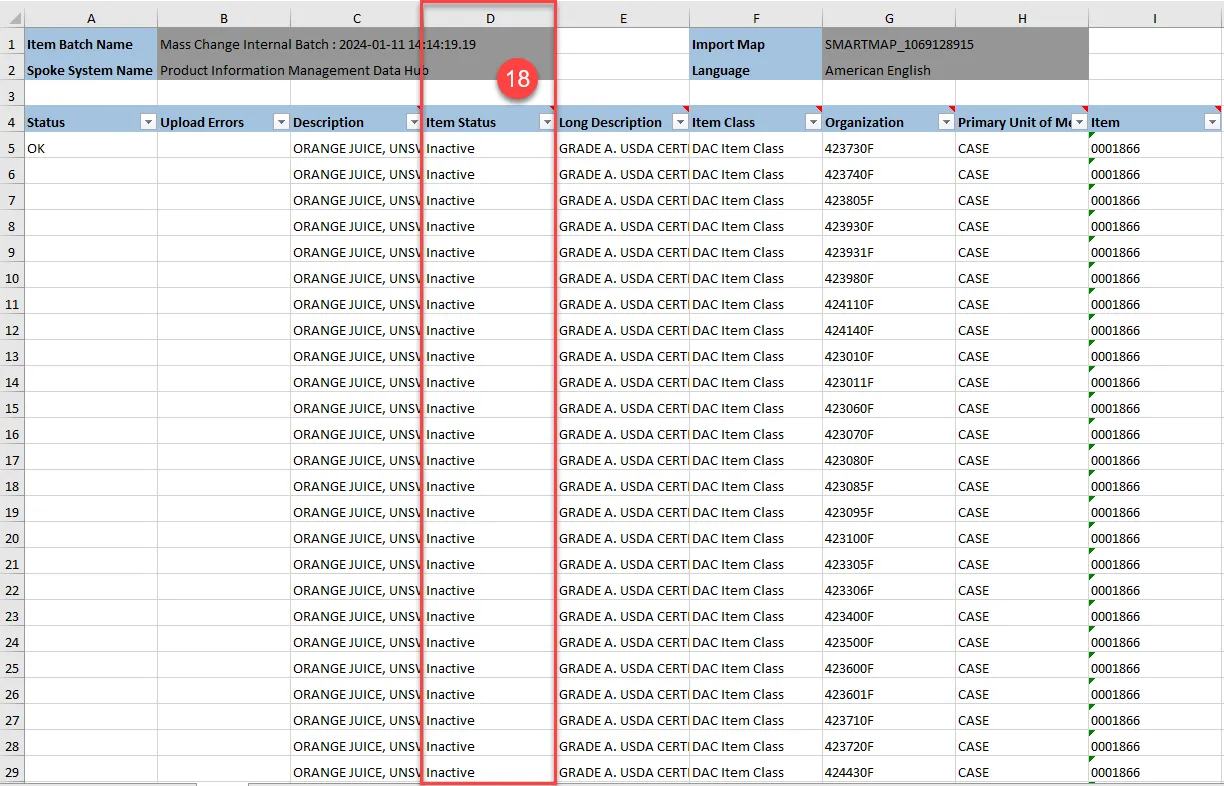
Step 18. Update the status to Inactive or Active in column D for each row desired for status updating.
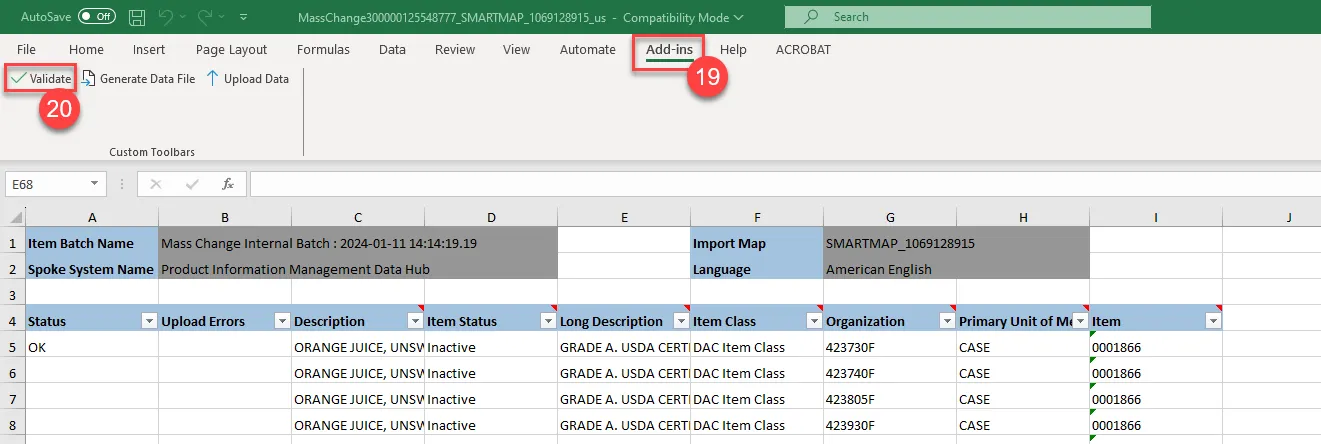
Step 19. Click the Add-ins menu in Excel.
Step 20. Click the Validate option.
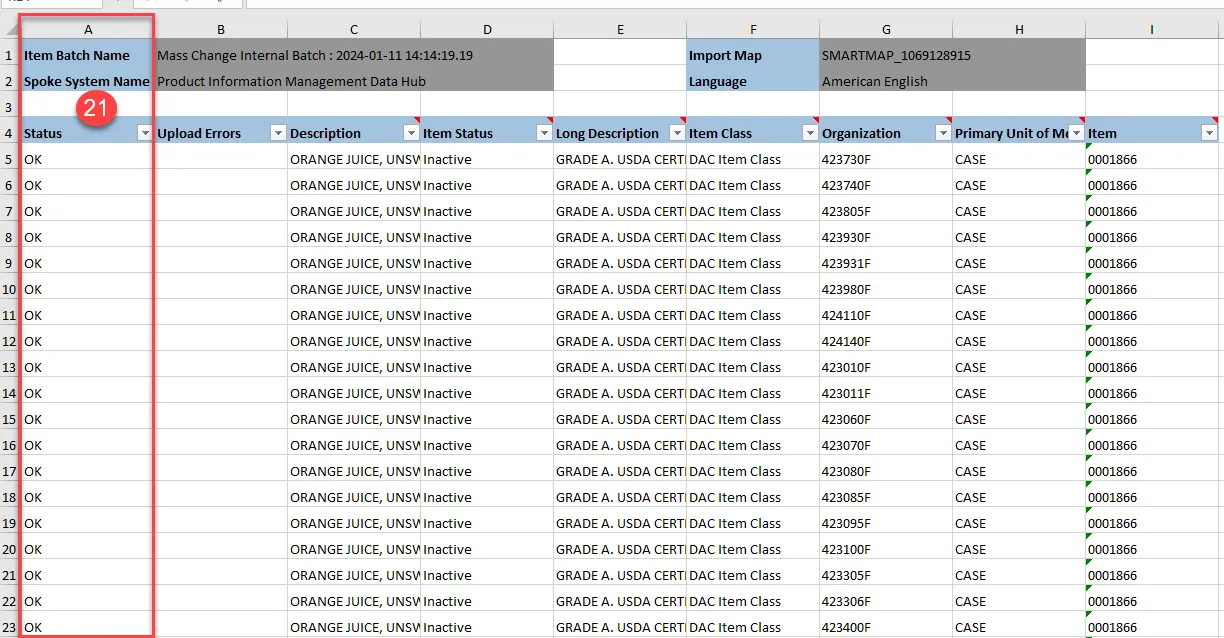
Step 21. The Status in Column A will update to OK.
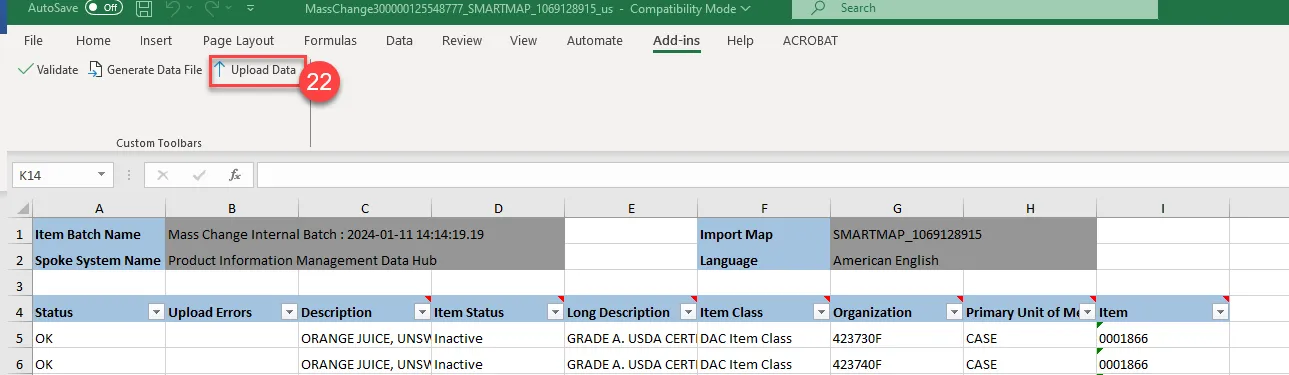
Step 22. Click Upload Data under Add-ins in Excel.
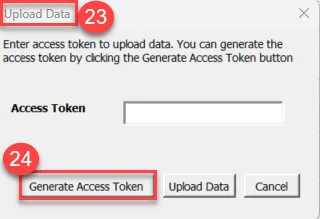
Step 23. An Upload Data window will appear.
Step 24. Click Generate Access Token.
Step 25. This will navigate you to NCFS Generate Access Token screen.
Step 26. Click on Generate and Copy Access Token button.

Step 27. If successful, you will receive the following message:

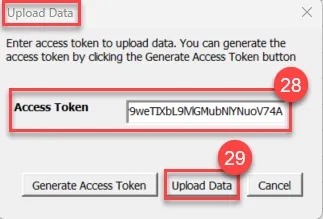
Step 28. Go back to the Excel spreadsheet Upload Data Window and click in the Access Token field and click Ctrl+P to paste the generated access token.
Step 29. Click the Upload Data button.
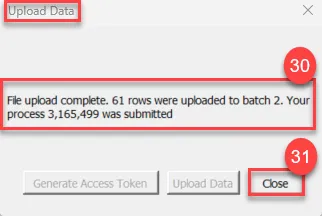
Step 30. Once the file is finished downloading, the Upload Data window will populate the below message, letting you know the file upload is complete.
Step 31. Click the Close button.
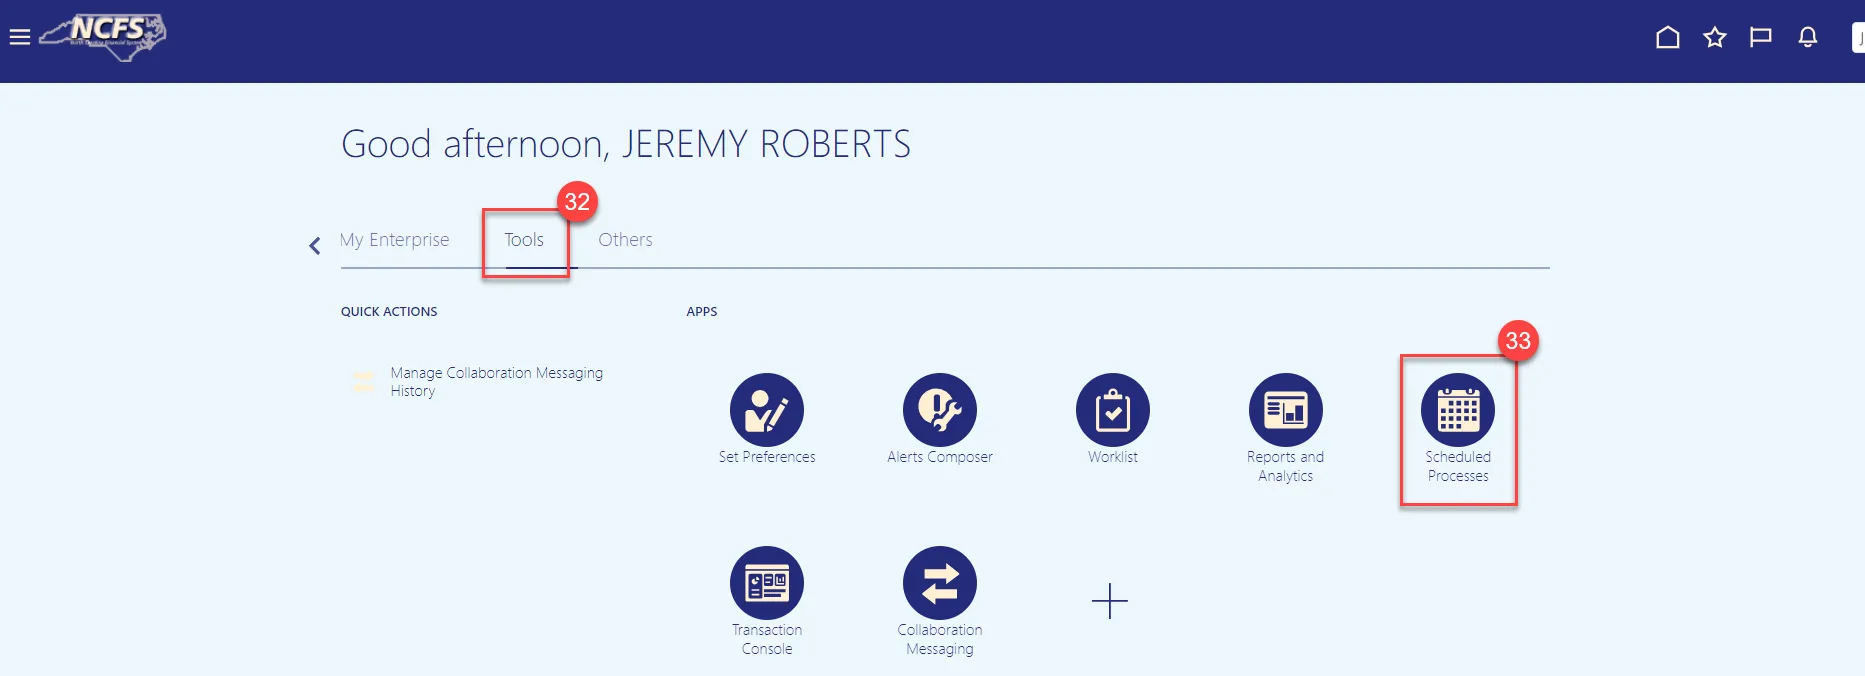
Step 32. Go to the NCFS Home screen and select Tools.
Step 33. Click the Scheduled Processes app.
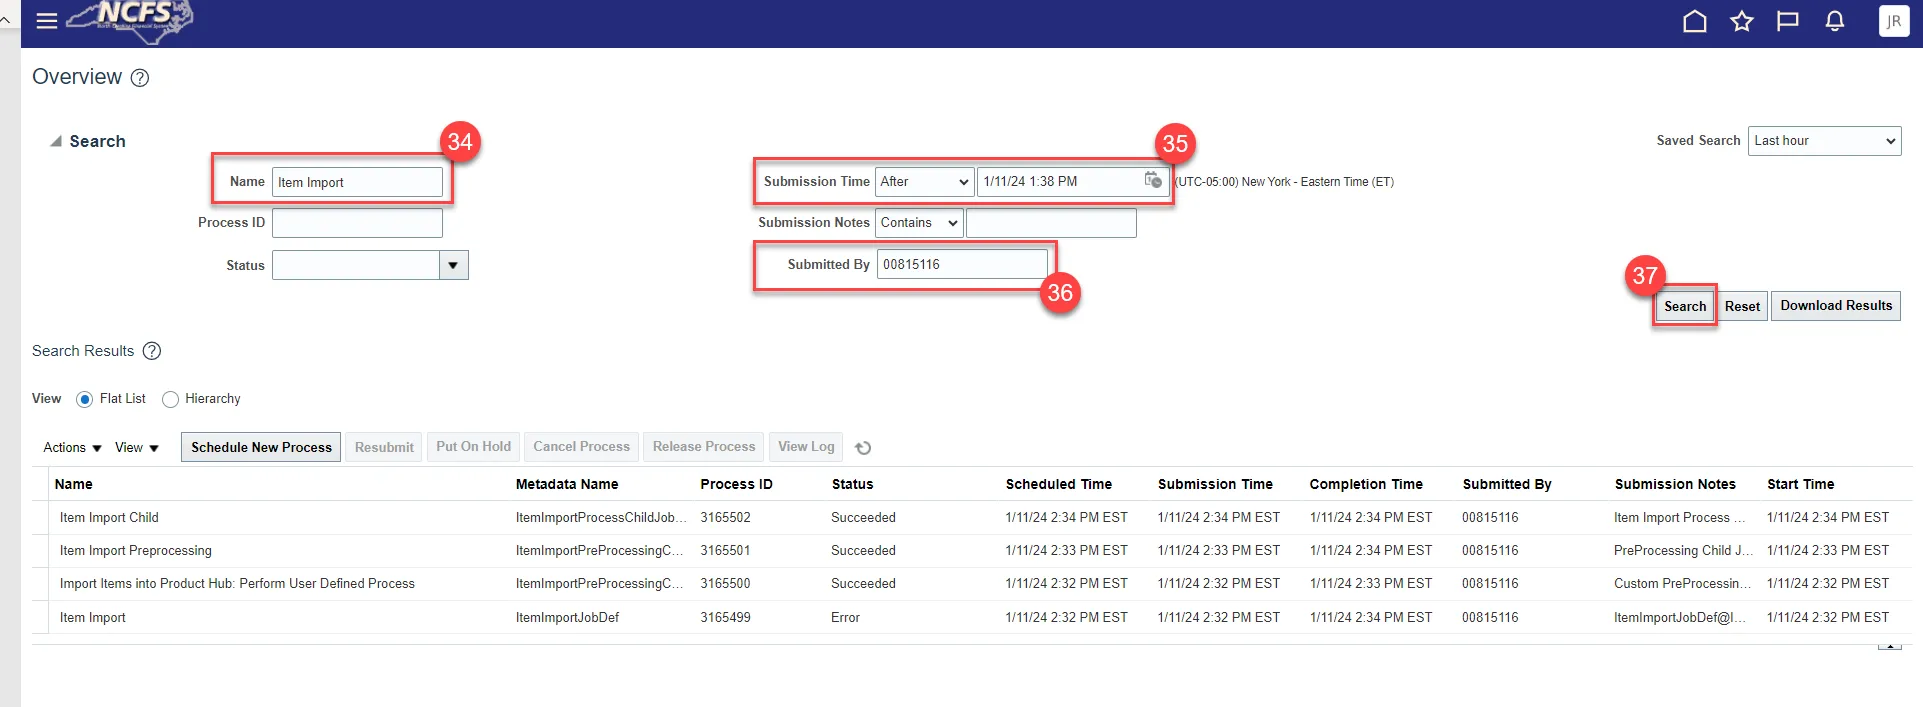
Step 34. Enter Item Import in the Name field.
Step 35. Enter your Personnel Number (PERNR) in the Submitted by field.
Step 36. Check the Submission Time.
Step 37. Click the Search button.
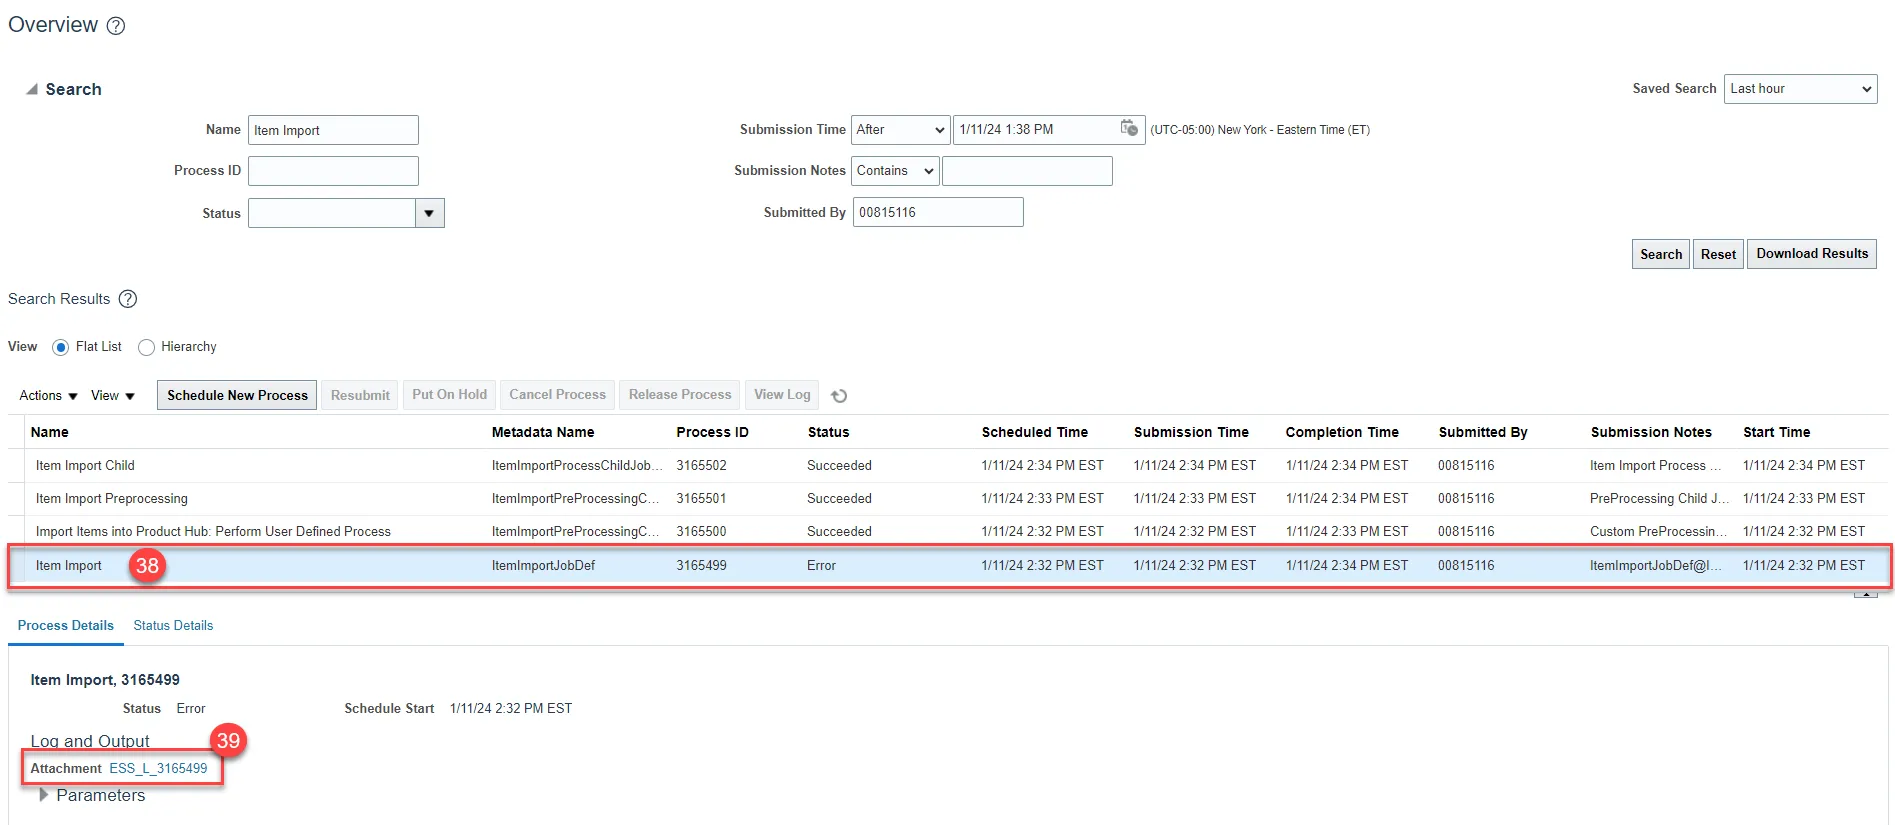
Step 38. Click on the Item Import row.
Step 39. Click on the Attachment and download the attachment if the process is in error to identify failed records.
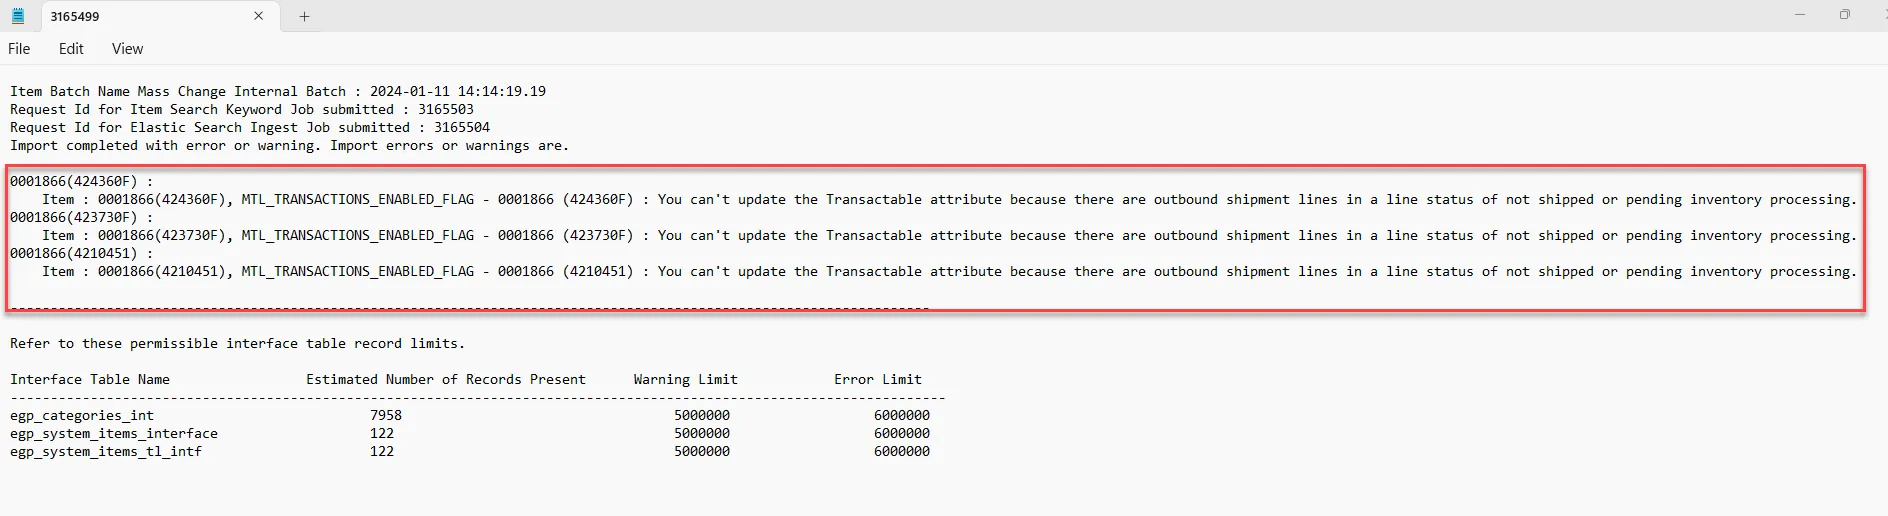
Step 40. Error details will be displayed in the file. The error messages will inform you which warehouse(s) the item was not updated for due to pending inventory processing.
Step 41. Navigate back to Product Information Management and Manage Items.
Step 42. Select the Item Class for your Business Unit.
Step 43. Enter the Item Number in the Item field.
Step 44. Click the Search button to display the item information.
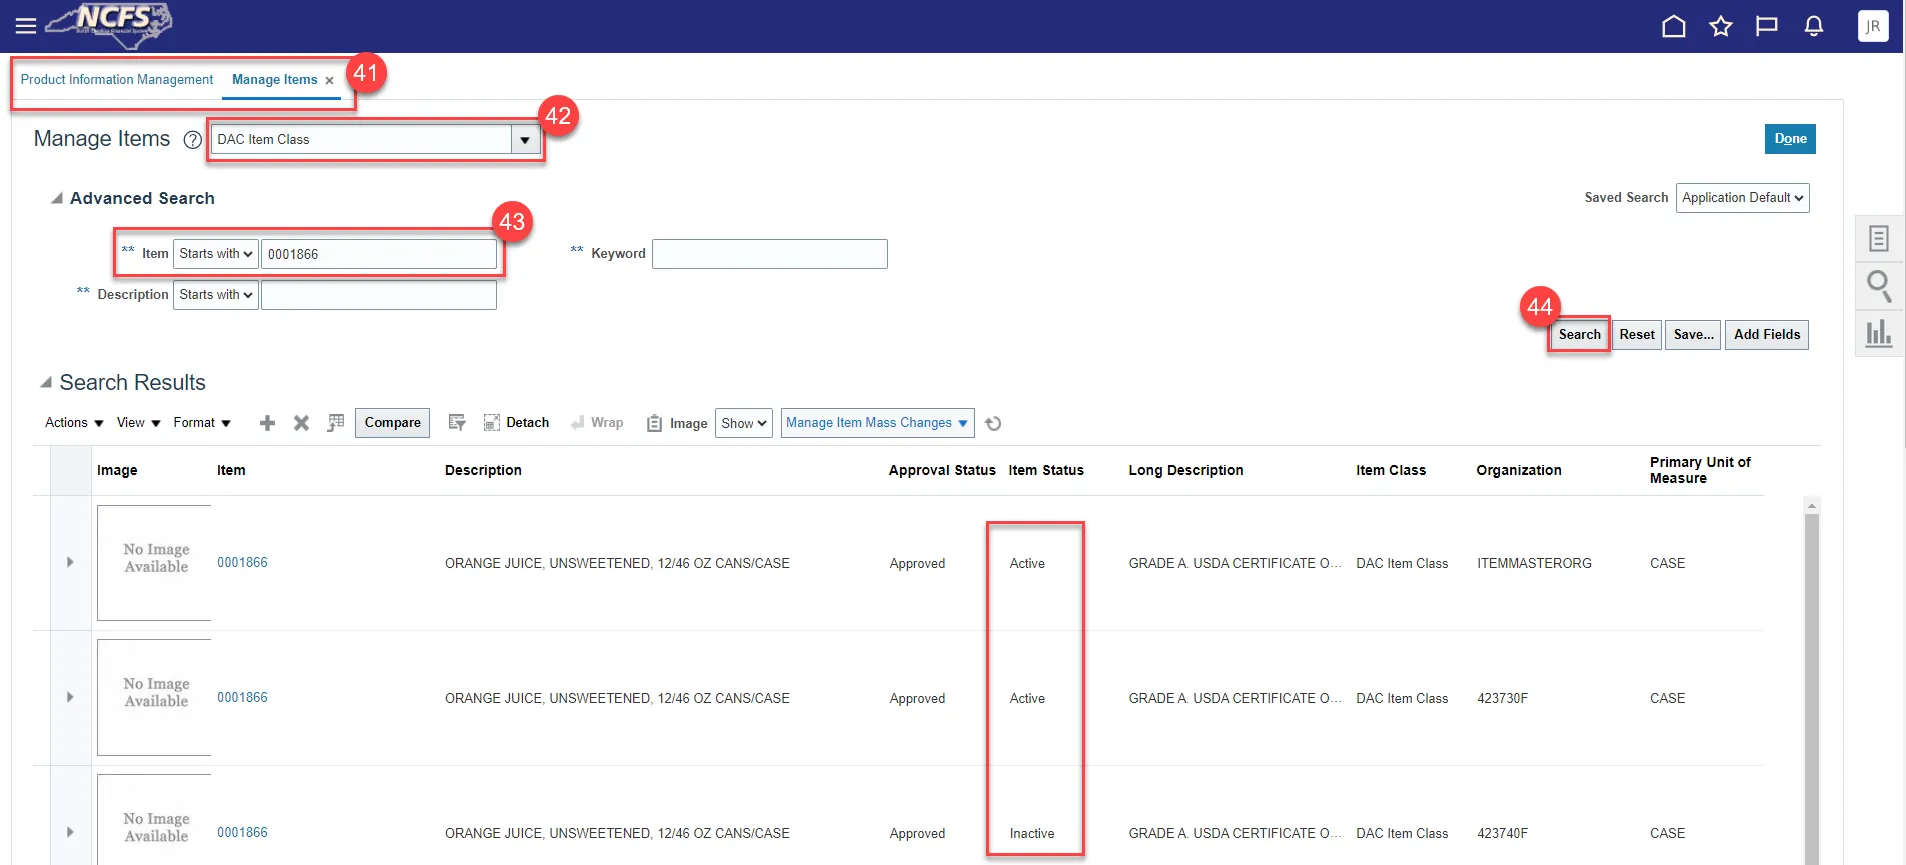
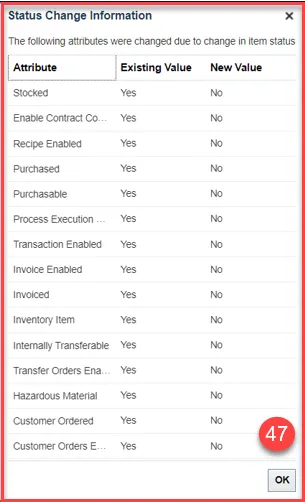
Step 45. The below item attributes will update to No when an item status is made inactive from active for Inventory Organizations.
IMPORTANT NOTE: THE INVENTORY ITEM STATUS SHOULD BE MADE AS INACTIVE IN ALL INVENTORY ORGANIZATIONS BEFORE MAKING THE ITEM INACTIVE IN THE MASTER ORGAINIZATIONS.
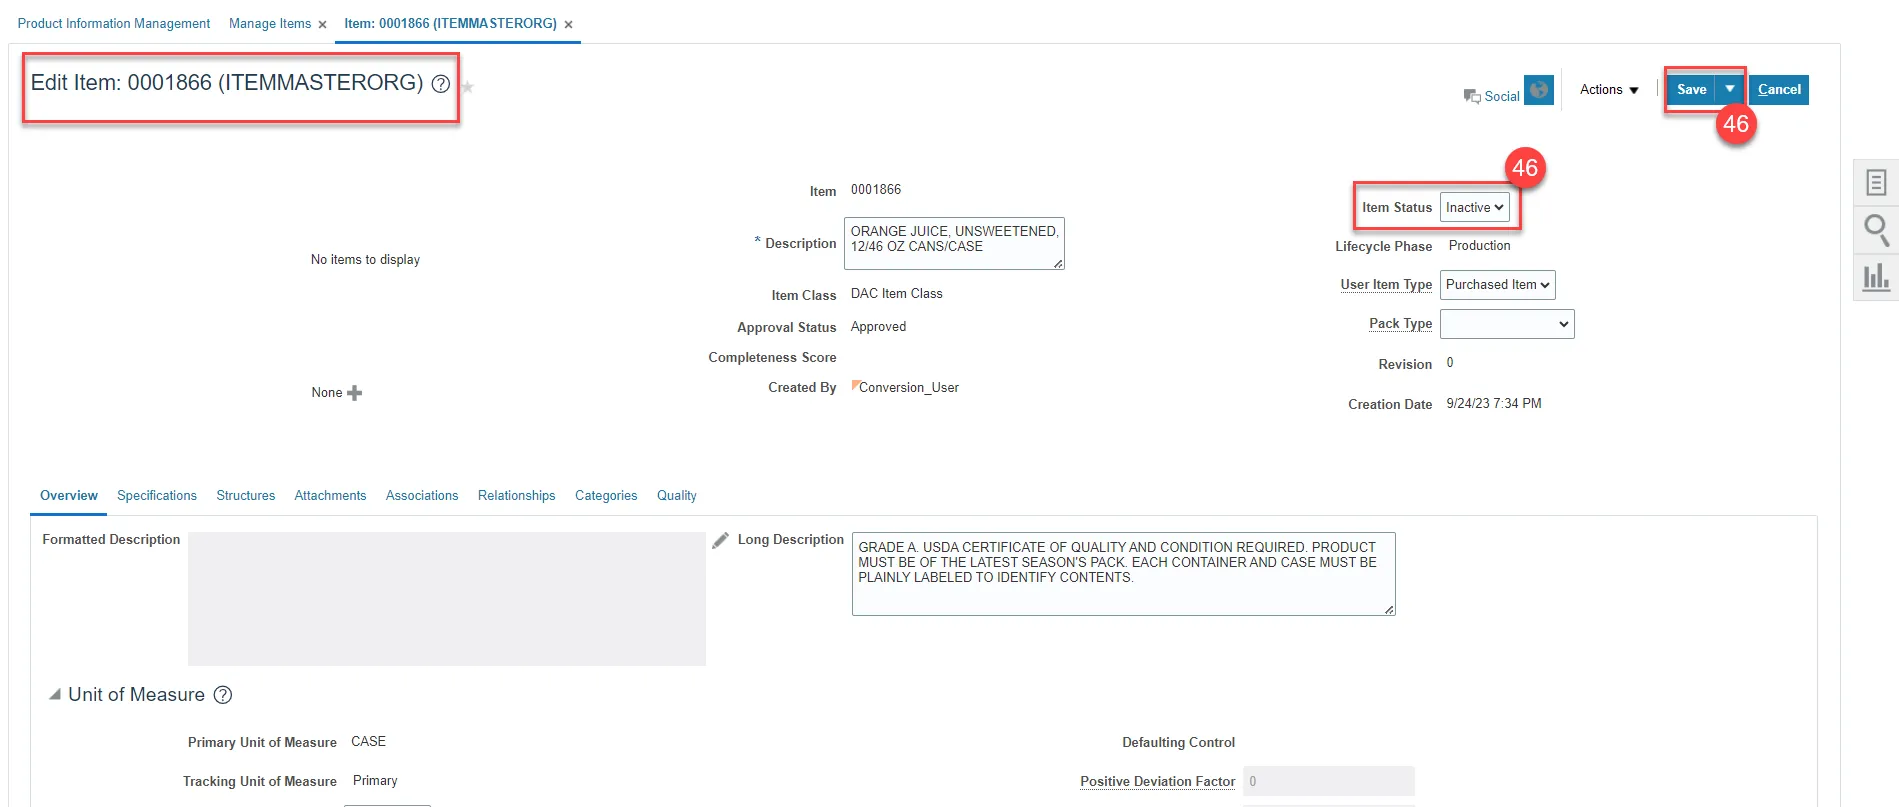
Step 46. The last step, once all item Organizations are inactive, is to make the ITEMMASTERORG inactive. Update Item Status to Inactive and click Save.
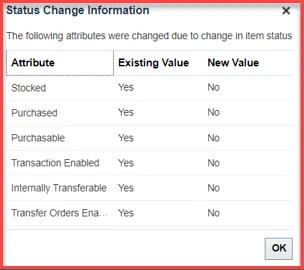
Step 47. The below item attributes will update to No when an item status is made inactive from active for Master Organizations.
Wrap-Up/Important Notes
This QRG explains how to mass update inventory items status to Active or Inactive. By updating the item status for an inventory item, certain transactions can or cannot be performed with the item.
- NCFS will allow an item to be made inactive even if there is an on-hand quantity existing. The only way to remove the on-hand quantity on an inactive item(s) is by reactivating the items at the Master Org level first and then at the Org level.
- NCFS will not allow you to change an item status to inactive in Source Org’s if there are any outbound shipment lines or open transfer order(s), but will allow to make it as inactive in Destination Org.
- Inactivating of items at NI orgs will happen only when items are inactivated at item master level. If the agency decides to reactivate the item in Item Master Org and NI Org, user (item maintenance role) will be trained to change the inventory asset value to ‘No’ in NI Org.
- User should check if there are any open transfer order supply in destination org before making item as inactive in destination org. Review Item Demand and Supply screen can be used.
- If user doesn’t want to see inactive item in min-max planning report, planning method attribute needs to be updated manually to ‘Not Planned’ after item is made inactive. This could be done through smart spreadsheet as well.
- If user doesn’t want to see inactive item in cycle counting, item attribute cycle count enabled attribute should be set to No. To achieve this, we have made cycle count enabled flag to be controlled at Organization level. The cycle count enabled flag should not be turned to “No” unless the on-hand quantity for item is zero in warehouse. If cycle count discrepancy is found for inactive item, then the item needs to be reactivated to process the adjustments.
- Once an item is made inactive, it will not appear in Inventory Turns Report.
Reports Updated by Item Inactivation
| Report | Inactive Items Included in Report |
|---|---|
| NC Cycle Count Variance Report (RPTIN003) | No |
| NC DAC Food Warehouses Issues & Returns Report (RPTIN018) | Yes |
| NC DAC Produce Distribution Warehouse Issues & Returns Report (RPTIN019) | Yes |
| NC Daily Average Cost Changes Report (RPTIN005) | Yes |
| NC Inventory On-hand Balance Dashboard (RPTIN013) | Yes |
| NC Inventory Negative On-hand Balance Dashboard (RPTIN013) | Yes |
| NC Shipment By Warehouse Report (RPTIN001) | No |
| NC Sub Inventory Item Movement Report (RPTIN010) | No |
| NC Warehouse Activity Register Report (RPTIN008) | No |
| NC Valued Transaction Register Report (RPTIN004) | No |
| NC Quantity Adjustment Details Report (RPTIN009) | Yes |
| NC Inventory Turns and All Items Valuation Report (RPTIN014) | No |
|
NC Pre-Pick Item Availability Report (RPTIN020) NC Open Orders Report (RPTIN006) NC Quantity Backorder Report (RPTIN002) |
User will not be able to change the item status to inactive in source organization in case of any outbound shipment lines or open transfer order lines but will. |
| INT-IN-001 Item Outbound Integration to Ariba | When item status is changed to inactive in Inventory Org, inactive item is sent in delete mode to Ariba. |
Additional Resources
- Virtual Instructor-Led Training (vILT)
- Quick Reference Guides (QRG)