Purpose
The purpose of this Quick Reference Guide (QRG) is to provide a step-by-step explanation of Inventory Transfer Order Deallocation after Pick Confirming the Pick Slip in the North Carolina Financial System (NCFS).
Introduction and Overview
This QRG covers the procedure of deallocating inventory items after the Pick Confirmation process has occurred in NCFS. This procedure will allow warehouses to reduce the quantity being shipped without creating a shipping exception in NCFS. There are two ways to deallocate the quantity being shipped, partially or completely.
Deallocate Transfer Order Quantity Completely
To deallocate a Transfer Order’s quantity completely post Pick Confirmation, please follow the steps below. There are 35 steps to complete this process.
Step 1. Log in to the NCFS portal with your credentials to access the system.
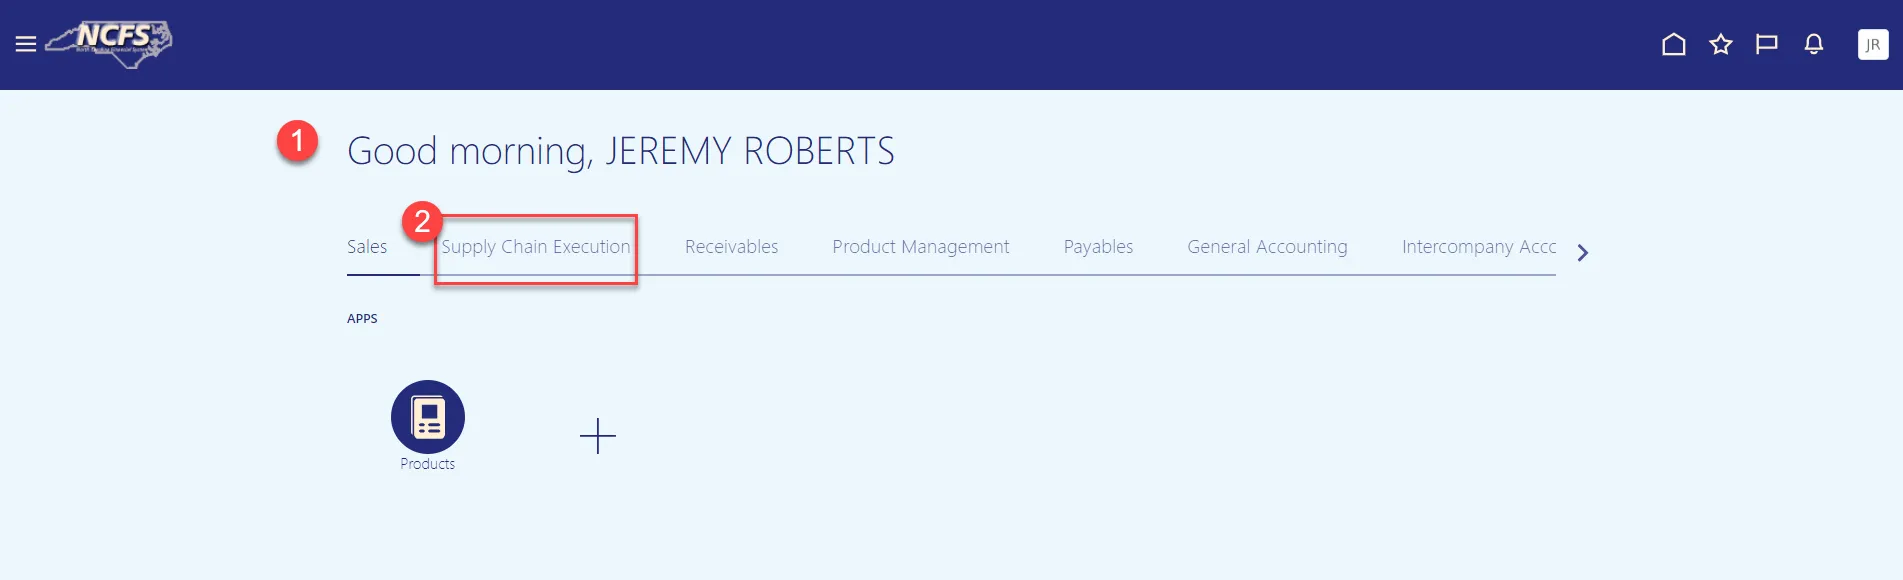
Step 2. On the Home page, click the Supply Chain Execution tab.
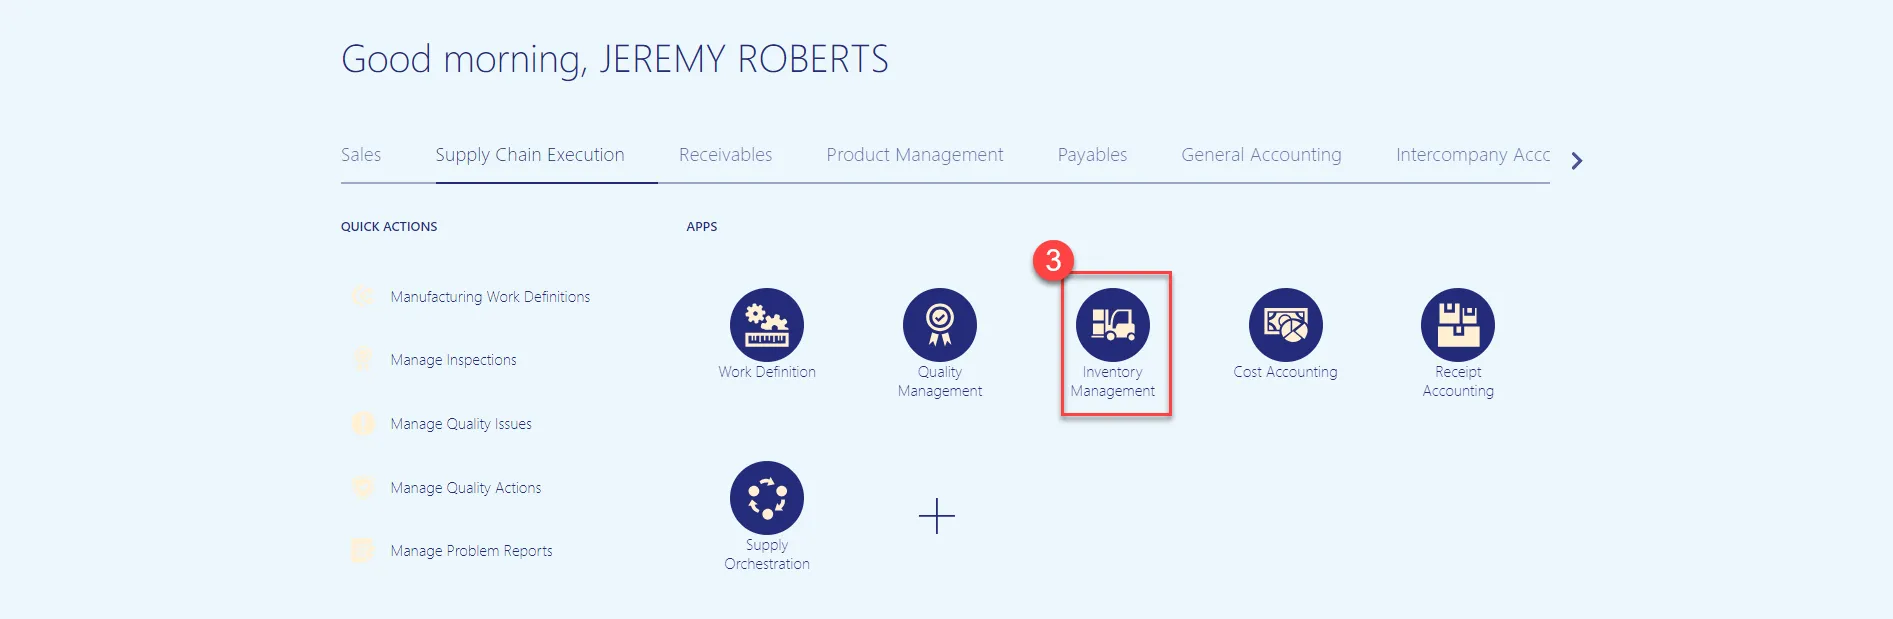
Step 3. Click the Inventory Management tab.
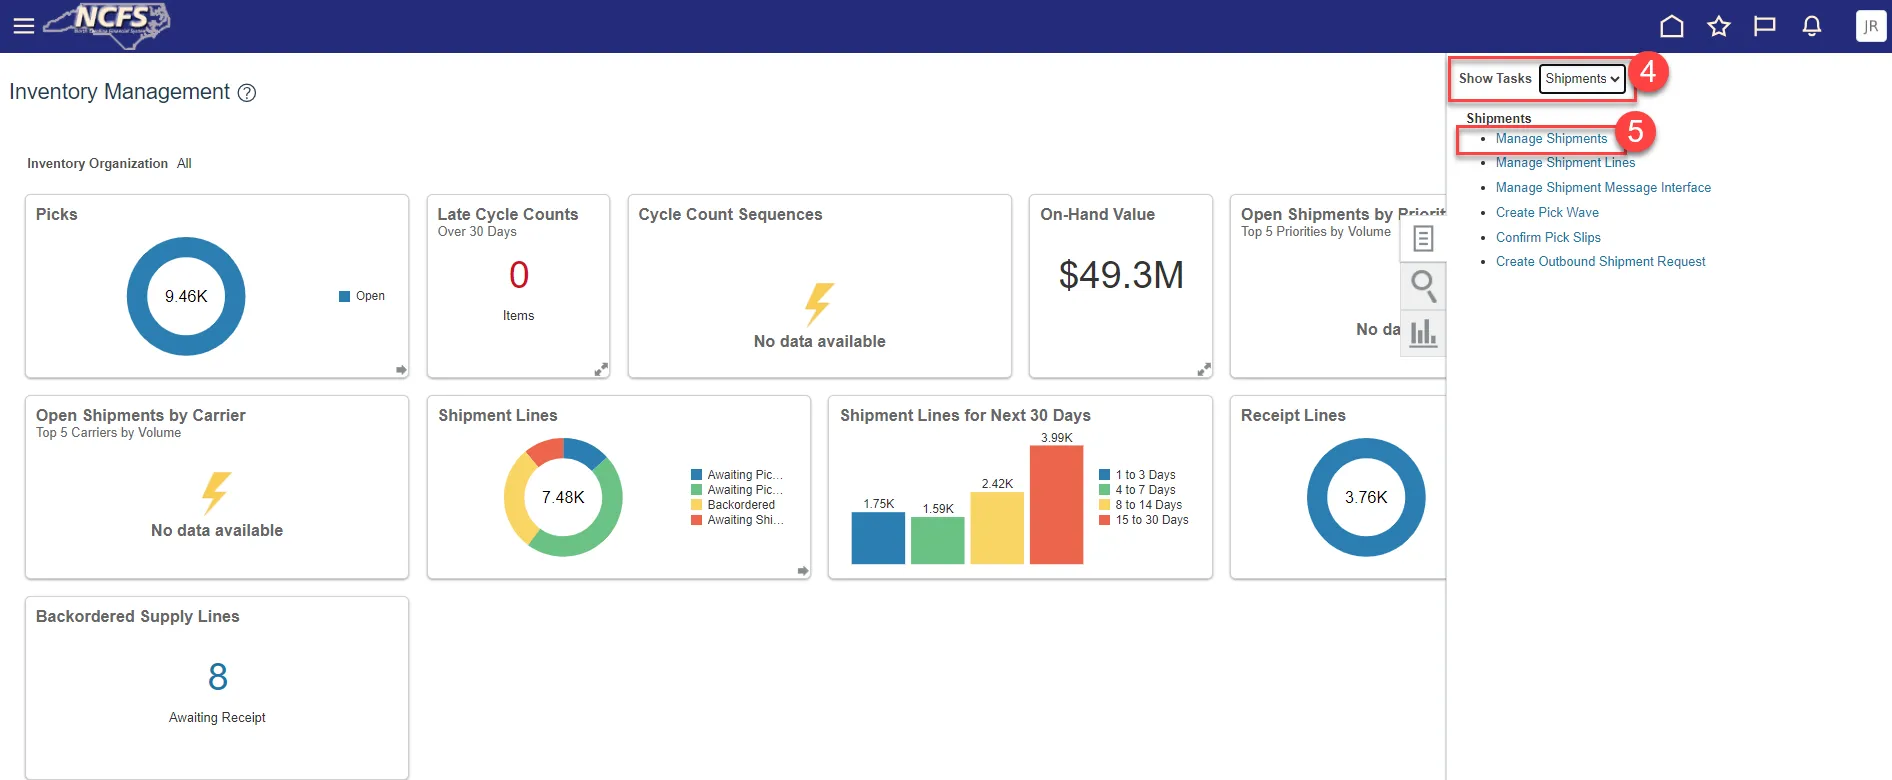
Step 4. Select Shipments from the Show Tasks drop-down menu.
Step 5. Click Manage Shipments task.
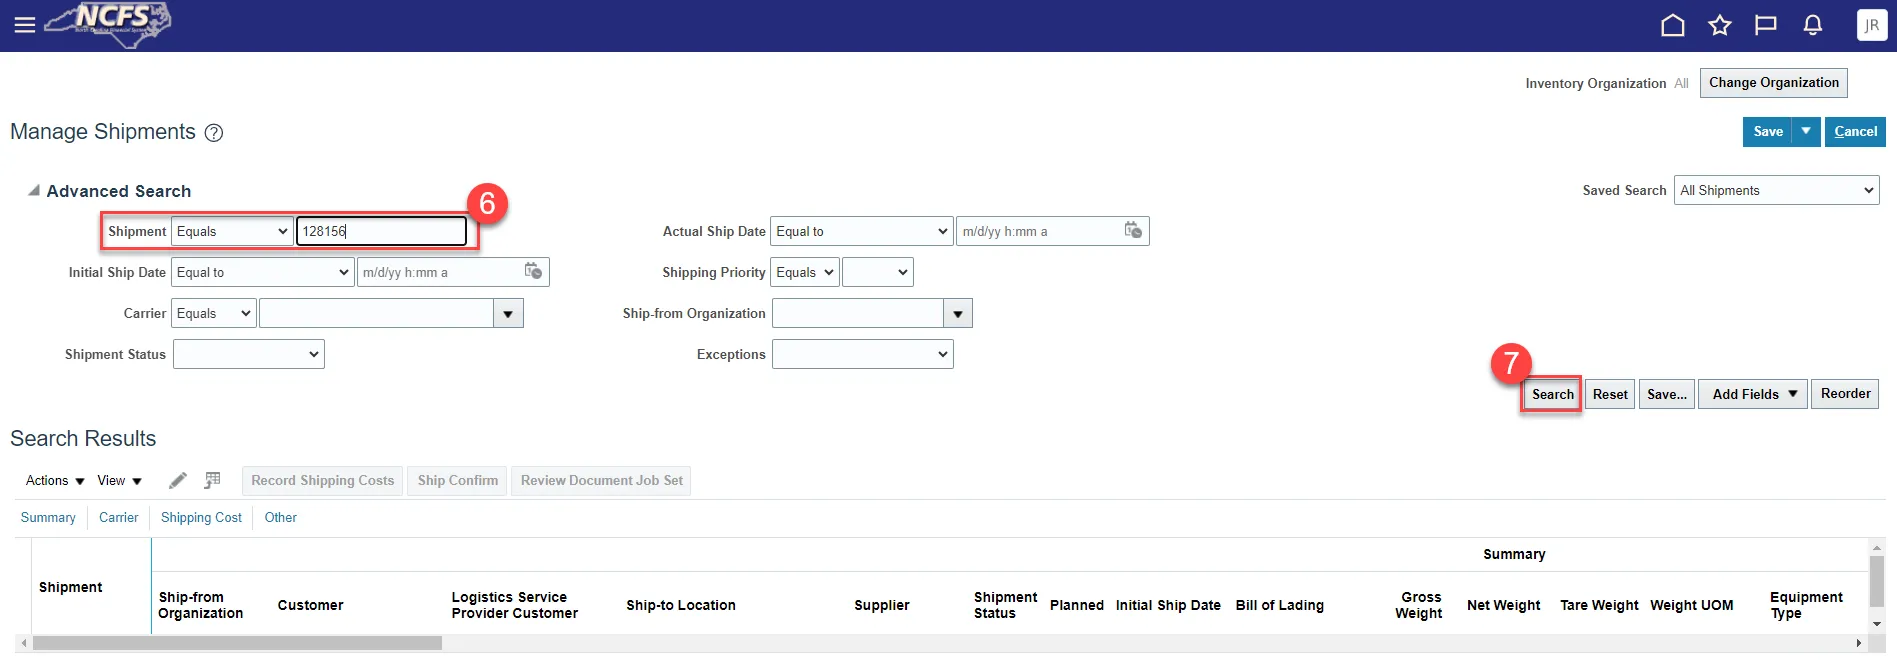
Step 6. Enter the Shipment number in the Shipment field.
Step 7. Click Search button.
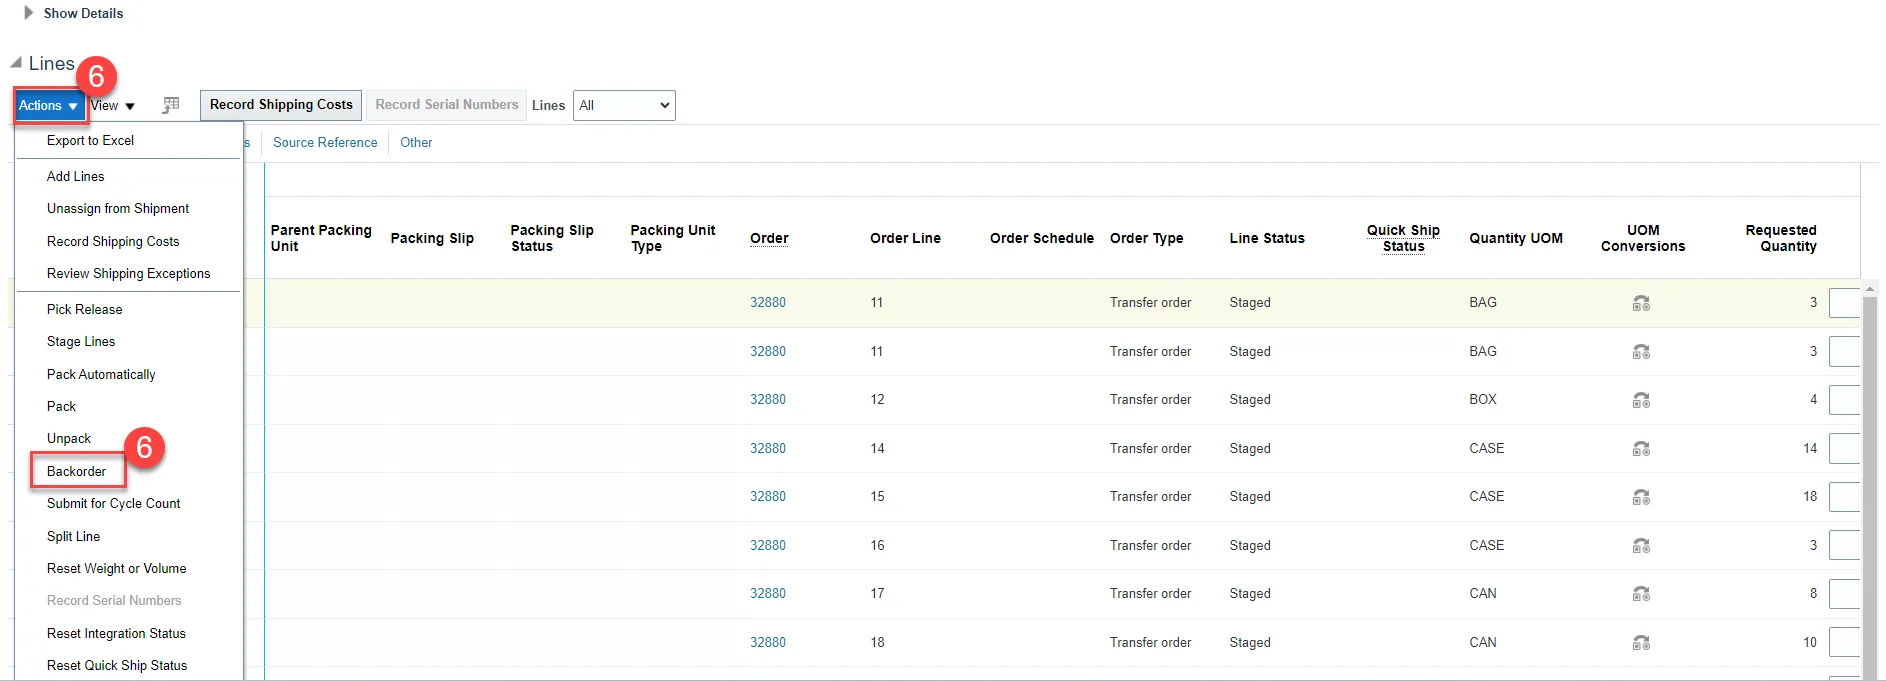
Step 8. Select the Shipment Line for the Item for deallocation.
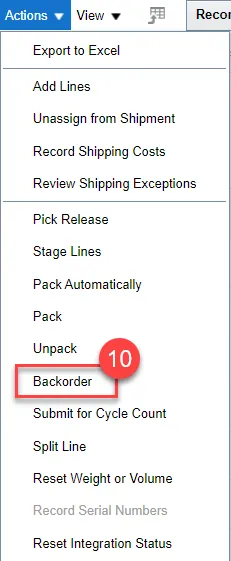
Step 9. Click the Actions drop-down.
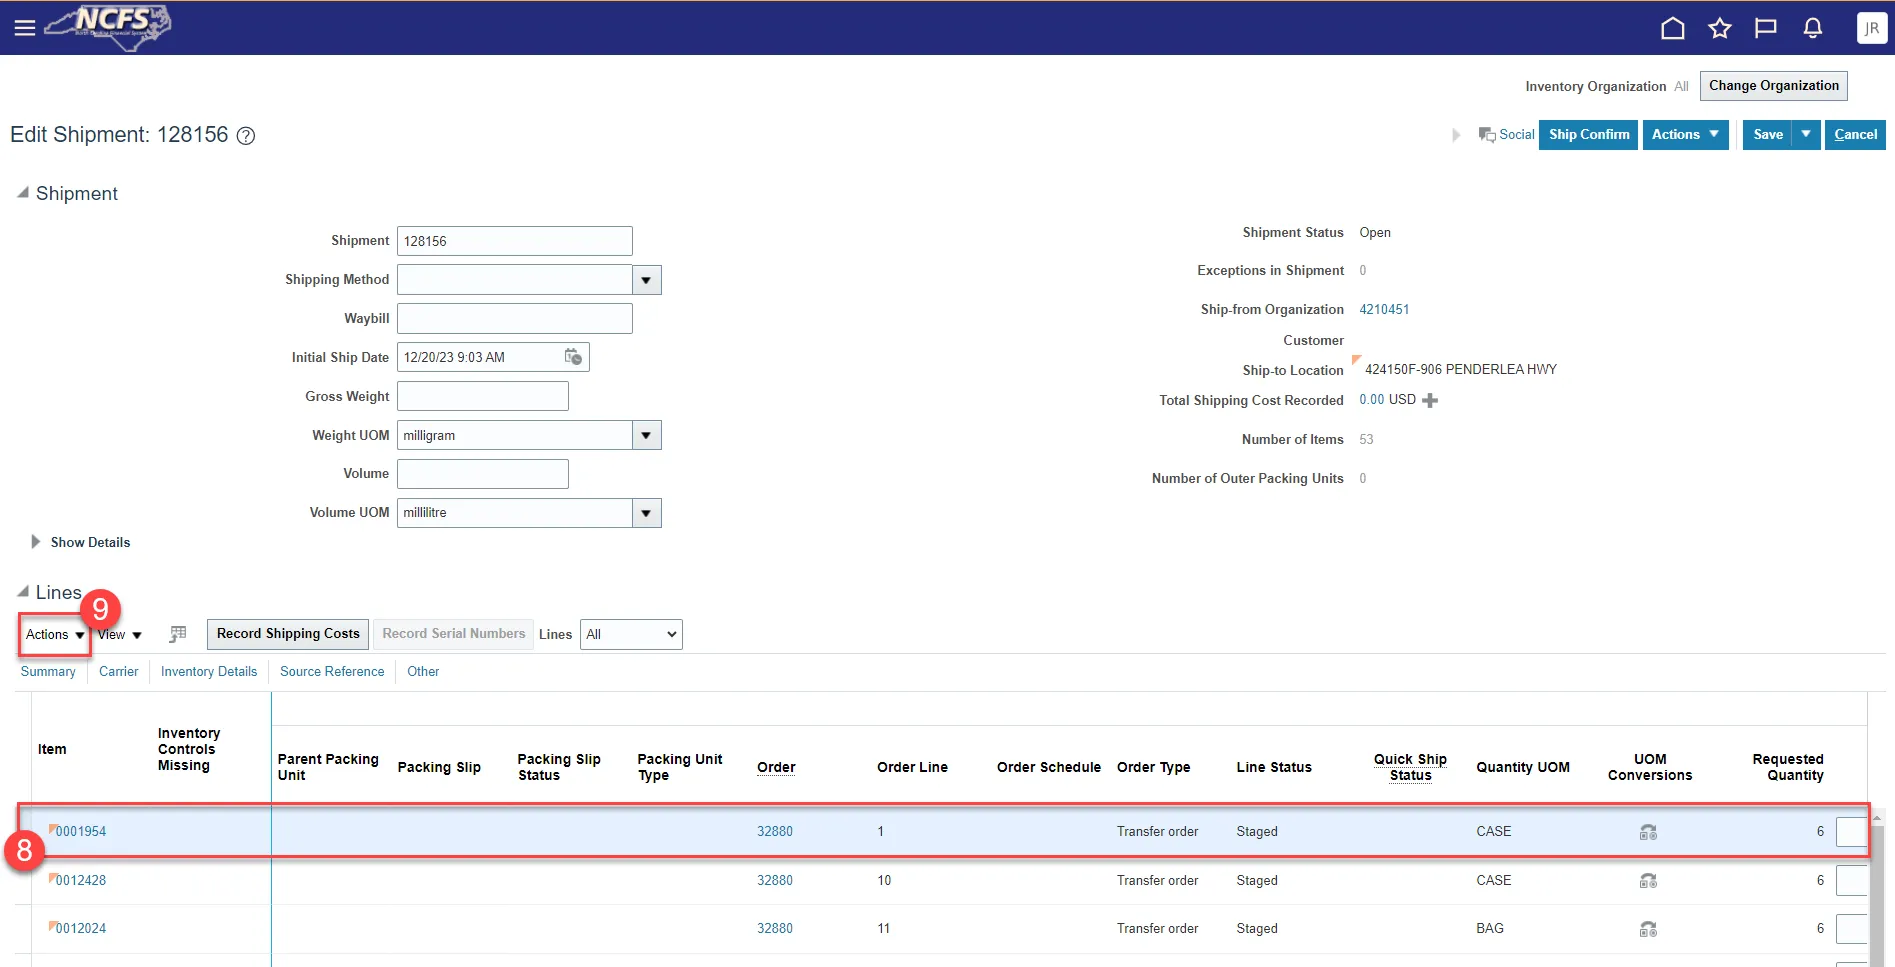
Step 10. Select Backorder from the drop-down list.
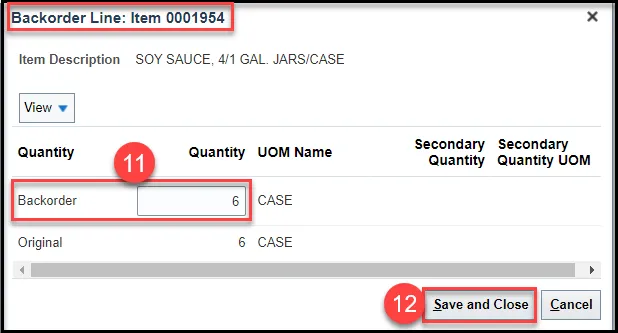
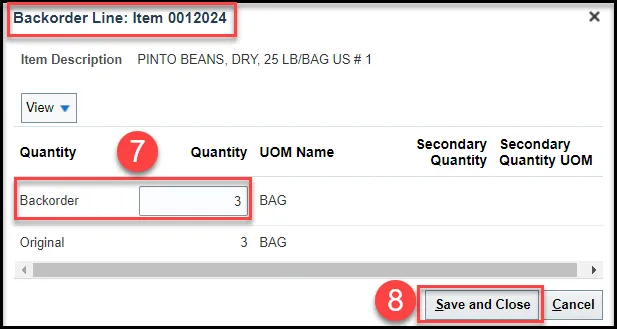
Step 11. The Backorder Line confirmation window will appear. Leave the full quantity populated in the Backorder quantity field.
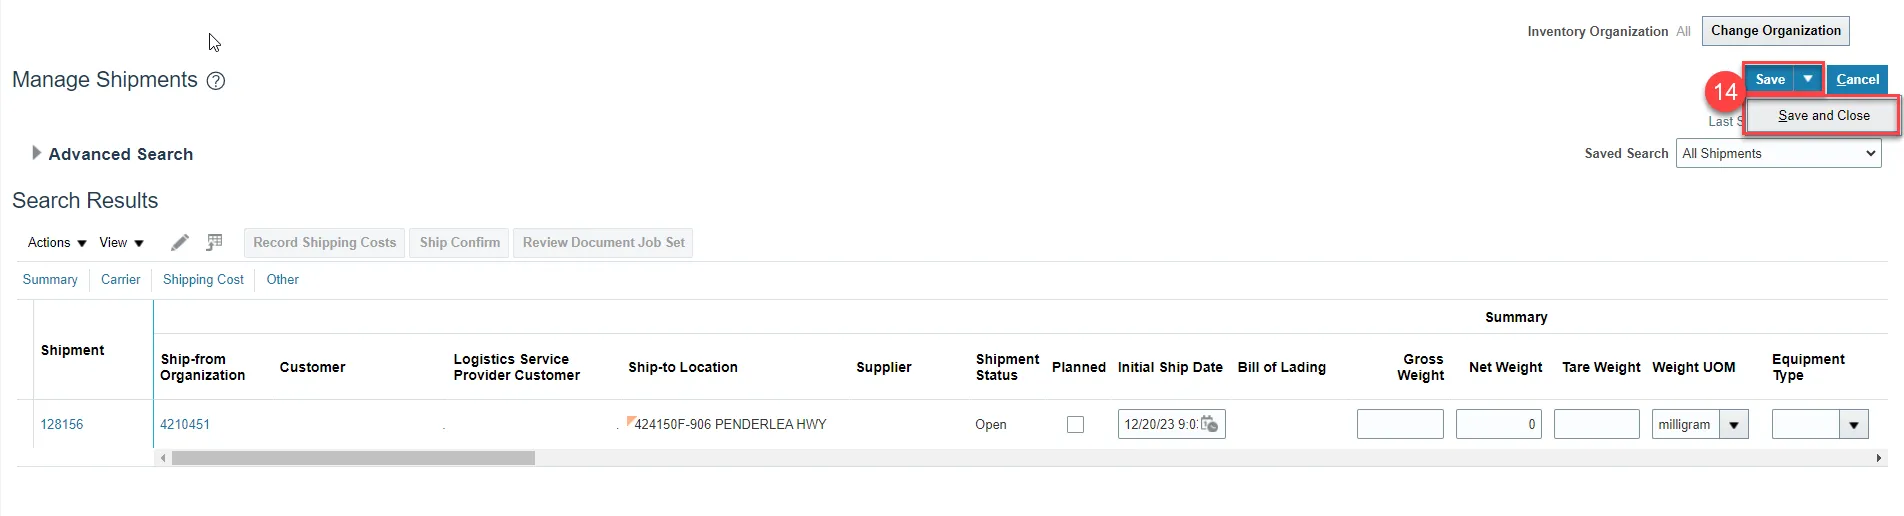
Step 12. Click Save and Close.
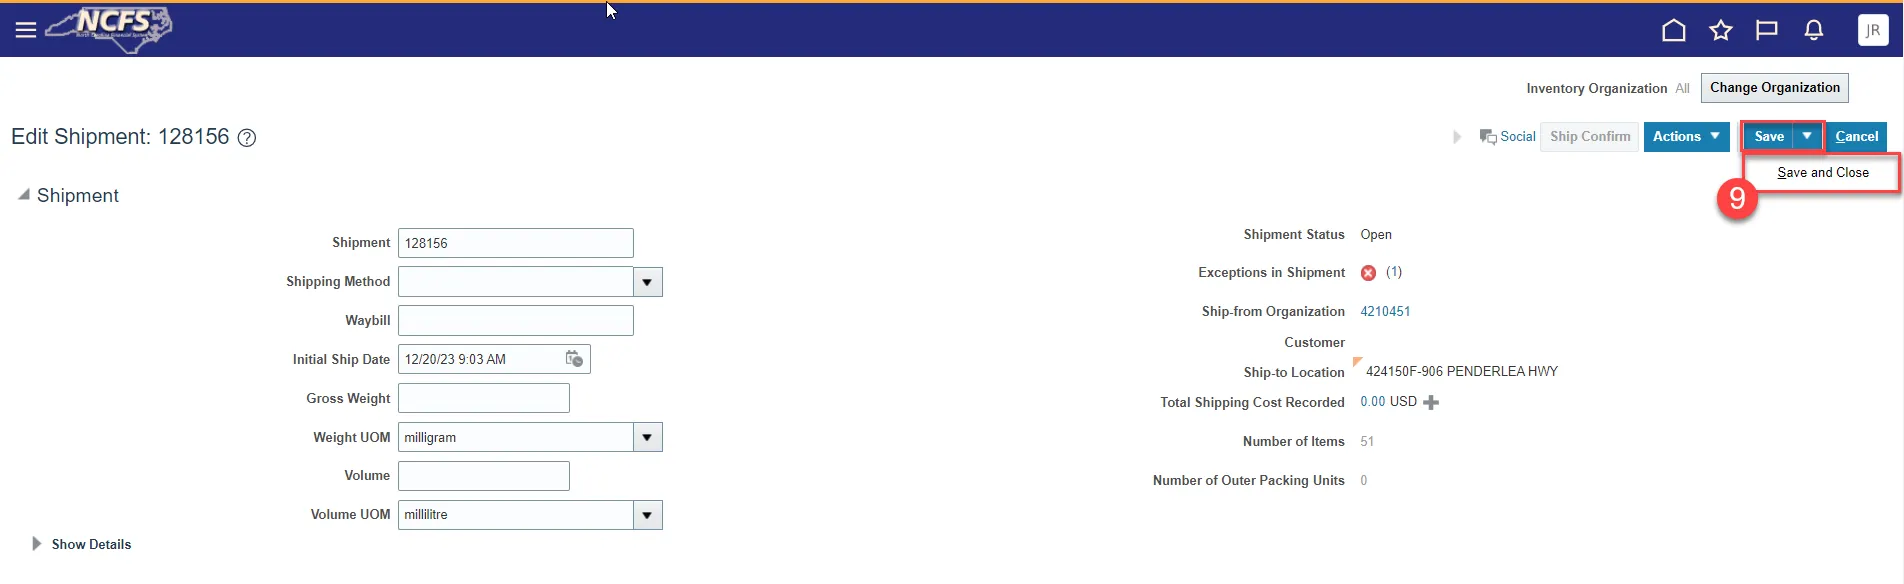
Step 13. Click Save and Close.
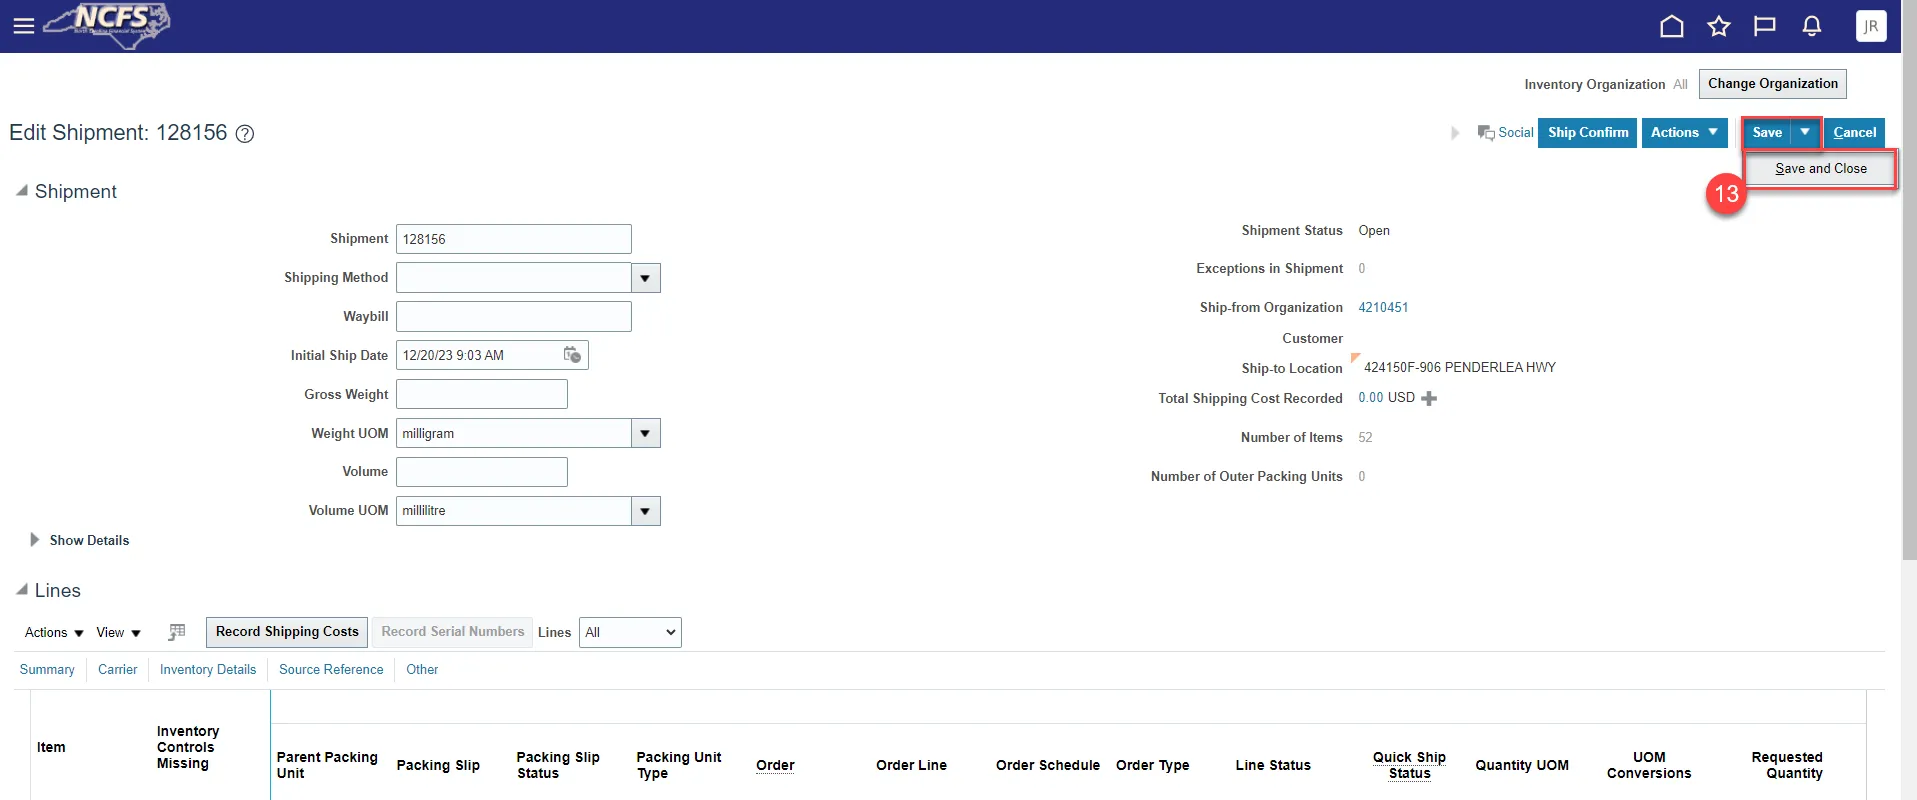
Step 14. Click Save and Close.
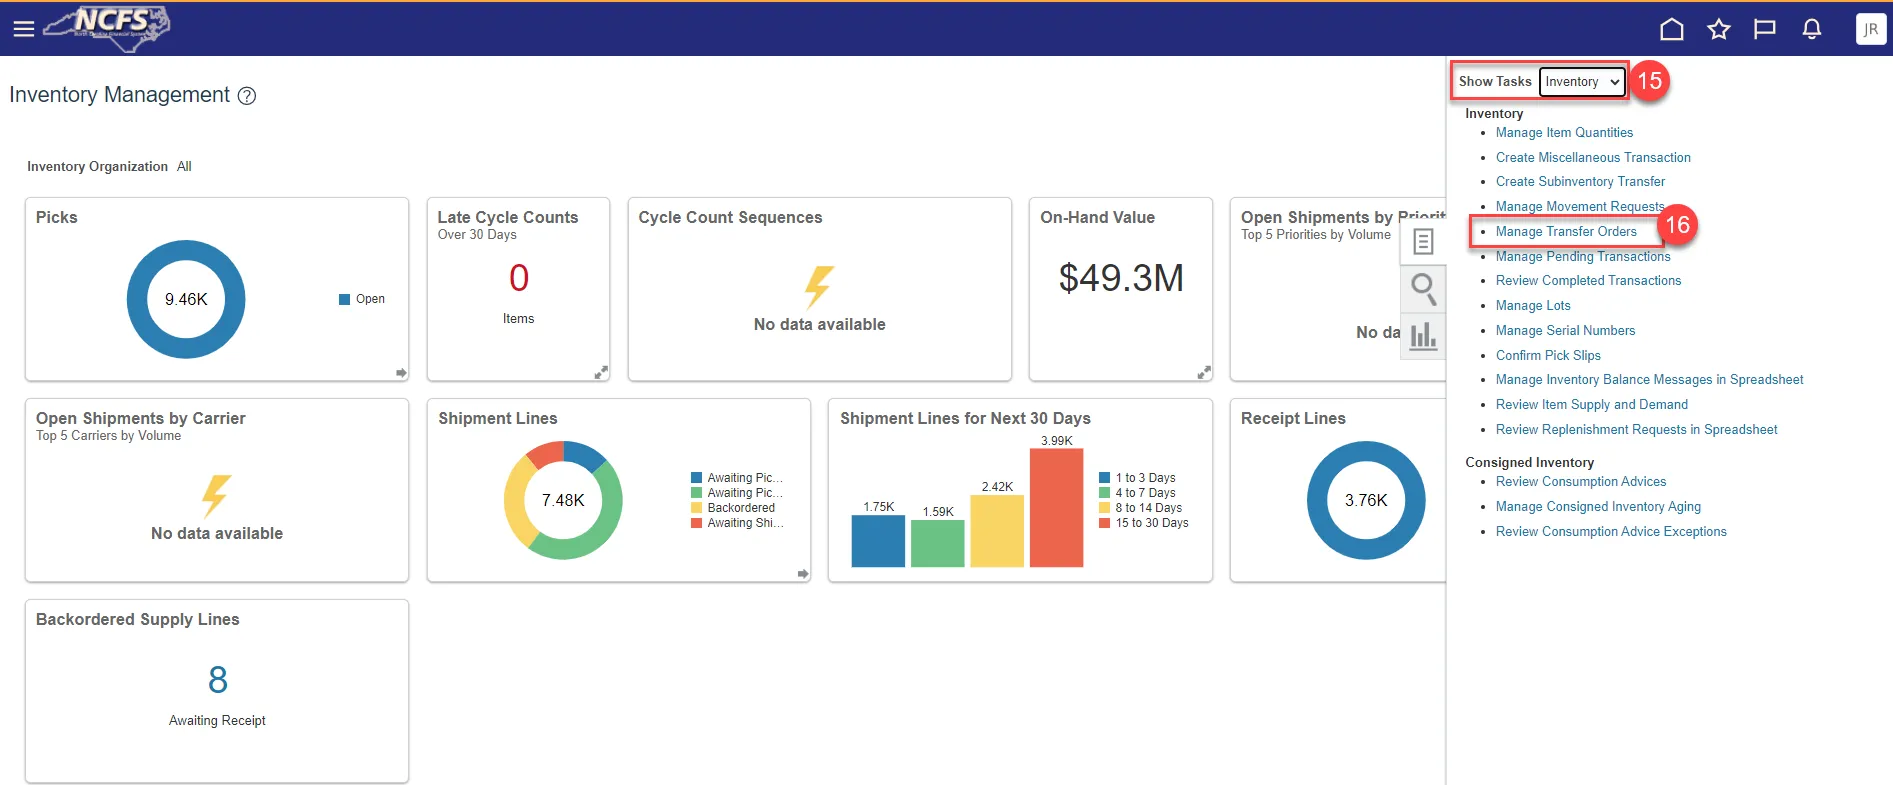
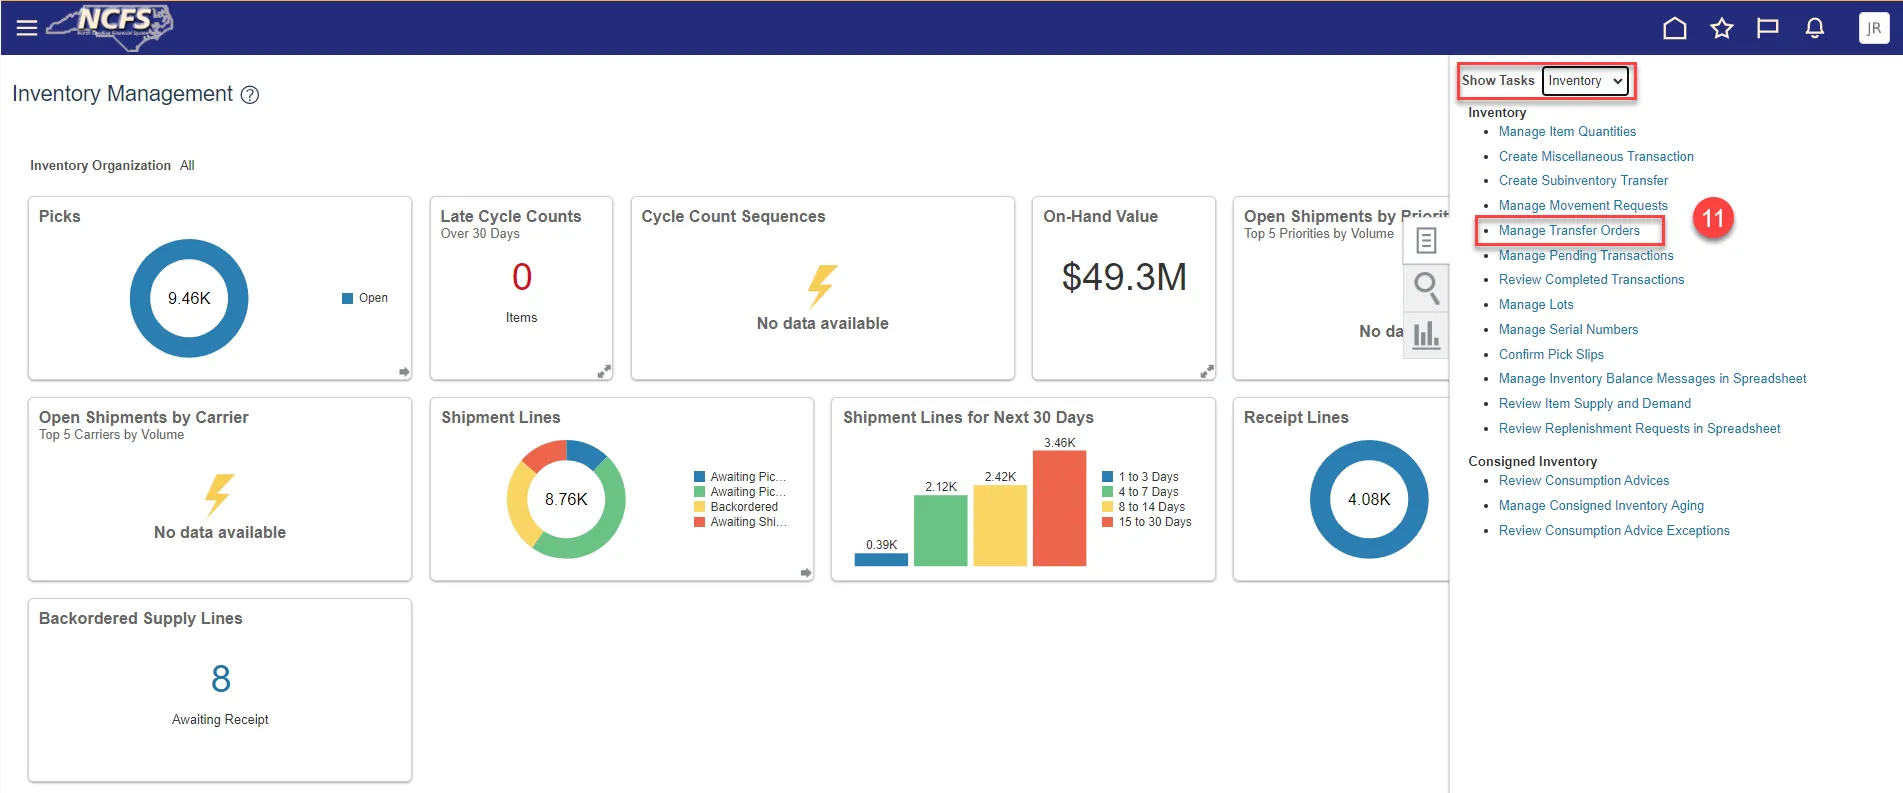
Step 15. Select Inventory under the Show Tasks menu.
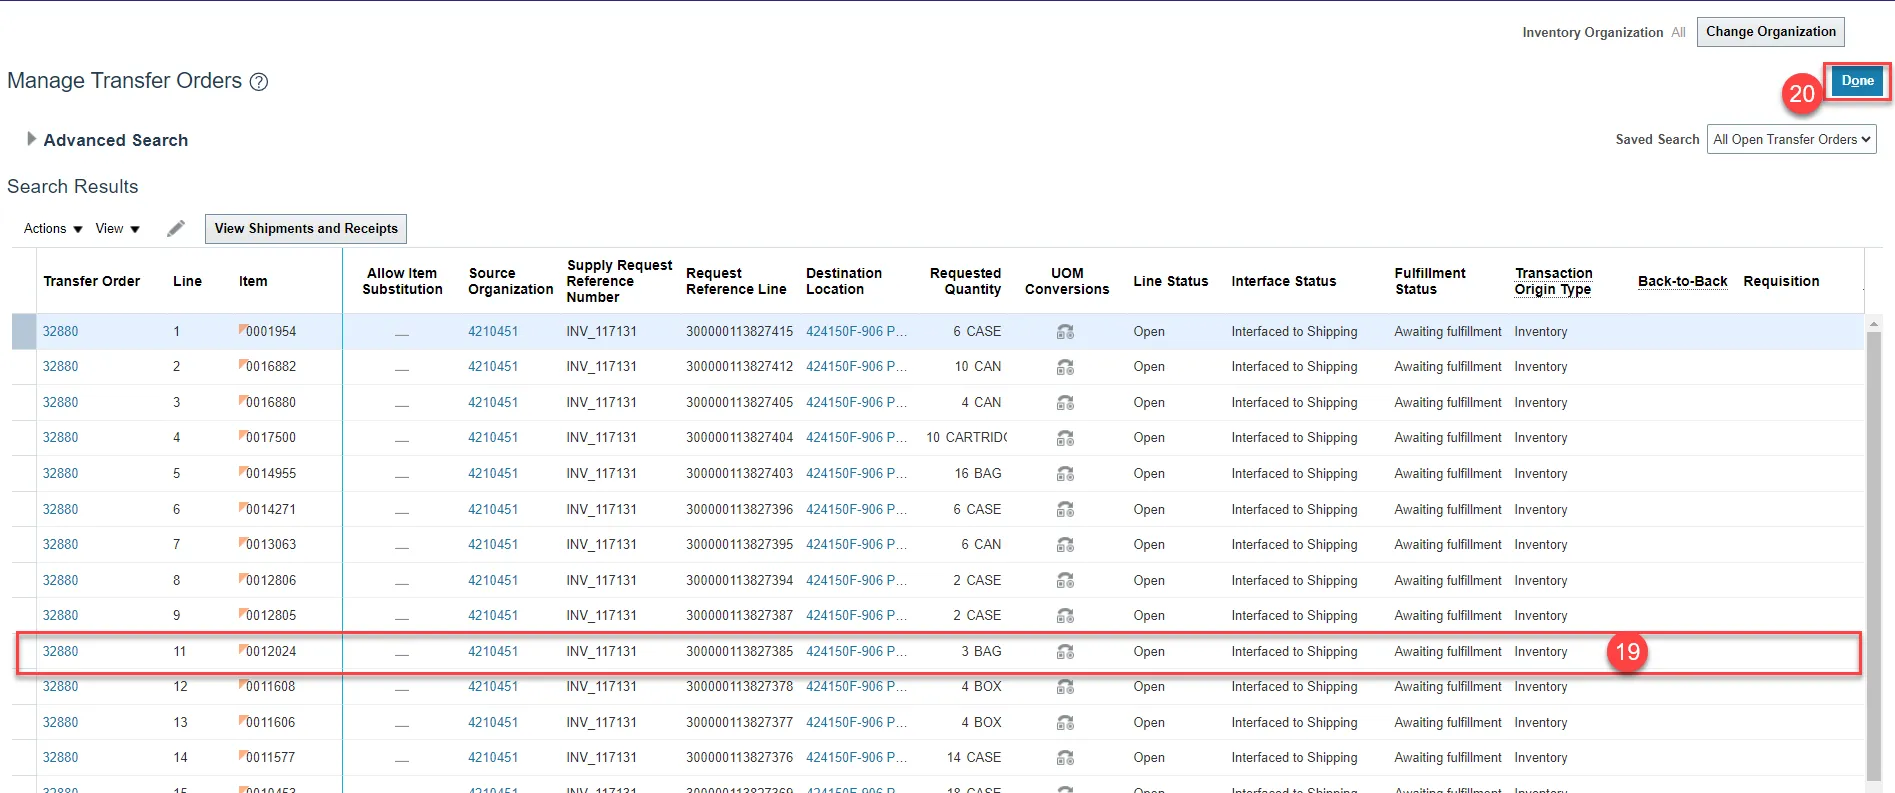
Step 16. Select Manage Transfer Orders.
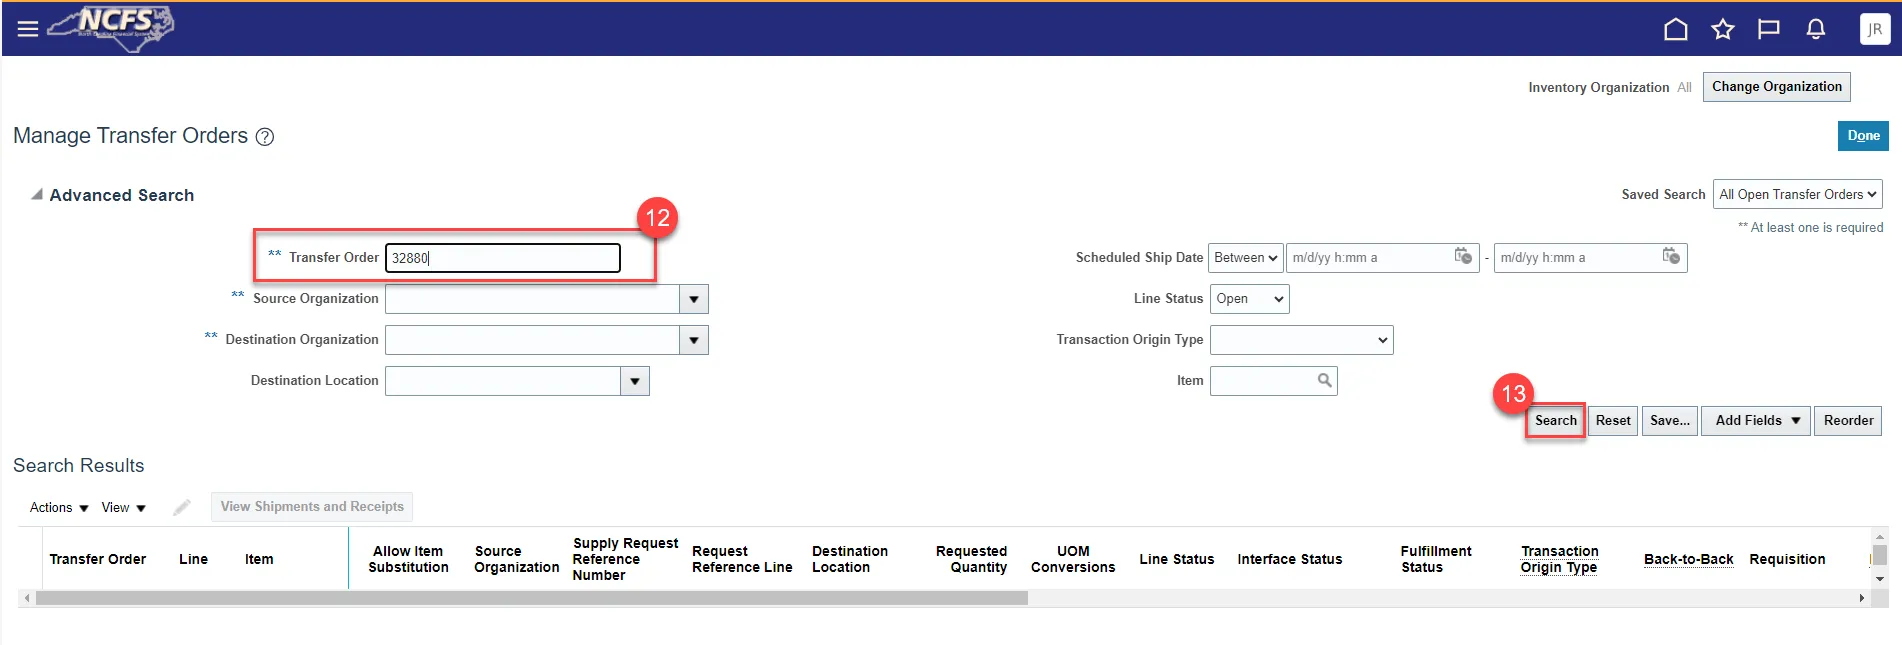
Step 17. Enter the Transfer Order number in the Transfer Order field.
Step 18. Click Search button.

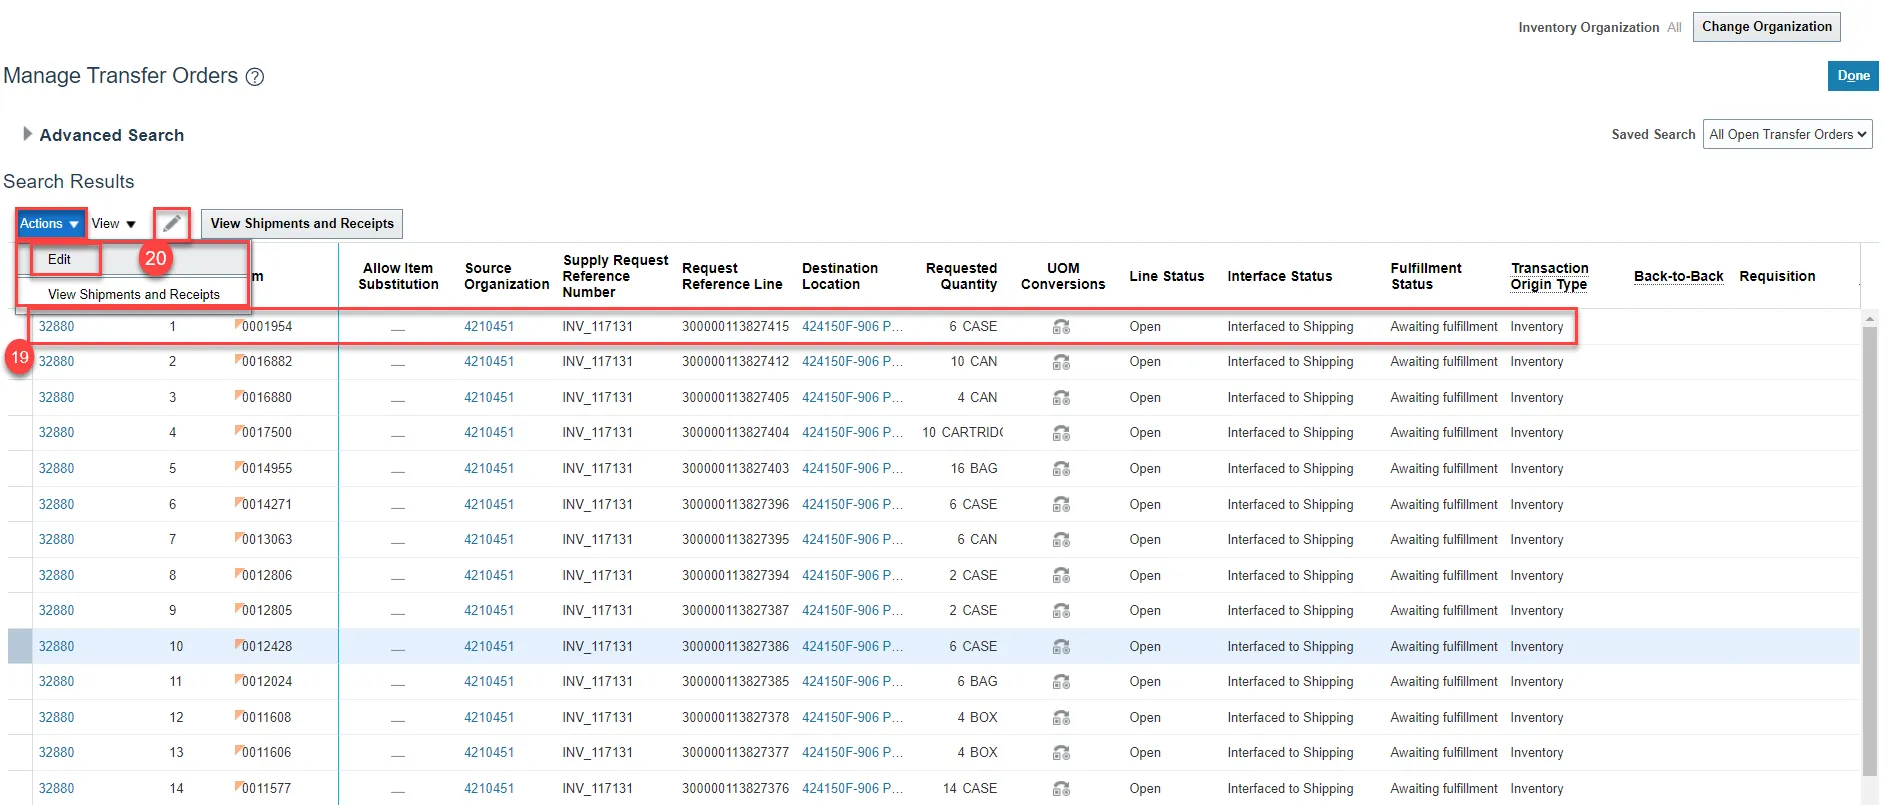
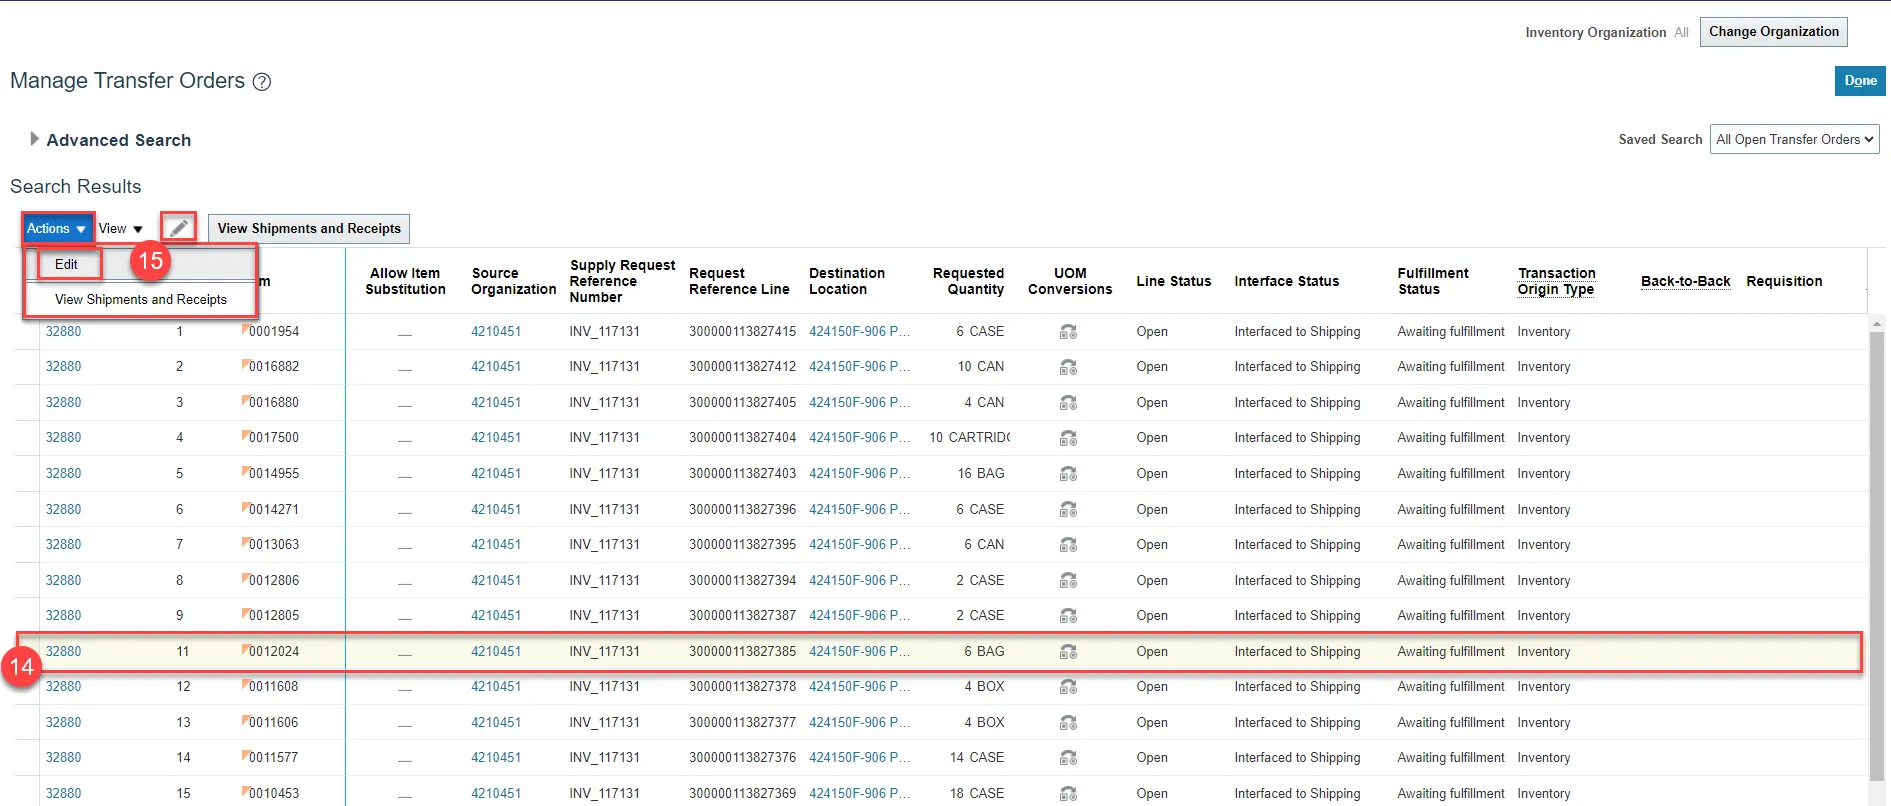
Step 19. Select the Transfer Order number line to be deallocated.
Step 20. Click the Actions drop-down and select Edit or click the Pencil icon.
Step 21. Select the Transfer Order number line to be deallocated.
Step 22. Click the Actions drop-down menu and select Cancel Line or click the Cancel Line button.

Step 23. A Warning pop-up window will appear, click Yes.

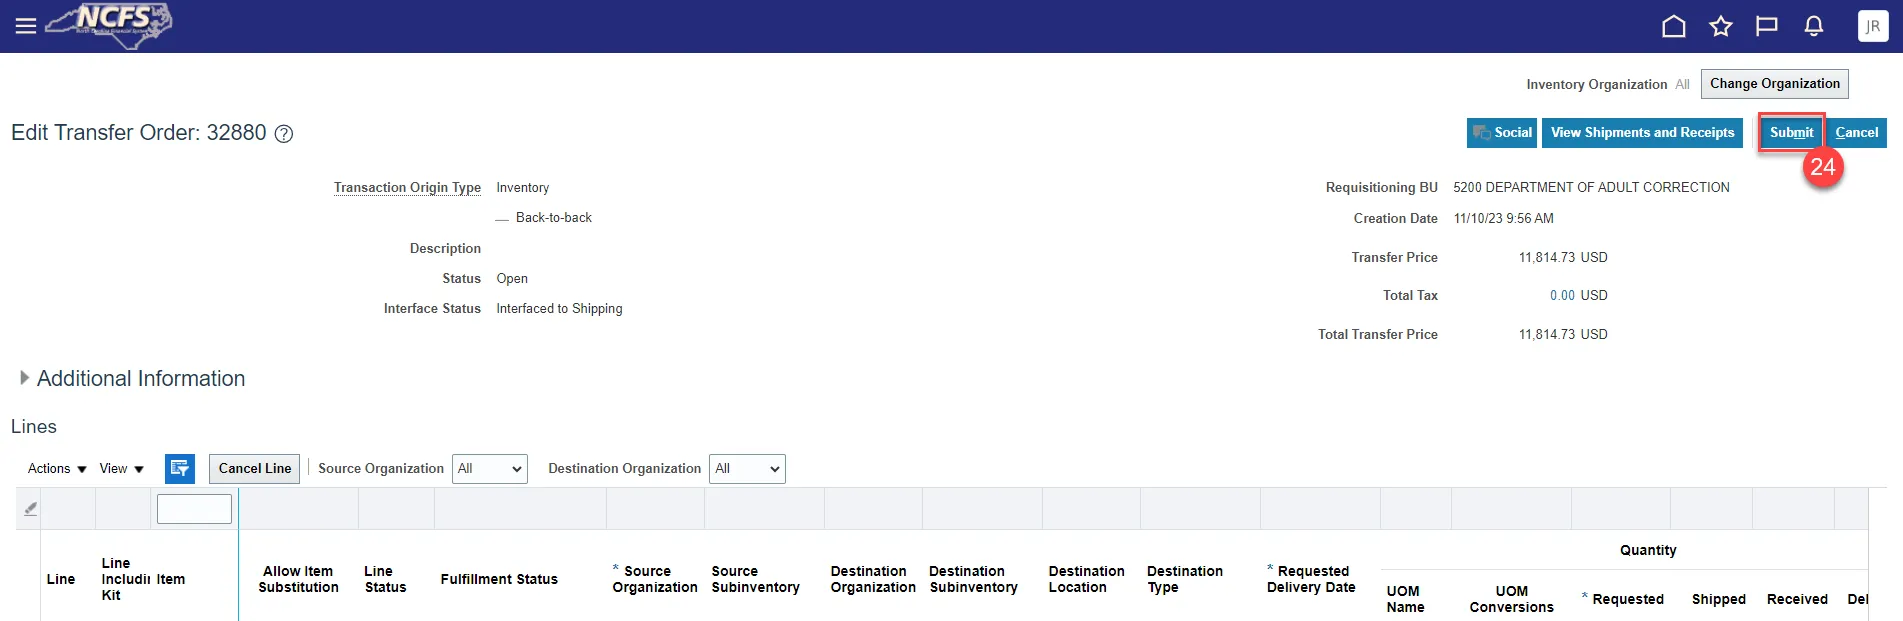
Step 24. Click the Submit button.
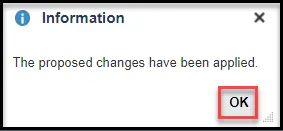
Step 25. An Information pop-up window will appear, click OK.
Step 26. The cancelled Transfer Order line will no longer appear under Manage Transfer Orders. To review the Canceled Transfer Order, change the Line Status field to Canceled and click Search.
Step 27. Select Inventory under Show Tasks and select Create Subinventory Transfer.
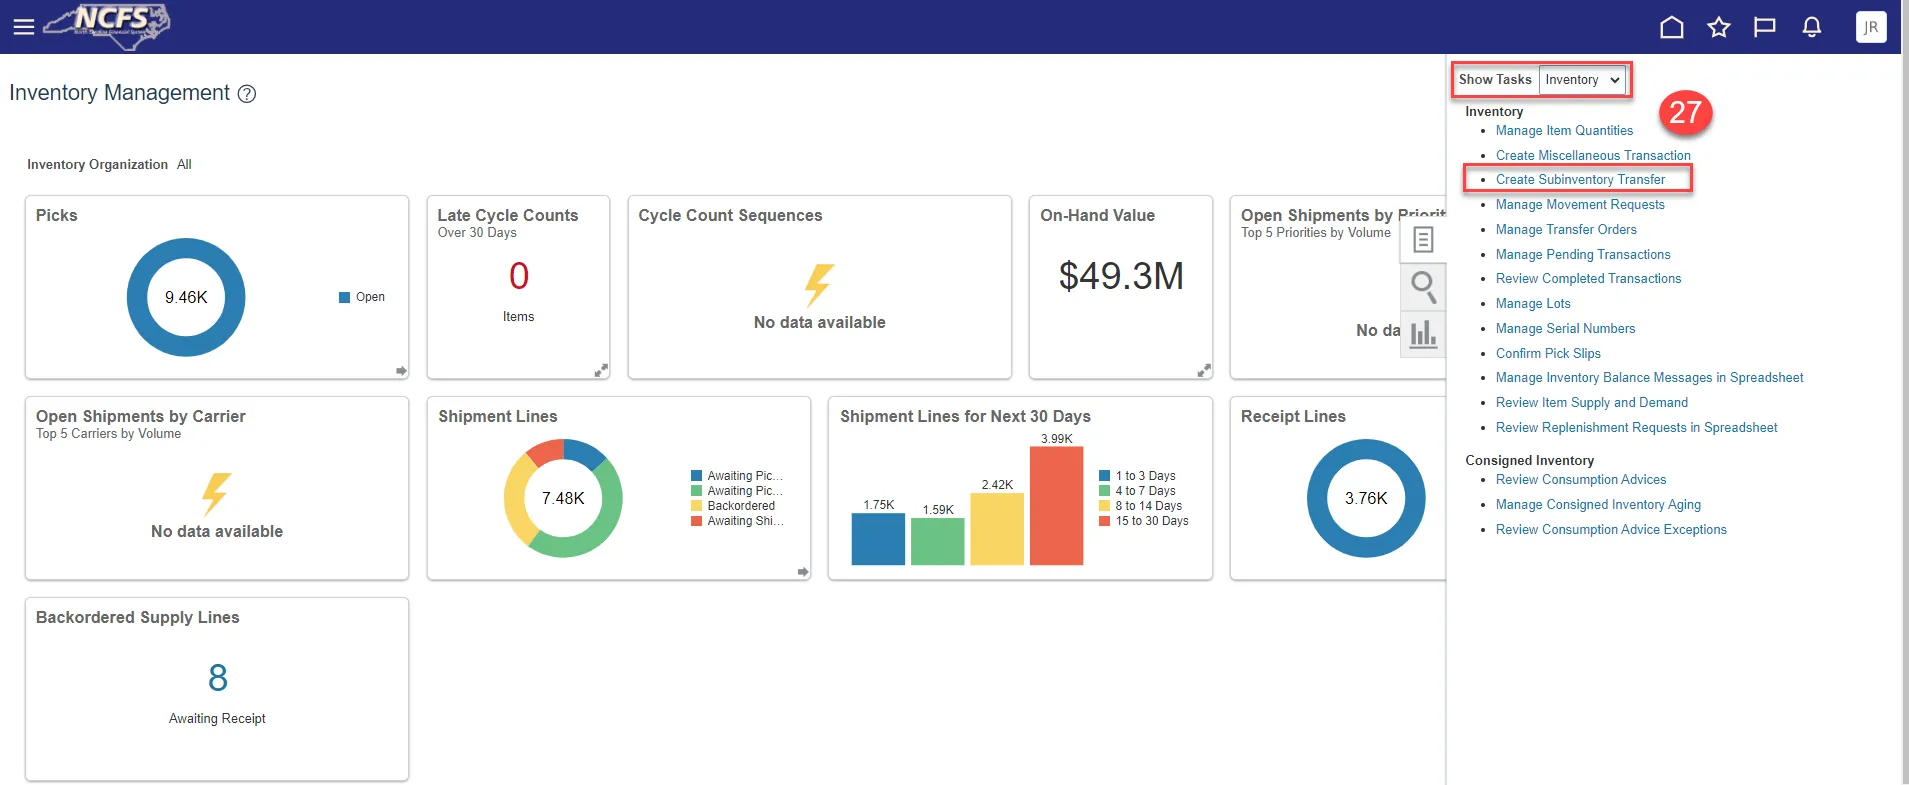
Step 28. Select Subinventory Transfer in the Type field.
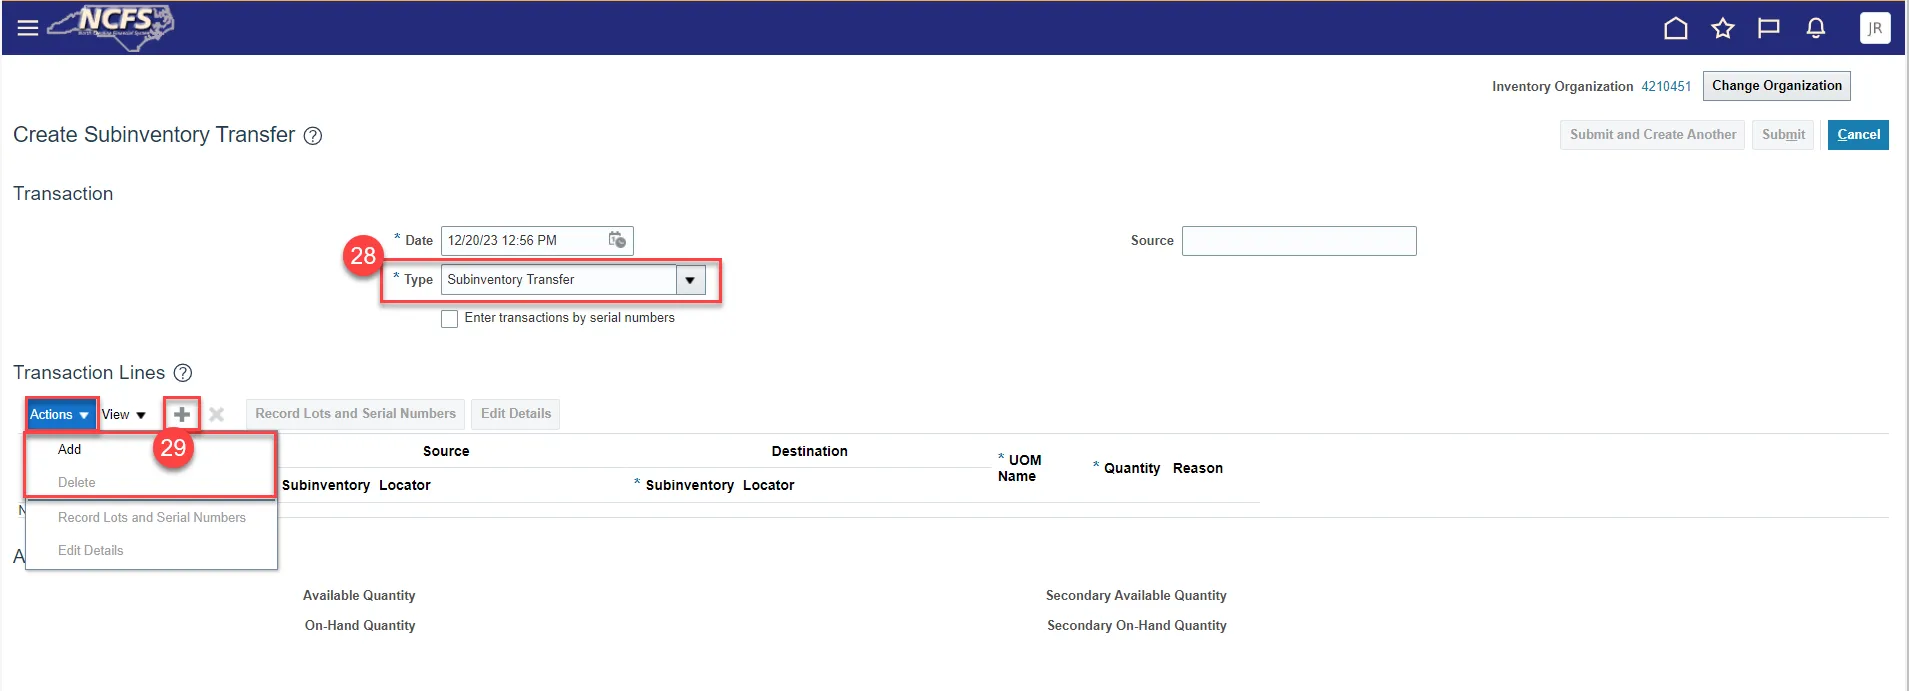
Step 29. Click the Actions drop-down menu and select Add or click the Plus button.
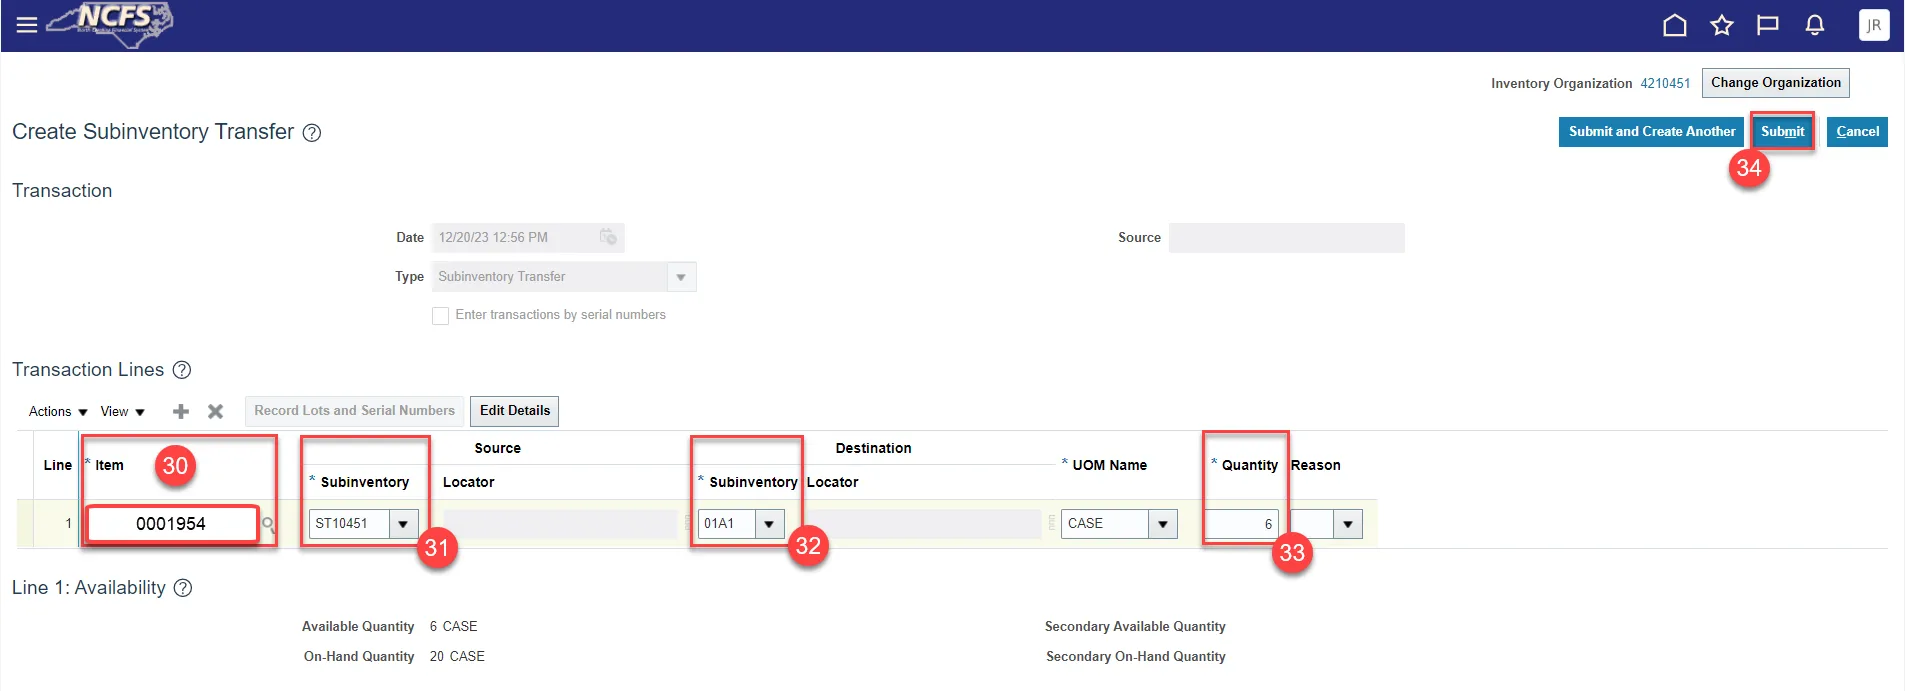
Step 30. Enter the Item number in the Item field and press Tab.
Step 31. Select the Staging area for the Source Subinventory field.
Step 32. Select the Subinventory area for the Destination Subinventory field.
Step 33. Enter the Item Quantity to be transferred in the Quantity field.
Step 34. Click Submit button.
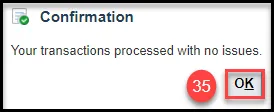
Step 35. A Confirmation pop-up window will appear, Click OK.
Deallocate Transfer Order Quantity Partially
To deallocate a Transfer Order’s quantity partially post Pick Confirmation, please follow the steps below. There are 21 steps to complete this process.
Step 1. Repeat steps 1-9 above.
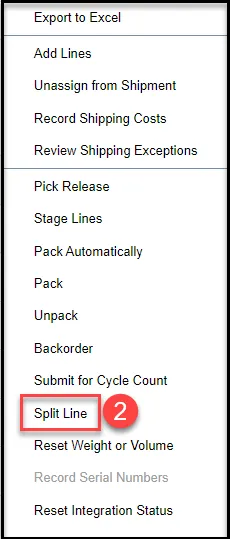
Step 2. From the Actions drop-down, select Split Line.
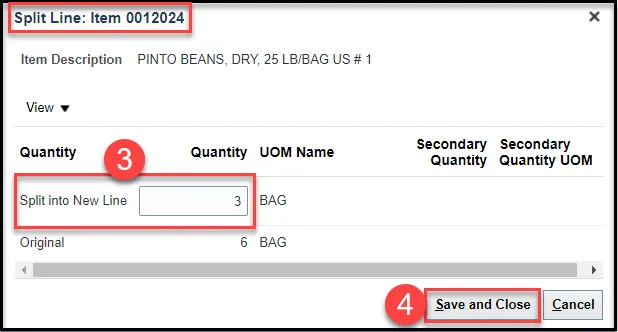
Step 3. The Split Line window will appear, enter deallocation quantity into the Split into New Line Quantity field.
Step 4. Click Save and Close.
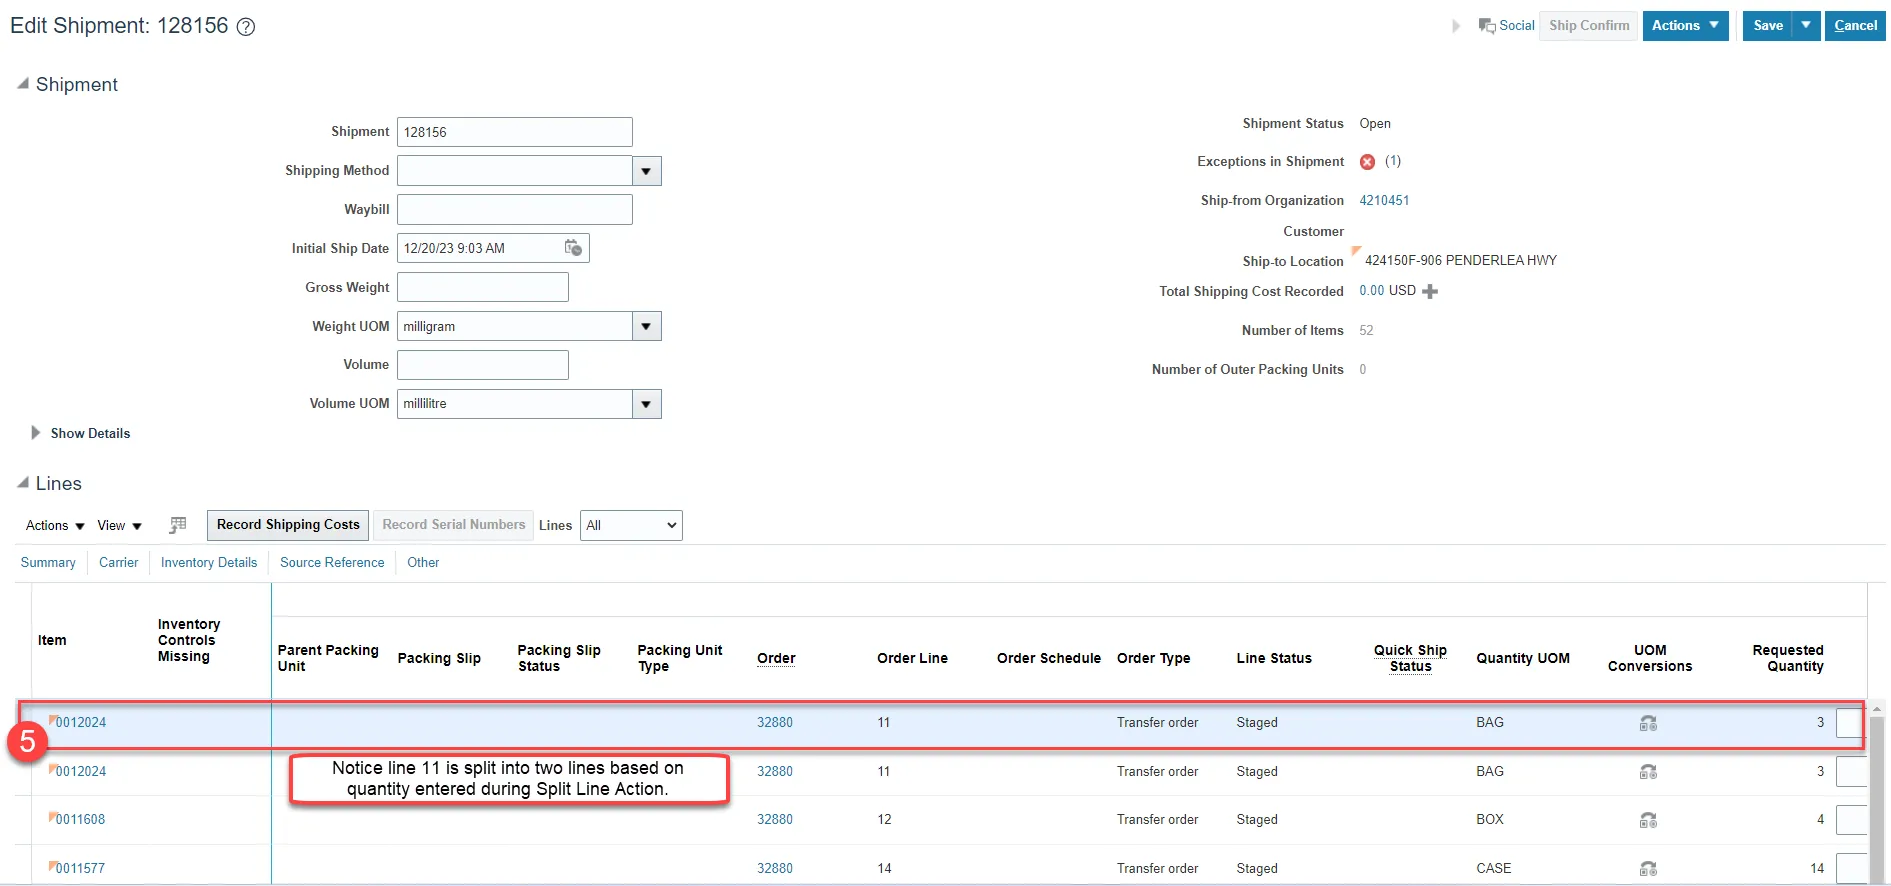
Step 5. Select one of the split lines.
Step 6. Click the Actions drop-down menu and select Backorder.
Step 7. The Backorder Line confirmation window will appear. Leave the full quantity populated in the Backorder quantity field.
Step 8. Click Save and Close.
Step 9. Click Save and Close.
Step 10. Click Save and Close.

Step 11. Select Inventory under Show Tasks and then select Manage Transfer Orders.
Step 12. Enter the Transfer Order number in the Transfer Order field.
Step 13. Click Search.
Step 14. Select the Transfer Order number line to be partially deallocated.
Step 15. Click the Actions drop-down and select Edit or click the Pencil icon.
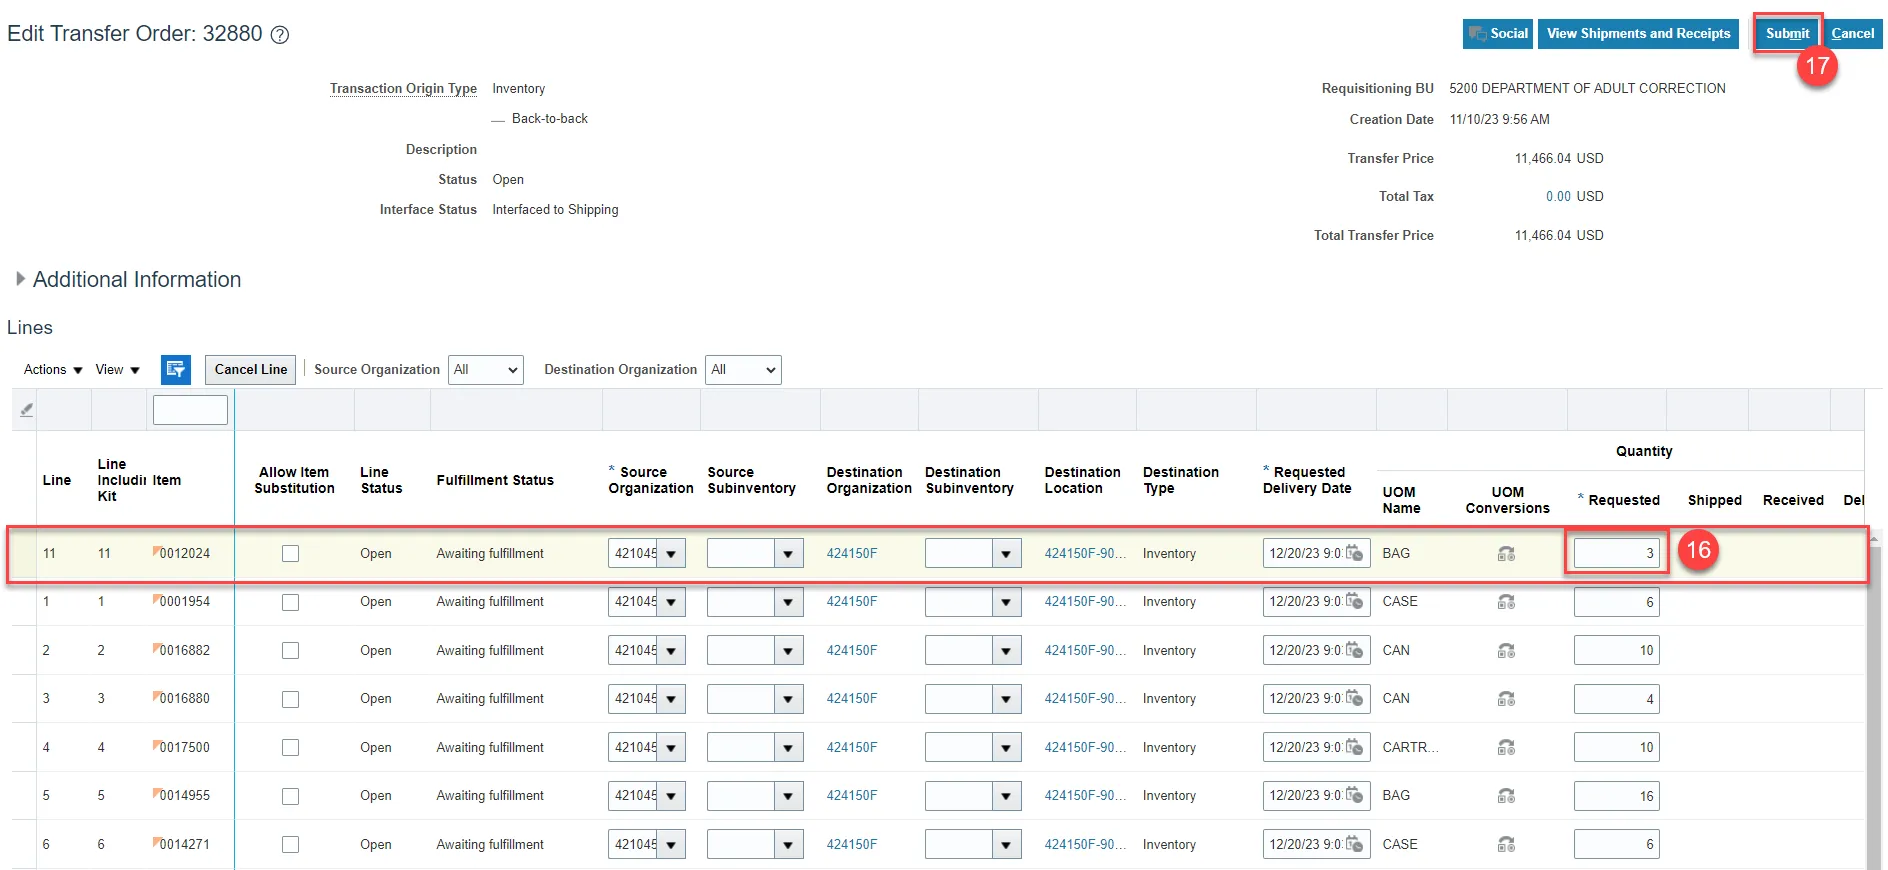
Step 16. Update the Requested Quantity to match the quantity kept on the Shipment Line.
Step 17. Click Submit.
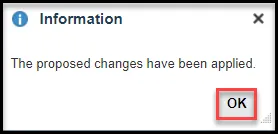
Step 18. An Information pop-up window will appear, Click OK.
Step 19. The Transfer Order line quantity should now match the Shipment Line quantity.
Step 20. Click Done.
Step 21. Perform Steps 27-35 above to Create a Subinventory Transfer to move the partially deallocated quantity out of the Staging Area back into the Subinventory Area.
Wrap-Up
Manage Item Transaction Defaults using the steps above in NCFS.
Additional Resources
- Virtual Instructor-Led Training (vILT)
- Quick Reference Guides (QRG)