Purpose
The purpose of this Quick Reference Guide (QRG) is to provide a step-by-step explanation of how to Create Orders on Behalf of Others (Self-Service Procurement) in the North Carolina Financial System (NCFS).
Introduction and Overview
This QRG covers the creation of orders on behalf of others (Self-Service Procurement) in NCFS.
Initiate Consumption Requisition
To initiate a Consumption Requisition in NCFS, please follow these steps. There are 31 steps to complete this process.
Step 1. Log in to the NCFS portal with your credentials to access the system.
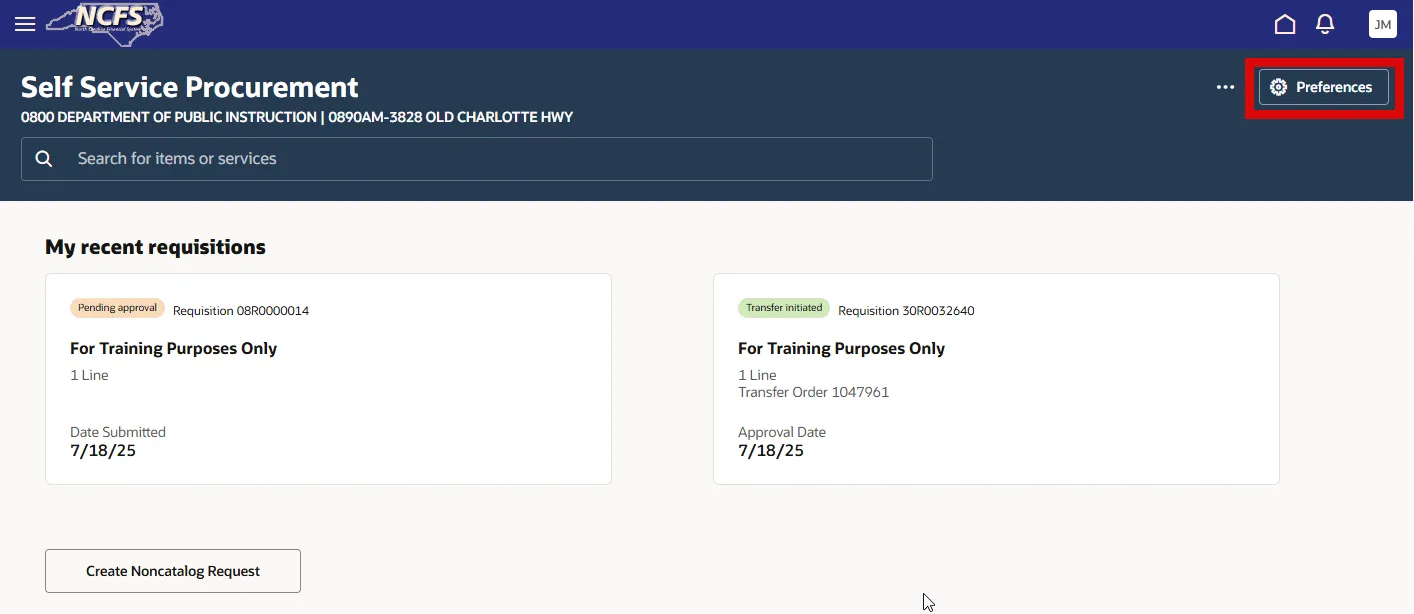
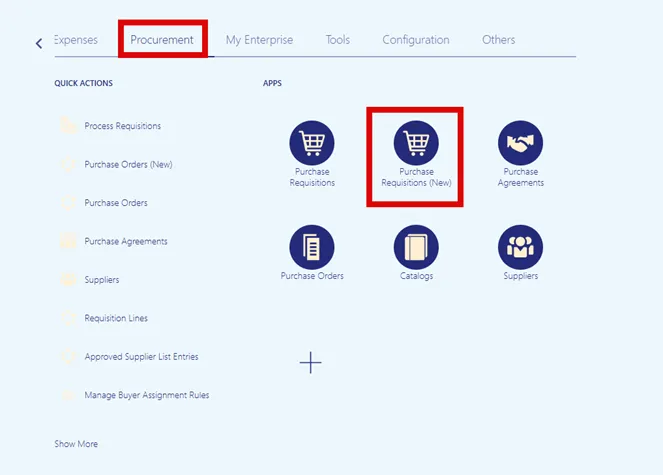
Step 2. On the Home page, select the Procurement tab. Select the Purchase Requisitions (New) app.

Step 3. Select the Preferences button in the top right corner.
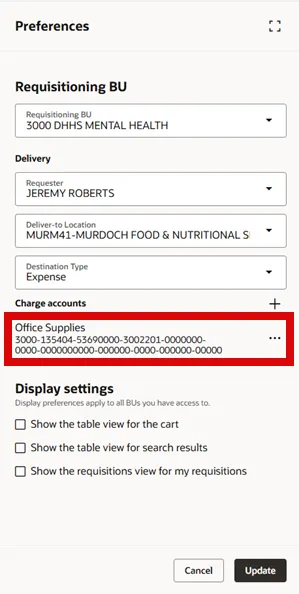
Step 4. On the Preferences page, enter the Requisition BU and Deliver-to-Location, and select the Update button.
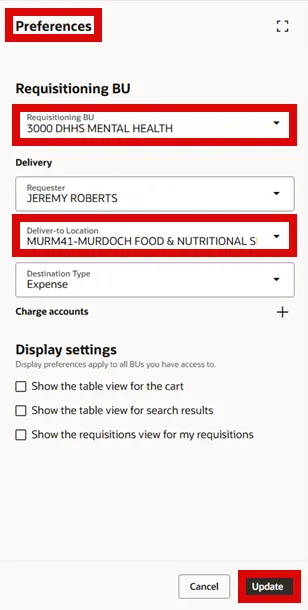
Step 5. To add default Charge Account(s) click the Plus sign besides the Charge accounts section. You can add this information before clicking the Update button, from the above step.

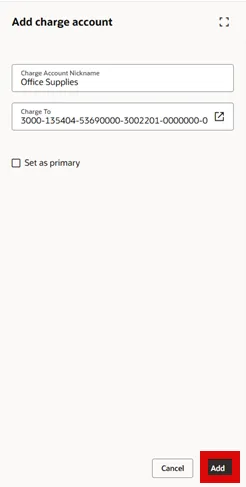
Enter a Charge Account Nickname, example: Office Supplies.
Then select the Charge to Arrow icon.
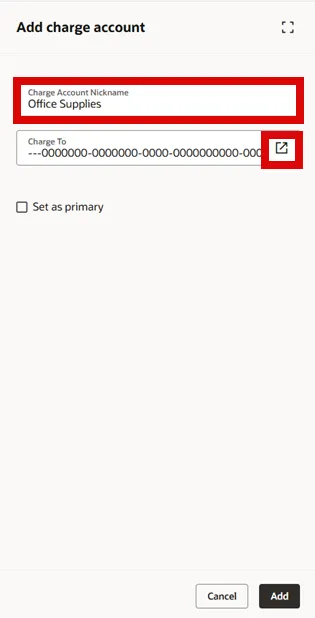
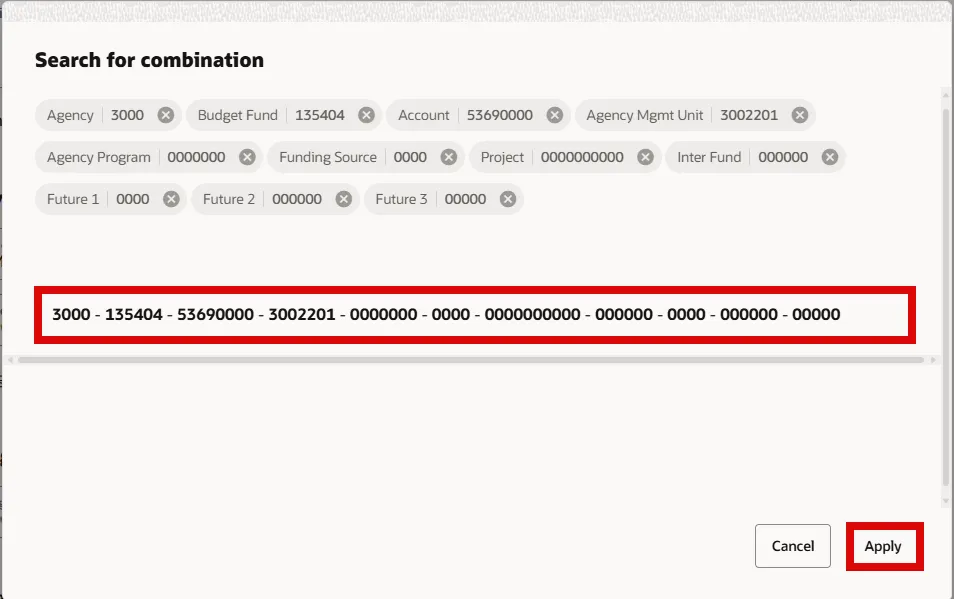
Now you can enter the Agency, Budget Fund, Account, and Agency Mgmt Unit and then select the populated option and select the Apply button.
Now you can select the Add button, to add this account. You can repeat these steps to add multiple Charge Accounts, if desired.
Now you will be able to see this added Charge Account listed under the Preferences section and have the option to select it as your default.
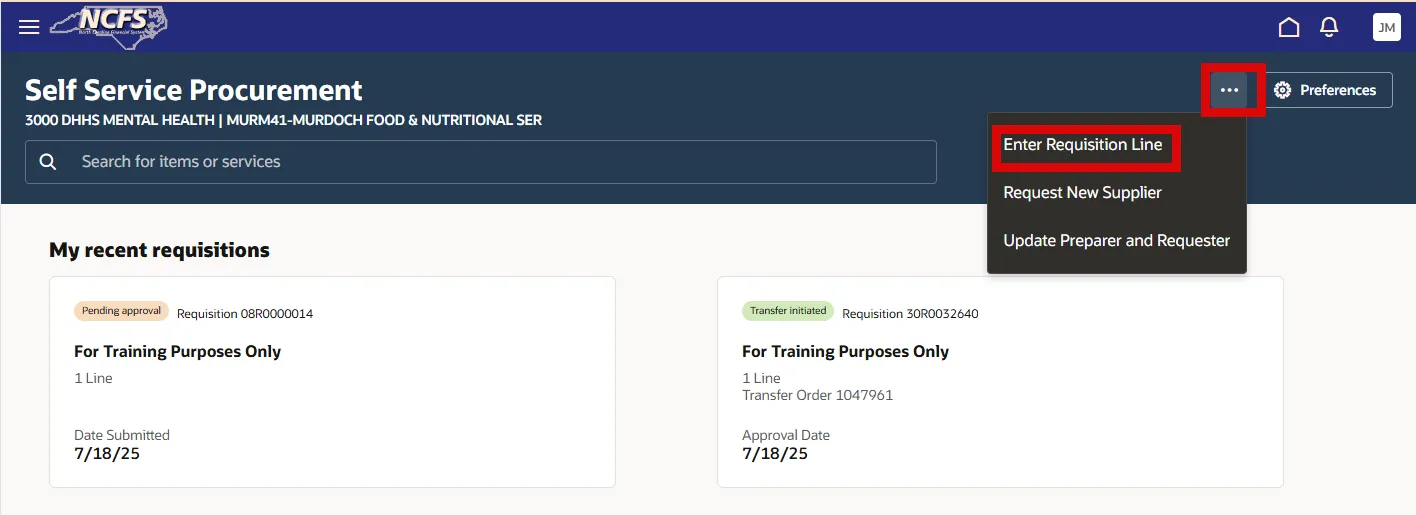
Step 6. Select More Actions (…) in the upper right corner and then select Enter Requisition Line.
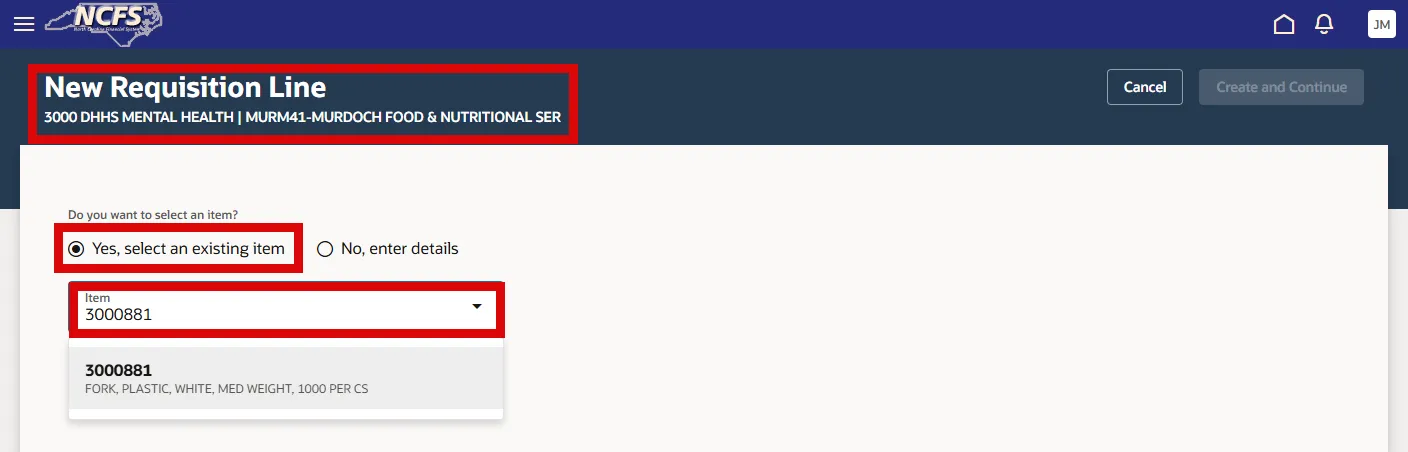
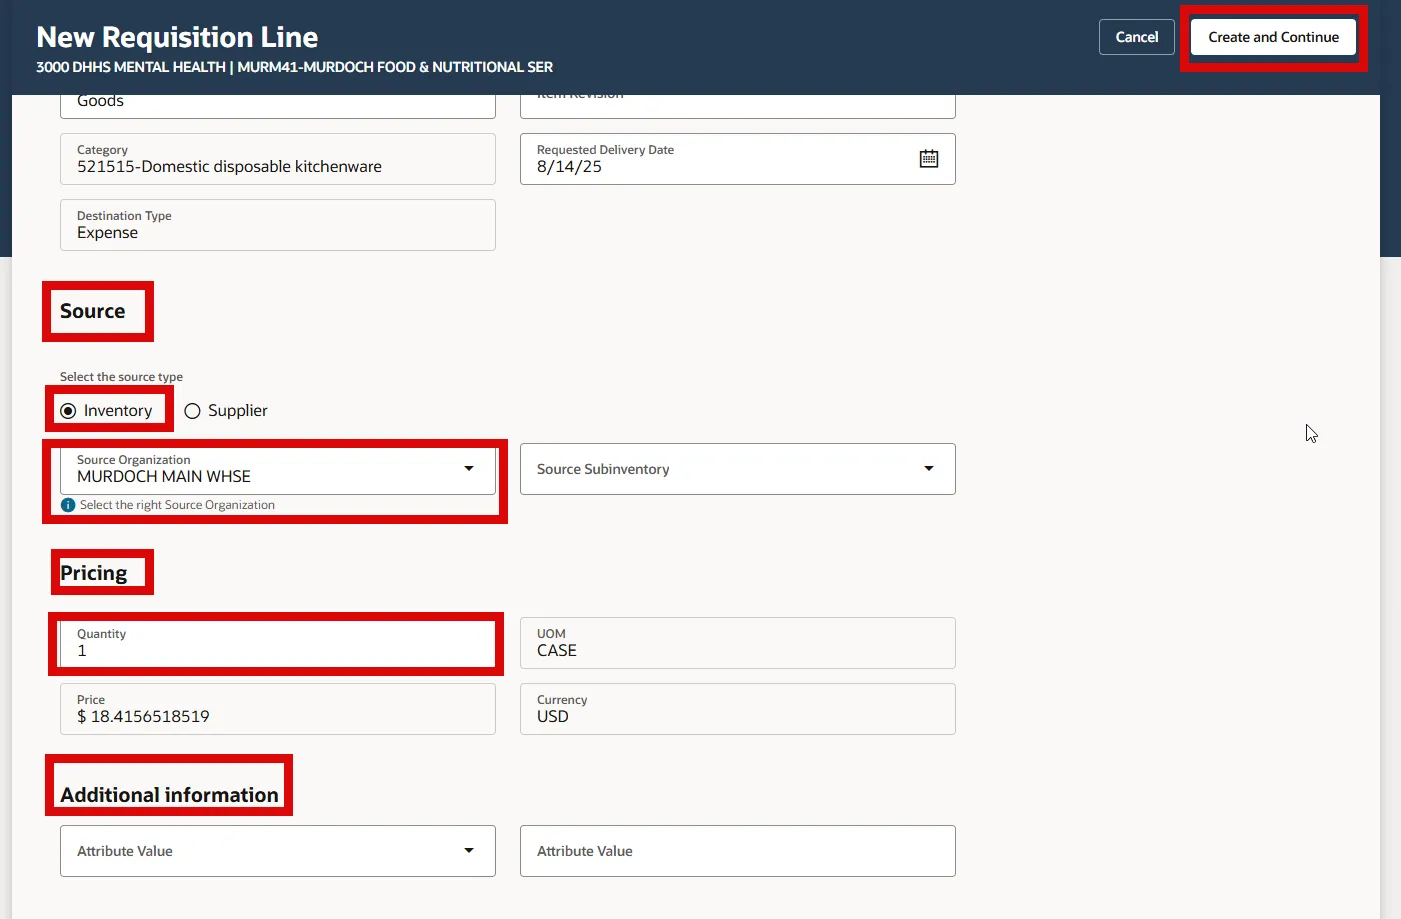
Step 7. On the New Requisition Line page, select Yes, select an existing item radio button and enter the Item number.
Step 8. Line Description will populate, Line Type defaults to Goods, Category defaults per item, Requested Delivery Date defaults to one week from date of entry and can be adjusted.

Note: Updates to the Requested Delivery Date should be made after the Source Organization has been selected in Step #9. If you adjust the Requested Delivery Date before selecting a Source Organization the date will default back to one week, from the current date.
Step 9. In the Source section, select the Inventory radio button. Select the appropriate Source Organization to order from. No Source Subinventory selection needed.
Note: A Reminder Message will appear below the Source Organization selection field, confirm your selection.
Step 10. In the Pricing section, update the Quantity, and the UOM will default per Item setup, Price will default per Item Cost.
Step 11. No Additional Information is needed in this section.
Step 12. Select Create and Continue button in the upper right corner.
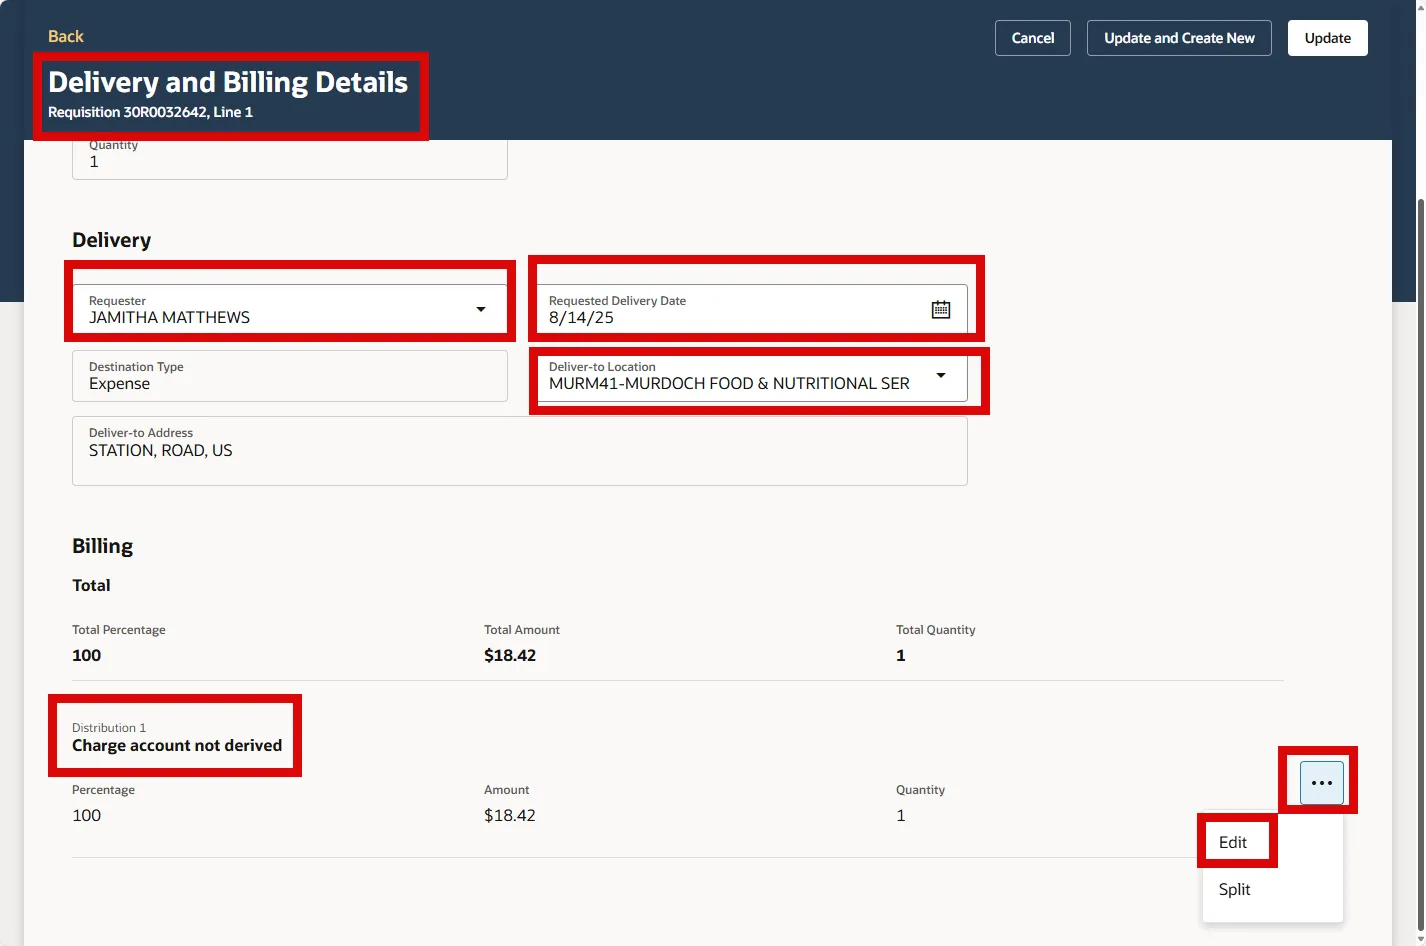
Step 13. In the Delivery and Billing Details section, update the Requestor Name, Requested Delivery Date, and Deliver-to Location if needed.
Step 14. In the Billing section, select the Actions (…) and select the Edit option to enter the Charge Account.
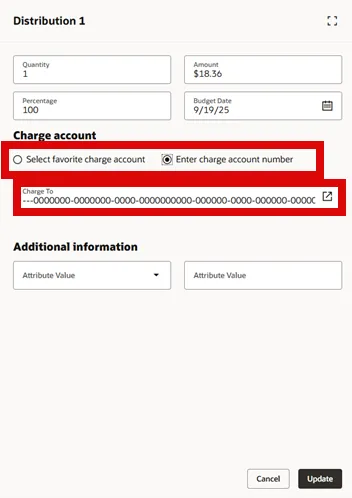
Step 15. Select the Arrow Box in the Charge Account field
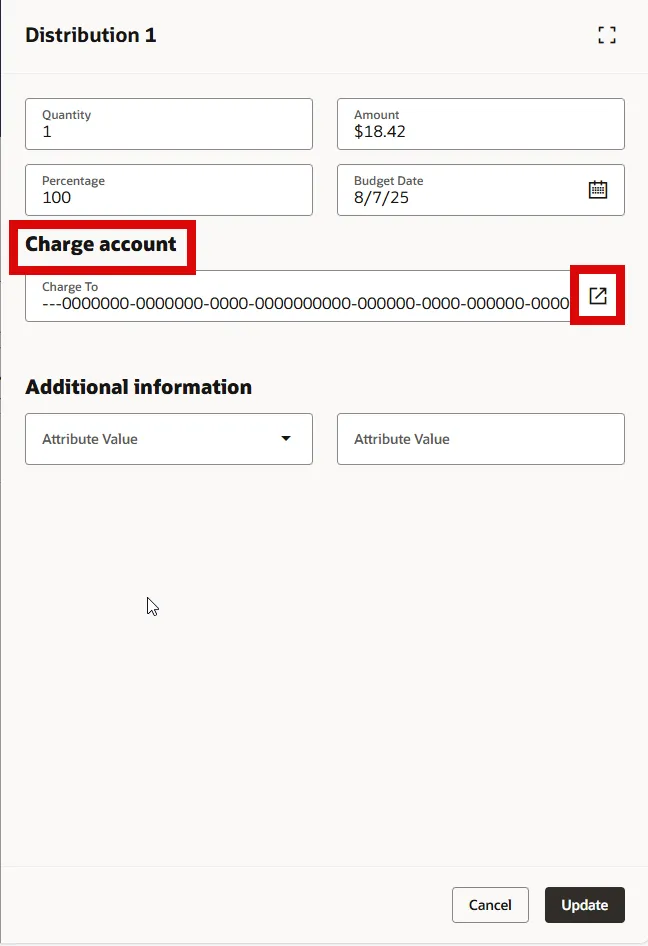
If you entered a default Charge Account under the Preferences section, from Step #5, you will be able to select that default, or you can enter a new Charge Account.
Select the radio button for Select favorite charge account selection from the Charge Account Nickname drop-down menu.
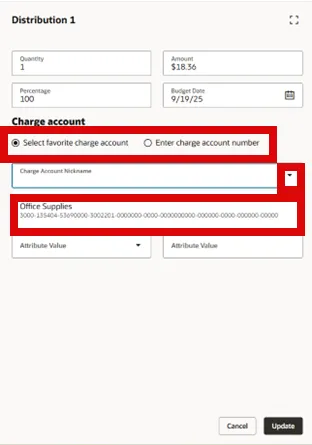
Select the radio button Enter Charge account number and follow the below steps.
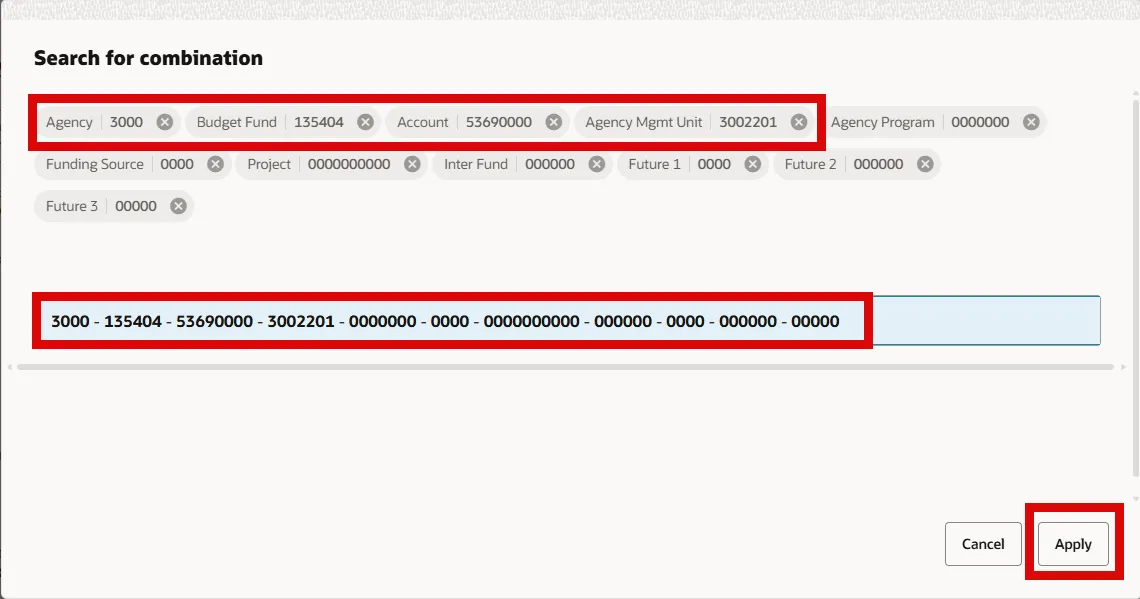
Step 16. Select the appropriate Accounting Distribution Charge Account and then select Apply.
Note: For the Charge Account, please make sure to only use your agency’s correct Business Unit, (DHHS = 3000, DAC = 5200, and DPI = 0800) Enter a valid Budget Fund, select a 5 series account and an appropriate AMU for your facility. DO NOT ENTER ZEROS FOR AMU.
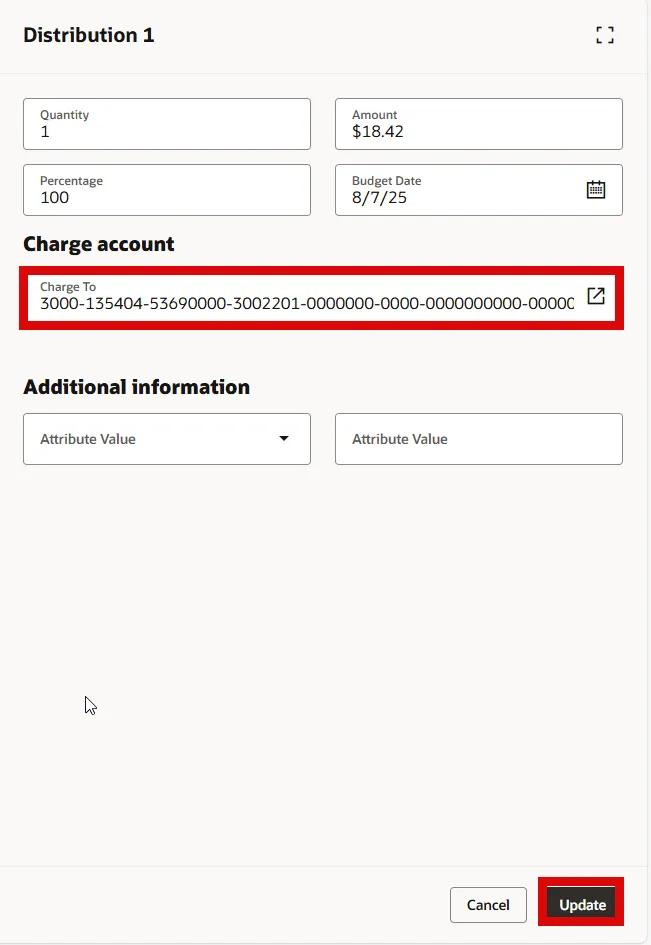
Step 17. Verify the Charge Account is correct and select the Update button.
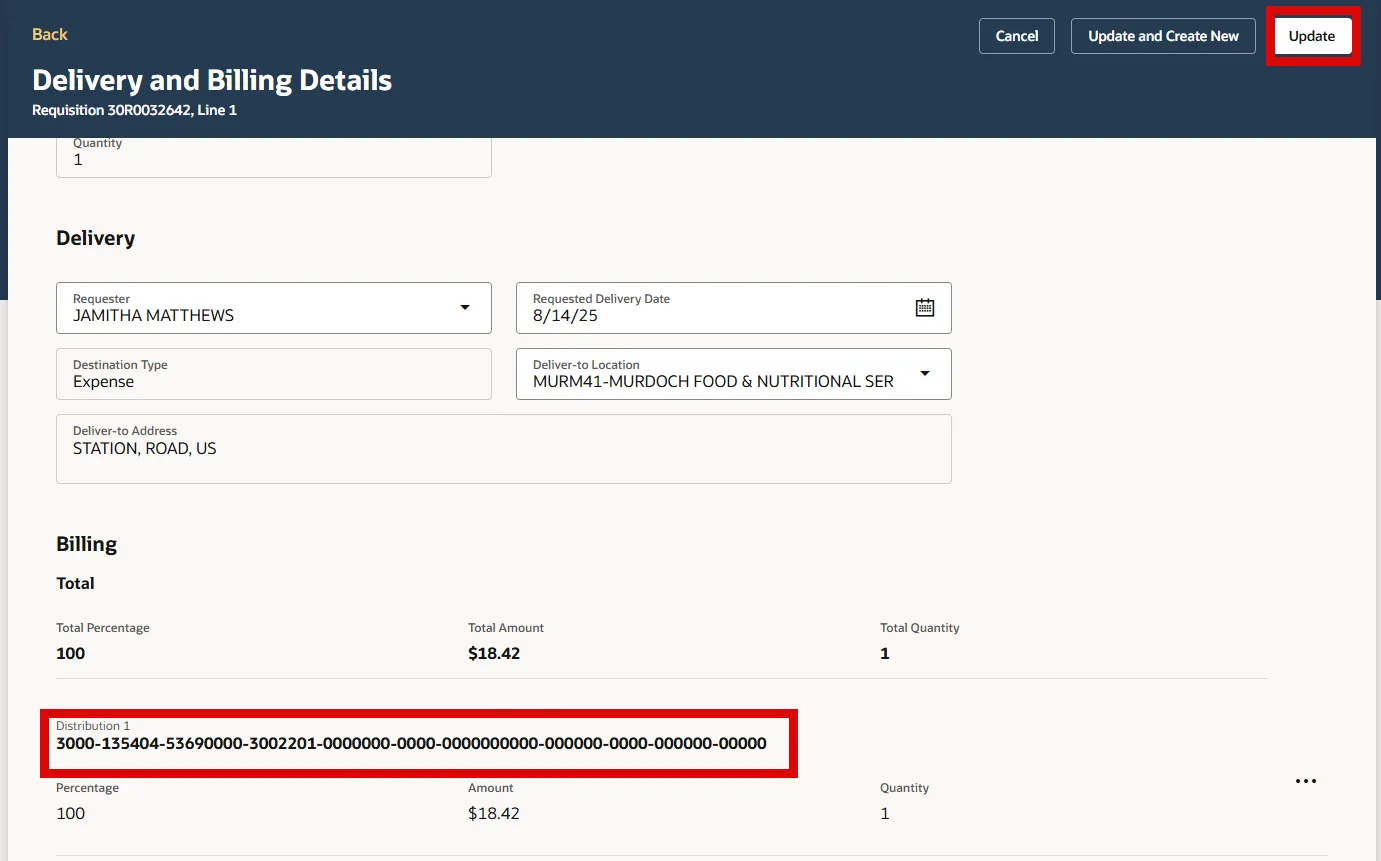
Step 18. The Accounting Distribution will populate in the Billing section, then select Update.
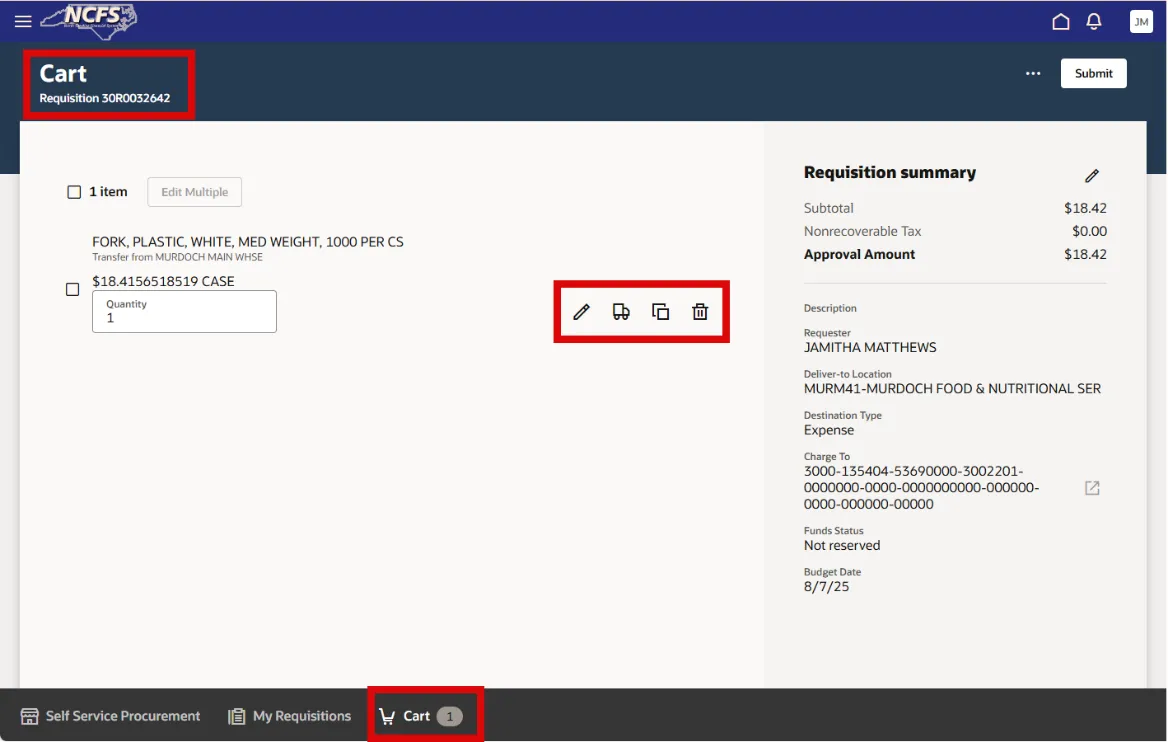
Step 19. In the Cart section, verify the Requisition Order details before submitting the order.
Step 20. You can edit the Line Item details by selecting the Pencil icon, edit the Delivery and Billing details by selecting the Box Truck icon, Duplicate the line details by selecting the Two Overlapping boxes icon, or delete the line by selecting the Trashcan icon.
Step 21. To enter additional Requisition Lines to your Requisition order, select the Self Service Procurement tab at the bottom of your screen.
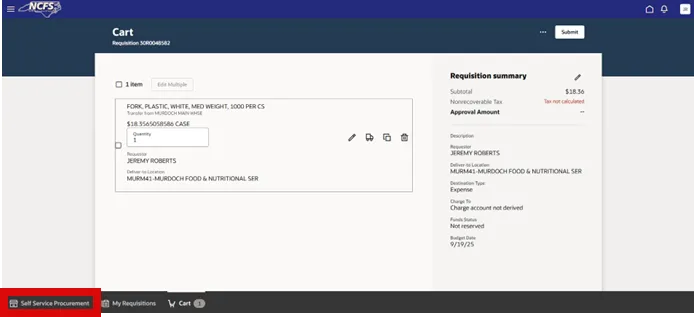
Note: Repeat Steps #6 through Steps #20 to add additional lines to your Requisition Order.
Step 22. Next select the Pencil icon beside the Requisition Summary to enter a mandatory Description.
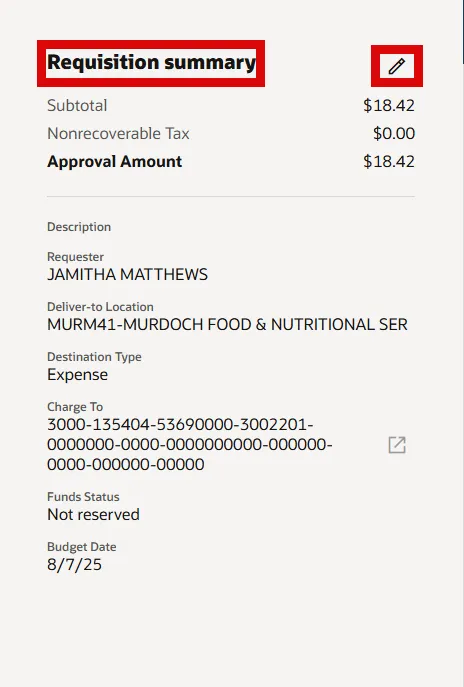
Step 23. In the Description field, enter information that will be useful in identifying this Requisition. Example: Requisition 30RXXXXXXX XX/XX/XXXX.
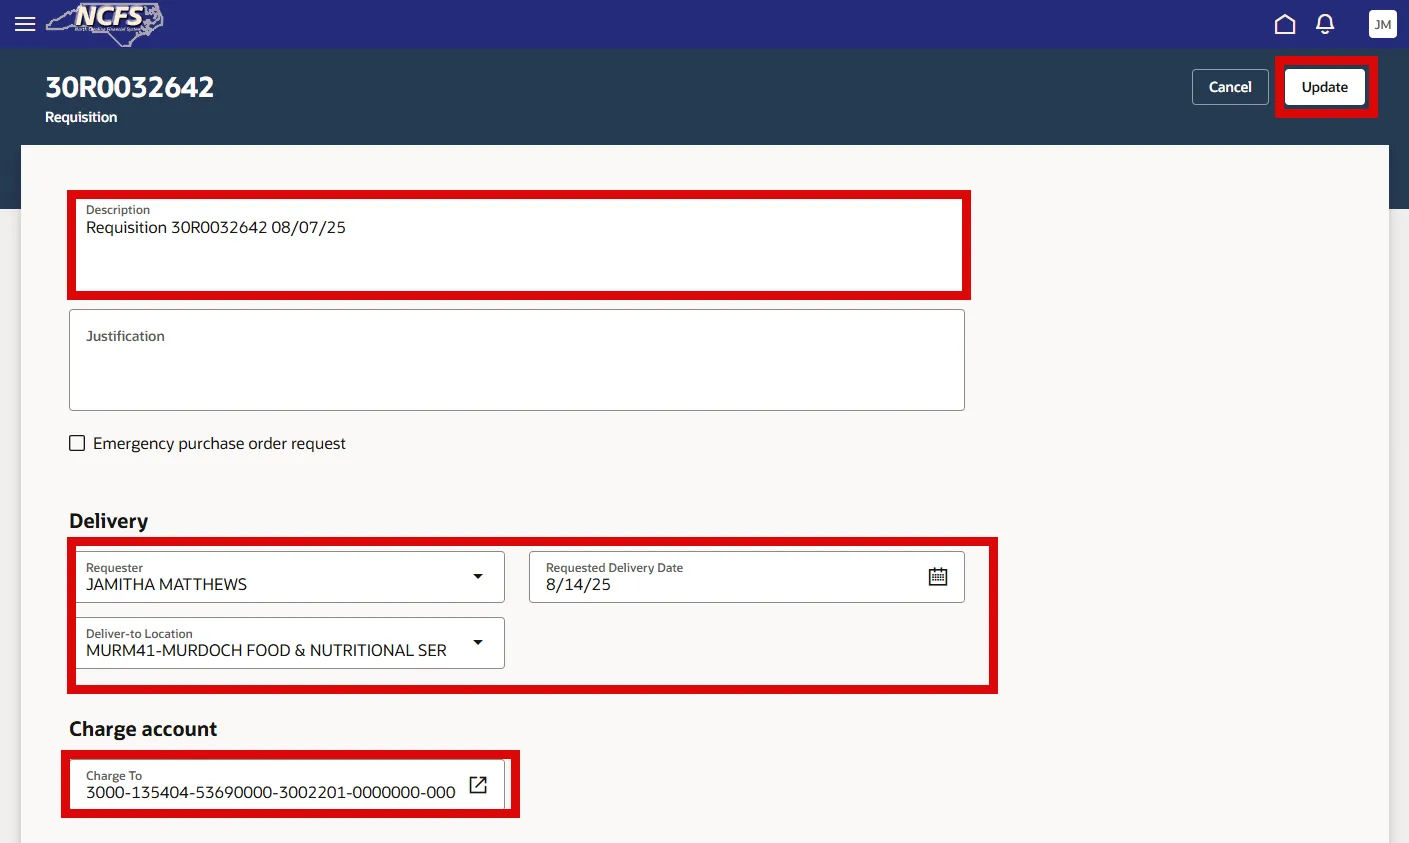
Step 24. You can edit the Requestor, Requested Delivery Date, Deliver to Location, and Charge Account by selecting the Pencil icon next to the Requisition Summary.
Step 25. Then select the Update button to continue.
Step 26. Verify all your information and then select the Submit button.
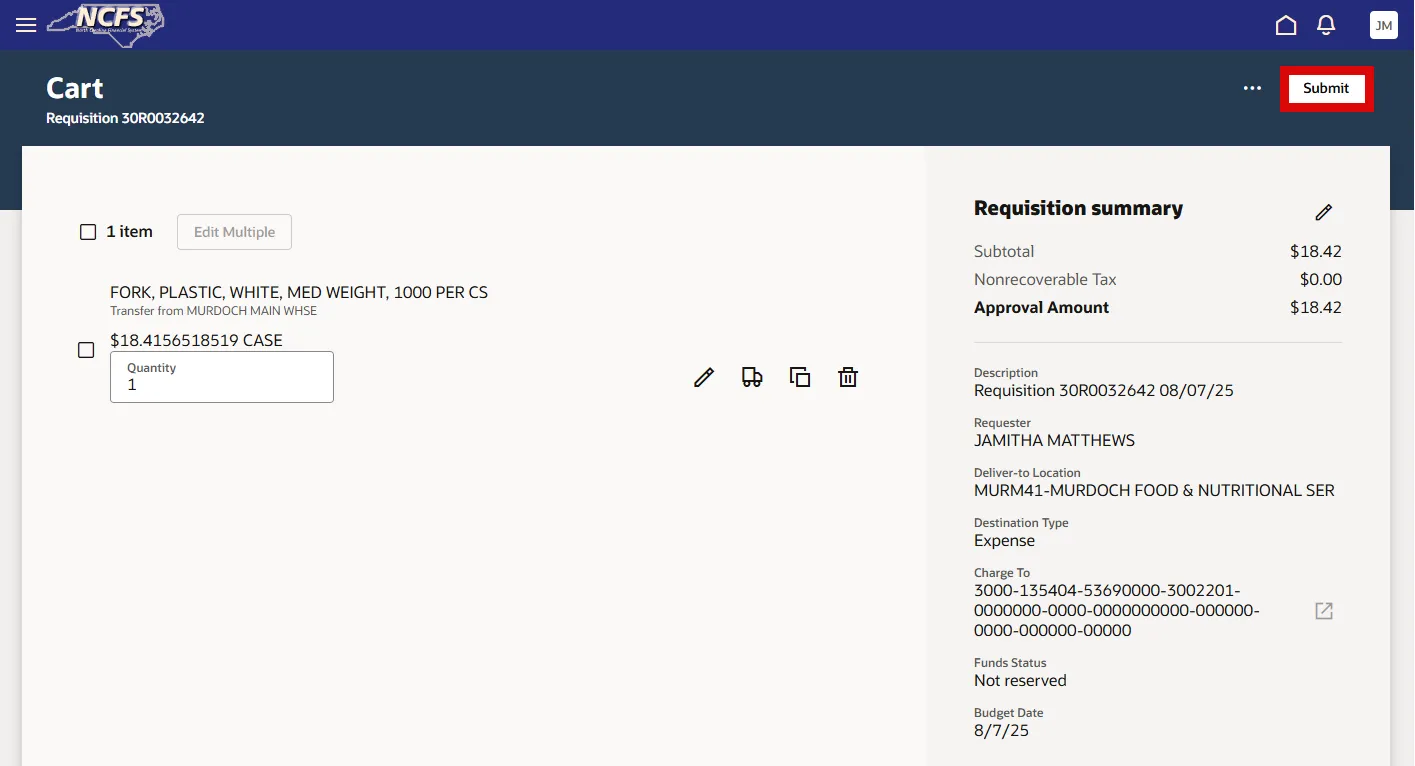
Step 27. A Pop-Up Box will appear, if there are any Funds Check warnings.
Step 28. Select the View Details link to see any warning details.
Step 29. Select the Submit button, when you’re ready to submit the Requisition order.

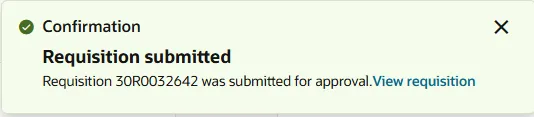
Step 30. A Confirmation box will appear, showing the Requisition was submitted.
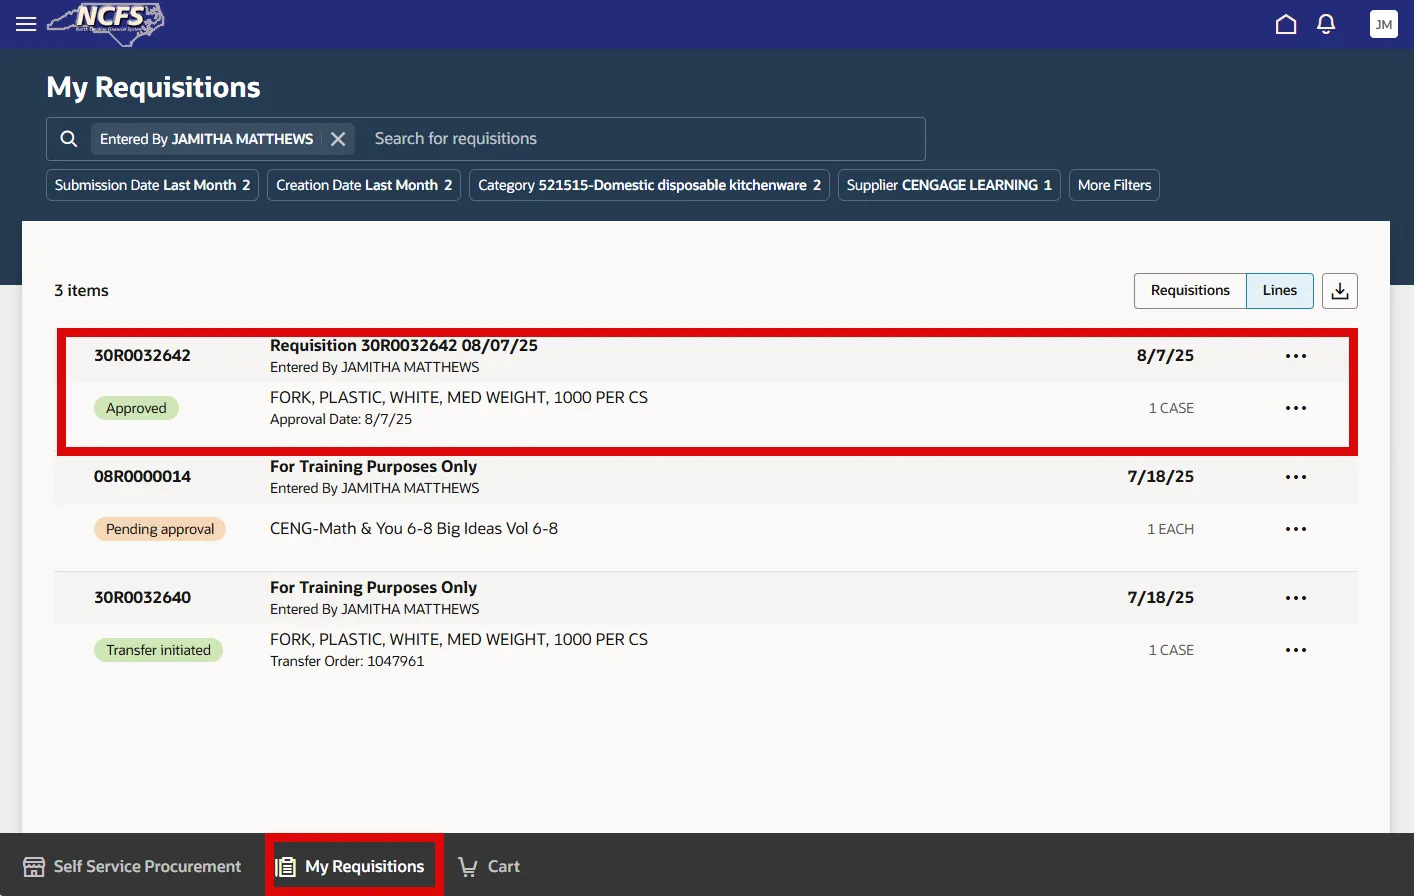
Step 31. You can select the My Requisition tab at the bottom of the screen to view the Approved Requisition.
Review Consumption Requisitions
To review Consumption Requisitions in NCFS, please follow these steps. There are 5 steps to complete this process.
Step 1. On the Home page, select the Procurement tab. Select the Purchase Requisitions (New) app.
Step 2. Select the My Requisitions tab at the bottom of the screen, you will now be able to review recent orders and search for Requisitions.
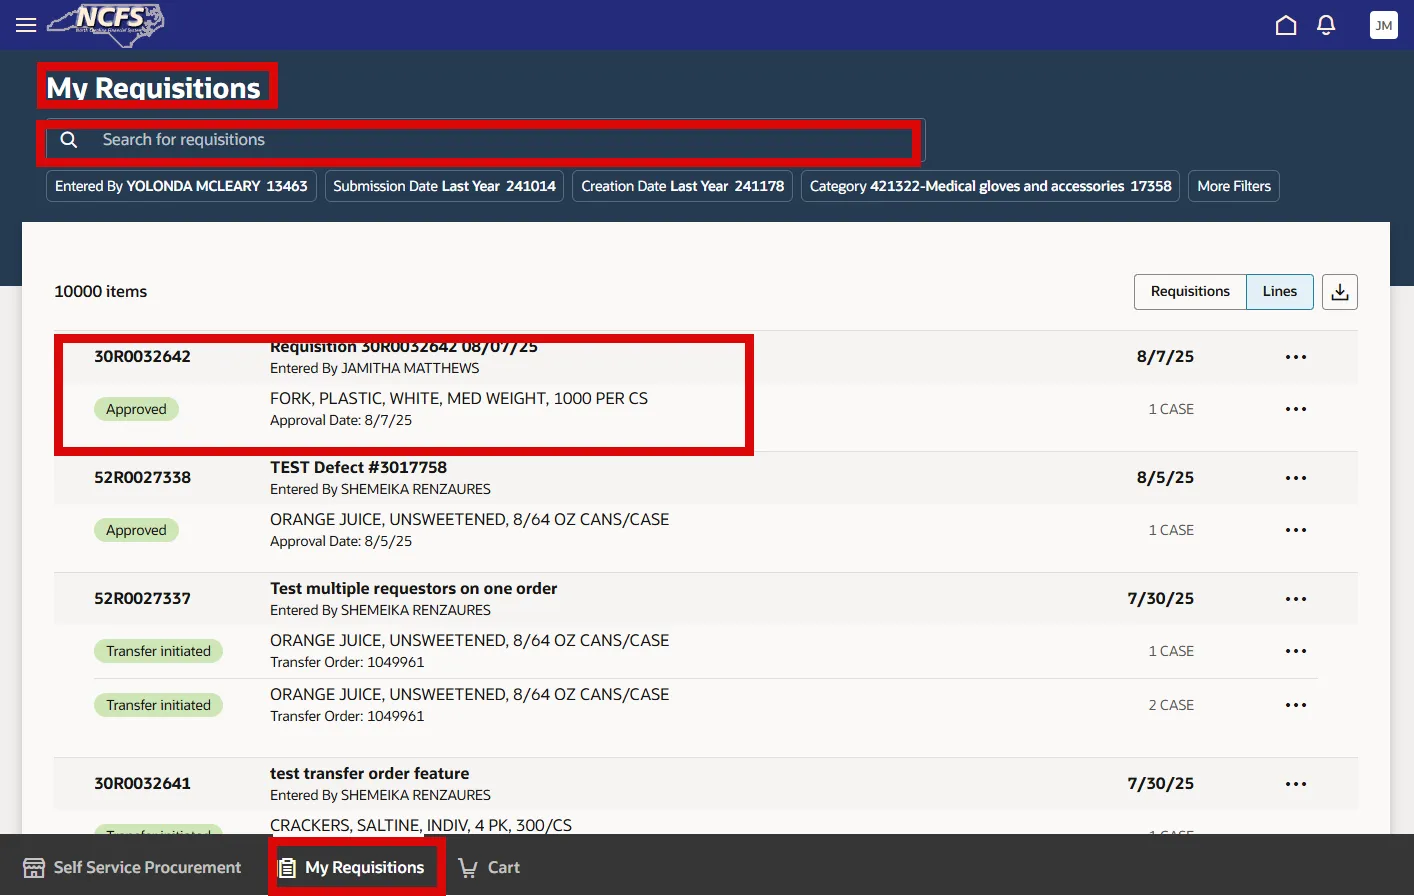
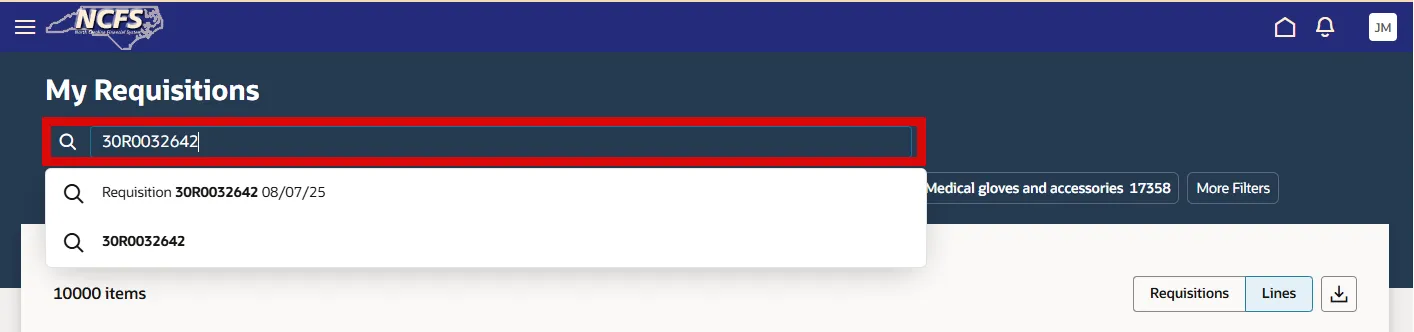
Step 3. In the Search Bar section, enter the Requisition number and press the Enter key.
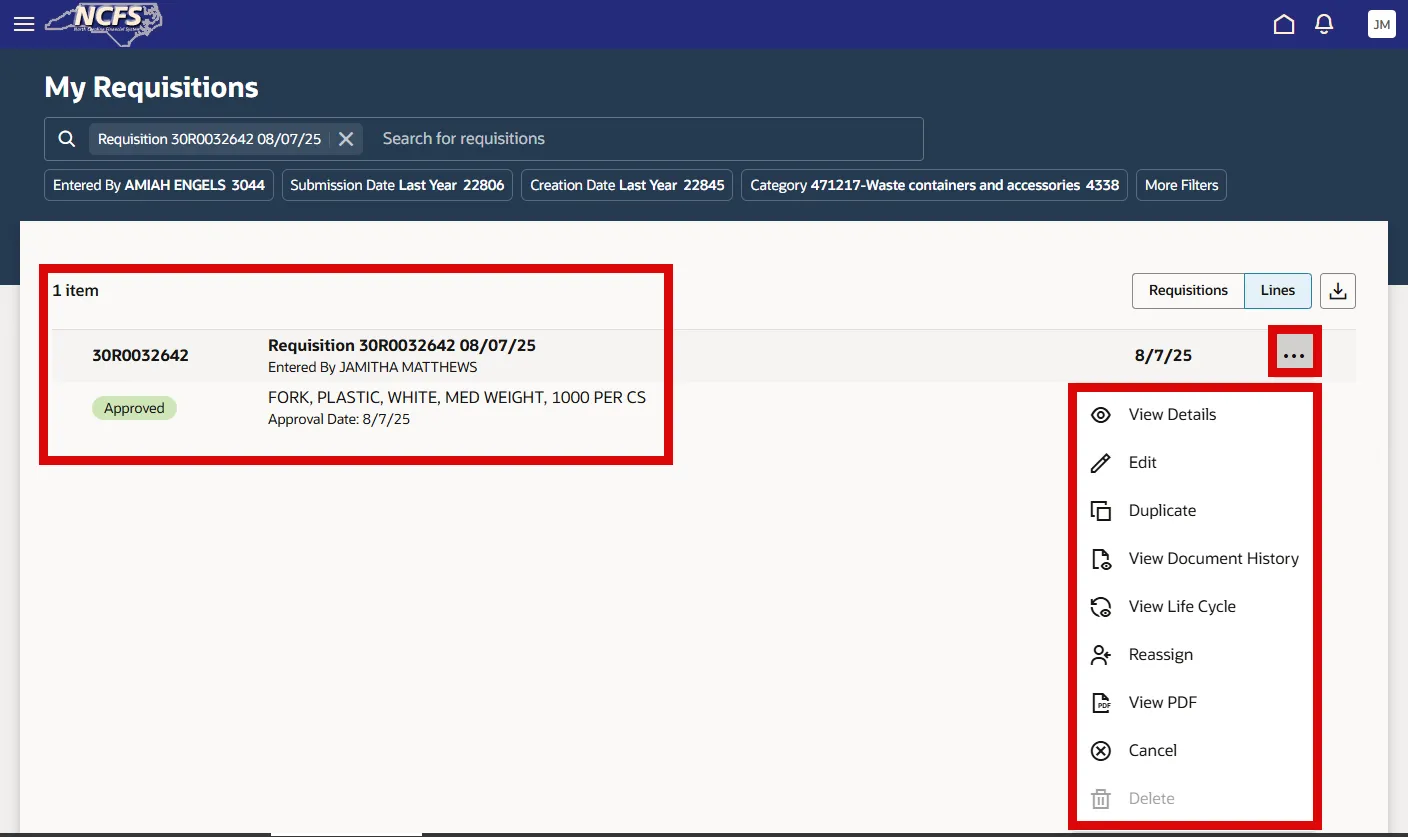
Step 4. The Requisition will appear. You can select the Actions (…) to view: View Details, Edit, Duplicate, View Document History, View Life Cycle, Reassign, View PDF, or Cancel.
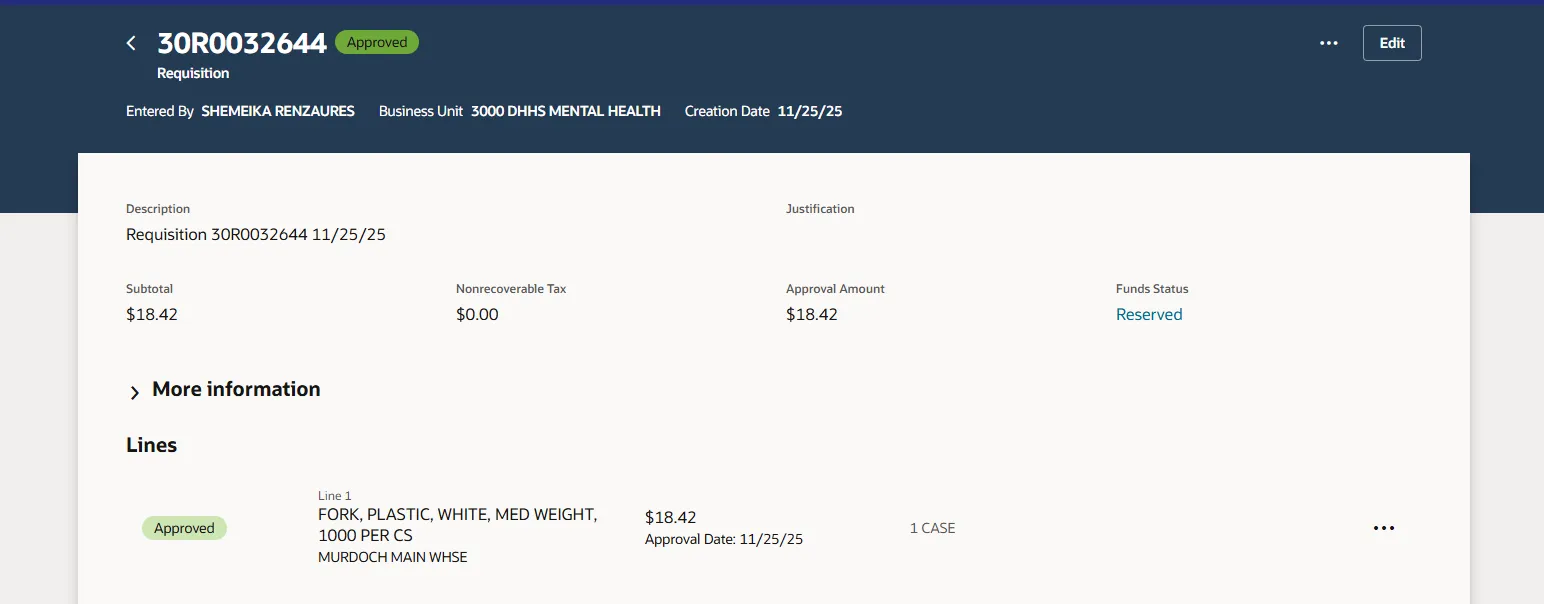
Step 5. Click the Requisition to view requisition line information.
Wrap-Up
You can create orders on behalf of others by creating Consumption Requisitions in NCFS using the steps above.
You can review and submit orders in NCFS using the steps above.
Additional Resources
- Web Based Training (WBT)