Purpose
The purpose of this Business Process Procedure is to explain how to transfer an existing position from one Organizational Unit to another Organizational Unit within an Agency in the Integrated HR-Payroll System.
Trigger
There is a need to move an existing position from one Organizational Unit to another Organizational Unit within an Agency.
Business Process Procedure Overview
This action will move a position from one Organizational Unit to another Organizational Unit. The move may involve a change in the Cost Distribution, Organizational Unit, or the County. The position number does not change.
Agency to Agency transfers must be completed by BEST Shared Services OM team.
Tips and Tricks
See the OM Tips and Tricks Job Aid for a full listing of Best Practices and Tips & Tricks. The job aid is located on the Training HELP website.
- Copy is to be used most of the time. This will delimit the existing record and create a new record with the start date given. Copying keeps a history of the old record.
- Change is to be used only if you make a spelling or other simple error and want to change the record. There is no history tracked on what the record used to be if you use the change functionality.
Access Transaction
Via Menu Path: This transaction code is not on the menu path. Enter the transaction code in the Command Field (white field in the upper left-hand corner of the screen. If the Command field is not visible, click the gray triangle in this area to display it). Click Enter once the transaction code has been entered.
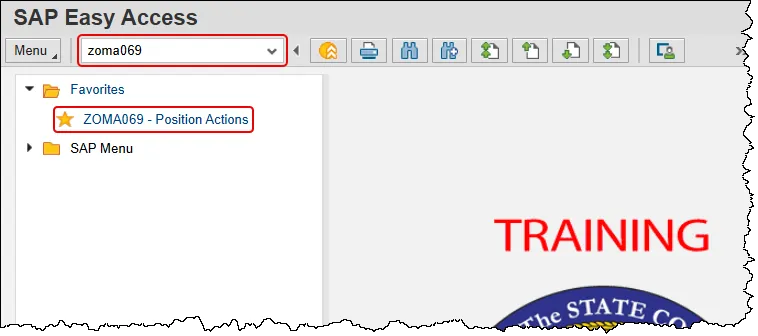
Via Transaction Code: ZOMA069
Procedure
There are 19 steps to complete this process.
Step 1. Enter zoma069 in the command field and press enter, or double click it from your favorites folder if you’ve previously saved it there.
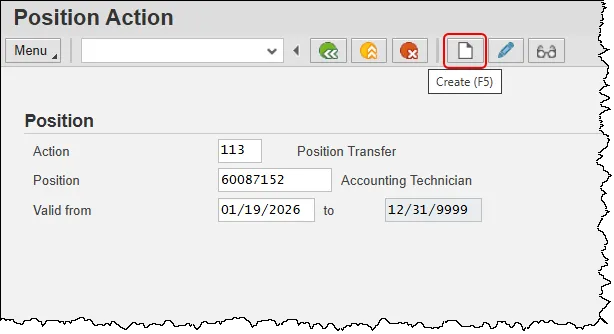
Step 2. Input 113 for Position Transfer, into the action field. You may type it in directly or you can click in the empty field, then click on the matchcode button to its right and then choose it from the pop-up.
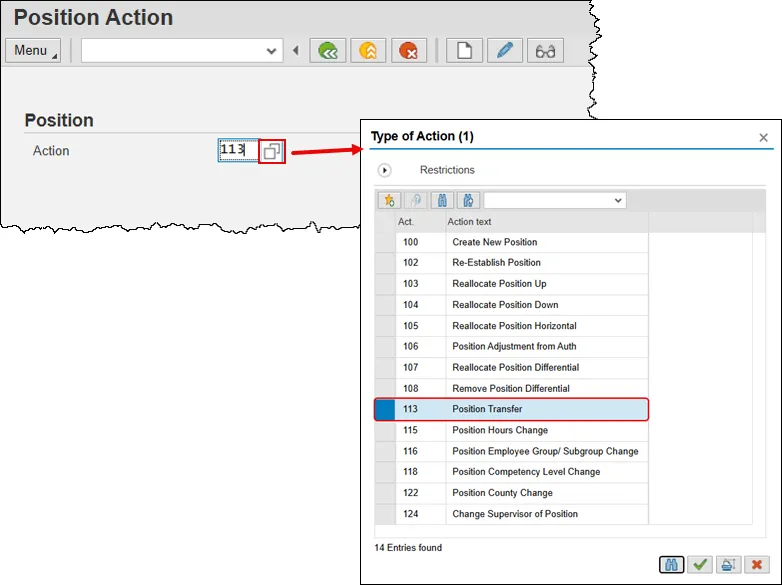
Note: The action number to transfer a position is 113. Use the matchcode search function for additional OM action options available from this transaction as appropriate.
Clicking Enter will validate the action you have requested and display the date fields for entry.
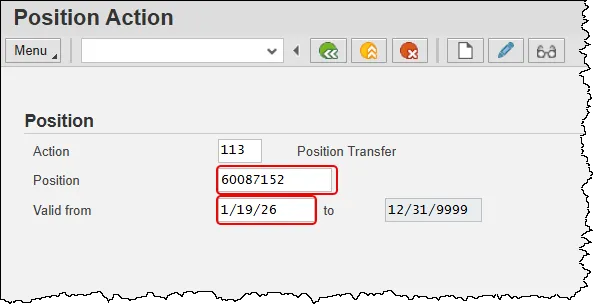
Step 3. Input the appropriate data in the following new fields:
- Position – ID number of position being transferred. (This document will use 60087152.)
- Valid From – Date on which the transfer becomes active (This document will use 01/19/26.)
Step 4. Click the Enter button to validate that this is the position with which you need to work. This step will also ensure that the date is in the format mm/dd/yyyy.
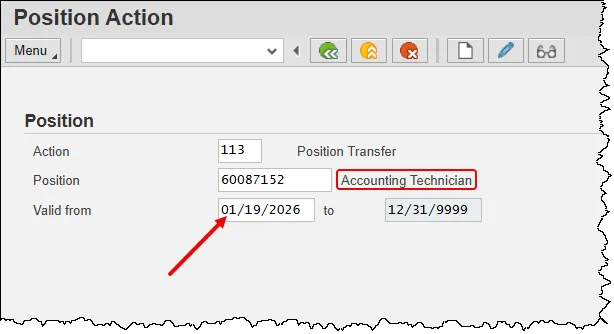
Step 5. Click the Create button.
Note: Once you click create, the position number and effective date are locked in. If a mistake is discovered with one of these data points, the action must be deleted and a new one created with the correct information.
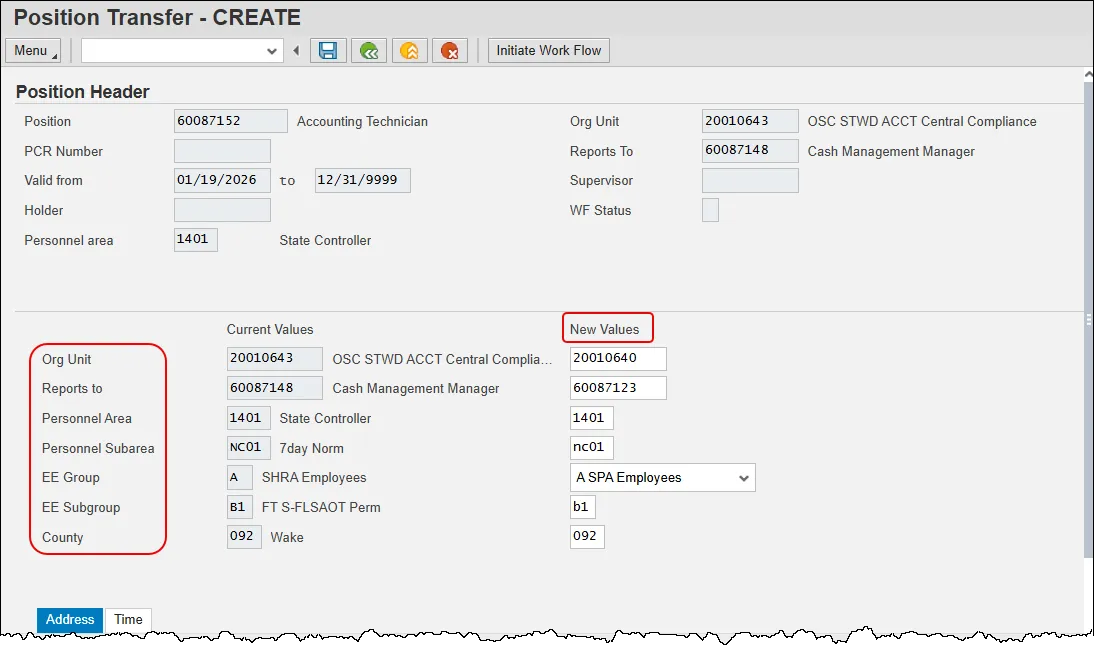
Step 6. Note that there are two columns showing in the body of the screen. The left column is labeled ‘Current Values’ and data exist in each field. The right column is designated for ‘New Values.’ All fields require input as denoted by an asterisk. If the exact value for a field is not known you can click within the empty space to generate a matchcode button to its right. Clicking on the button will provide multiple ways to search for the applicable data.
Update the following fields:
- Org Unit – The 8-digit number representing the organizational unit the position is transferring to. You must change the org unit value for the transfer action, or you will receive a hard stop error. This document will use ‘20010640’.
- Reports to – The 8-digit number representing the position the one being transferred will report to upon completion of the action. This document will use ‘60087123’.
- Personnel Area – The 4-digit code representing the agency to which the position belongs. This document will use ‘1401’.
- Personnel Subarea – The code that defines various working schedules so that Time Management can define groups of specific time entry rules. This document will use ‘NC01’.
- EE Group - An organizational entity which is governed by specific personnel regulations. An employee group is divided into several employee subgroups. This document will use ‘A’.
- EE Subgroup - Code on position identifying the FLSA status and full-time equivalency. This document will use ‘B1’.
- County – The 3-digit code identifying the county in which the position resides. This document will use ‘092’.
Note: The data used in this example is provided for sample purposes only. The data will change depending on the Agency and specific position being transferred.
Best Business Practice: The best practice is to enter any data as appropriate, review all data, and click Enter to allow the system to validate the data.
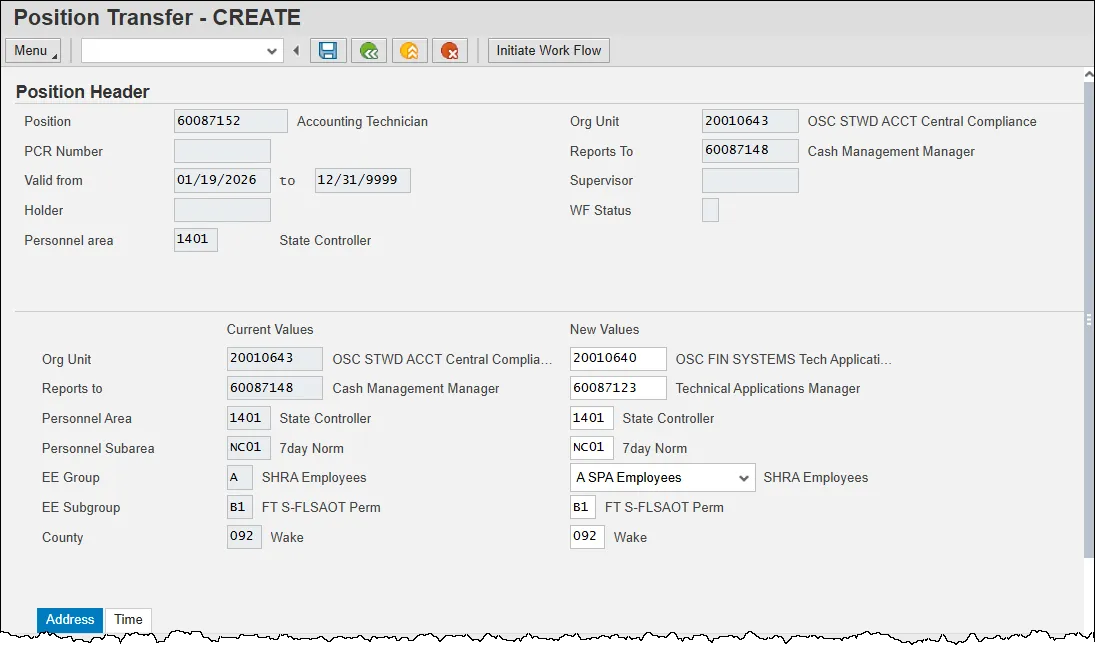
Step 7. Click the Enter button to validate your data and check its validity. The text for the values will appear to the right of the fields and provides an opportunity to ensure accuracy. Corrections can be made until the data is saved.
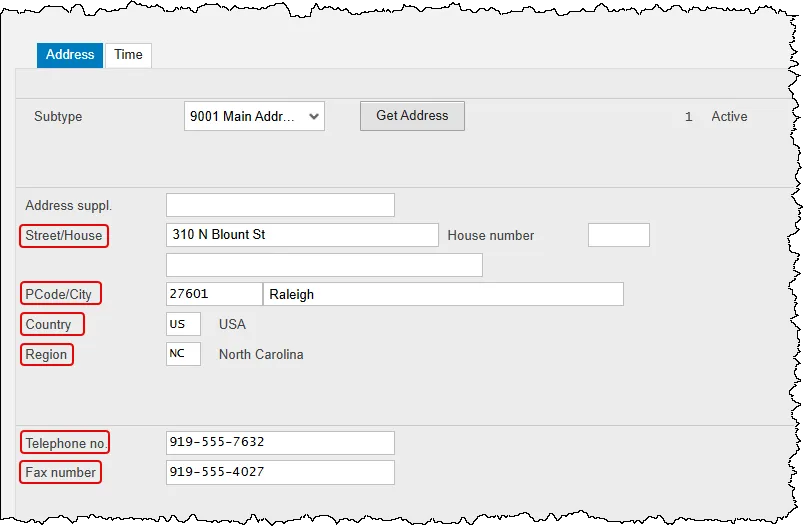
Step 8. A Position Transfer action allows us to update its address. Ensure the Address tab is selected by clicking on it. Select the type of address (Main, Mailing, or Courier) being updated by clicking on the drop-down list in the Subtype field.
Finally, click the Get Address button to display the current data for that subtype. This document will update the Main Address.
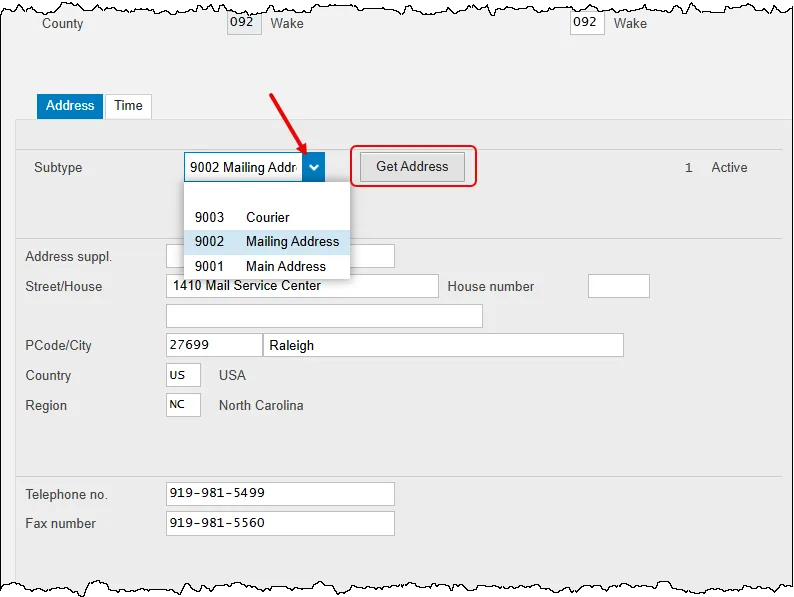
Step 9. Enter the new or updated address in the following fields.
Note: Data should only be added to the fields below. The State of North Carolina does not use the other fields.
- Street/House – The street name and number, up to a maximum of 30 characters. This document will use ‘310 N Blount St.’
- PCode/City – The postal (zip) code for the address. This document will use ‘27601/Raleigh’.
- Country – The country in which the position resides. This field defaults to ‘US’ and should only be changed as required.
- Region – Represents the state in which the position resides. This field defaults to ‘NC’ and should only be changed as required.
- Telephone no. – Phone number to be associated with the position.
- Fax number – Fax number to be associated with the position.
Step 10. Click the Enter button to validate the address entries. No new data is shown, however any potential errors with entered values will be shared at this step.
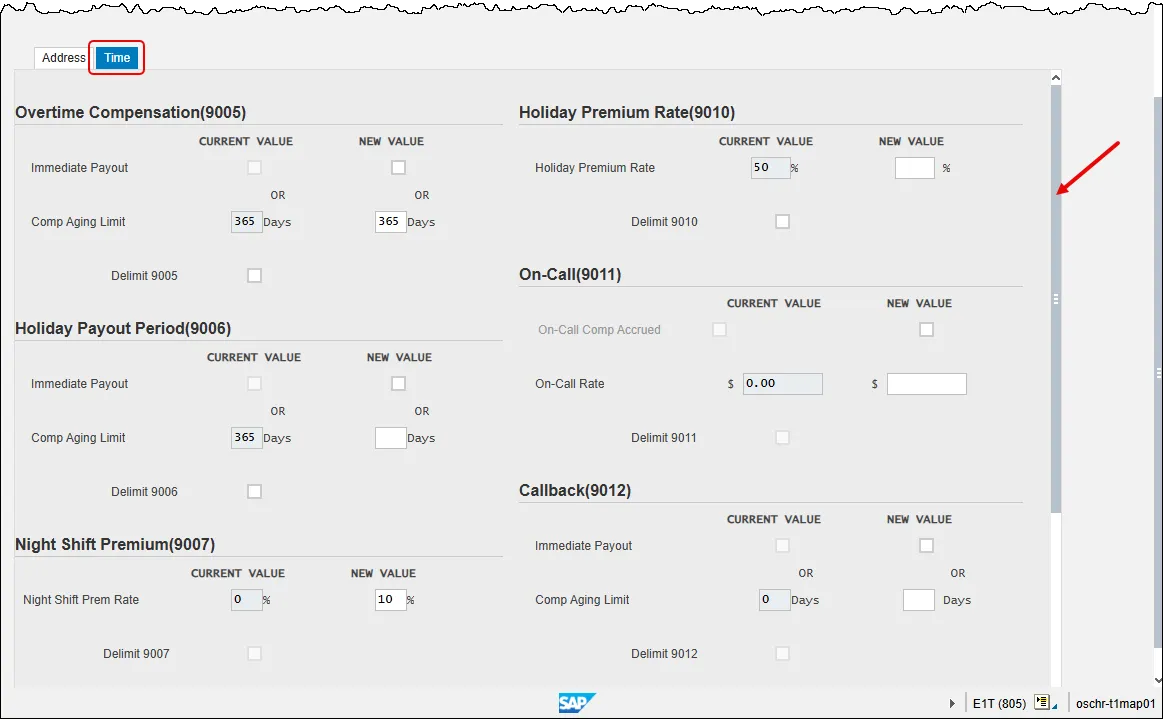
Step 11. A Position Transfer action allows us to update any time setting(s) associated with the position. Click the Time tab.
The Time tab contains the fields required for time entry and payroll calculation rules. Premium rates are determined from the data saved on the Position in the HR-Payroll system, not what a person enters on their time sheet. The person who holds this position will automatically receive the premiums which are designated on this position.
There are 10 potential fields that can be changed and not all will be viewable at one time. Note that the Time Tab will have its own vertical scroll bar which is used to see all the settings.
Each field is associated with a specific position infotype and displays current values. Changes are applied via the values entered in the New Value column. If no data is entered, the current setting remains in place.
Update the following fields as applicable:
- Overtime Compensation (IT9005) - Stores settings related to overtime compensation.
- If time worked beyond the overtime limit (40 hours, etc.) is to be paid or accumulated as compensatory time, the position must have a valid IT9005 record (which is this area).
- If overtime compensatory time is to be paid out (FLSA Subject only) or expired (FLSA Not-subject only) at a point earlier than 12 months from when it was earned, the Comp Aging Limit field should be populated with the corresponding number of days (30 days, 60 days, etc.).
- If it is to be paid out immediately, the Immediate Payout checkbox should be checked. The default is 365 days. An IT9005 record is not required if the position is not eligible for overtime pay or compensation.
- Holiday Payout Period (IT9006) - Indicates if overtime compensatory time is to be paid out (FLSA Subject only) or expired (FLSA Not-Subject only) at a point earlier than 12 months from when it was earned. The Comp Aging Limit field should be populated with the corresponding number of days (30 days, 60 days, etc.). The default is 365 days. If no record exists, the default value of 365 applies. If it is to be paid out immediately, the Immediate Payout checkbox should be checked.
- Night Shift Prem Rate (IT9007) - Pay rate increase for Night Shift premium. If OSHR has approved a rate other than the default of 10%, the rate as a percentage must be entered in the rate field.
- Evening Shift Premium (IT9008) - Stores settings for positions that are eligible for evening shift premium. OSHR approved rates other than the default of 10% must be entered in the rate field.
- Weekend Shift Premium (IT9009) - Stores settings for positions that are eligible for weekend shift premium. The OSHR approved rate other than the default of 10% must be entered in the rate field.
- Holiday Premium Rate (IT9010) - Pay rate increase for Holiday Pay. The OSHR approved rate other than the default of 50% must be entered in the rate field.
- On-call (IT9011) - Stores settings for positions that are eligible for On-Call compensation. The accrued box should be checked if the time is to be collected as On-Call comp time. The rate field must be populated with the OSHR approved on-call rate.
- Callback (IT9012) - Stores settings for positions that are eligible for Callback compensation. The decision to pay or award comp time is determined by the “Immediate Payout” checkbox.
- Extended Duty (IT9016) - Stores settings for positions that are eligible for extended duty
- GAP Hours (IT9017) - Positions eligible for Gap Hours Comp must have a valid IT9017 record. The decision to pay versus comp time is determined by the existence of the 9017 infotype. Gap Hours are additional hours for Subject-FLSA employees. The “Additional hours” are those hours caught in the gap between the minimum hours of work required and the overtime threshold. These hours are currently being paid at an hour-for-hour rate for Subject-FLSA employees.
Note: The values shown in the screenshot are sample data only and are provided for illustration purposes.
Step 12. Click the Enter button to validate the time setting(s) entries. No new data is shown, however any potential errors with entered values will be shared at this step.
Best Business Practice: The best practice is to enter any data as appropriate, review all data, and click Enter to allow the system to validate the data.
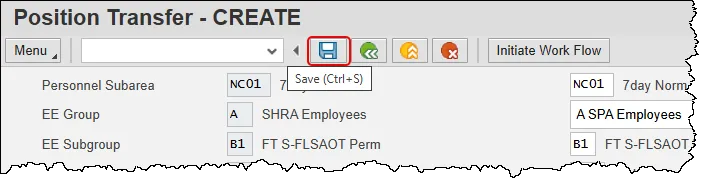
Step 13. Take a moment to verify all data that has been entered. When the Save button is pressed, all values are locked in and can only be changed by leaving the action and coming back to it with the Change button in transaction zoma069.
Step 14. Click the Save button.
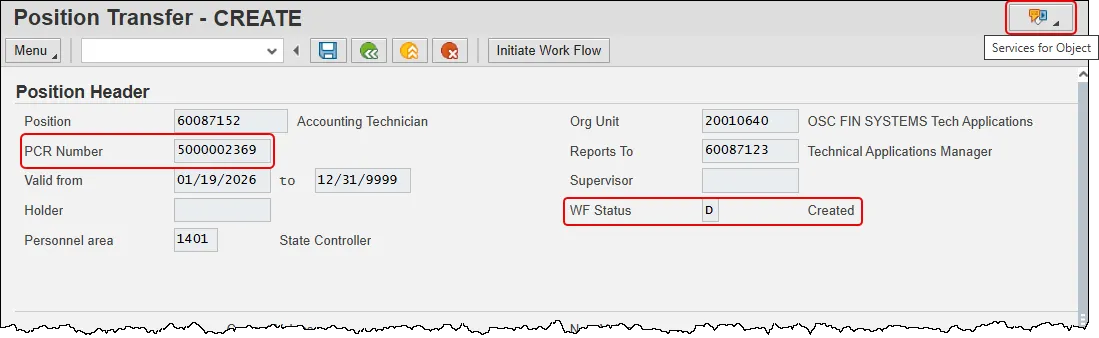
Step 15. Observe that new data has been added and a new functional button has appeared.
The system has assigned a Position Request Number (PCR) and a WF Status of ‘D’ (Created) in the Position Header section. This PCR number does not mean the form has been submitted to workflow. You still must initiate workflow to begin the process. If you have not yet initiated the workflow, you can use the PCR number to make changes and save the latest form.
Although it is not required, BEST Shared Services recommends that you keep a log of your created and submitted actions. Doing so will help them in assisting you should you need their help. Information that may be helpful includes the position number, the action type, the effective date and the PCR number.
Additionally, the Services for Object button has appeared on the top right of the screen.
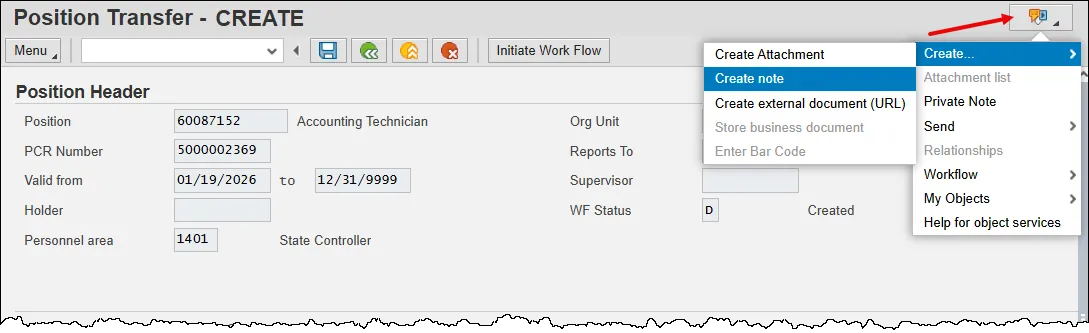
Step 16. Per Office of State Human Resources (OSHR) policy, all PCRs must include an attached note at the time of submission.
Click the Services for Objects button, hover over Create…, then click Create Note.
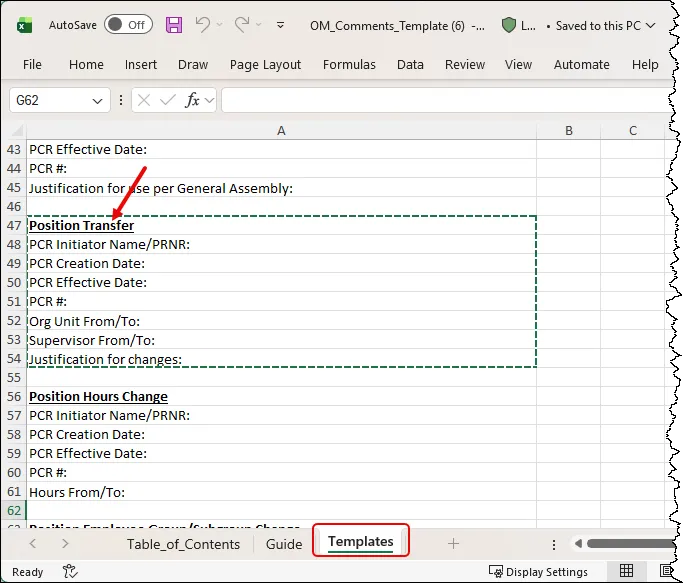
Step 17. The content and format of this note must follow the appropriate template provided in the OM Action Notes Template.
- In the referenced action notes template, click into the Templates tab and then locate the template for Position Transfer. Copy the template into your clipboard.
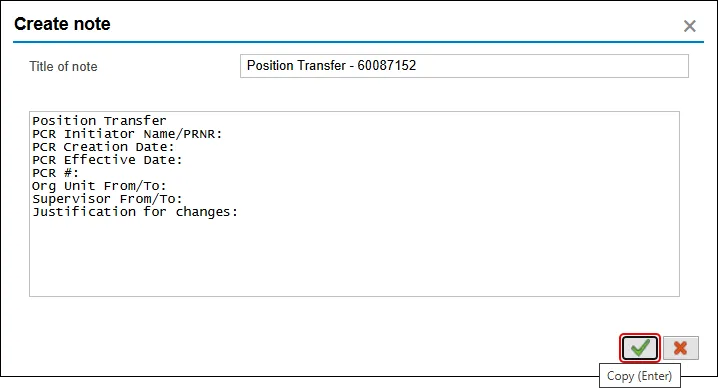
- Return to the Integrated HR-Payroll System and provide a note in the Title of note field. Then, paste the template into the body of the Create Note pop-up and fill it in with the appropriate information. Finally, press the Copy button to save the note.
Step 18. Click the Initiate Work Flow button.
Doing so begins the electronic approval process known as Workflow. No changes can be made after the PCR has been submitted for approval, unless it is rejected at any stage and sent back to you (the initiator/requestor).
This position data in the HR-Payroll System is held in the Planned status until the workflow has gone through the entire approval process. Once position data has been saved, it is in Planned status on the position. If the workflow is approved, the data on the various infotypes will be moved into the Active status on the position. If the workflow is cancelled, the data will be moved into the Rejected status on the position.
Note the confirmation on the bottom left of the screen.

Step 19. Click the back button to return to the SAP Easy Access Screen.
The system task is complete.