Purpose
The purpose of this Business Process Procedure is to explain how to reallocate a position to a different level and job classification in the Integrated HR-Payroll System.
Trigger
A position is assigned to a different level and Job classification. NOTE: A position must be reallocated (OM) prior to the person being reallocated (PA).
Business Process Procedure Overview
Reallocation actions are performed in the Integrated HR-Payroll System when a position is assigned to a different level and Job classification:
- Selection of a Job (creating a new relationship between the position and new job)
- Assignment of a Supervisor (creating a new relationship between the position and position of the supervisor) (if changing)
- Assignment of Employee Group/Employee Subgroup (if changing)
All fields are mandatory and must be maintained. If no changes are needed to these fields, select and copy the current values (left hand side) into the “proposed value” (right hand side) for:
- Supervisor and/or
- Employee Group/Employee Subgroup
Otherwise, manually enter or use the standard SAP search to select the Position. Also, use the drop-down list to select the appropriate Employee Group/Employee Subgroup.
Please reference the State Personnel Manual for additional business process questions regarding when to execute each of the reallocation actions. Please note that the action codes (numerical values) are SAP specific and will not appear in the State Personnel Manual:
- Reallocate Position Up (103)
- Reallocate Position Down (104)
- Reallocate Position Horizontal (105)
- Reallocate Position – Pay Plan Change (121)
- Position Adjustment from Auth (106)
- Reallocate Position Differential (107)
- Remove Position Differential (108)
103 - Reallocate Position Up: Used to assign a Position to a Job with a higher pay grade within the same pay plan.
- Example: NC11 to NC12
104 - Reallocate Position Down: Used to assign a Position to a Job with a lower pay grade within the same pay plan.
- Example: NC24 to NC21
105 - Reallocate Position Horizontal: Used to assign a Position from one Job to another Job within the same pay plan, grade, and range. Is also used for reallocations from FR to FR.
- Example: NC15 to NC15
121 - Reallocate Pay Plan Change: Used to assign a Position from a Job in one pay plan to a Job in another pay plan.
- Examples: Graded to Banded, Banded to Graded.
NOTE: If a Position is reallocated from one Banded Job to another Banded Job, use Market rates to determine if the reallocation is up, down, or horizontal. The Market rate is the rate determined for each competency level (Contributing, Journey, Advanced) of the job class. Compare the Market rate of the old Job to the new Job. If higher, use Reallocate Up. If lower, use Reallocate Down. If the same, use Reallocate Horizontal.
106 - Position Adjustment from Auth: Used to adjust a Position differently (Higher/Lower) from Budget Authorization.
107 - Reallocate Position Differential: Used to adjust a Position to a Job classification at a higher salary grade due to a recruitment or retention problem at a specific location.
108 - Remove Position Differential: Used to return a Position to a Job with a lower salary grade when the higher grade is no longer needed.
Access Transaction
Via Transaction Code: ZOMA069
Procedure
There are 16 steps to complete this process.
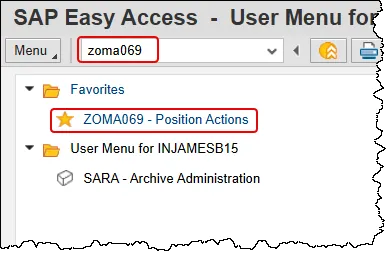
Step 1. Enter zoma069 in the command field and press enter, or double click it from your favorites folder if you’ve previously saved it there.
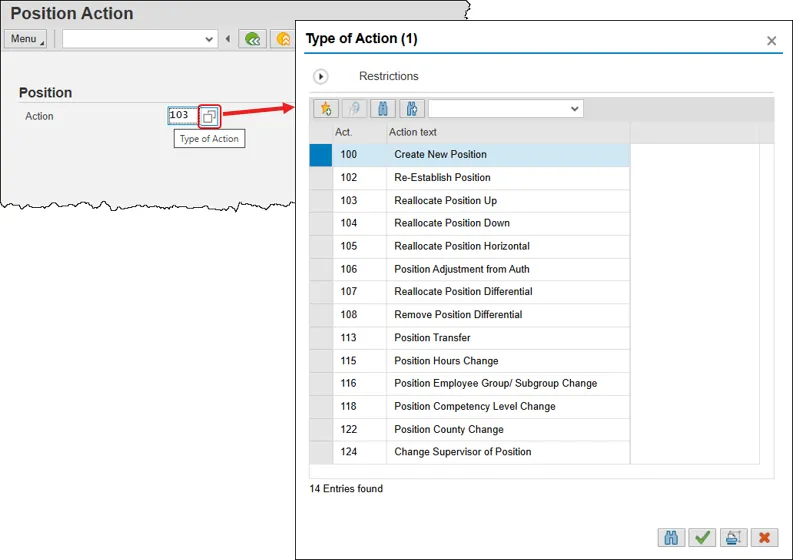
Step 2. Enter the appropriate action code in the Action field. Alternatively, click in the empty field, then on the matchcode box and choose the desired action by double clicking it. This help document will demonstrate action 103 – Reallocate Position Up.
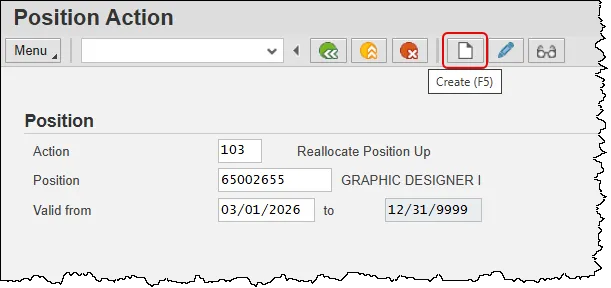
Step 3. Input the ID number of the Position being maintained as well as the effective date of the change in the Valid from field, then press Enter. Validate the position name and double check the effective date for accuracy. These values cannot be changed after this step. When satisfied, press the Create button. This help doc will use position 65002655 from the training database.
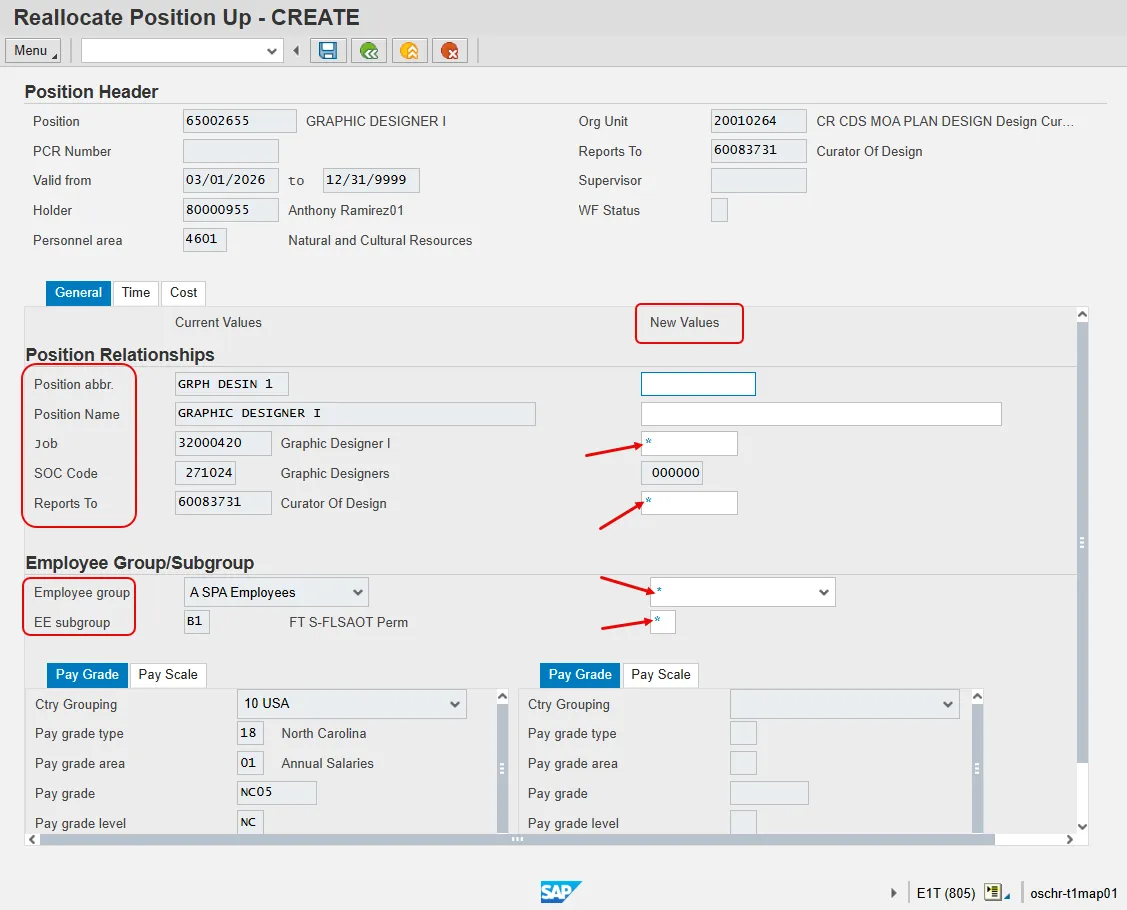
Step 4. Review the current data for the position being updated.
The system will copy the existing data from the position and default it on screen. The Header section will default values in these fields:
- Organizational Unit Object ID and Abbreviation
- Reports To (Supervisor's personnel number and name)
- Valid from (Effective Date based on the value entered on the prior screen)
- Valid to (End date which defaults as 12/31/9999)
- Supervisor (Position's Supervisor)
- Holder (Person assigned to the Position, if any. Position may be vacant.)
- Workflow (WF) Status
- Personnel area (Agency)
On the General tab, the system will display proposed values. This includes:
- Position abbr.
- Position Name
- Job
- SOC Code
- Reports To (Supervisor's personnel number and name)
- Employee group (Subject/Not subject to FLSA and overtime provisions)
- Employee subgroup (Work schedule grouping)
The Pay Grade/Pay Scale tab will default based on the "Job" that is assigned to the position.
Note: The data used in this example is provided for sample purposes only. The data will change depending on the Agency and specific position being updated.
The best practice is to enter any data as appropriate, review all data, and click Enter to allow the system to validate the data.
Several fields on this screen are mandatory. The system will not let you continue if you have not provided data for the mandatory fields. If you are unsure which fields are mandatory, click Enter, and the system will prompt you for information in the mandatory fields.
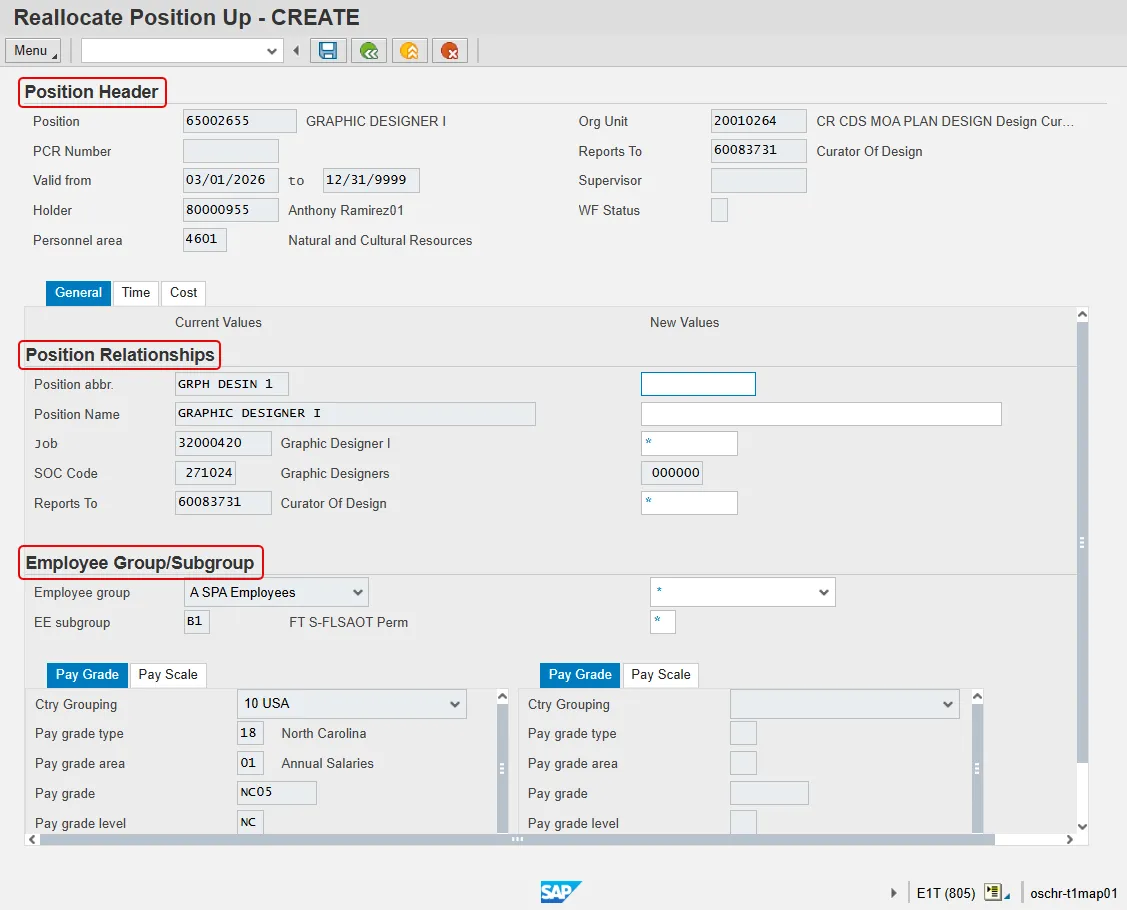
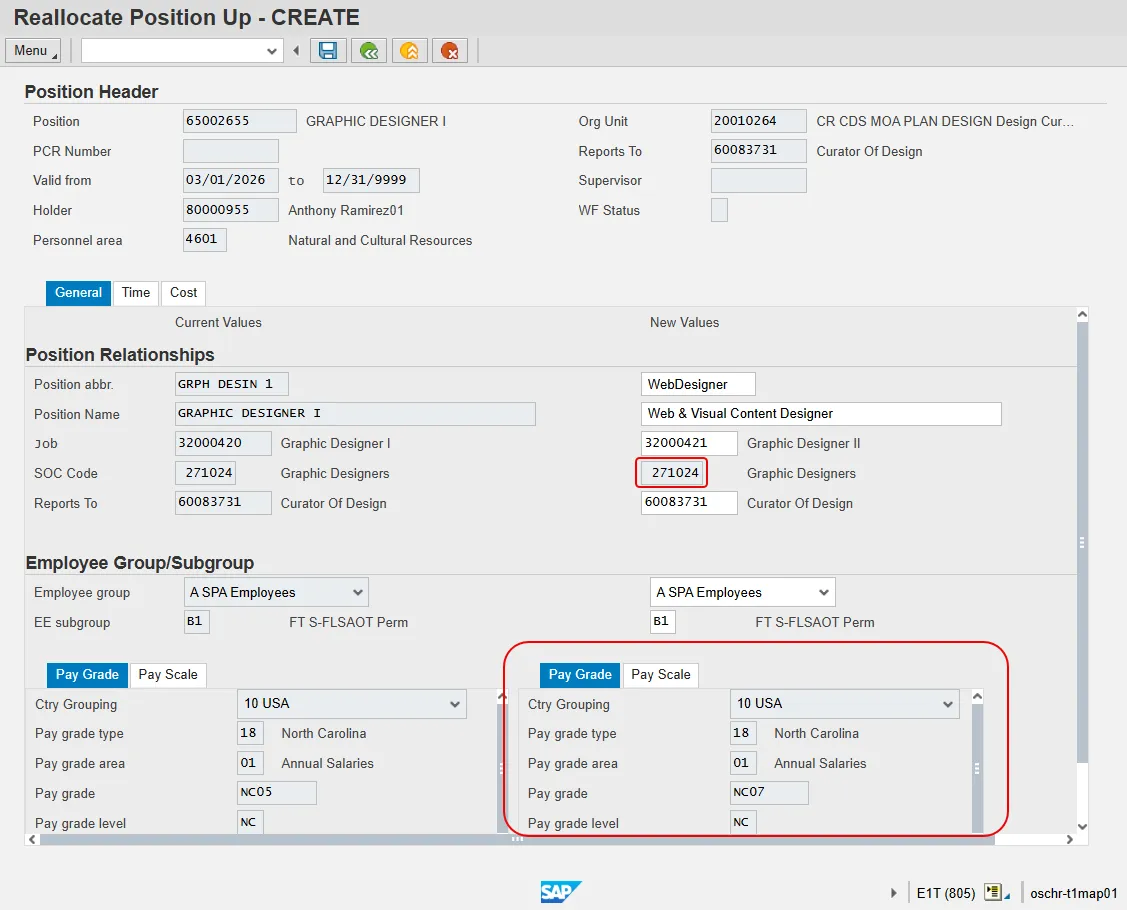
Step 5. Update the following fields in the New Values column:
- Position abbr. – Name of the Position abbreviation. Position short text is a 12-character field. Not all 12 characters must be used. Follow the naming conventions of your agency.
- Position Name – Full description of Position Name, up to 40 characters long. This is the Position Working Title. Best practice is to use something more descriptive than the Job Title.
Note: The following fields are required to be filled out as denoted by the asterisk in the empty field, though only the Job field is required to be different from the Current Values column.
- Job – Code identifying the job. The job is a class and are general classifications of tasks routinely performed together. This value must be changed as part of a reallocation action.
- Reports to – Contains the eight-digit position number that represents the supervising (chief) position for the organizational unit.
- Employee Group – Drives benefits eligibility, leave, and pay calculations.
- EE subgroup – Code identifying:
- Full time/Part time status
- Fair Labor Standards Act Overtime provisions status (Subject or Not-subject)
- Object status (Permanent, Probationary, Time Limited, Supplemental)
Step 6. Click the Enter key to validate the data. Notice that the SOC Code and Pay Grade tab fields are also filled out. The data in these fields is derived from the value input in the Job field.
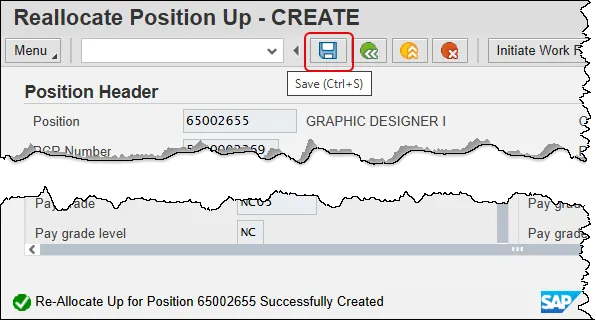
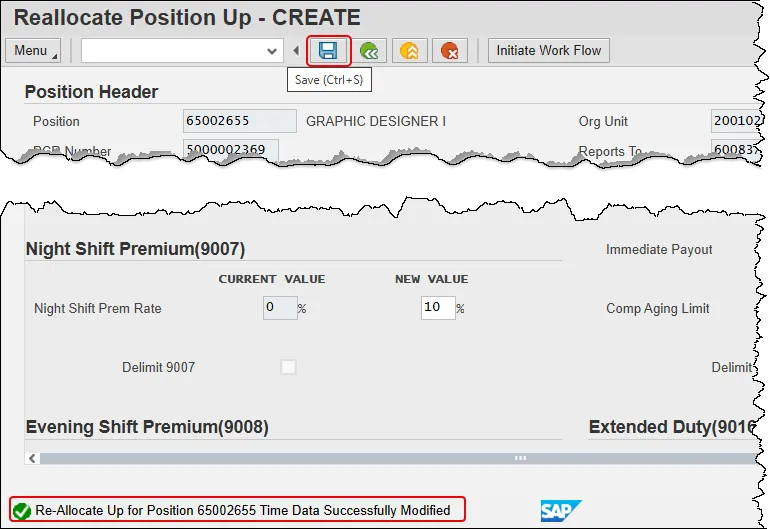
Step 7. Click the Save button. Note that the data fields have grayed out. If you discover a mistake before initiating workflow, you can exit the action and return to it in Change mode to make corrections.
You can save this information as many times as you like; each time you will receive confirmation of the save. Once you submit the PCR to workflow you will not be able to change the details, nor save any new information, only display the existing details.
Note: On an OM workflow item, you will not see the Initiate Workflow button, nor will you be able to create a note within Services for Object until you have saved the information at least once.
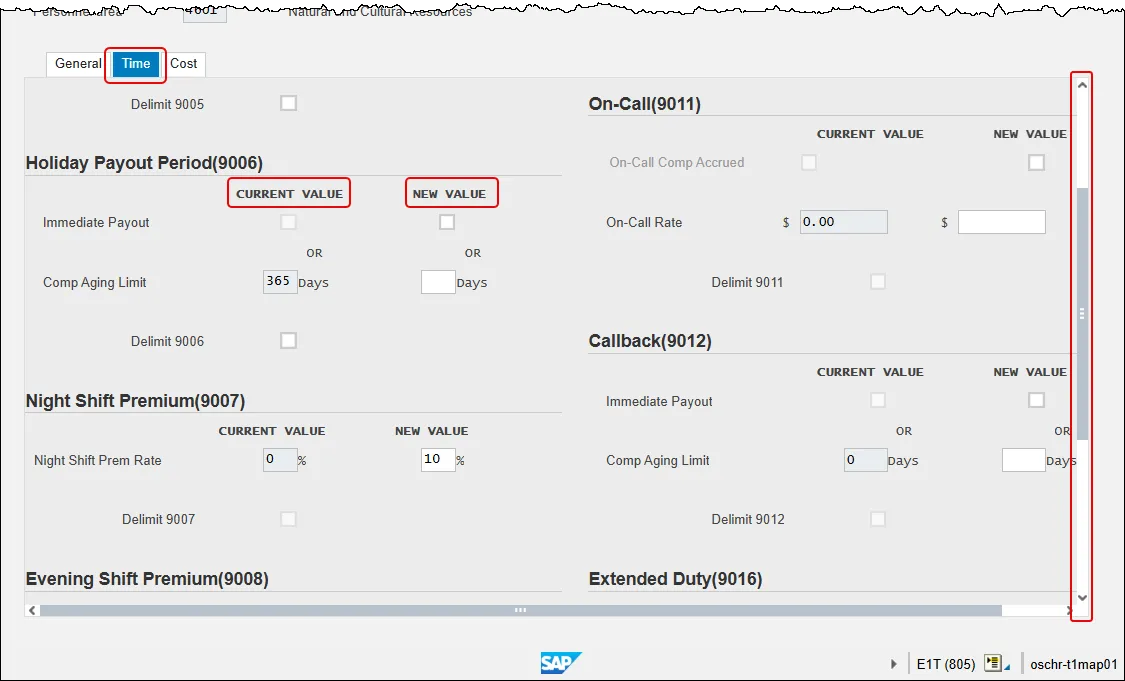
Step 8. Click the Time tab. Update the position time setting tabs as applicable. If no entries are made, the current settings will remain. Use the vertical scroll bar within the Time tab to access all available infotypes.
The Time tab contains the fields required for time entry and payroll calculation rules. A position can have one or more fields. The Premium rates are determined from the data saved on the Position in the Integrated HR-Payroll System, not what a person enters on their time sheet, so the person hired into this position will automatically receive the premiums that are requested here when they submit their time.
Note: In this example we have changed the Night Shift Premium from 0% to 10%.
- Overtime Compensation (IT 9005) - Stores settings related to overtime compensation.
- If time worked beyond the overtime limit (40 hours, etc.) is to be paid or accumulated as compensatory time, the position must have a valid IT9005 record (which is this area).
- If overtime compensatory time is to be paid out (FLSA Subject only) or expired (FLSA Not-subject only) at a point earlier than 12 months from when it was earned, the Comp Aging Limit field should be populated with the corresponding number of days (30 days, 60 days, etc.). The default is 365 days.
- If it is to be paid out immediately, the Immediate Payout checkbox should be checked. An IT9005 record is not required if the position is not eligible for overtime pay or compensation.
- Holiday Payout Period (IT 9006) - Indicates if holiday compensatory time is to be paid out (FLSA Subject only) or expired (FLSA Not-Subject only) at a point earlier than 12 months from when it was earned. The Comp Aging Limit field should be populated with the corresponding number of days (30 days, 60 days, etc.). The default is 365 days. If no record exists, the default value of 365 applies. If it is to be paid out immediately, the Immediate Payout checkbox should be checked.
- Night Shift Prem Rate (IT 9007) - Pay rate increase for Night Shift premium. If OSHR has approved a rate other than the default of 10%, the rate as a percentage must be entered in the rate field.
- Evening Shift Premium (IT 9008) - Stores settings for positions that are eligible for evening shift premium. OSHR approved rates other than the default of 10% must be entered in the rate field.
- Weekend Shift Premium (IT 9009) - Stores settings for positions that are eligible for weekend shift premium. The OSHR approved rate other than the default of 10% must be entered in the rate field.
- Holiday Premium Rate (IT9010) - Pay rate increase for Holiday Pay. The OSHR approved rate other than the default of 50% must be entered in the rate field.
- On-call (IT 9011) - Stores settings for positions that are eligible for On-Call compensation. The accrued box should be checked if the time is to be collected as On-Call comp time. The rate field must be populated with the OSHR approved on-call rate.
- Callback (IT 9012) – Stores settings for positions that are eligible for Callback compensation. The decision to pay or award compensation is determined by the Callback Accrual checkbox.
- Extended Duty (IT 9016) – Stores settings for positions that are eligible for extended duty
- Gap Hours (IT 9017) – Positions eligible for Gap Hours Comp must have a valid IT9017 record. The decision to pay versus comp time is determined by the existence of the 9017 infotype. Gap Hours are additional hours for Subject- FLSA employees. The “Additional hours” are those hours caught in the gap between the minimum hours of work required and the overtime threshold. These hours are currently being paid at an hour-for-hour rate for Subject-FLSA employees.
The best practice is to enter any data as appropriate, review all data, and click Enter to allow the system to validate the data.
Step 9. Click the Save button.
You can save this information as many times as you like; each time you will receive confirmation of the Save. You will not be able to create a Services for Objects (note attachment) until you have saved it at least once. (See below) If you have submitted the PCR to workflow already, you will not be able to change the details, nor save any new information, only display the existing details.
Note: On an OM workflow item, you will not see the Initiate Workflow button until you have saved the information at least once.
Note: There is also a cost tab available to click. Feel free to explore this tab, however none of the data found there is editable while creating the action.
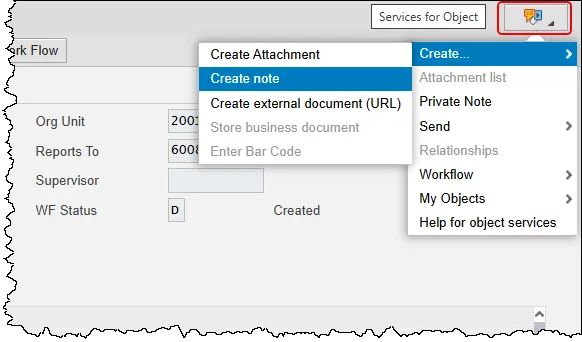
Step 10. Click the Services for Objects button. Hover over Create, then click the Create note option.
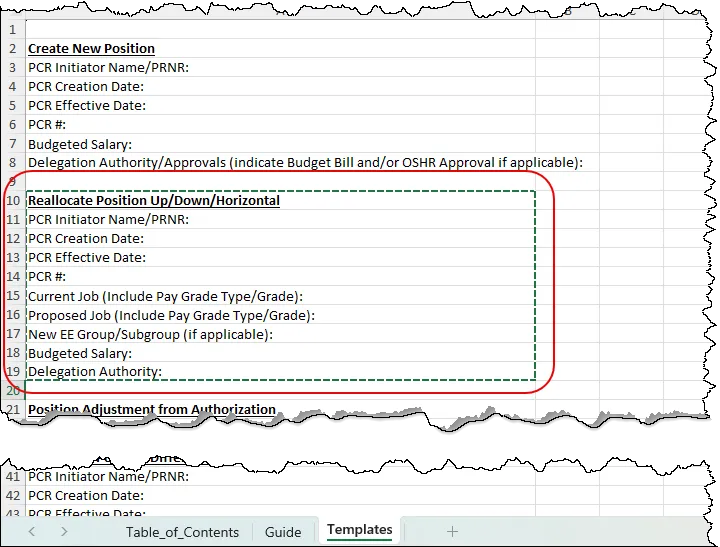
Step 11. Locate the Reallocation note template within the OM Actions Note Template spreadsheet. Copy the template into your clipboard. Highlight the applicable cells and press Ctrl-C on your keyboard, or right-click with your mouse and choose Copy.
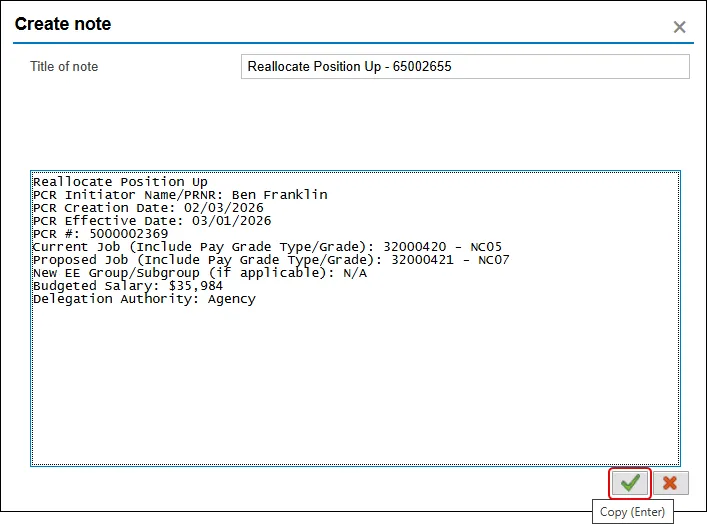
Step 12. Return to your Integrated HR-Payroll System screen and complete the note. Paste the template from your clipboard into the body of the note and input the requested information. Add an appropriate title, which can be the label for the template you are using.
Note: The PCR number was generated when you saved the request and can be found in the Position Header section.
Once completed, click the Copy button to save.
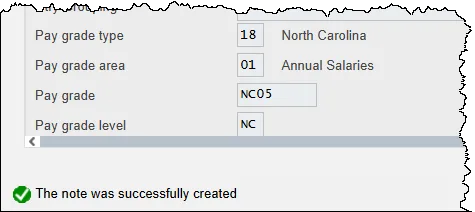
Step 13. Observe that your note has been saved with the message on the bottom left corner of your window.
Step 14. Optional step: Although not required, BEST Shared Services recommends that you keep a log with details of each request you make. Data that is useful to keep in the log includes the action type, creation date, effective date, position number and PCR (position change request) number. Having this information handy will be useful if trouble shooting is needed in the future.
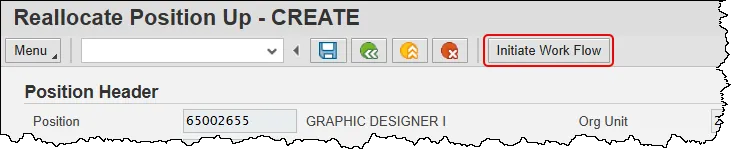
Step 15. Review all entered data for accuracy. If a mistake is discovered, exit the transaction and come back to it in Change mode. Otherwise, click the Initiate Work Flow button. This step ends the creation steps and begins the electronic approval process wherein the request is reviewed by designated workflow approvers.
This position data in the Integrated HR-Payroll System is held in the Planned status until the workflow has gone through the entire approval process. If the workflow is approved, all the data on the various infotypes will be moved into the Active status on the position. If the workflow is rejected or cancelled, the data will be moved into the Rejected status on the position.
Step 16. If the position is held by an employee, a corresponding personnel action with the same effective date for this position action must be created. The OM action should be fully completed before the PA action is begun. Please contact the appropriate Agency HR staff to coordinate the required OM and PA actions. Use either the PPOSE transaction or the PO13 transaction to determine if the position is currently held by an employee.

The system task is complete.