Purpose
The purpose of this job aid is to illustrate how to use the functions of the layout capabilities which can be found in many Integrated-HR Payroll System transactions. Some of the most common end user report transactions are listed below:
- CATS_DA
- CATC
- PT_BAL00
- PT_QTA10
- ZPT2013
- PC00_M99_CWTR
- S_AHR_31016362
- ZPA0189
- ZOM0178
- ZPAWFMON
- ZOMWFMON
- Z_ORGPATH
Most reporting transactions in the Integrated HR-Payroll System modules return results in column form. Once the report results are generated, users can manage the way the data is displayed by creating a new layout or recalling a previously saved one.
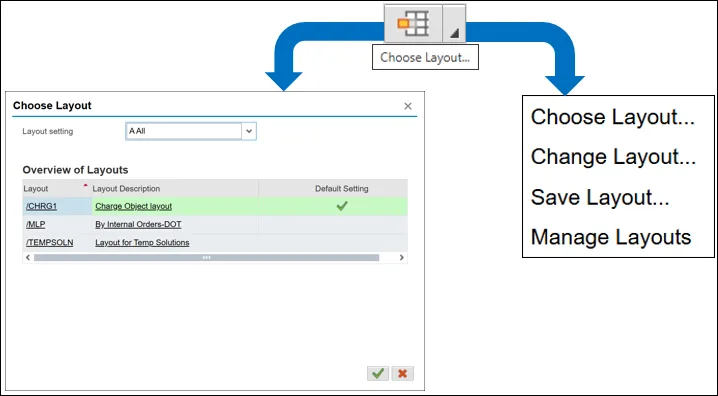
There are three Layout functions that are used: Change layout, Save layout, and Choose (or Select) layout. Sometimes these functions have their own unique button, as such:

But sometimes the functions are behind a single button labeled ‘Choose Layout’ that produces a drop-down menu. In this type of display, the button will have a vertical line. Clicking the button on the right side of the line produces the drop-down where you can select the Choose, Change, or Save layout function. Clicking to the left of the line is the same as selecting Choose layout. Observe that the drop-down menu has a 4th choice – Manage Layouts. This option, and how to find it without the dropdown menu, is further explored below.
Change Layout
Choosing ‘Change Layout’ allows you to choose which columns of information to display and the order in which to display them. The following pop-up will appear.

Displayed Columns – Shows the sets of data that will be displayed in the report. Once the green check is clicked, the table displays its columns from left to right in the same order, with the top item in the list appearing as the leftmost column.
Column Set – Shows set of data that are not displayed but are available to include in the report.
The data sets can be moved between the two columns using the left and right facing arrow buttons in the middle of this window. The up and down arrows above Displayed Columns allows users to manage the order of the report’s returned data.
Save Layout
After changes have been applied, you can save the layout for future use. Click the Save Layout button to get the pop-up:
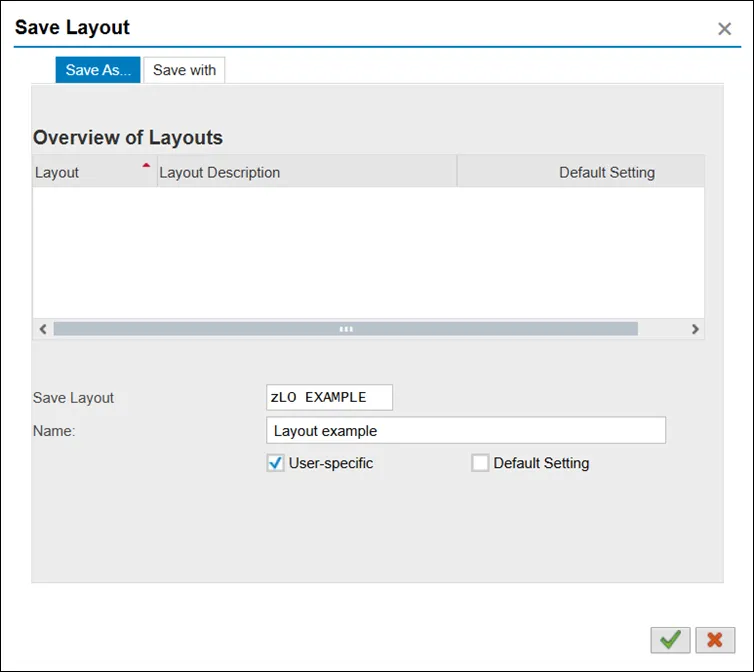
The Save Layout field can contain up to 12 characters and must start with the letter ‘z’.
The Name field is limited to 40 characters and is used to provide a short description of this personalized layout.
Finally, the User-specific check box must be checked before clicking the green check to save.
Selecting the Default Setting check box will make the new layout the default data set whenever the report is run.
Choose Layout
Selecting the Choose Layout option or clicking to the left of the line on the Choose Layout button will open a new pop-up window with several pre-saved Layouts from which to choose. The pre-saved layouts are report dependent and may include global layouts as well as User-specific ones.
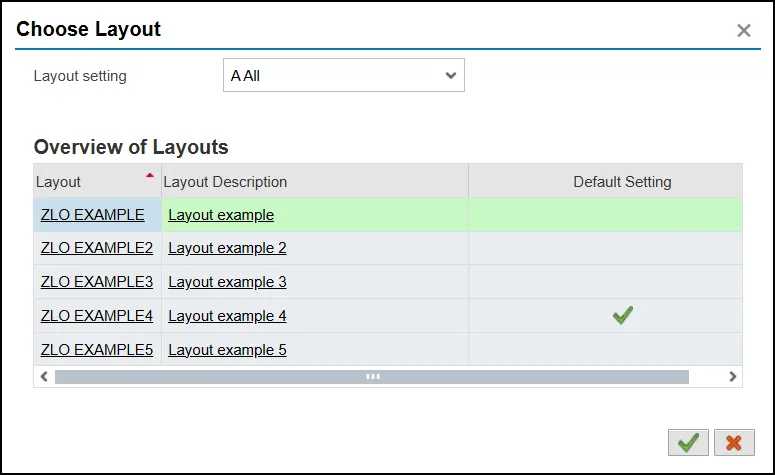
The Layout setting on the Choose Layout screen will default to All. Users can filter to show only those available to all users (Global) or to show only user-specific designed layouts using the drop-down menu.
In the screenshot above, ‘ZLO EXAMPLE4’ is the current layout which has been returned due to the green check in the Default Setting column. Simply choosing a different layout in which to view the data does not change which will be used the next time the transaction is run. That can be accomplished with the Manage Layout option discussed below.
Manage Layouts
Though there are many predefined global layouts, only user-specific layouts can be tagged as a new default setting. If a user prefers a modified layout, they should go through the process of saving it as a user-specific layout and click the default setting check box. The User-specific selection sets the layout visibility only to the single user.
Note: A user can change layouts by saving the new layout with the same name. The system will warn the user that the layout will be overwritten.
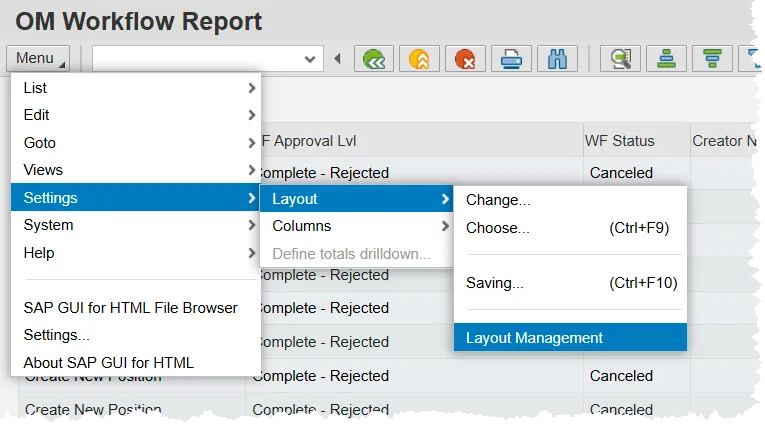
If the Manage Layouts option is not available in the button bar, it can be found under the Menu button. After clicking, first hover over Settings and then hover over Layout. Finally, choose Layout Management.