Purpose
The purpose of this Business Process Procedure is to explain how to record time in Fiori with Charge Objects.
Record Time in Fiori with Charge Objects
The following process is used when an employee needs to record time against Charge Objects using a saved template for a set time and is best practice if there is not an uploaded Worklist of Charge Objects. This process requires two steps with the My Timesheet application. The first step is to Create Assignment then the second step is to Create Assignment group.
Create Assignment
There are 20 steps to complete this process.
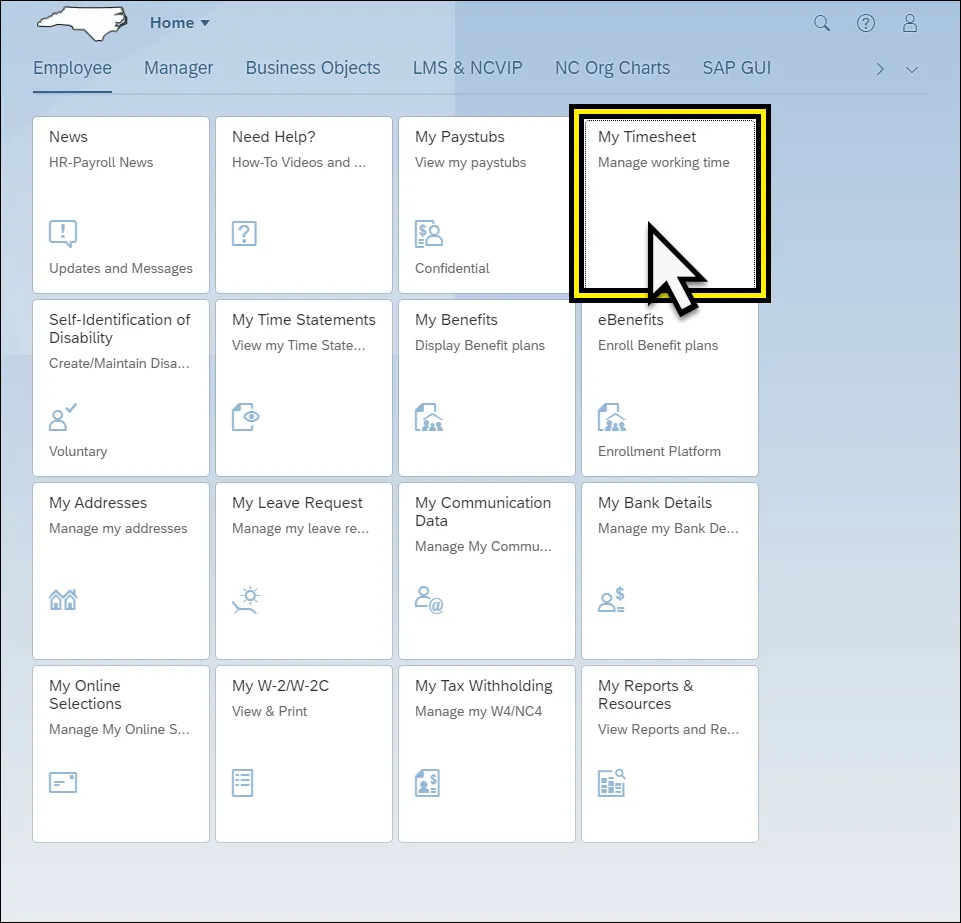
Step 1. Navigate to the My Timesheet application within Fiori.
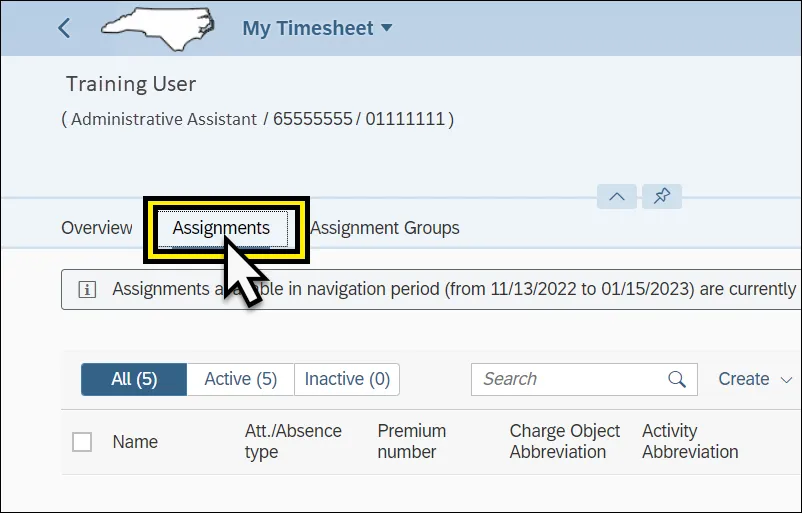
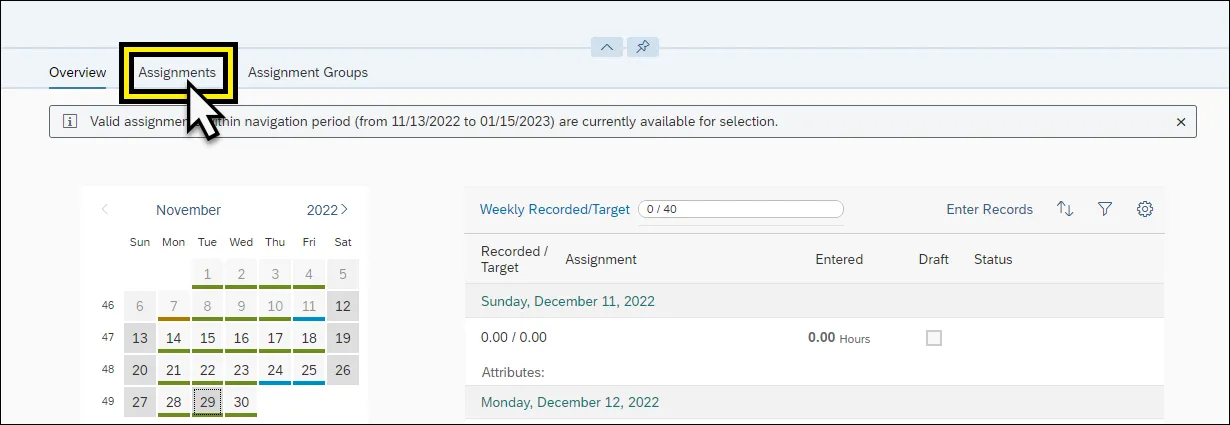
Step 2. Click the Assignments tab from the edit tab options (Overview, Assignments, Assignment Groups).
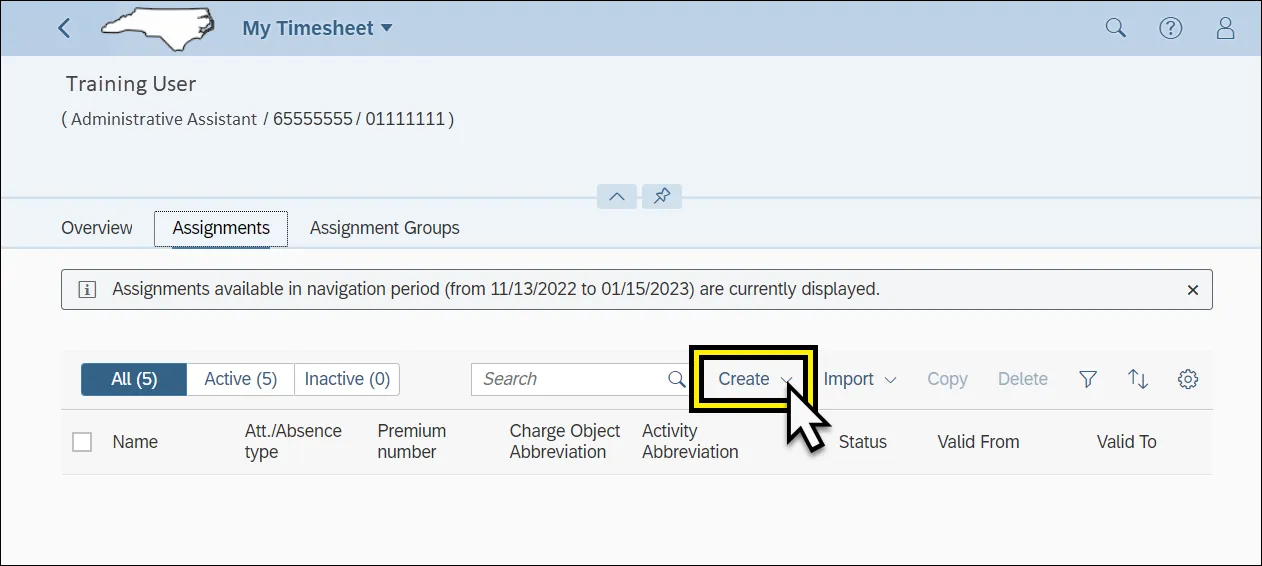
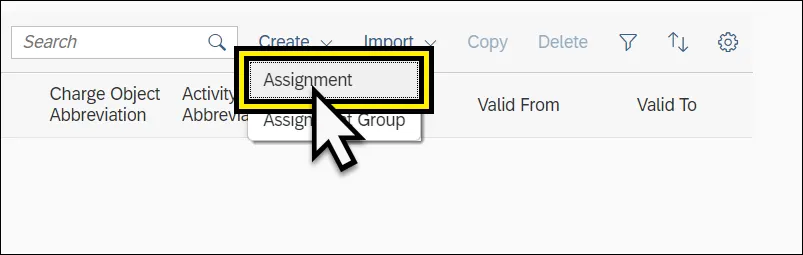
Step 3. Click the dropdown arrow next to Create from the edit tabs options (Create, Import, Copy, Delete). Create dropdown menu from the My Timesheet application assignments.
Step 4. Select Assignment from the drop-down list.
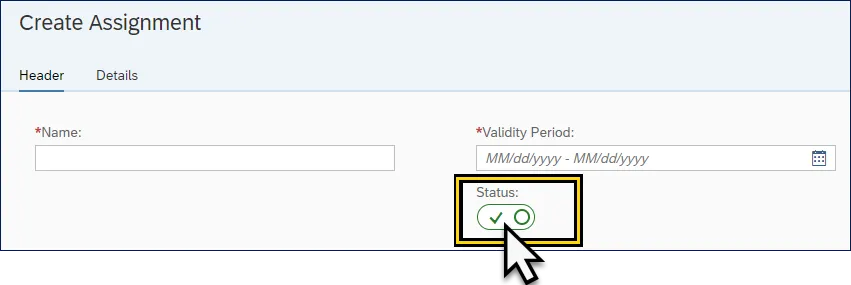
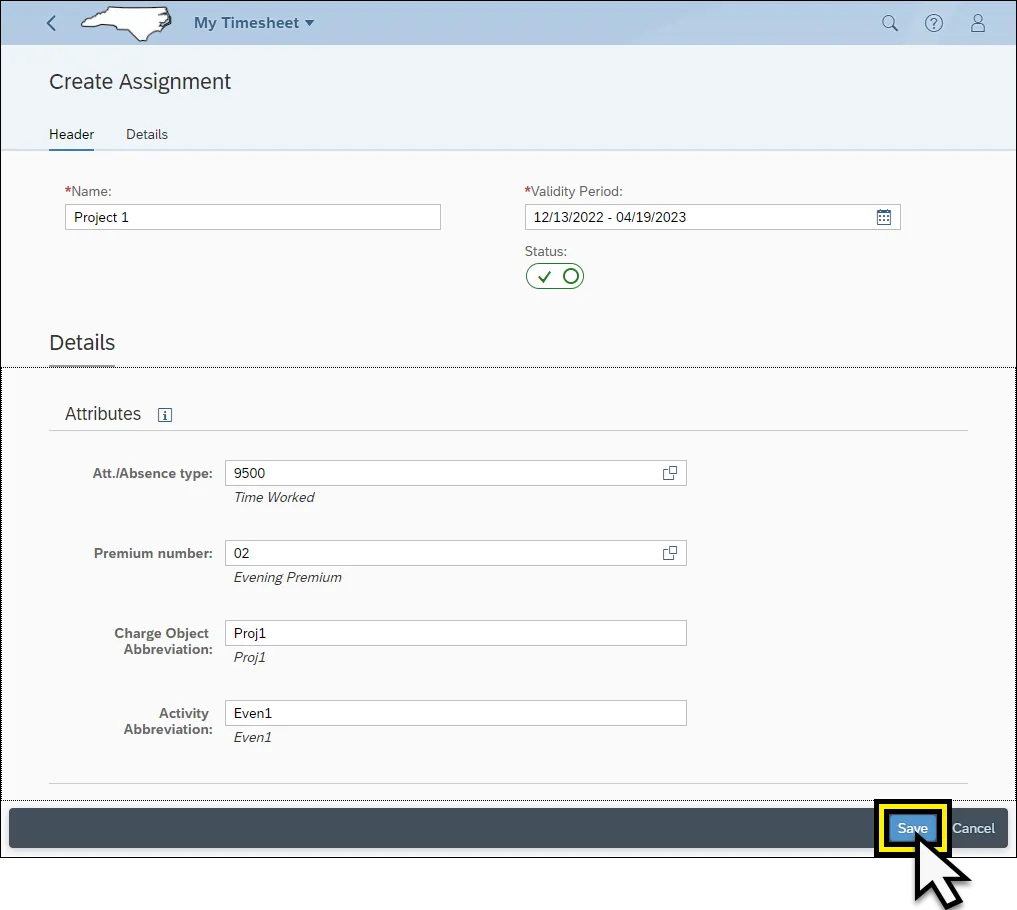
Step 5. The Create Assignment Screen is then filled in with the necessary information.
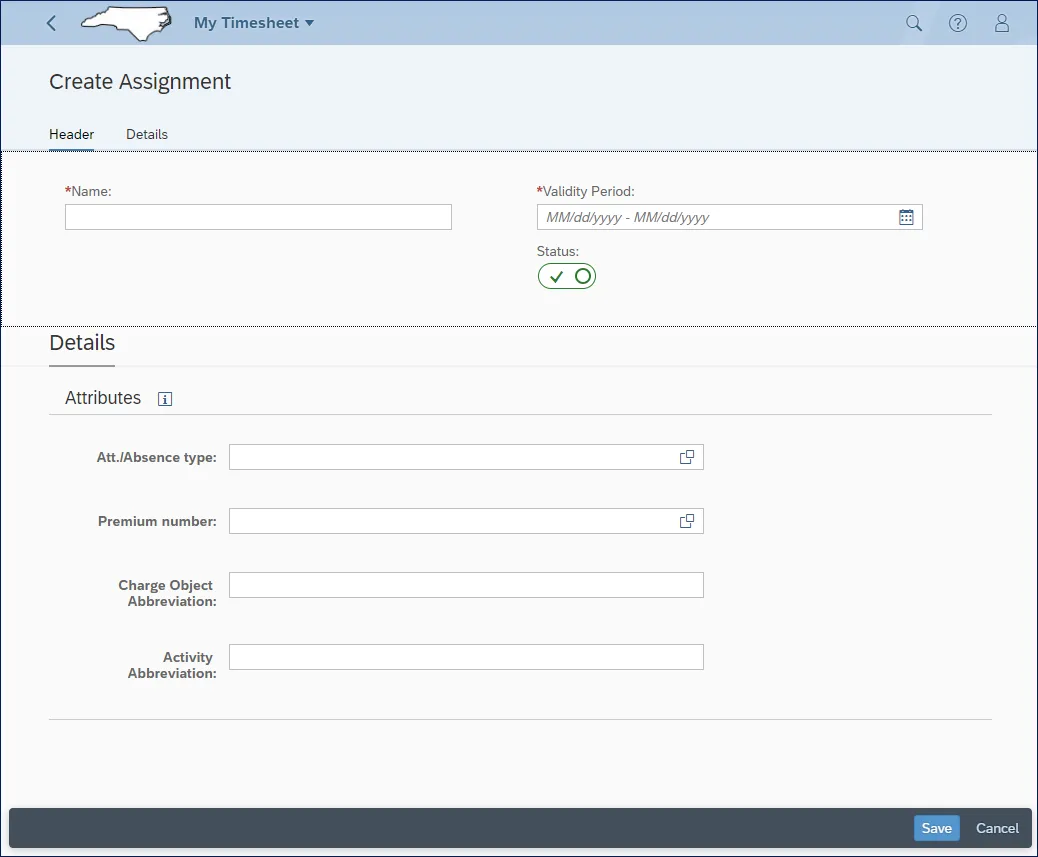
Note: The Charge Object Fields are displayed based on the settings specific to the user. In the example shown above the employee is assigned two Charge Object Fields.
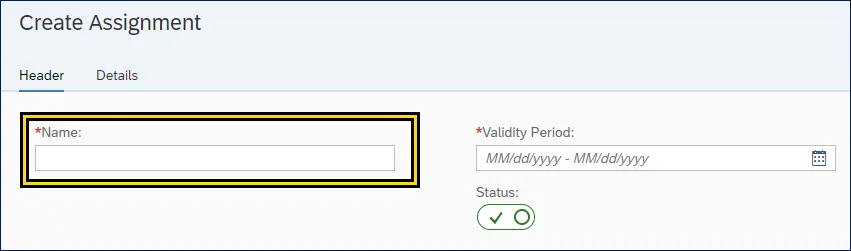
Step 6. Complete the header section Name field with the name of the Assignment. All Assignment names must be unique, no two assignments can have the same name.
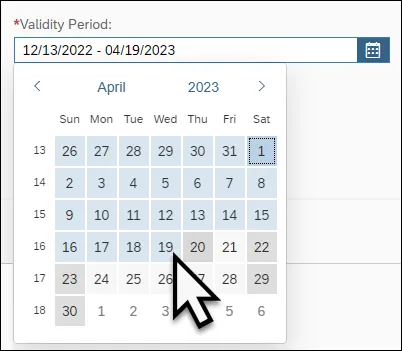
Step 7. Enter the Validity Period by clicking on the calendar in the right edge of the field.

Step 8. Select the starting date.
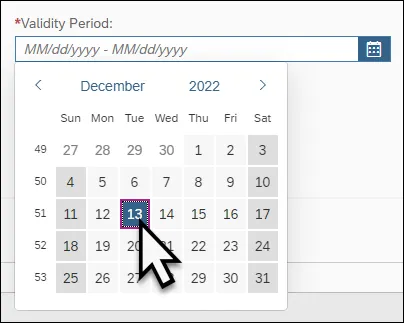
Step 9. Then select the ending date.
Step 10. The Assignment Status is defaulted to Active but can be changed to inactive by clicking on the Status switch. Deactivated assignments cannot be used and will not be visible in the selection drop down list within the time entry mode.
Step 11. The Details section contains the Attributes for the assignment, including:
- Att./Absence type
- Premium number (If applicable)
- Charge Object
- Activity Abbreviation
- Element Abbreviation (If applicable)
- Sub-element Abbreviation (If applicable)
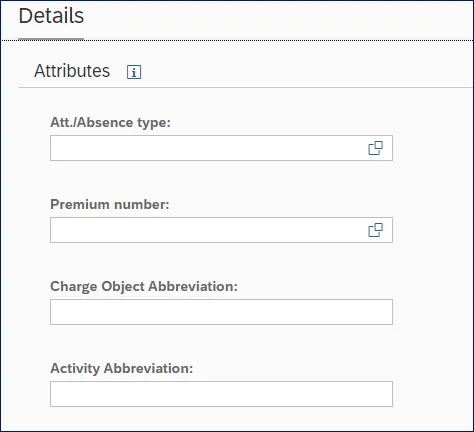
Note: The Charge Object Fields are displayed based on the settings specific to the user. There may be up to four fields. In the example shown above the employee is assigned two Charge Object Fields. Element Abbreviation and Sub-element Abbreviation are not applicable in the displayed example.
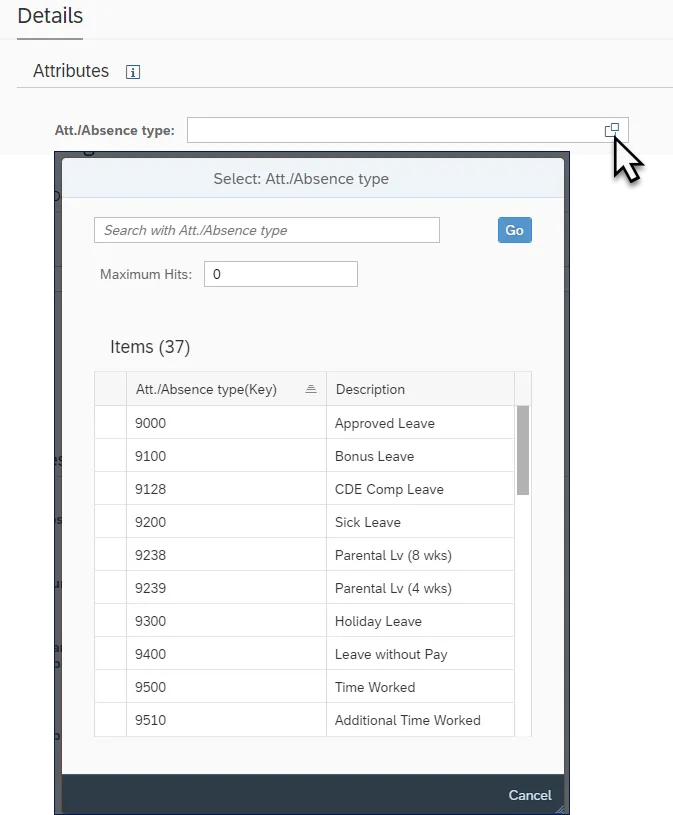
Step 12. Click the Att./Absence type field to select the Att./Absence type.
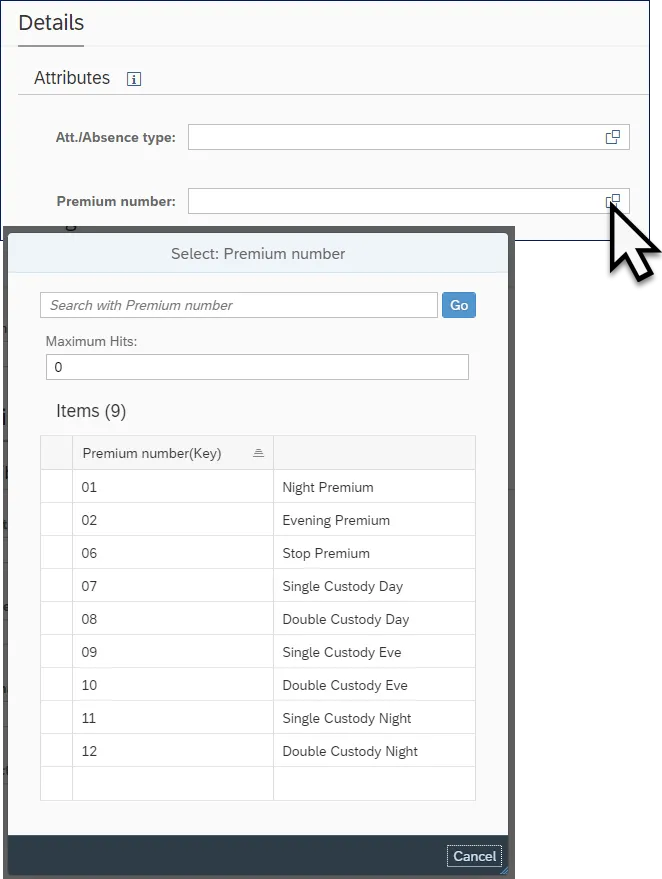
Step 13. If applicable, click the Premium number field to select the Premium number.
Note: While the charge objects are used more broadly, it is also possible for an employe to create an assignment for Att./Abs type and a premium, but not charge objects, or Att./Abs types and only Charge Objects, or both.
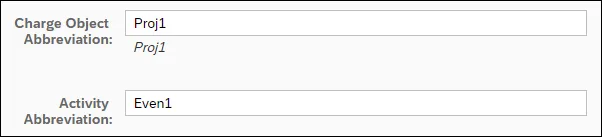
Step 14. Click into the Charge Object Fields and enter the necessary information.
Step 15. Once the required information is completed click Save.
Step 16. Repeat Steps 3 thru 15 to create additional Assignments.
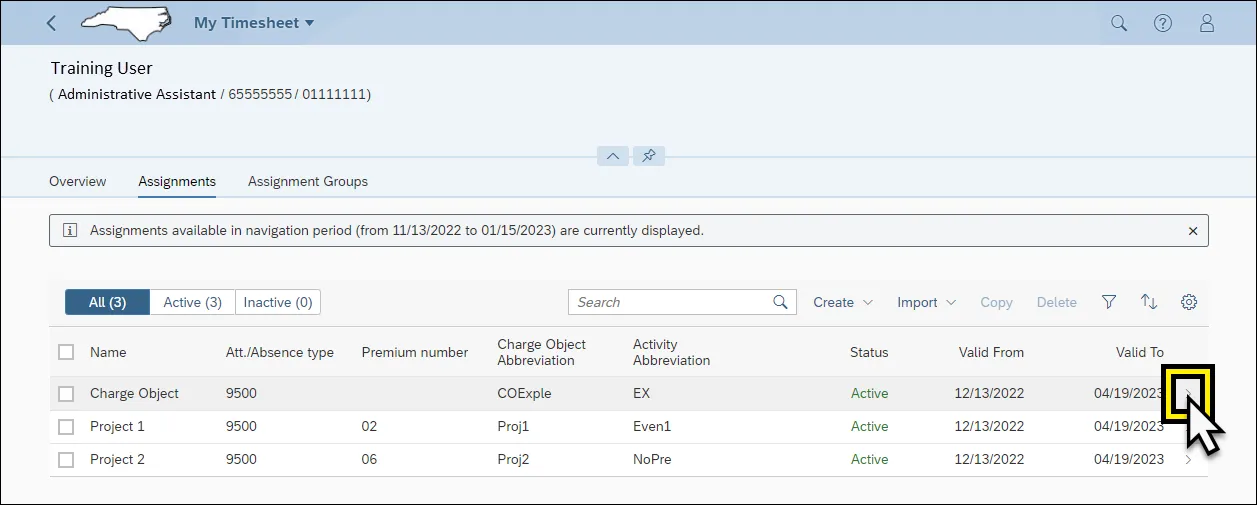
Step 17. Once assignments are created, they can be modified by going to the Assignments tab within the My Timesheet application.
Step 18. Select the arrow to the right of Assignment, which needs to be edited.
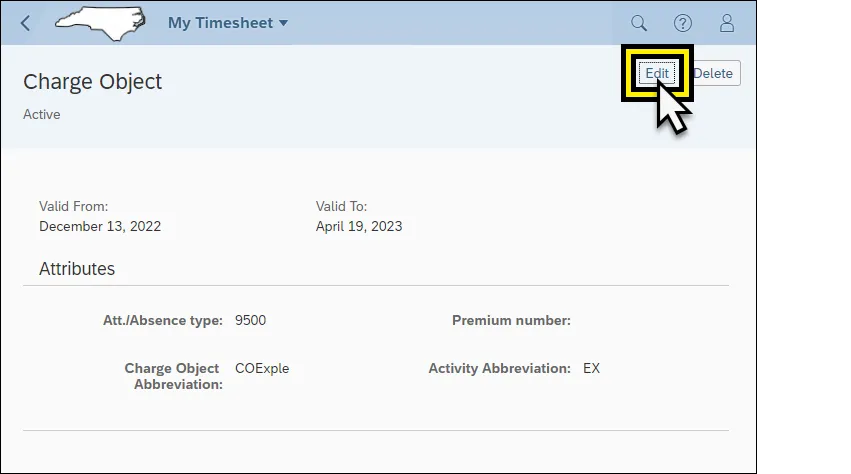
Step 19. Click Edit.
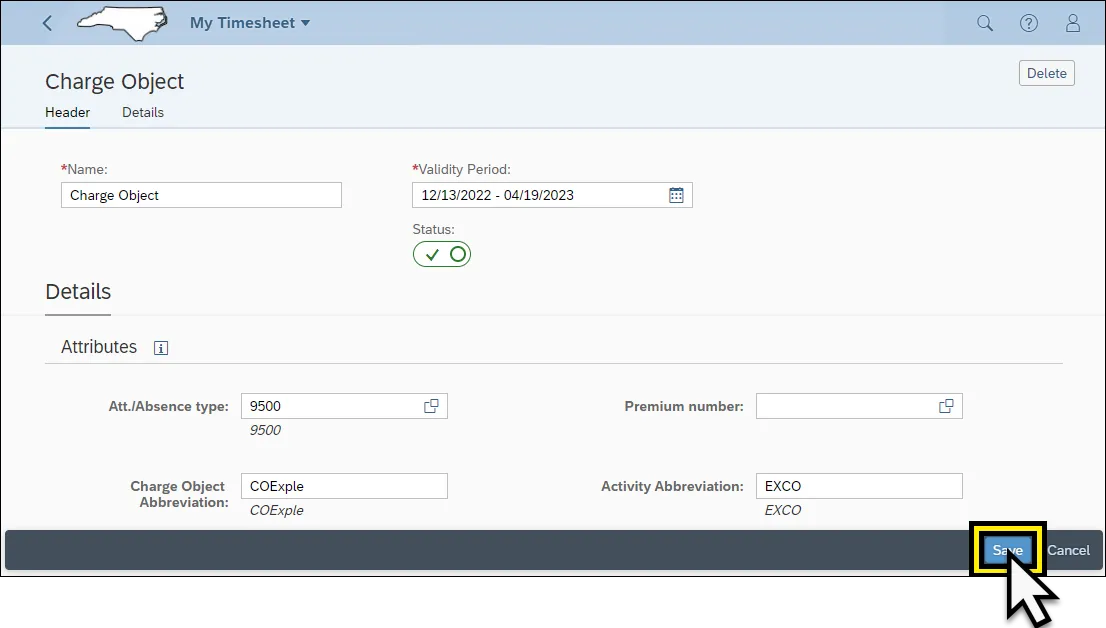
Step 20. Make the necessary changes and click Save.
Create an Assignment Group
The Create an Assignment Group works in parallel with the Create Assignment Steps from the above section. The Create Assignment Group should be done if the created Assignment needs to be added to a template, or Group.
There are 16 steps to complete this process.
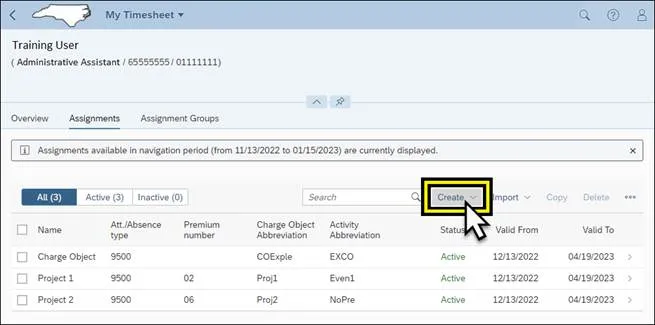
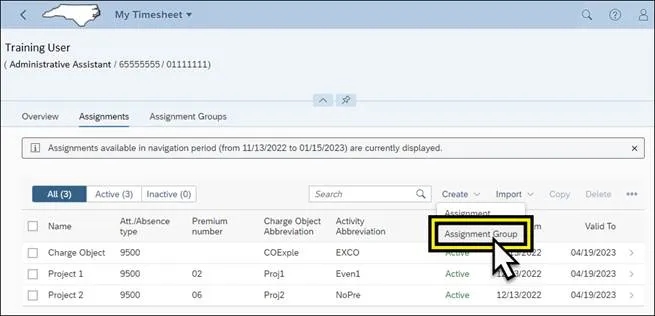
Step 1. Click the Assignments tab from the edit tab options (Overview, Assignments, Assignment Groups).

Step 2. Click Create from edit tabs options (Create, Import, Copy, Delete).
Step 3. Select Assignment Group from the drop-down list.
Step 4. The Create Group screen is divided into two sections Header and Assignments in the Group.
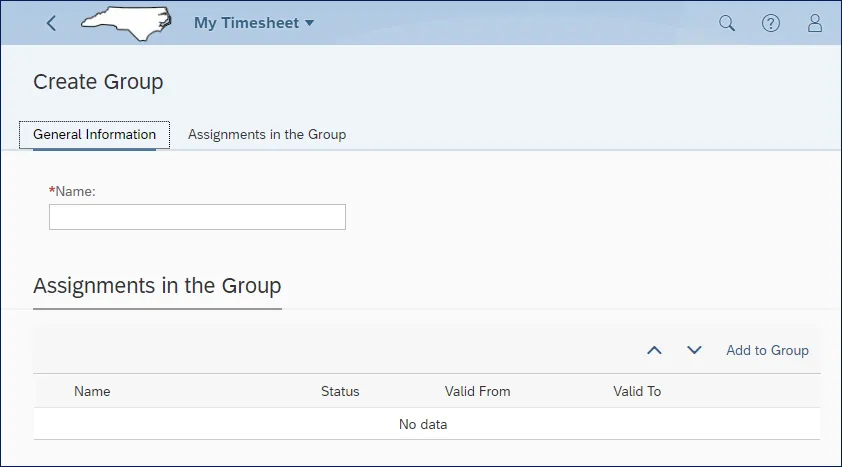
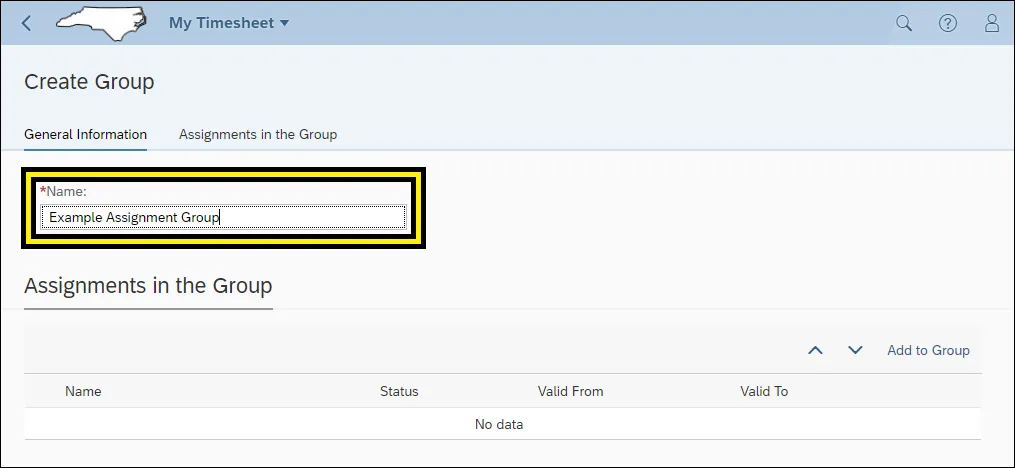
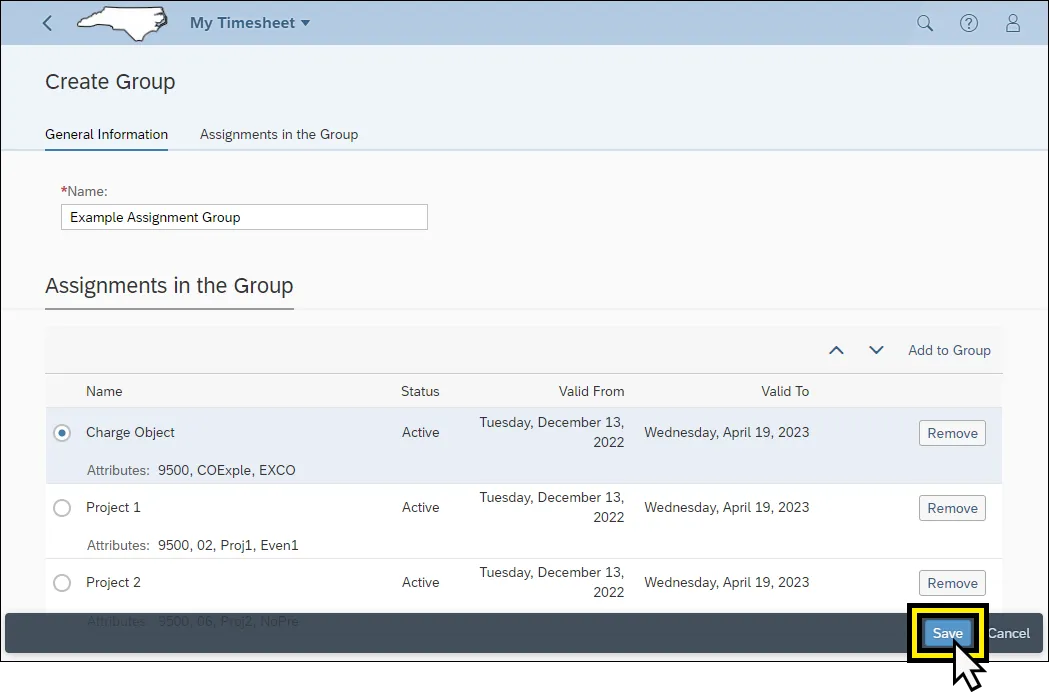
Step 5. Enter the Name of the Assignment Group in the header Name field. This name will appear in the Select Assignment list in the time entry edit mode. Each Assignment Group name must be unique, no two Assignment Groups can have the same name.
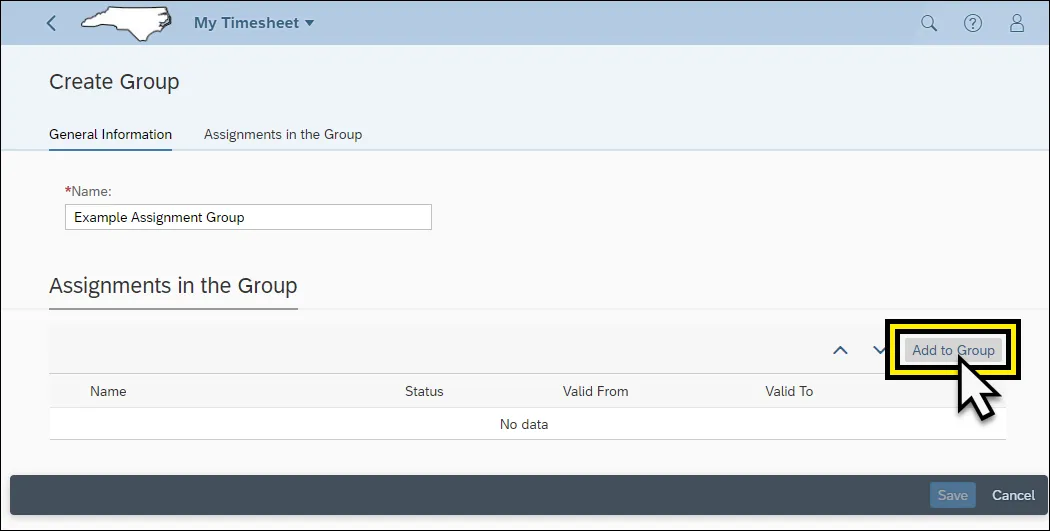
Step 6. Click Add to Group to add the Assignments you created in create assignment section on page 1. When Add to Group is selected, a list of created Assignments generates.
Step 7. Click the checkbox beside all Assignments that are to be added to the group.
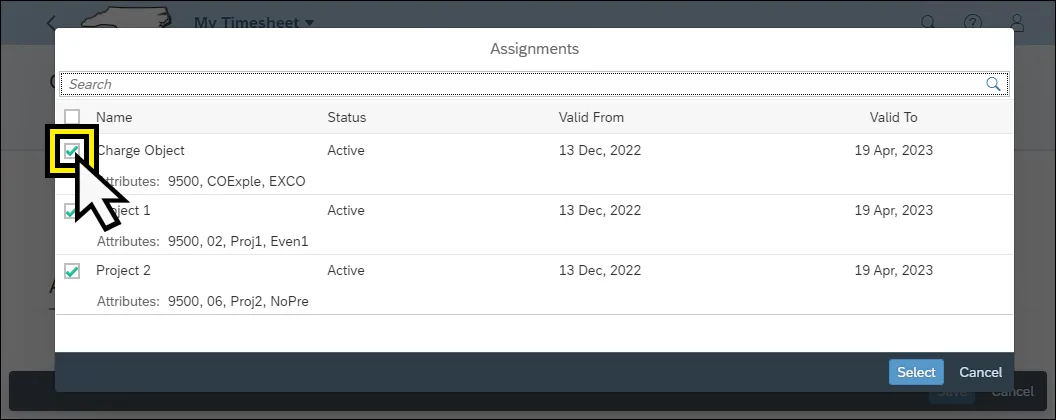
Note: In the example shown, the Charge Object Assignment created is shown in the Assignment list as the Charge Object Example. In addition, Project 1 and Project 2 have been selected for addition to the Assignment Group.
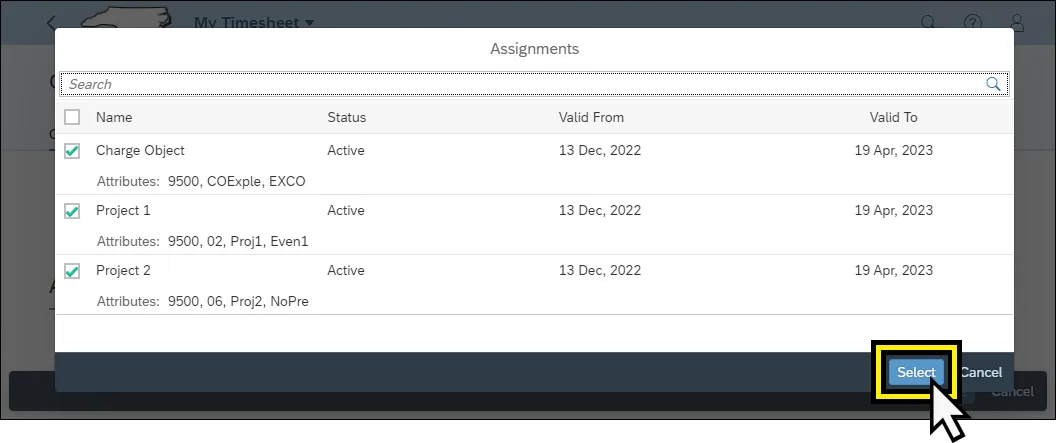
Step 8. Click Select on the Assignments list.
Step 9. Click Save to complete the Assignment Group Creation.
Step 10. The Assignment Groups will then populate in the Assignment Groups action tab.
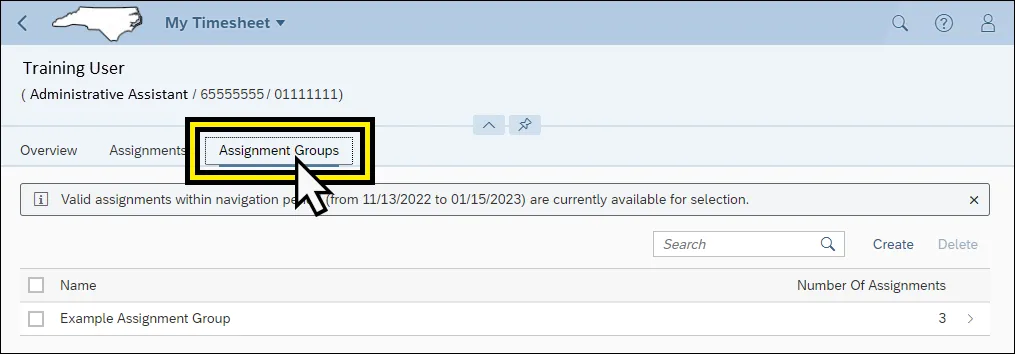
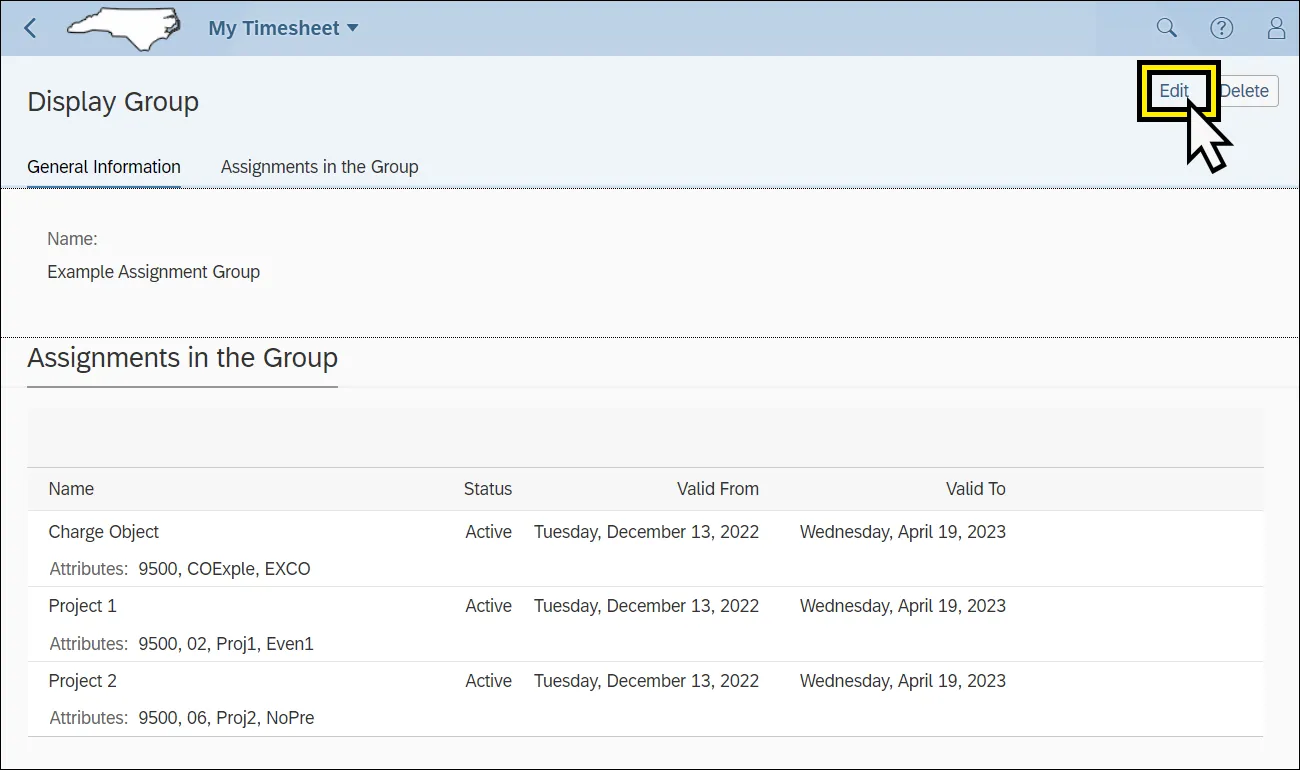
Step 11. The Assignment Groups can be modified by navigating to the Assignment Groups tab within the My timesheet application.
Step 12. Click the arrow to the right of the Assignment Group that needs to be modified.

Step 13. Click Edit to modify the Assignment Group.
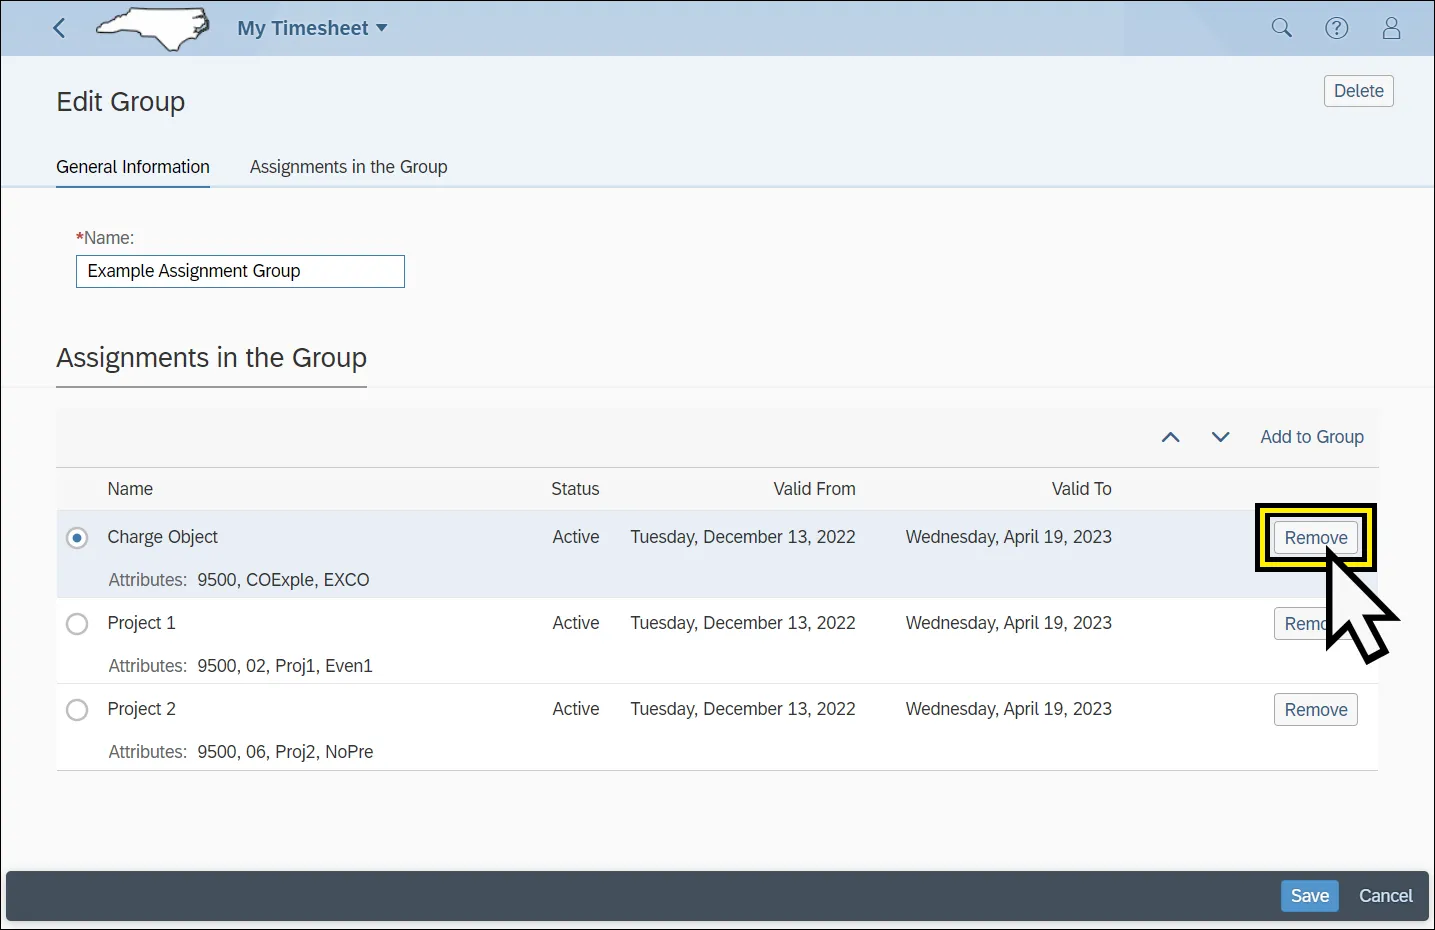
Step 14. Assignment Groups can be removed by selecting the assignment and click Remove.
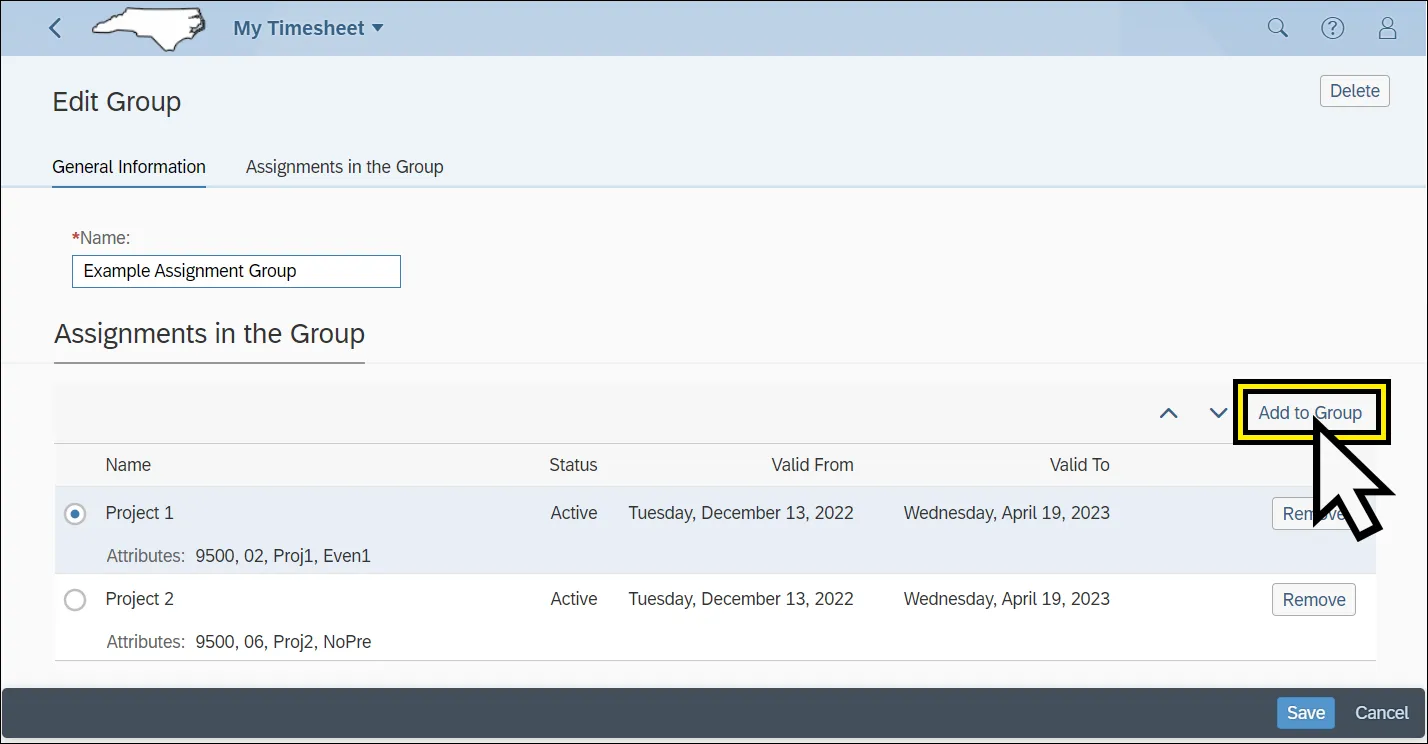
Step 15. Assignment Groups can be added by selecting Add To Group and select the appropriate Assignment Group to add.
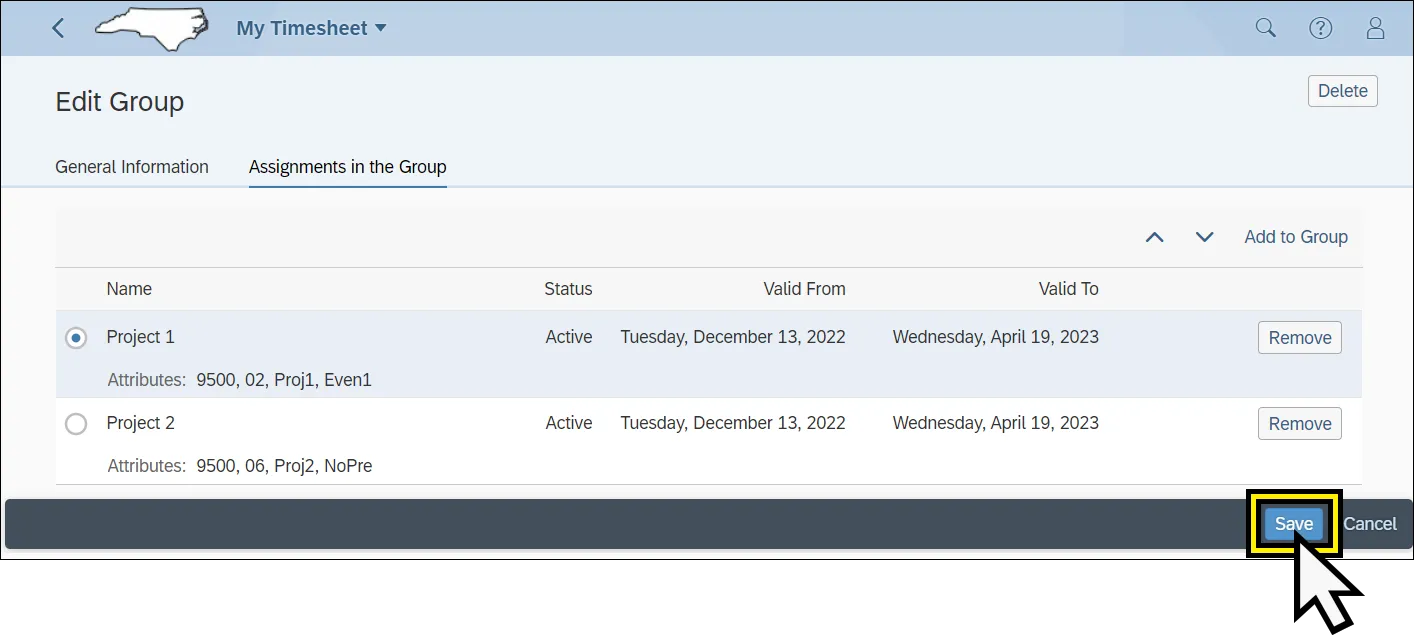
Step 16. Once the Assignments and Assignment Groups are confirmed as valid/accurate, click Save.
Entering Time Against Charge Objects
Assignments and Assignment Groups created from the sections above (Create Assignment and Create an Assignment Group) can be used to record time against charge objects within the time entry area of the overview tab with the My Timesheet application.
There are 8 steps to complete this process.
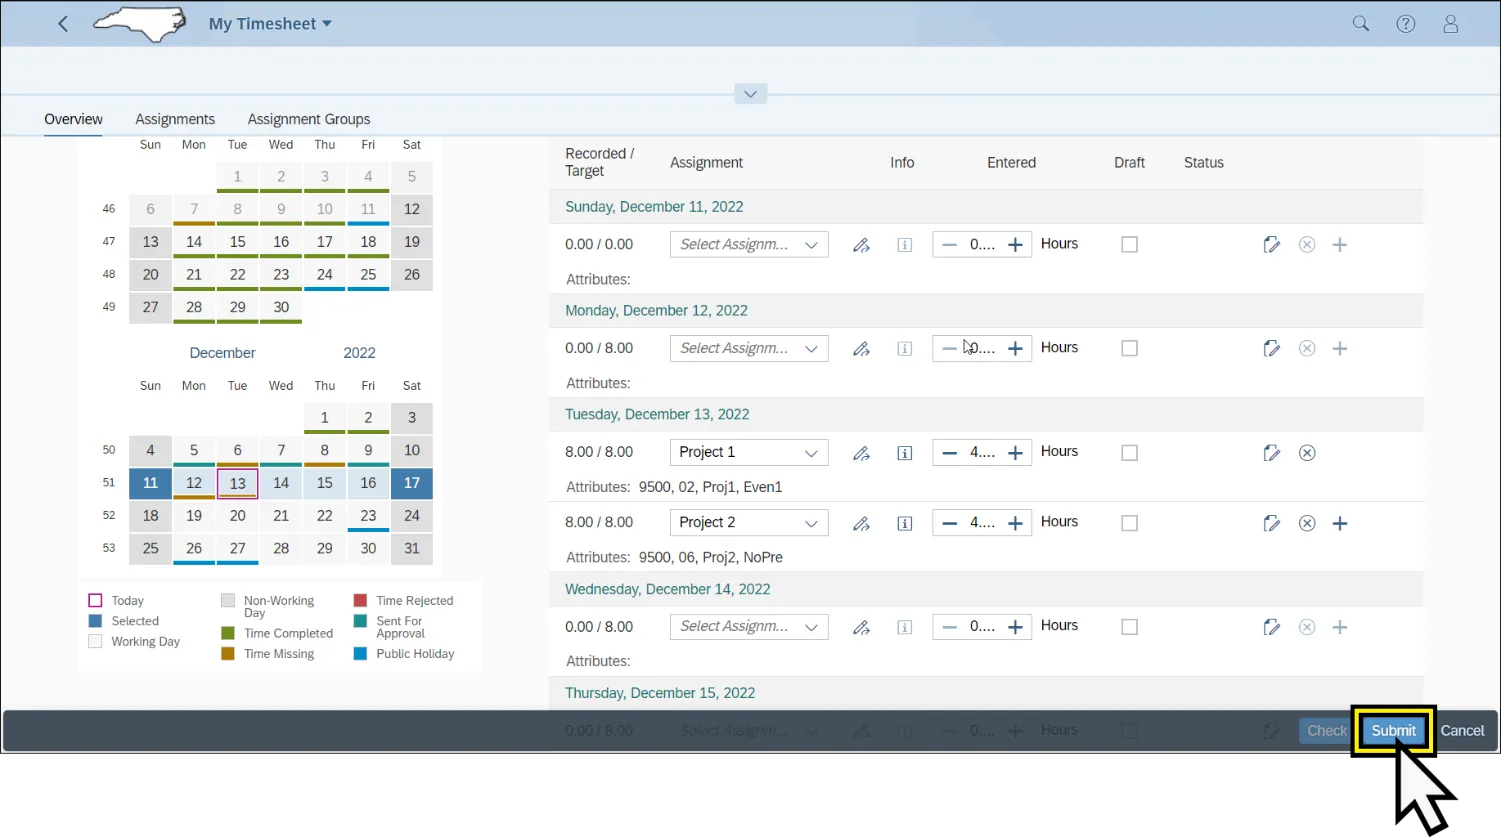
Step 1. Click the Overview tab from the edit tab options (Overview, Assignment, Assignment Groups).
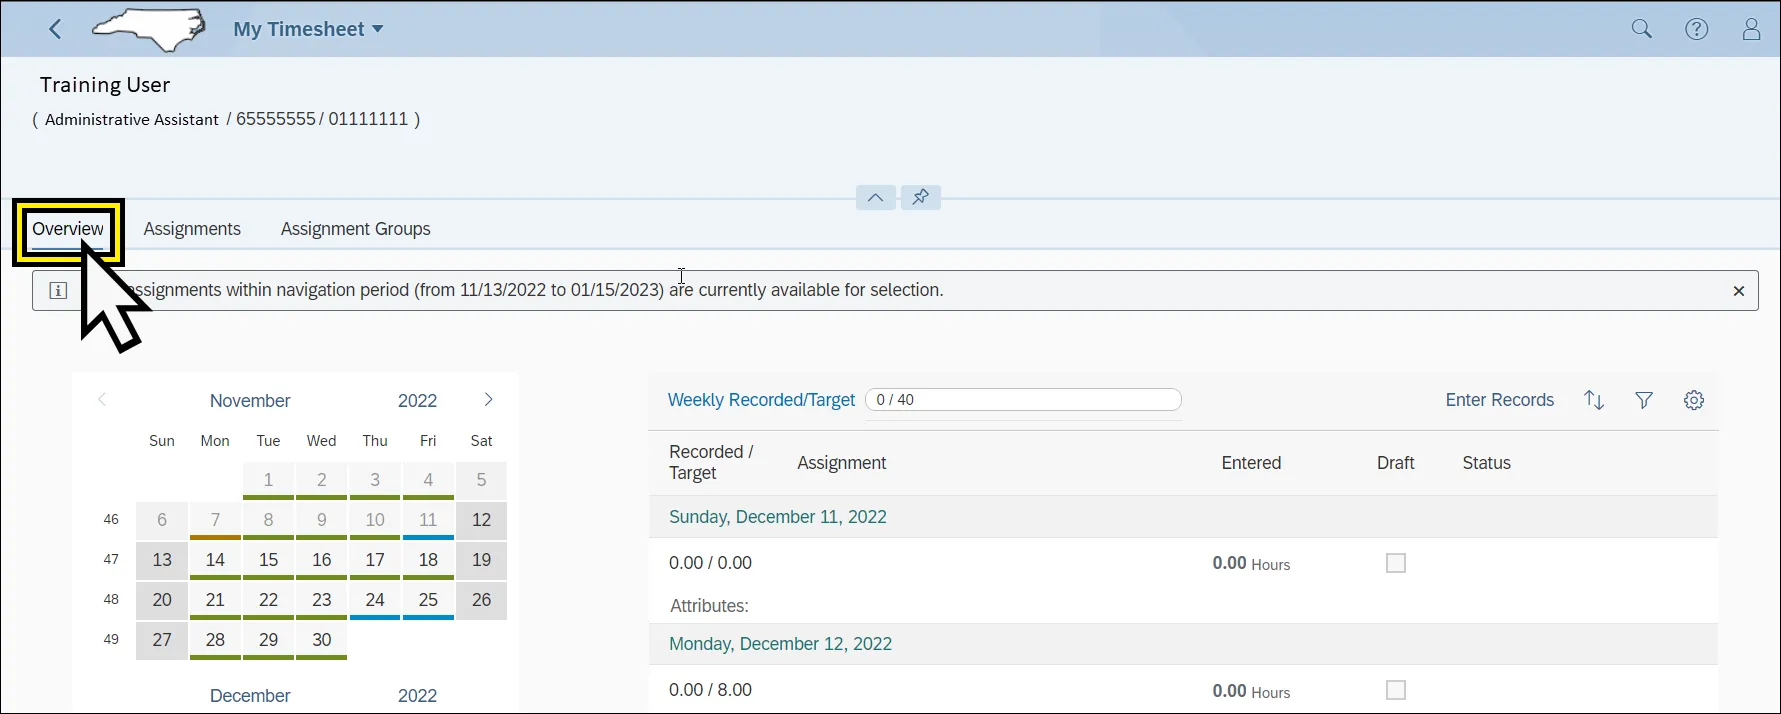
Step 2. Click Enter Records.
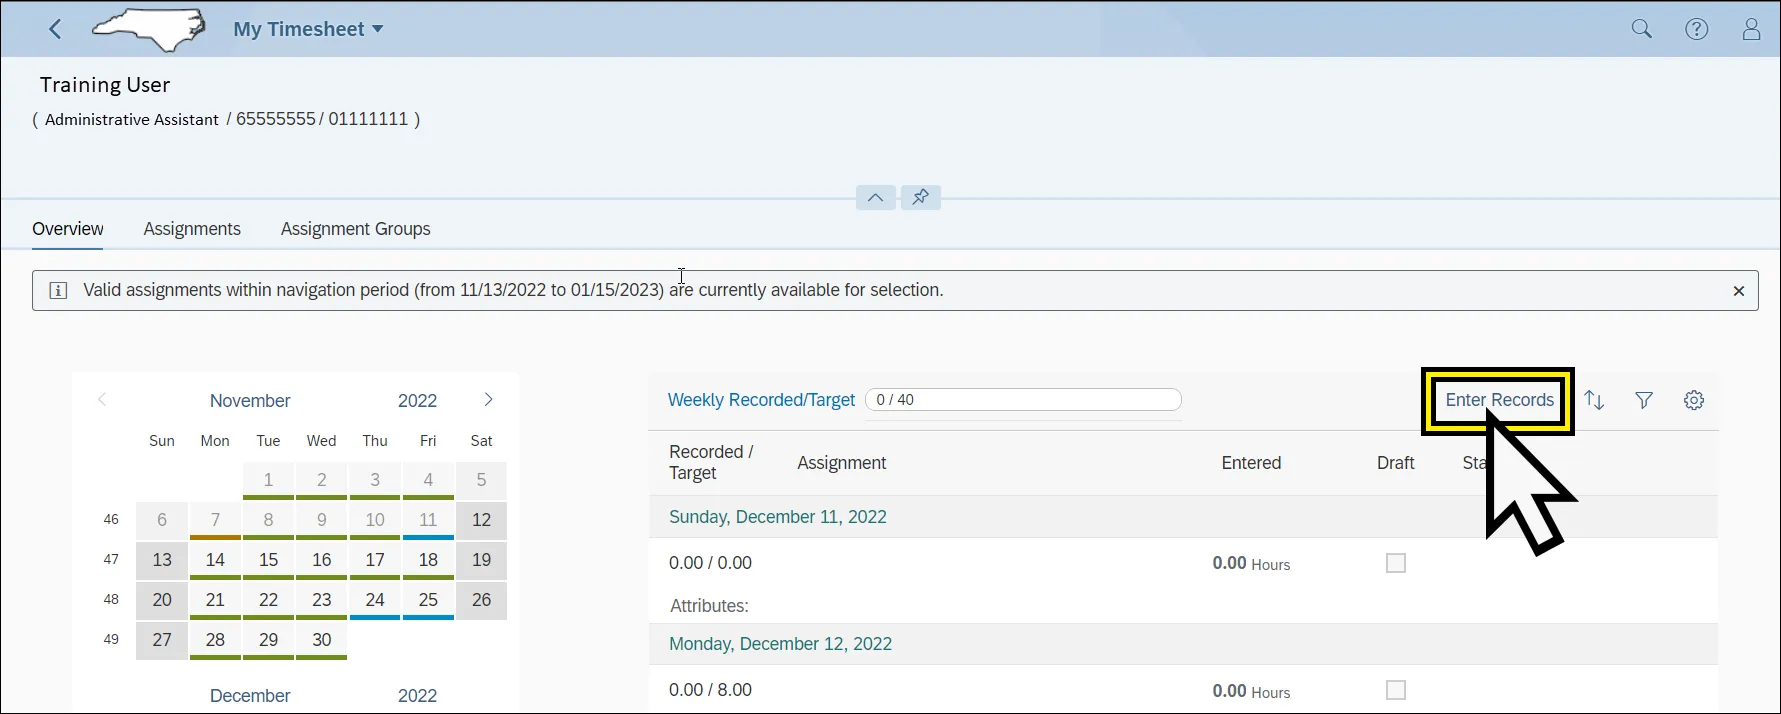
Step 3. Navigate to the date of the time entry and select the dropdown list from the Select Assignment field.
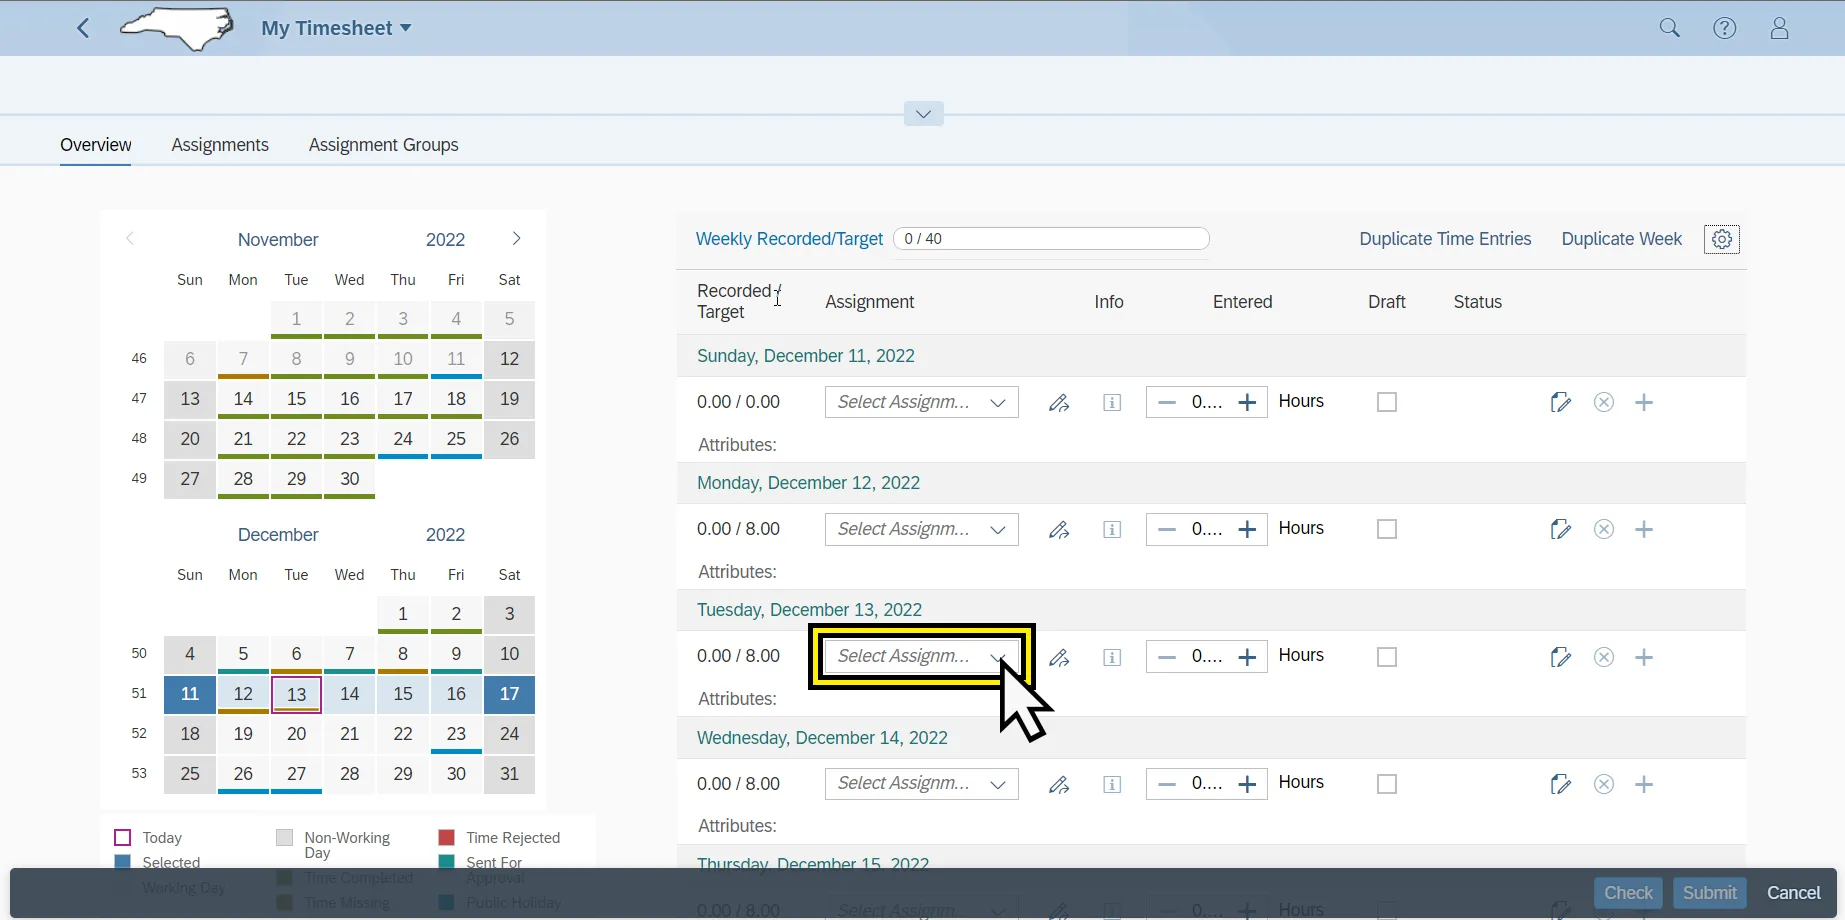
Step 4. Select the Assignment Group from the dropdown, the example shown below displays the Assignment Group called Example Assignment Group.
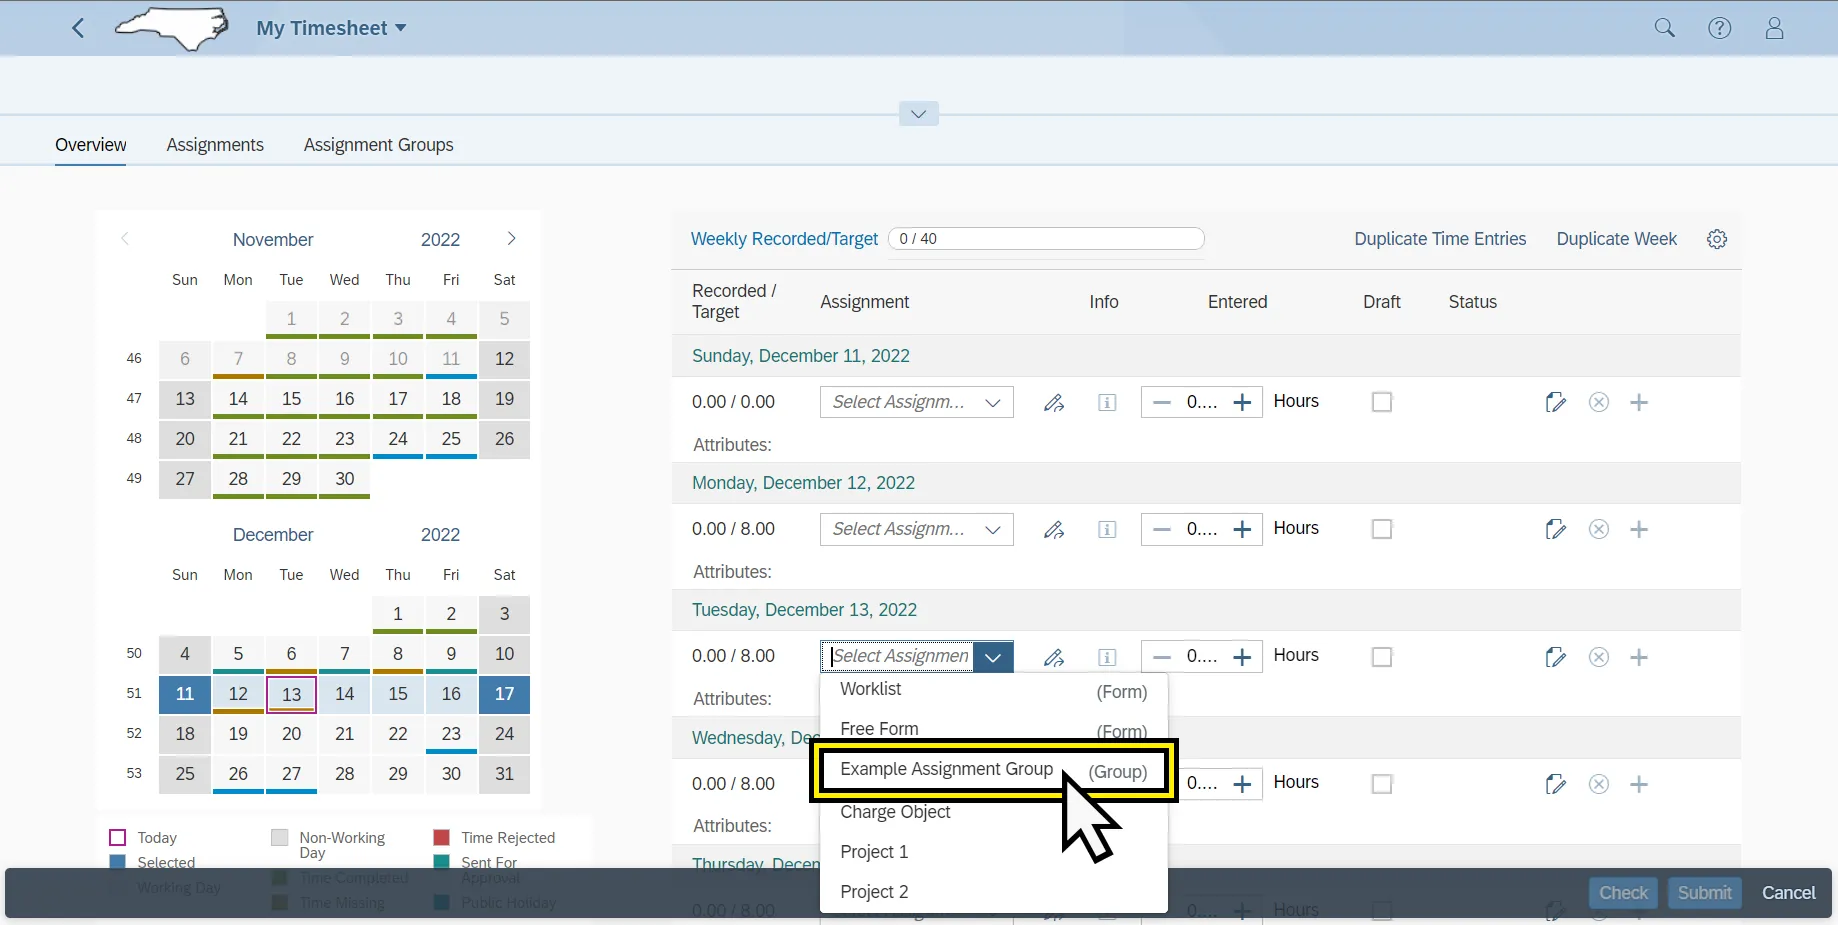
Step 5. If an Assignment Group is selected, from the list of Assignments with multiple assignments in the group, the time can be split between the assignments on each day selected.
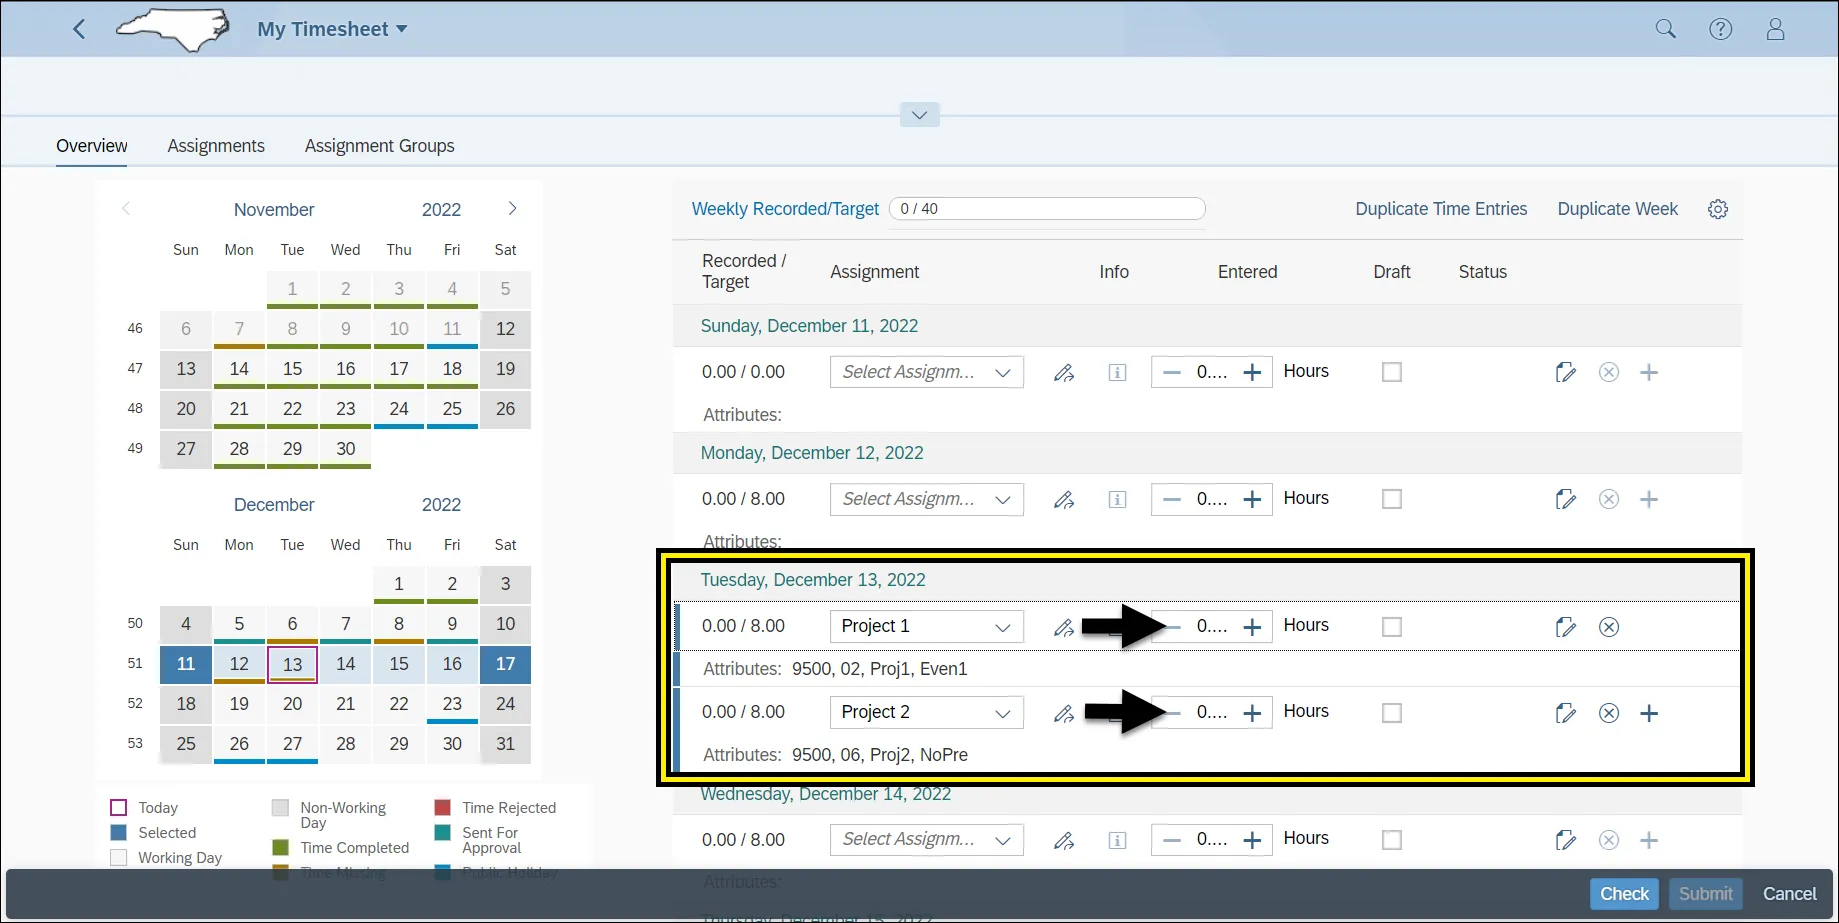
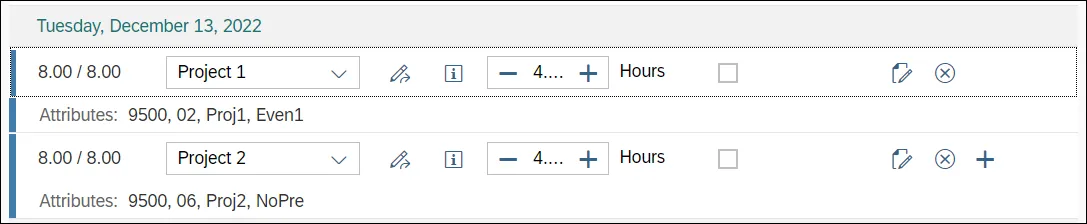
Step 6. Enter the appropriate hours for each Assignment for the day.
Step 7. Click Check to ensure there no errors.
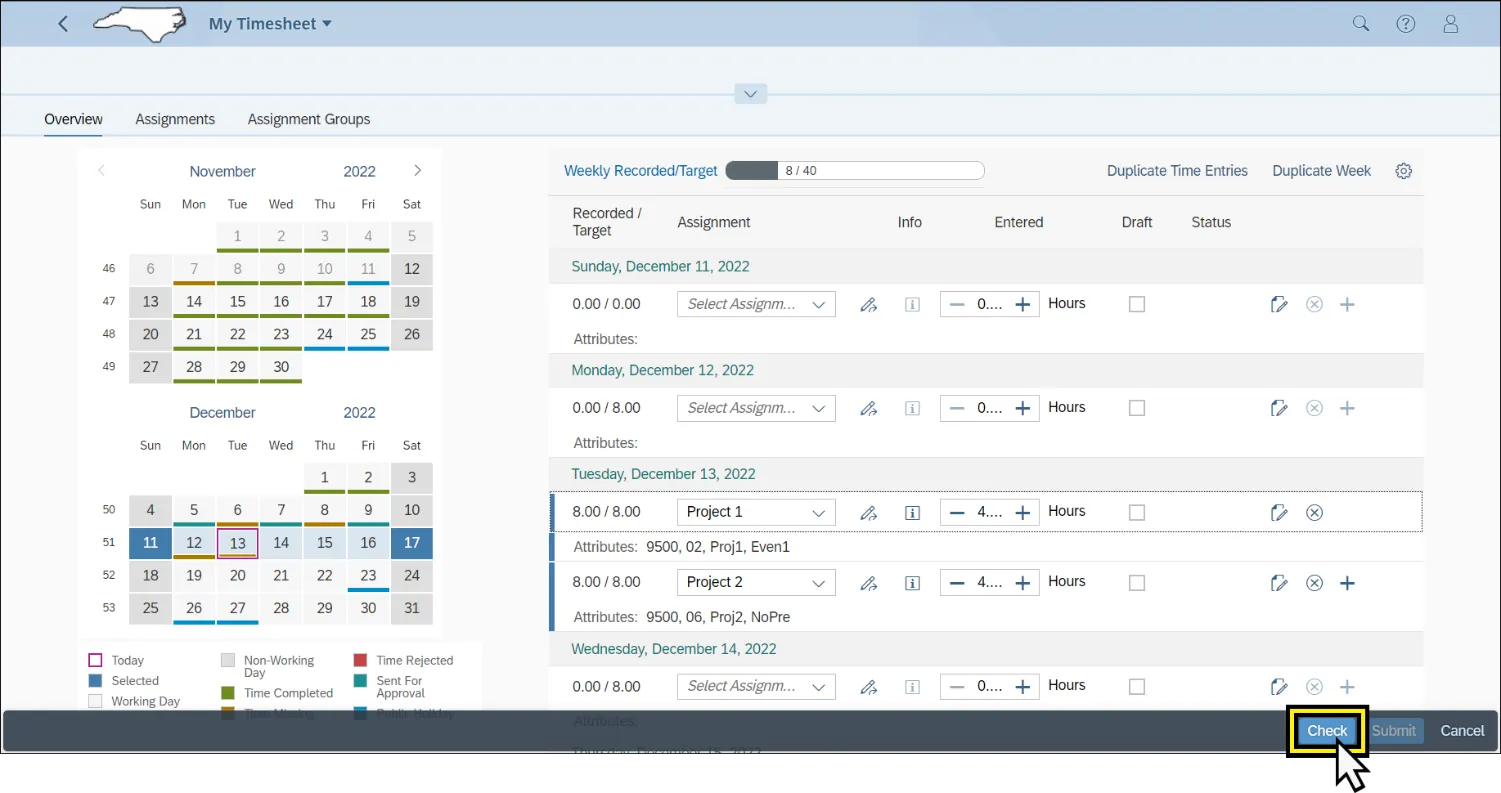
Step 8. Click Submit to save the time entries.