View Approve Timesheets Tutorial Video
Purpose
The purpose of this Business Process Procedure is to explain how to review and approve employee timesheets in Fiori.
Reviewing Employee Time Entries
The Working Time Report provides a comprehensive look at the time entered by direct reporting employees. The report can be used to view time entries prior to approving timesheets. The following steps can be used to access the Working Time Report.
There are 15 steps to complete this process.
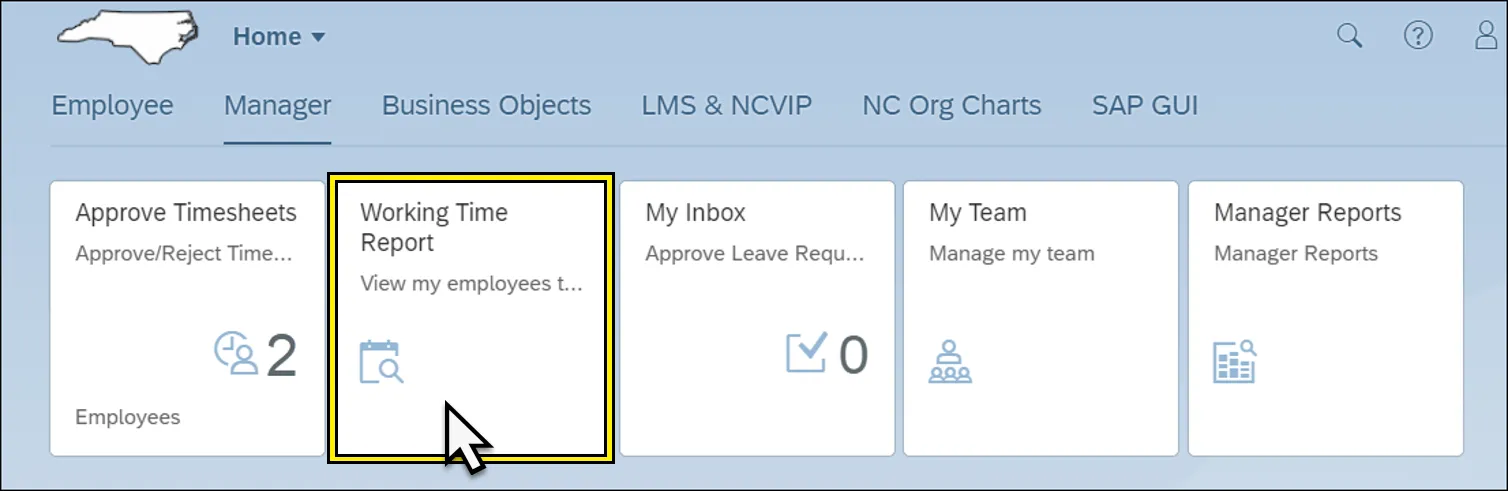
Step 1. Navigate to the Manager Tab within the Fiori application.

Step 2. Click the Working Time Report tile.
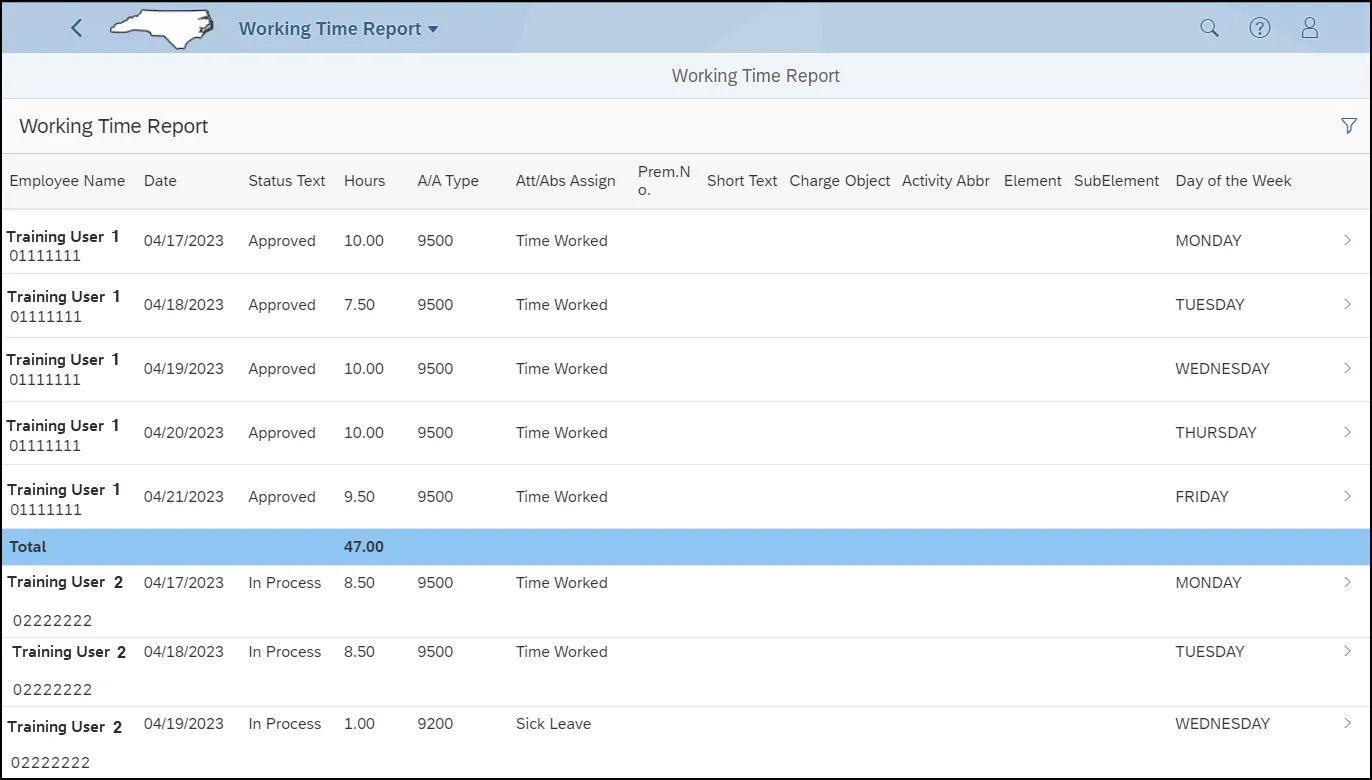
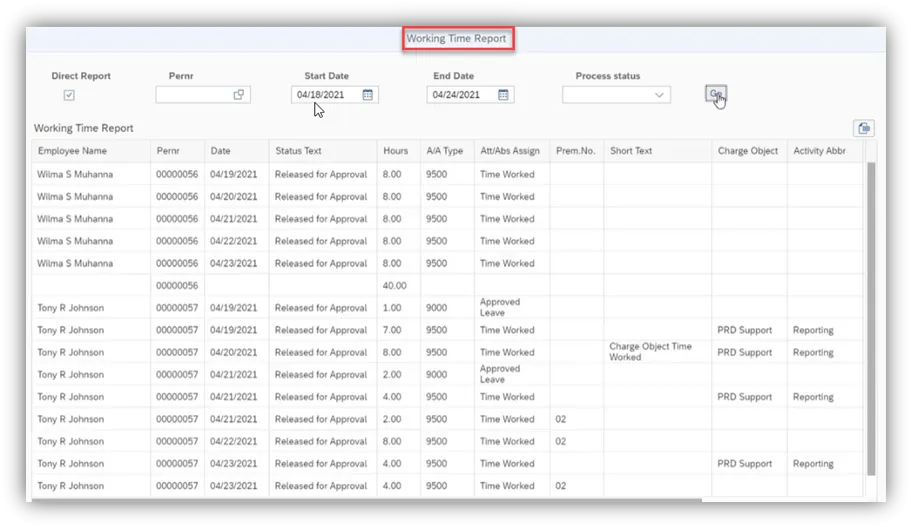
Step 3. The Working Time Report organizes all employee time entries by employee name and date. The report displays the employee name, personnel number, time entry date, time approval status, hours entered, Attendance/Absence type, Attendance/Absence Assignment text, and the day of the week. Additional fields such as premium number, premium text, charge object, activity abbreviation, elements, and sub elements may also be included if used when the employee submits the entry.
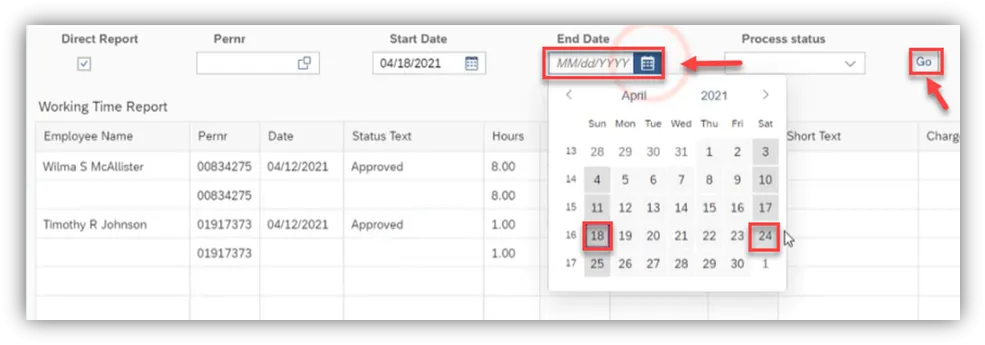
Note: FIORI defaults to the manager’s work week on a Sunday to Saturday[BJ1.1] schedule.
Step 4. For this example, choose the work week of April 18th through April 24th then click Go.
Step 5. Now you can review the time entries by the employees who report to you before proceeding to the next step.
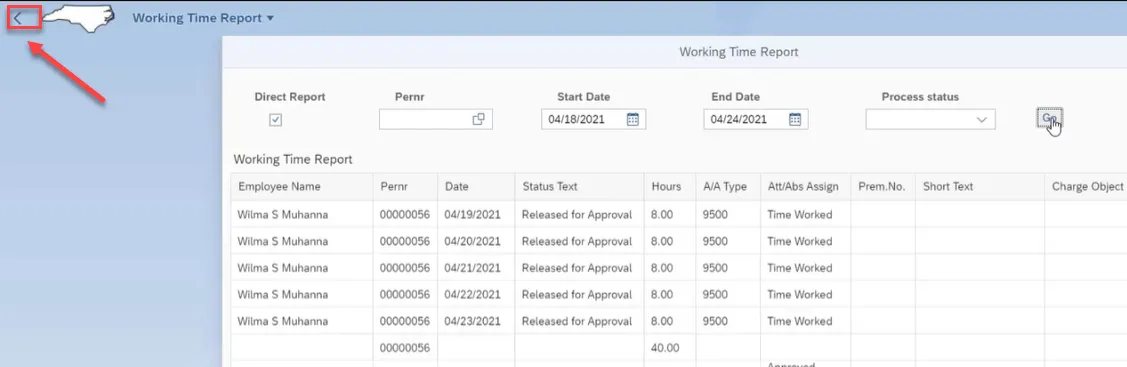
Step 6. Once you have reviewed all the time entries, click the arrow next to the NC State map in the top left of your screen and go back to the homepage.
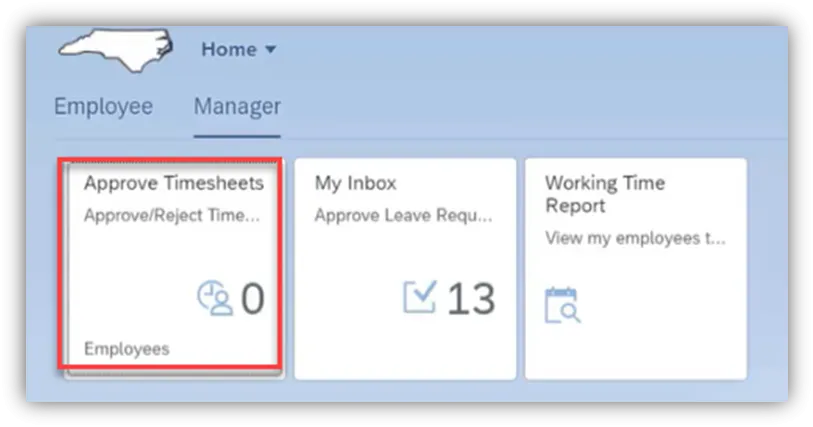
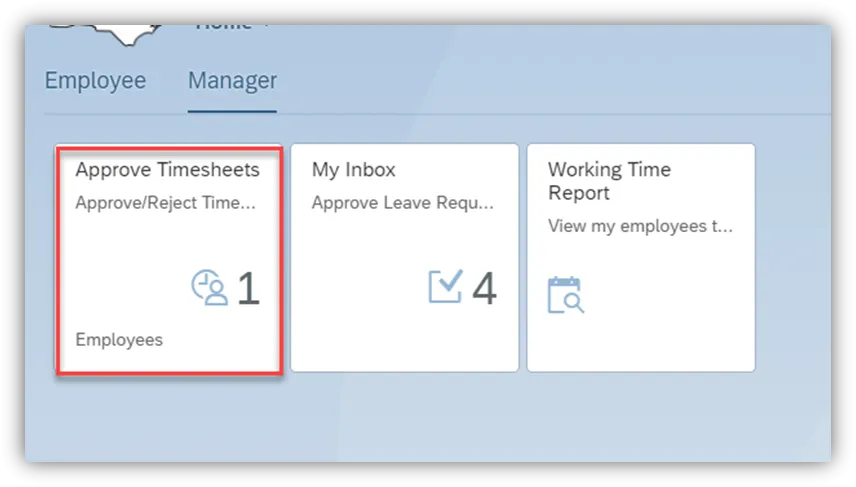
Step 7. On the Homepage, click on the Approve Timesheet[BJ2.1].
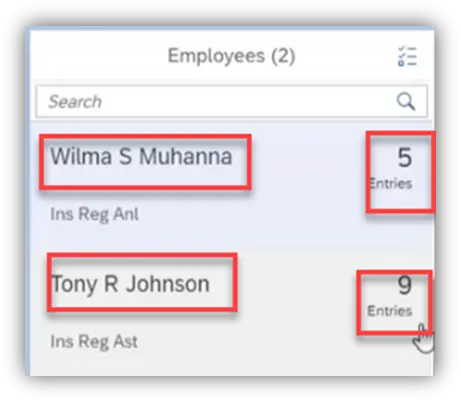
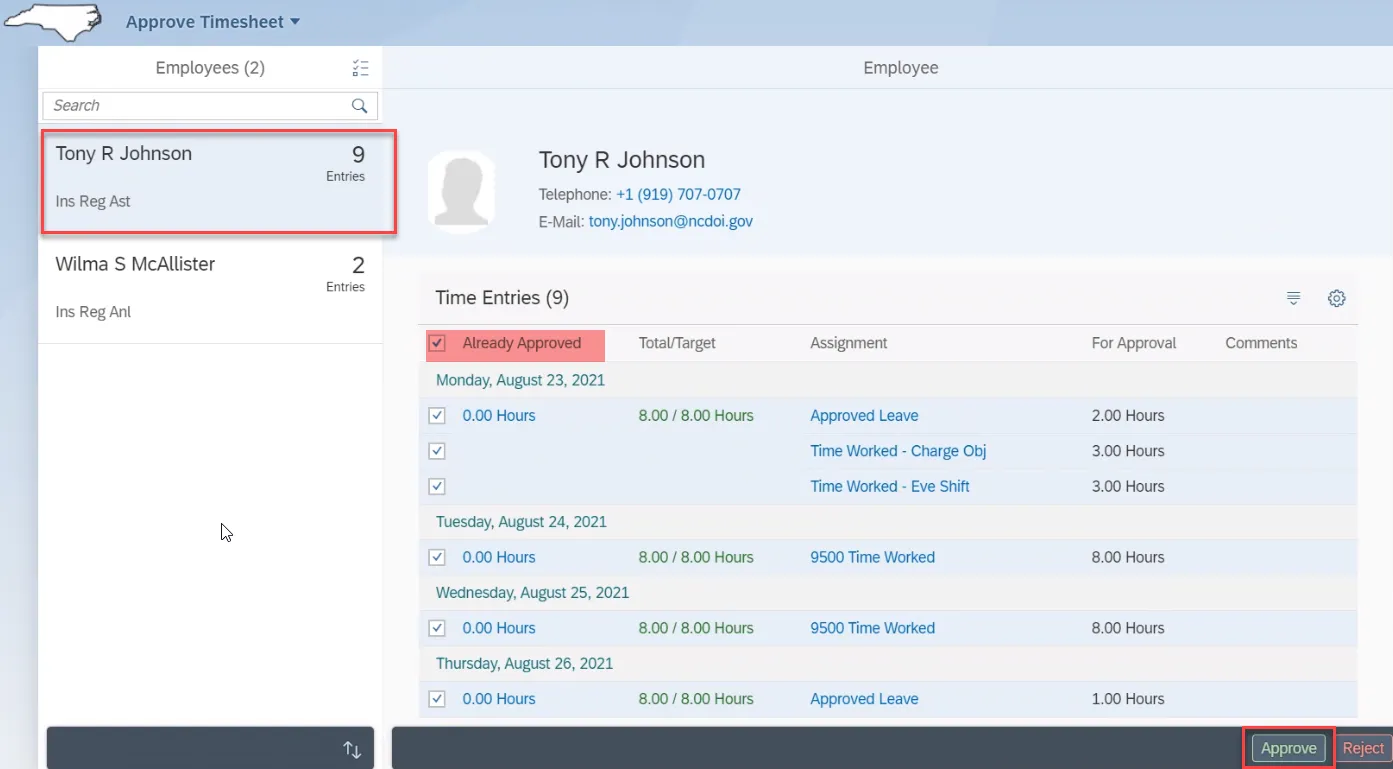
Step 8. Once you click on the Approve Timesheet, you will notice there are 2 employees with 14 entries to be approved. Wilma has 5 entries and Tony has 9 entries.
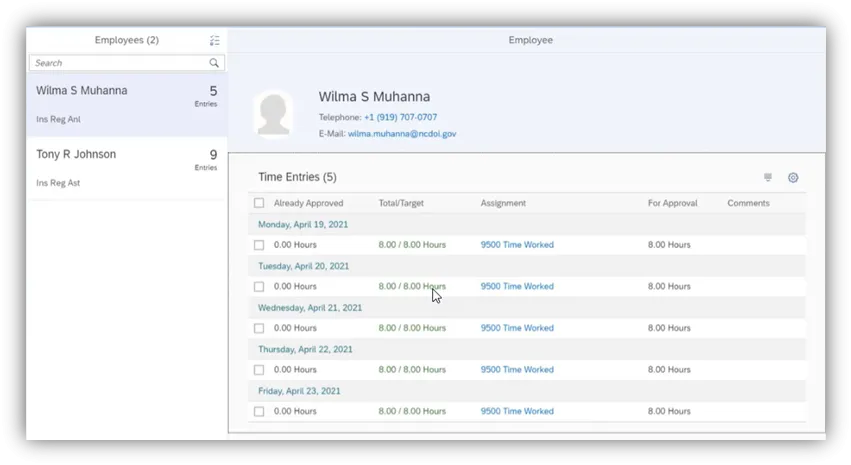
Step 9. Wilma shows 5 Entries and Tony shows 9 Entries to be approved.
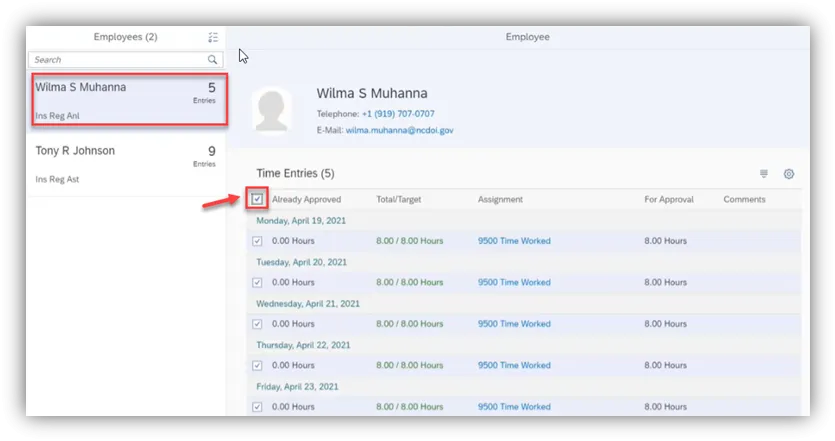
Step 10. Both employees are 40 hour approvals based on the information from the review of the Working Time Report. To select all of the Entries to be approved for Wilma, click the Select All box. When the Select All indicator has been checked, all time entries will be approved once the Approved icon is selected. Select Approve.
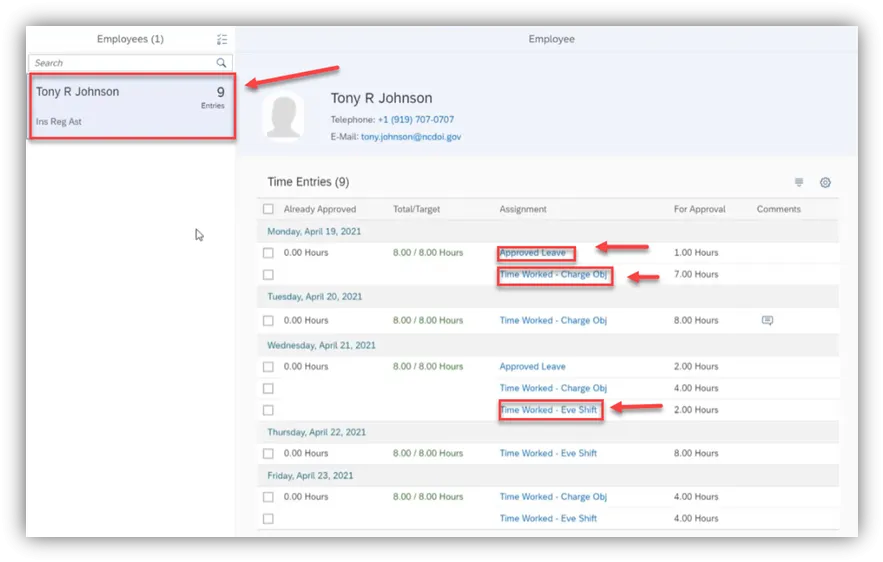
Step 11. Then select the next employee who has 9 Entries. In this case, you will notice a mix of Time Worked with shift and charge objects and Approved Leave that needs to be approved.
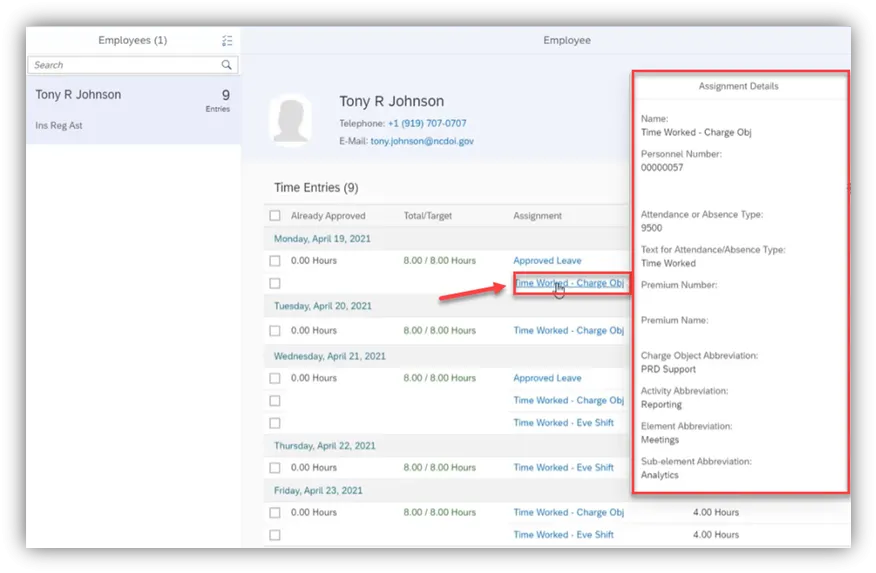
Step 12. When Assignment text is selected, a detailed view of the entry can be reviewed before approval.
Step 13. To select all of the Entries to be approved for Tony, click the Select All box. When the Select All indicator has been checked, all time entries will be approved once the Approved icon is selected. Select Approve.
Step 14. Once you have completed the step, click the arrow to go back.
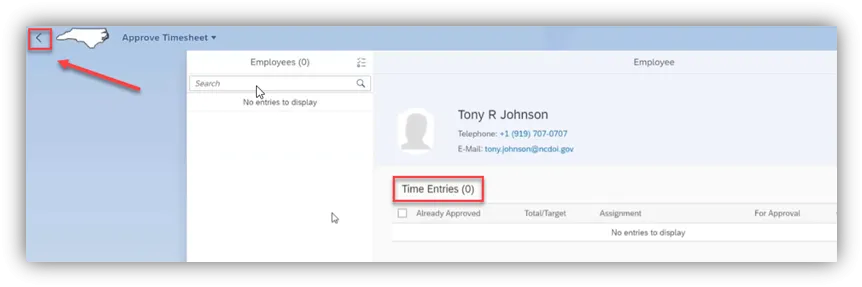
Step 15. The tile now shows 0 for employees who need to have time approved.