Purpose
The purpose of this document is to provide step by step detailed directions for interaction with some of the different prompts on Crystal Reports.
Prompt Types
Every Crystal report within the Business Objects repository has a unique set of prompts. These prompts determine the information that will be retrieved for the report generation. Each report will have a combination of different prompts. Every report will have mandatory prompts. These prompts must have values selected for the report to generate. Reports may also have optional prompts. Optional prompts can be used to narrow down the data that is compiled in the report. Optional prompts create more efficient and effective reports. Each type of prompt has an indication labeling it as a mandatory or optional.
Mandatory prompts are identified by a red asterisk at the beginning of the prompt. Once values are selected for the prompt a green circle with a check mark inside appears before the red asterisk.
Optional prompts are identified with the phrase (Optional) at the end of the prompt.
Prompts
Organization Unit
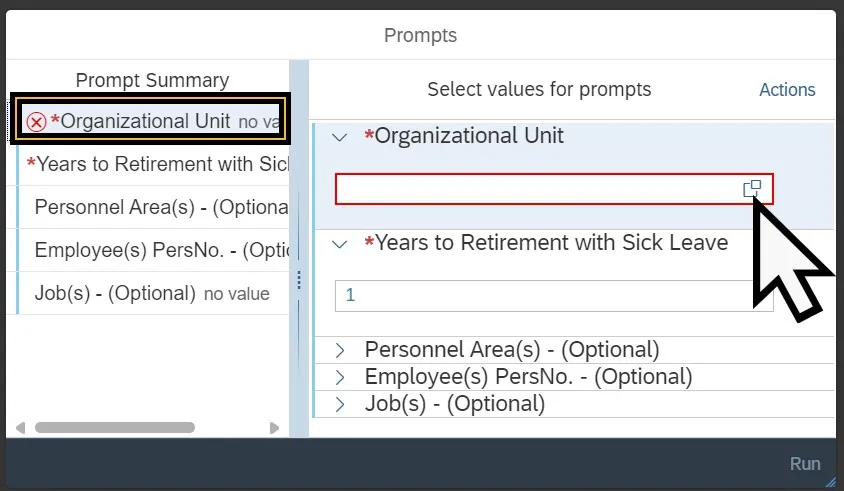
The Organizational Unit prompt selects the organizational unit that compiles the report data. Follow the steps below to complete the Organizational Unit prompt.
Step 1. Select the Organizational Unit Prompt.
Step 2. Click the LOV icon.
Step 3. Click the Expand node icon.
Step 4. Drill down to the desired Organizational Unit.
Step 5. Select the checkbox next to the desired Organizational Unit.
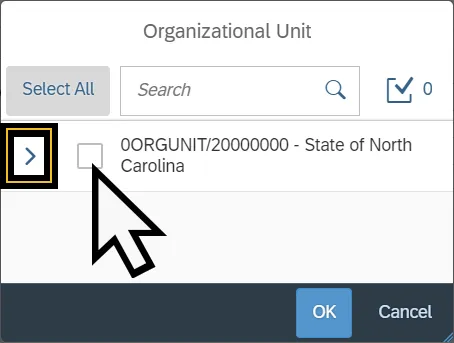
Step 6. Select the OK button.
Calendar Month/Year
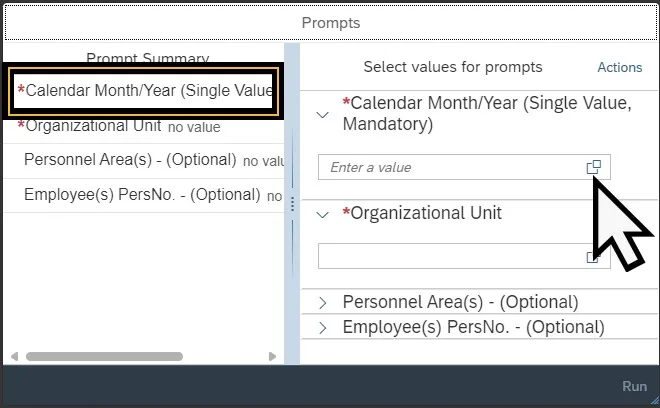
The Calendar Month/Year (Single Value) prompt selects a single month and year that compiles the data in the report. Follow the steps below to complete the Calendar Month/Year prompt.
Step 1. Select the Calendar Month/Year Prompt.
Step 2. Click the LOV icon.
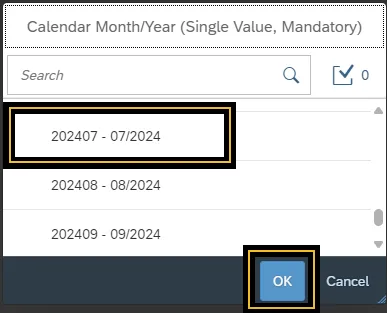
Step 3. Scroll down to the calendar month and year.
Step 4. Select the desired calendar month and year. The values are formatted by the year and month (YYYYMM) and by the month and year (MM/YYYY).
Step 5. Select the OK button.
Step 6. The selected values will display in the selected value field.
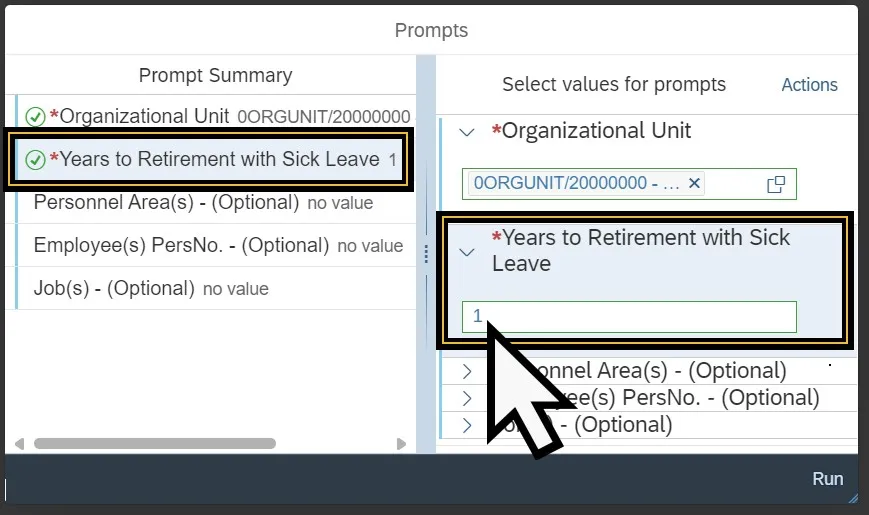
Years to Retirement with Sick Leave
The Years to Retirement with Sick Leave prompt filters the report data to compile the employees who are a specific number of years away from retirement when their sick leave is added to the calculation. Follow the steps below to complete the Years to Retirement with Sick Leave.
Step 1. Select the Years to Retirement with Sick Leave Prompt.
Step 2. Enter the number of years including the accumulated sick leave into the direct entry field.
Personnel Area(s)
The Personnel Area(s) prompt selects personnel areas to compile the report. Follow the steps below to complete the Personnel Area(s) prompt.
Step 1. Select the Personnel Area(s) Prompt.
Step 2. Enter the Personnel Area directly into the Enter a Value field.
Step 3. Click the Add icon.
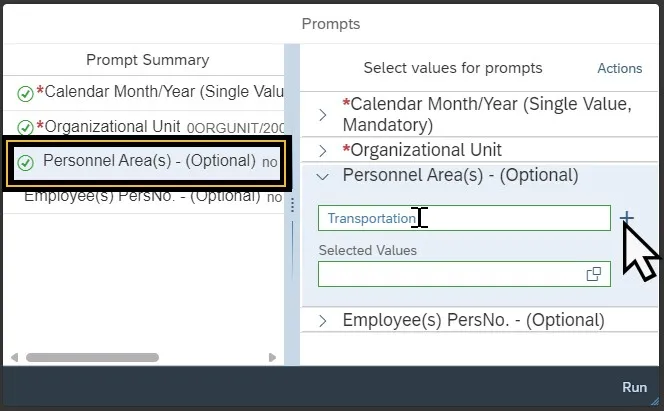
Step 4. Or click the LOV icon.
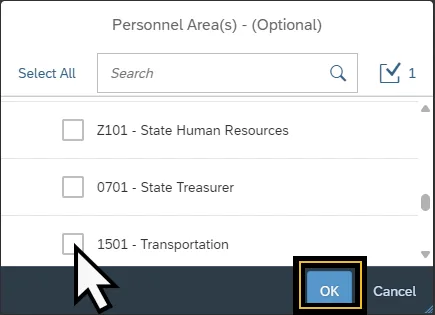
Step 5. Scroll down to the desired Personnel Area(s).
Step 6. Select the desired Personnel Area(s).
Step 7. Select the OK button.
Step 8. The selected values will display in the Selected Values field.
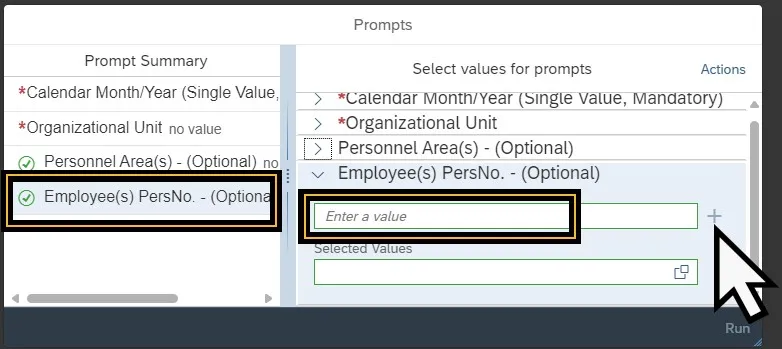
Employee(s) PersNo.
The Employee(s) PersNo. prompt selects the employee whose data is used to compile the report. Follow the steps below to complete the Employee(s) PersNo. prompt.
1. Select the Employee(s) PersNo. Prompt.
2. Enter the Employee’s Personnel Number directly into the Enter a Value field.
3. Click the Add icon.
4. The LOV icon can be used however an error notice may appear if the number of values returned from the LOV picker exceed the configured maximum display.
5. The selected values will display in the Selected Values field.