Purpose
The purpose of this job aid is to explain how dynamic columns and layouts work in the PA Business Workflow.
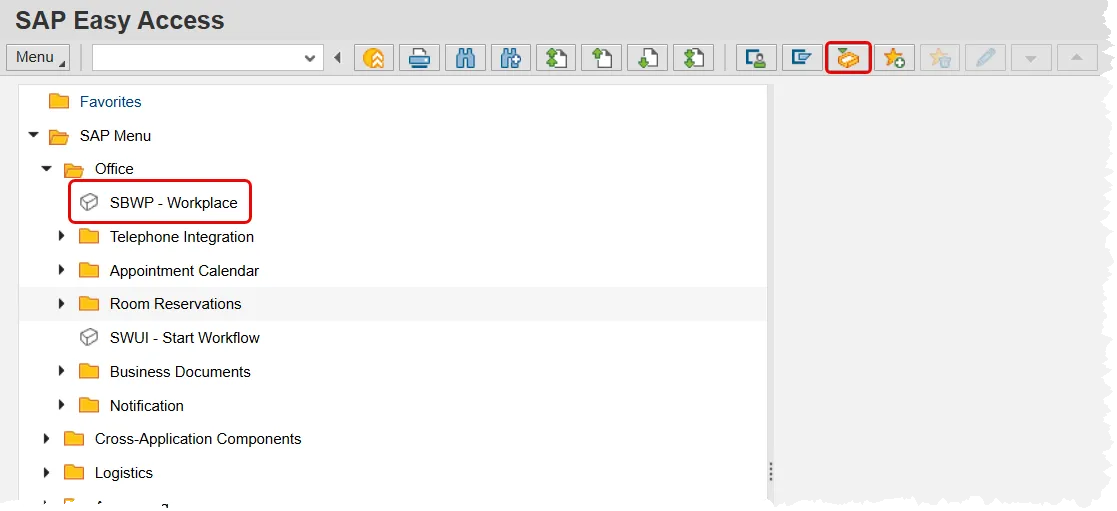
There are several ways to access the SAP Business Workplace (Inbox).
- Click the SAP Business Workplace (Ctrl+F12) button;
- Use the SAP Menu path SAP menu Office SBWP – Workplace; or
- Use the top Menu Path (see below): Menu Menu Business Workplace (Ctrl+F12).

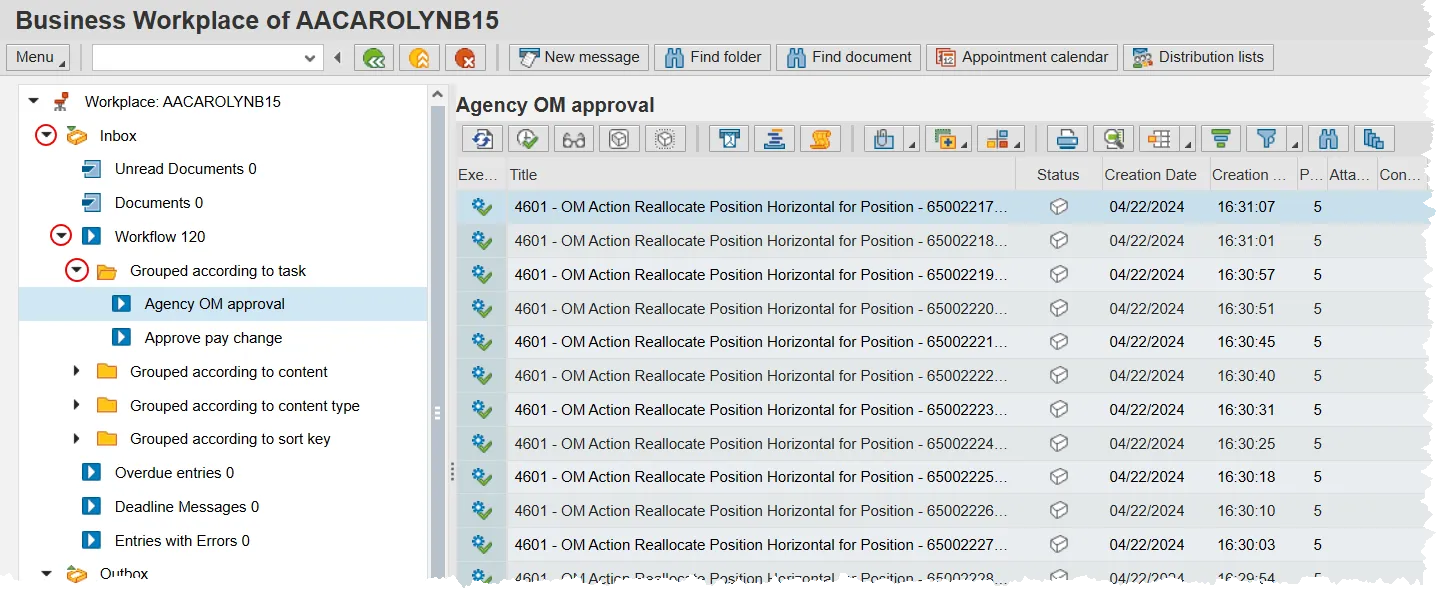
The Overview Tree will be found on the left-hand side when in your SAP Business Workplace. Options are available to group different work items together. Drill down by clicking on these nodes: Inbox → Workflow → Grouped according to task.
In the screen shot below, the two options for grouping are 'Agency OM approval' and 'Approve pay change'. Selecting ‘Agency OM approver’ will filter your list of items to display only OM actions. The ‘Approve pay change’ option will display the PA items.
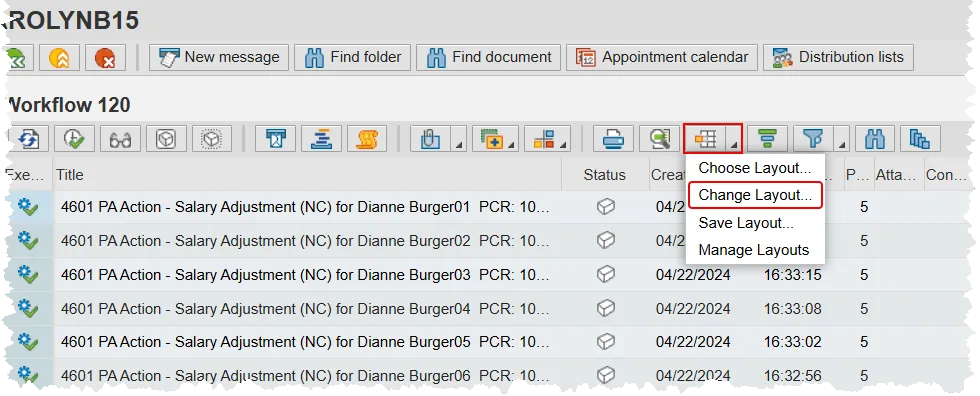
The view above is the default layout for the items in the Work List. This layout can be modified by removing columns or adding other preconfigured columns to your Work List view. To do so, click on the right hand side of the ‘Choose Layout’ button in the tool bar to display a drop down menu. Then choose ‘Change Layout’.
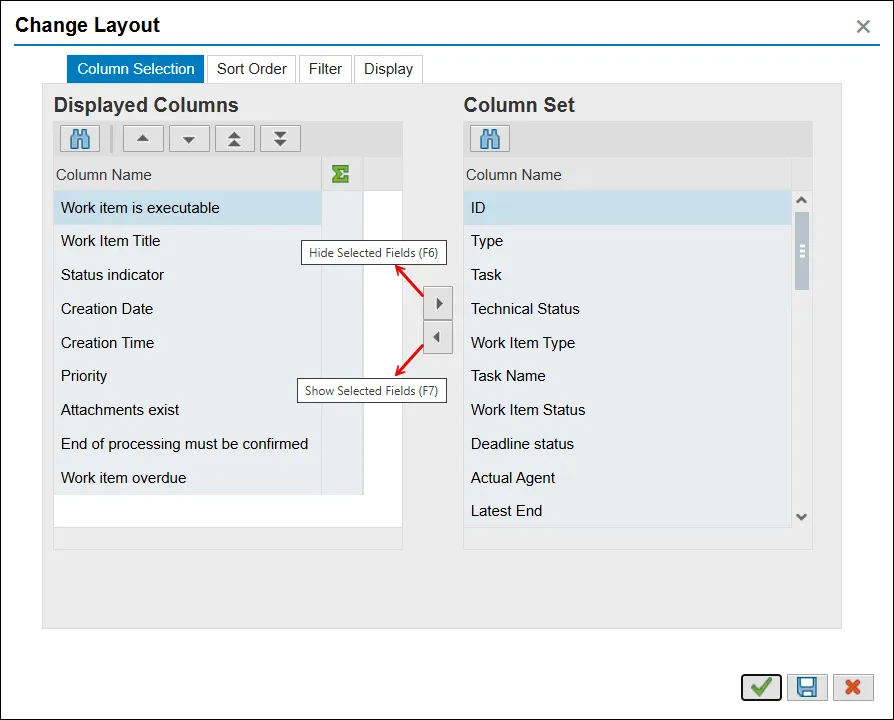
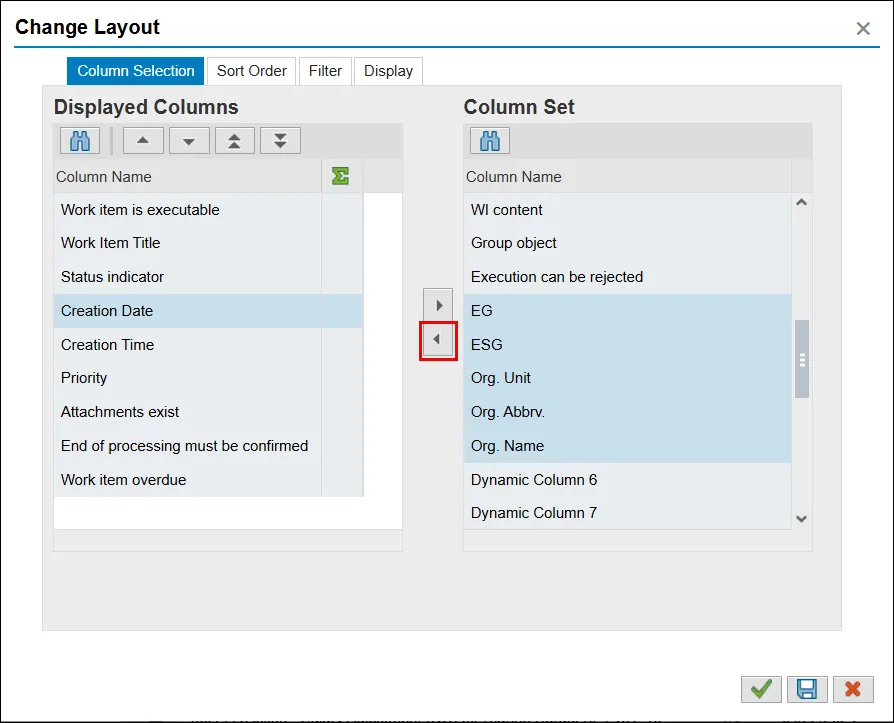
After clicking on the Change Layout option a pop-up window is displayed. It will allow you to customize the work area layout by choosing to either add or delete columns from the View. The Columns on the left side are the currently displayed columns. The column set on the right includes the additional possible columns to display.
To remove currently displayed columns, click on them to highlight them and then click the Hide Selected Fields (F6) button in the middle of the two lists. To display a column listed in the column set, click on it and then click on the Show Selected Fields (F7).
You can select more than one item per column by holding down the Ctrl key on your keyboard as you are selecting them.
Pro tip: When you move items from one set of colums to the other, they will be placed at the bottom of the list by default. However, if you select an item in the destination column, the one being moved will be placed directly above the one you’ve selected.
Review the example below. In the first image, the Creation Date line item is selected in the Displayed Columns set, and 5 items (EG, ESG, Org. Unit, Org. Abbrv., & Org Name) have been selected in the right hand list. The Show Selected Fields button is circled.
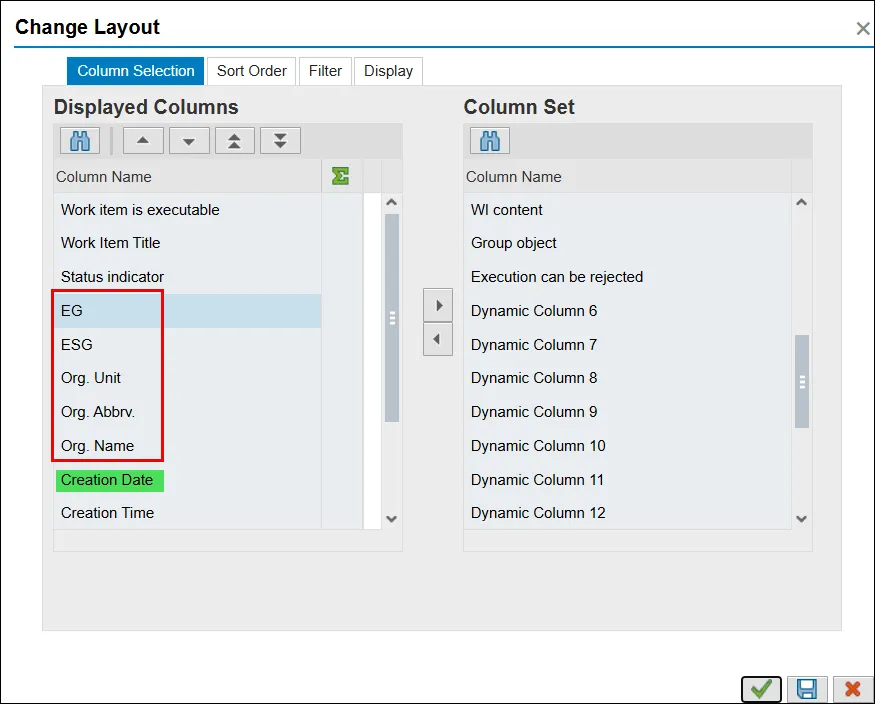
The results of clicking that button are shown in the second image. Notice that the 5 items have moved to the Displayed Columns side and have been placed directly above Creation Date.
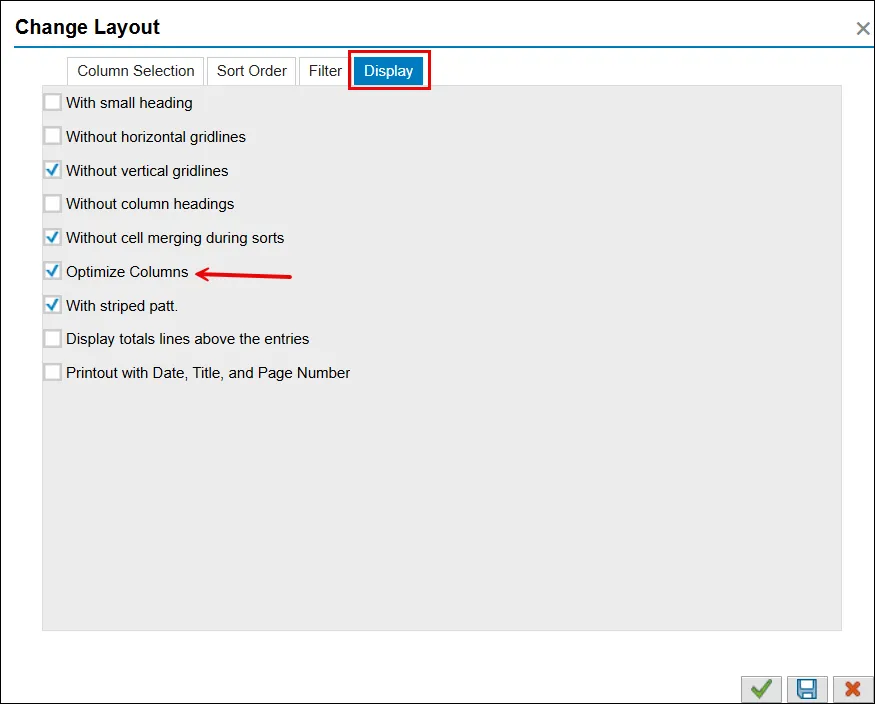
Next, locate and click on the Display tab in the Change Layout pop-up. If it is not already selected, check the box labeled Optimize Columns. This will automatically adjust the columns widths to the correct size.
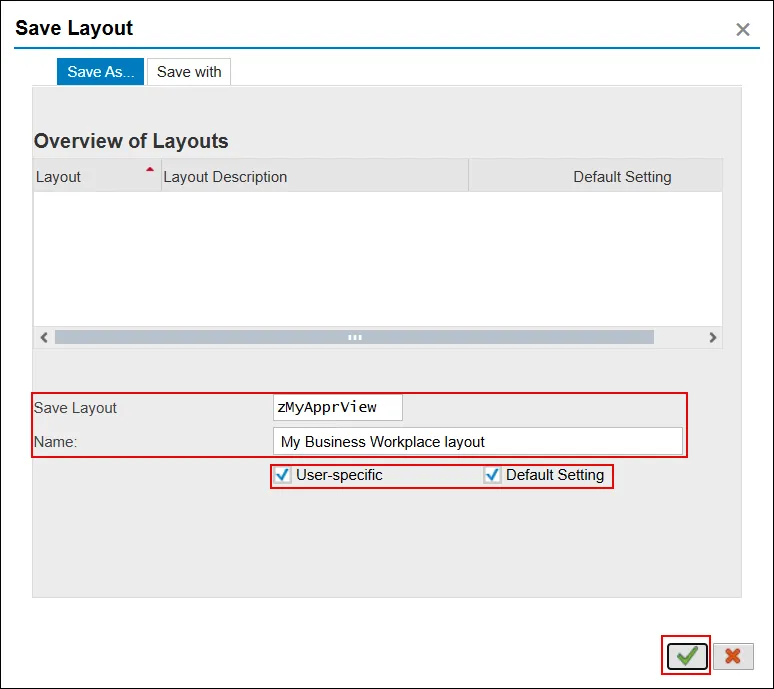
Finally, make this the default layout for your SAP Business Workplace. Start by clicking the Save button on the bottom right of the Change Layout pop-up. (Not pictured). A new window will appear as shown in the image below.
Enter a name and description for the Layout such as zMyApprView. The Layout must be saved starting with a Z so it will be specific to your Views. Make sure the check box User-specific is checked, and check Default setting so that whenever the Grouped Task is accessed, it will display the view that was created including the new columns. When the data entry above is complete, click the Green Check Continue (Enter) button.
When returning to the Business Workplace, the new columns with the values for each individual item will be visible. From this point, the capability to Sort or Filter to narrow down the view of the work items even further is available.
