Purpose
The purpose of this job aid is to review the SAP Business Workplace for Initiators.
Overview
As an Initiator you will have access to both an ‘Inbox’ and ‘Outbox’ in your SAP Business Workplace.
Your inbox may display items that have been fully approved and are ready for execution, or ones that have been rejected and need further attention from you.
In your Outbox you will find items that you have submitted to workflow, Personnel Administration actions that you have processed and rejected items that you have canceled.
To access the SAP Business Workplace:
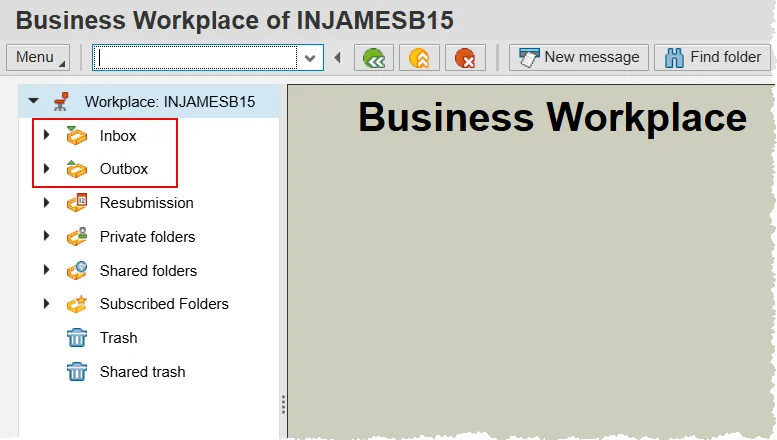
From the Easy Access screen, click the SAP Business Workplace button or type ‘SBWP’ in the command field and press enter.

The Business Workplace has several folders on the left-hand side. The State of North Carolina only uses the ‘Inbox’ and ‘Outbox’, so the rest can be disregarded. Note that there are little triangles to the left of these folders. We will refer to them as ‘nodes’.
A node that is pointing right indicates that the folder is closed. When it is clicked, the node will then point downwards and you will see several sub-items within the Inbox and Outbox.
Inbox
To access items that are in your inbox, click the node next to Inbox and then locate the Workflow entry. There will be a number next to this entry which indicates the number of items awaiting attention.
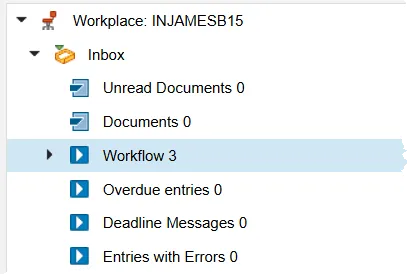
Click on the word Workflow to display the items in the inbox. There are three categories of items that you will see:
- Approved PA actions
- Rejected PA actions
- Rejected OM actions
You will not see any approved OM actions, because once BEST Shared Services approves an OM request as the last step, the Workflow process is complete.
This area can be customized for your needs and you can utilize the WF-14 Help Doc for reference.

Approved Items
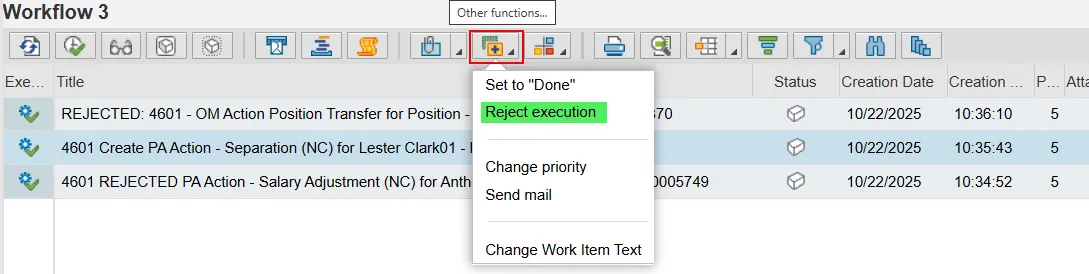
Items that have been approved will display as ‘Create PA Action - …’. For these items, there are two options. Most often an approved work item will be processed and then set to complete. Each PA action has a process guide that can be found on the HR-Payroll Help Documents web page.
Alternatively, there may be a need to cancel an approved item. If so, single click to select it and then click the ‘Other functions’ button. Choose the ‘Reject execution’ option. CAUTION! There is no confirmation pop-up. Clicking Reject execution will immediately put the work item into completed status.
Reject Execution Process
Rejected Items
Rejected items are easily identified by the word REJECTED in the title column. You will have three options for these PCRs. But each begins with reviewing the rejection note provided by the approver who sent it back to the initiator.
First, select the rejected item by clicking it. Next, click the Environment button and then choose Display objects in workflow.
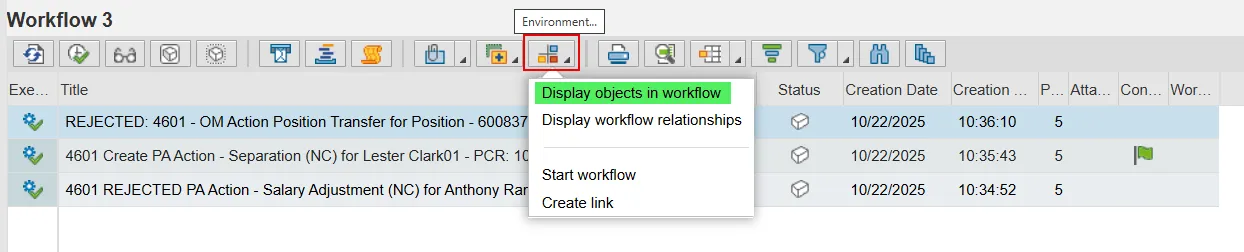
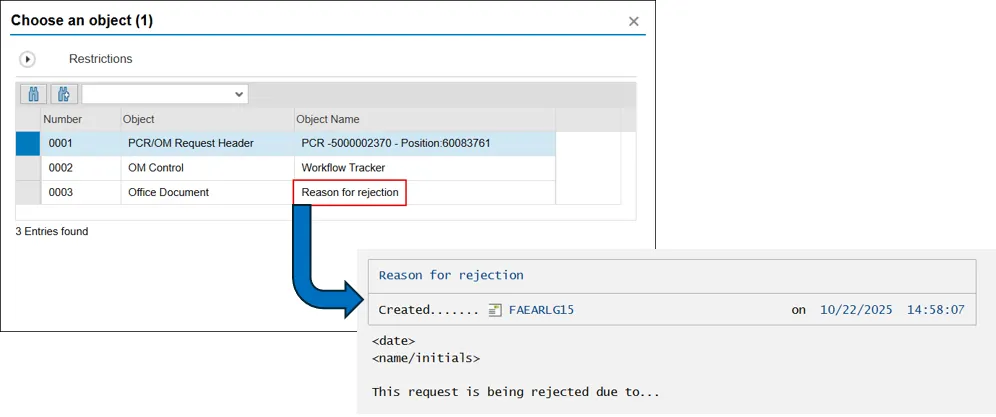
The ensuing pop-up will have links to the Workflow Header (the item with the PCR number in the Object Name column) and the Workflow Tracker. If the approver created their note correctly, then there will also be a link to that note in this pop-up with a title indicating what it is. In the screen shot below, the note is titled Reason for rejection. You can double click this item to read the note.
If this line item is not there, then you will have to find the note in the Workflow Tracker. It will assuredly be there because the system will not move the PCR into the initiator’s inbox without it. In this method, double click the Workflow Tracker item in the pop-up.
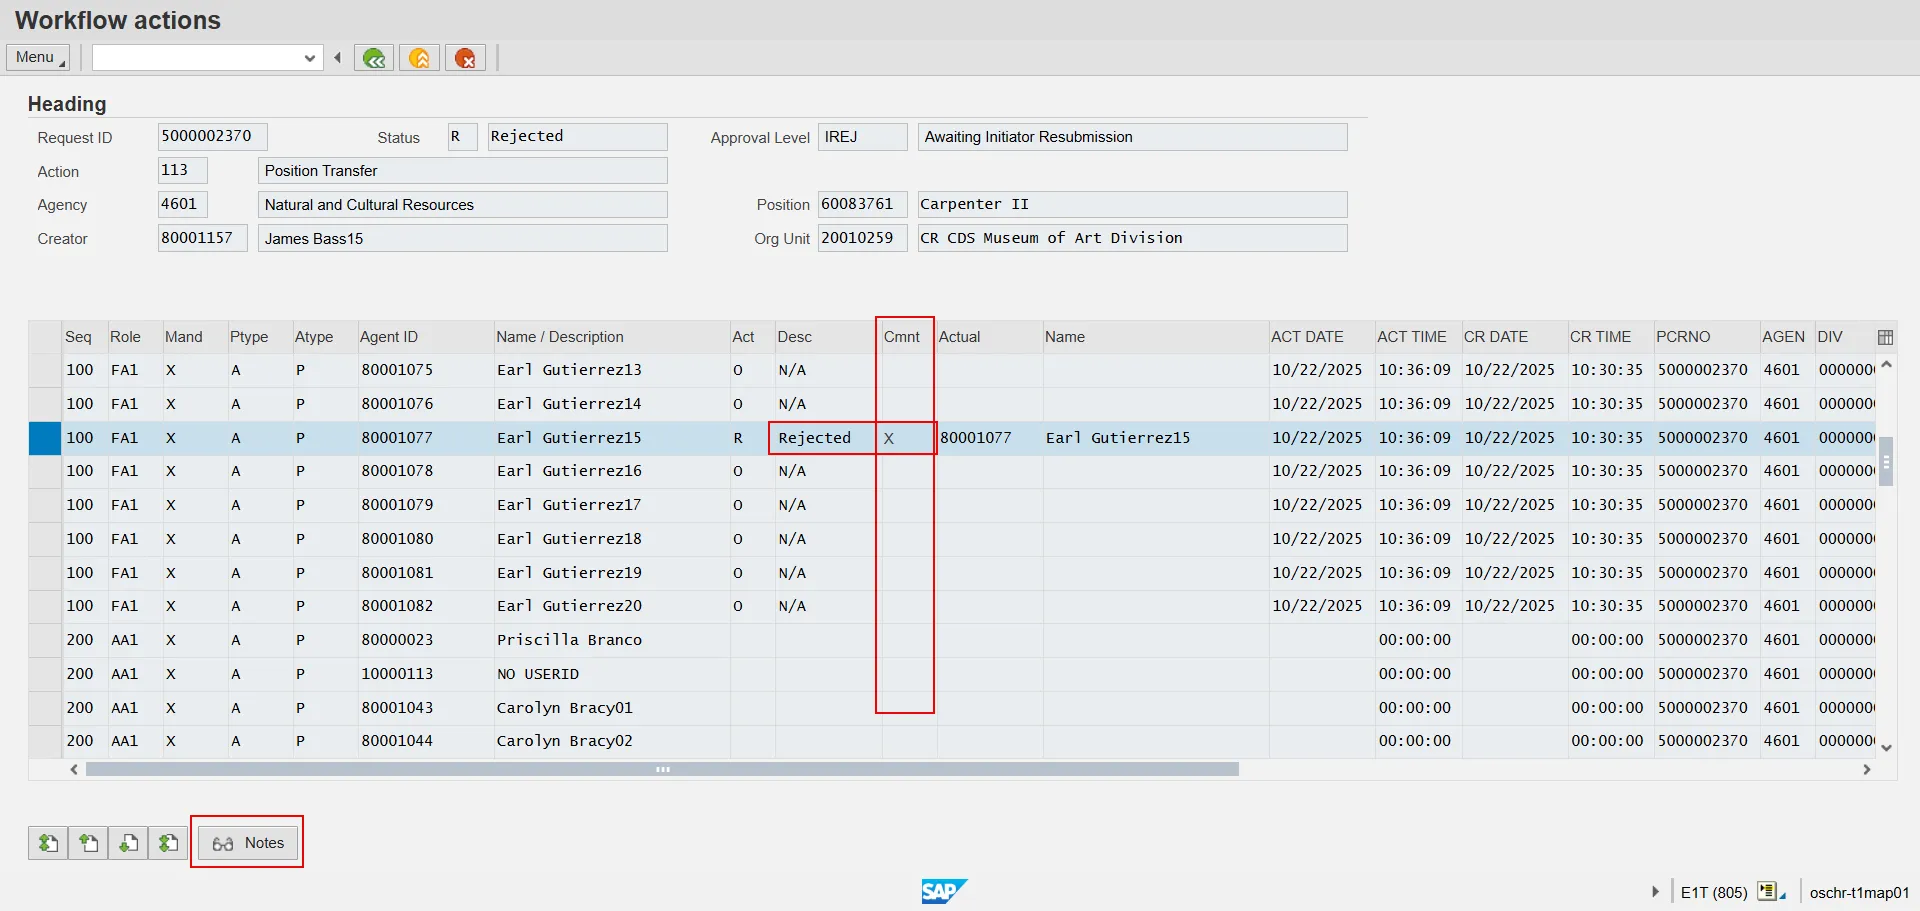
A screen titled Workflow actions will appear. Underneath the heading section, scroll down the Routing Table and locate the line item that has Rejected in the Desc column, where you will also see an X in the Cmnt column.
Highlight this line by clicking the box on the far left, then click the Notes button.
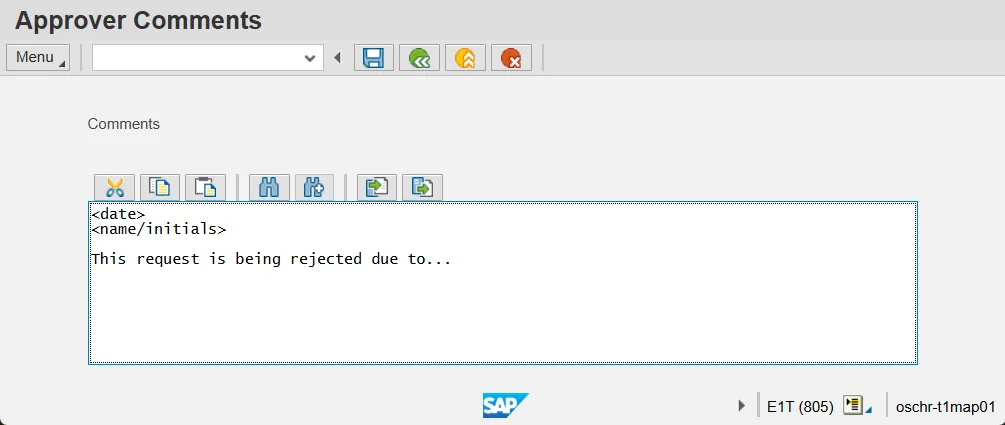
After reading the note, you will need to determine if the request should be canceled or changed and resubmitted.
Double click the rejected work item to access the Decision Step in Workflow screen. There will be three options to choose from. If the request should be canceled, click the Cancel Action button. If it can be corrected and resubmitted for consideration, click the Change and Resubmit button (see note below). The third option, Cancel and keep work item in inbox, will defer the decision until later. Choosing this option will return you to your Inbox without any action having been taken on the PCR.
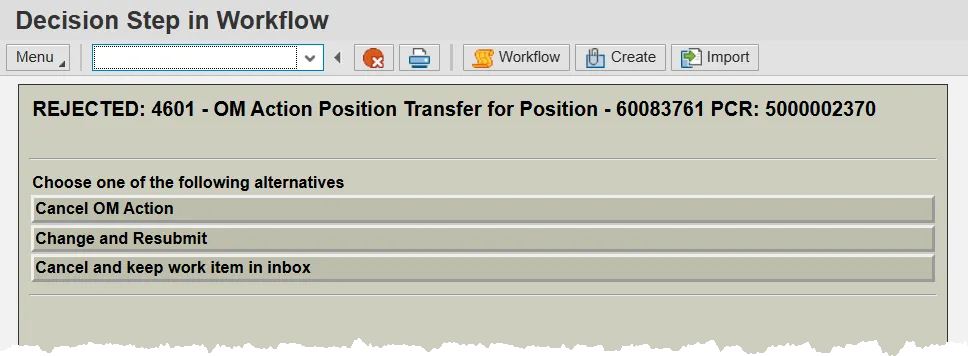
Note: If you choose the Change and Resubmit option, the PCR will open and be editable. Change the data as appropriate, then save. Click the Complete workflow item button on the bottom of the pop-up and your request will be put back into Workflow.
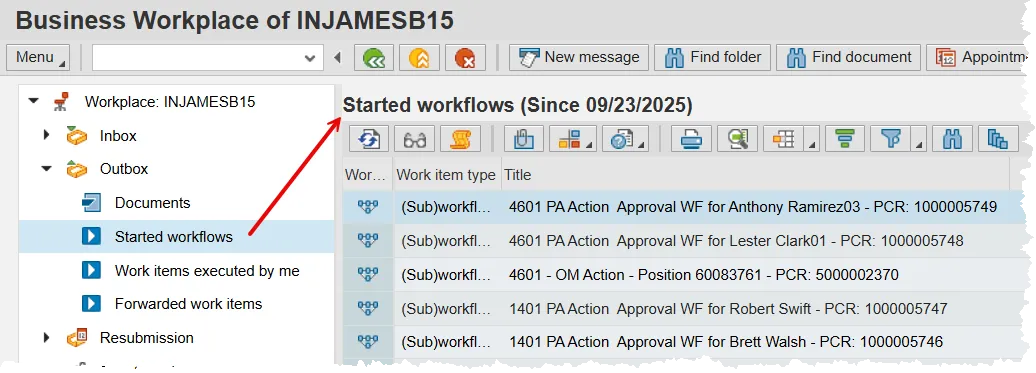
Outbox
To access items that are in your outbox, click the node next to Outbox and then select either the Started workflows or Work items executed by me entry. The first of these will display any items that you have sent for review. The second will display any PA actions that you have processed. Both will show the applicable items from the last 30 days by default.
If you would like to view the track of your request in the Workflow process, you can use the Workflow Tracker and/or the Workflow log. The help documents below cover how to open and use these useful tools.