Purpose
The purpose of this Business Process Procedure is to explain how to enter an FML transaction in the Integrated HR-Payroll System.
Trigger
Employee has requested an FMLA, and an FMLA transaction needs to be processed.
Business Process Procedure Overview
Eligible state employees are entitled to Family Medical Leave (FMLA) and Family Illness Leave (FIL). In either situation, an employee can use paid leave time or LWOP to account for absences during the specified periods. While employees are on FMLA, it is necessary to associate an employee's absences with the FMLA event in order to track when the allowable leave entitlement has been exhausted. To properly associate an employee’s absences with FMLA, a record with the FMLA entitlement is first created in the HR/Payroll system. The employee's applicable absences are attributed to the FMLA event.
The Family Medical Leave Workbench (transaction PTFMLA) handles all processes related to FMLA events only. FIL events must be tracked offline.
When creating an FMLA request, the FMLA Workbench will automatically check an employee's eligibility for FMLA. Based on OSHR policy, an employee's eligibility is related to his or her length of State service and hours worked during the previous 12 months.
After an employee has exhausted all of his or her leave entitlement, the FMLA Workbench will also manage his or her eligibility for subsequent leave entitlements.
This BPP will detail:
- Creating an FMLA request (or record)
- Approving an FMLA request
- Attributing absences to an approved FMLA request
Tips and Tricks
See OM Tips and Tricks Job Aid for a full listing of Best Practices and Tips and Tricks. The job aid is located on the Training Help page under Help Documents.
Via Transaction Code: PTFMLA
Procedure
There are 26 steps in this process.
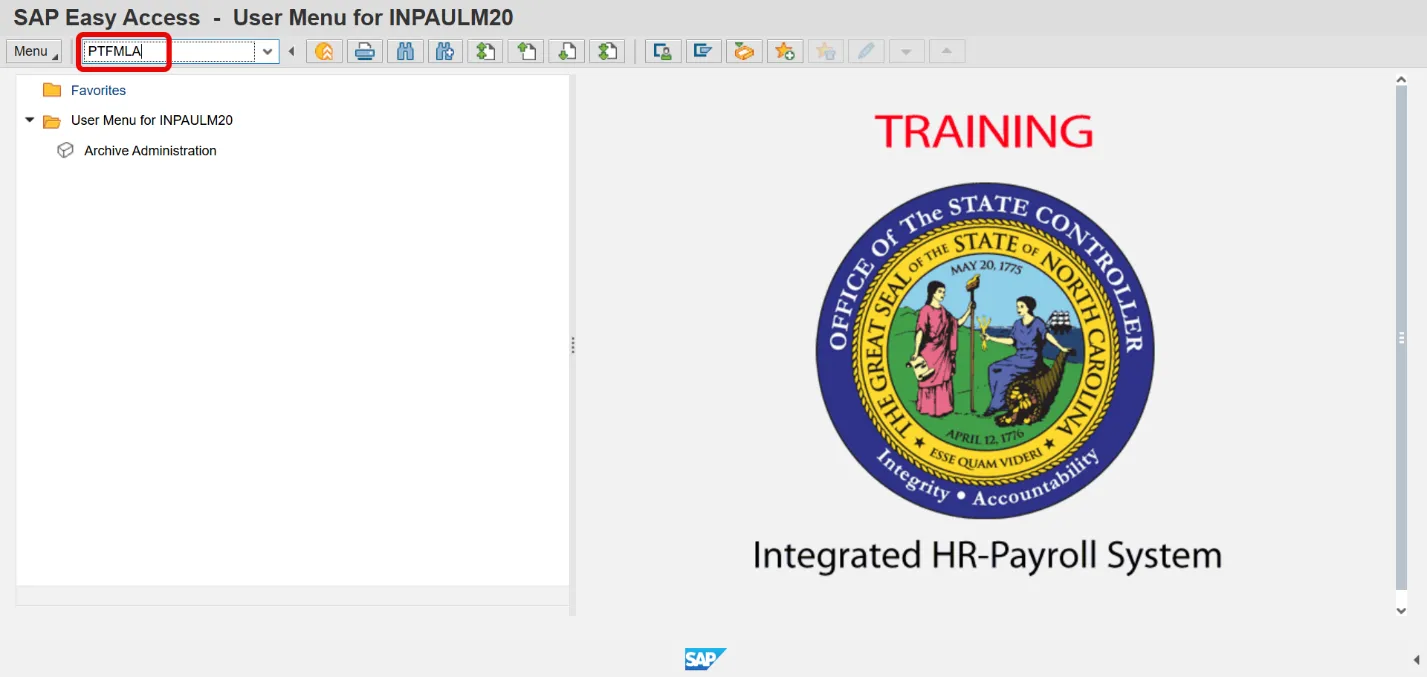
Step 1. Update the Command field with transaction code PTFMLA.
Step 2. Click the Enter button.
Step 3. Update the Profile field. Example: FMLA Approver
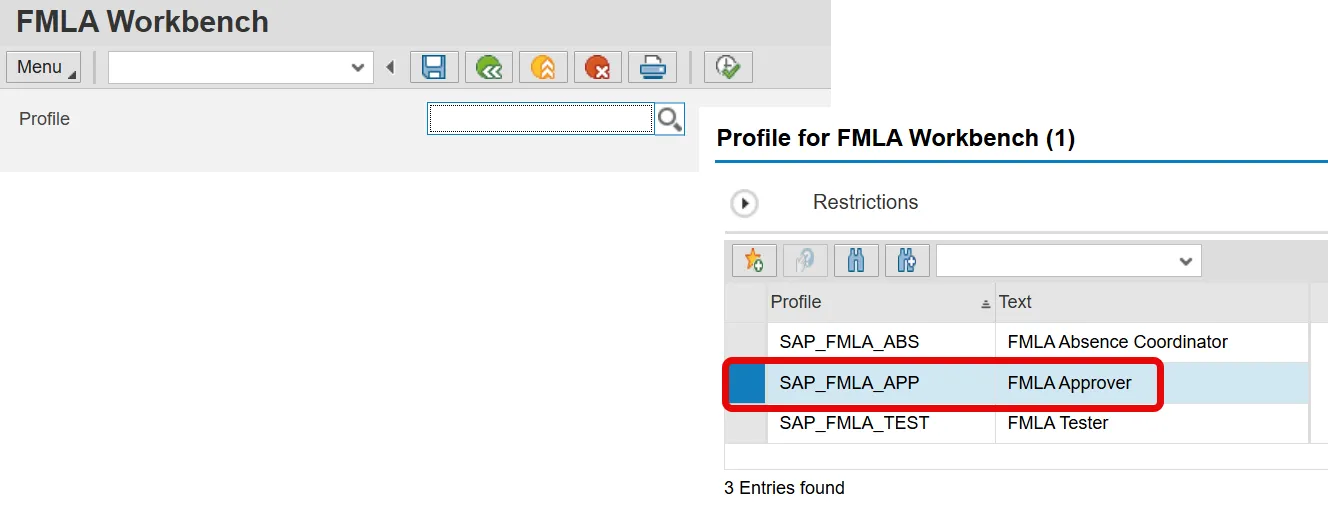
Step 4. Click Execute.
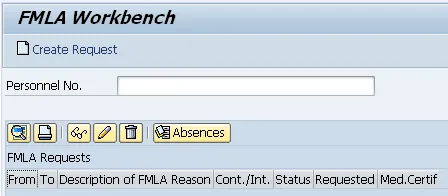
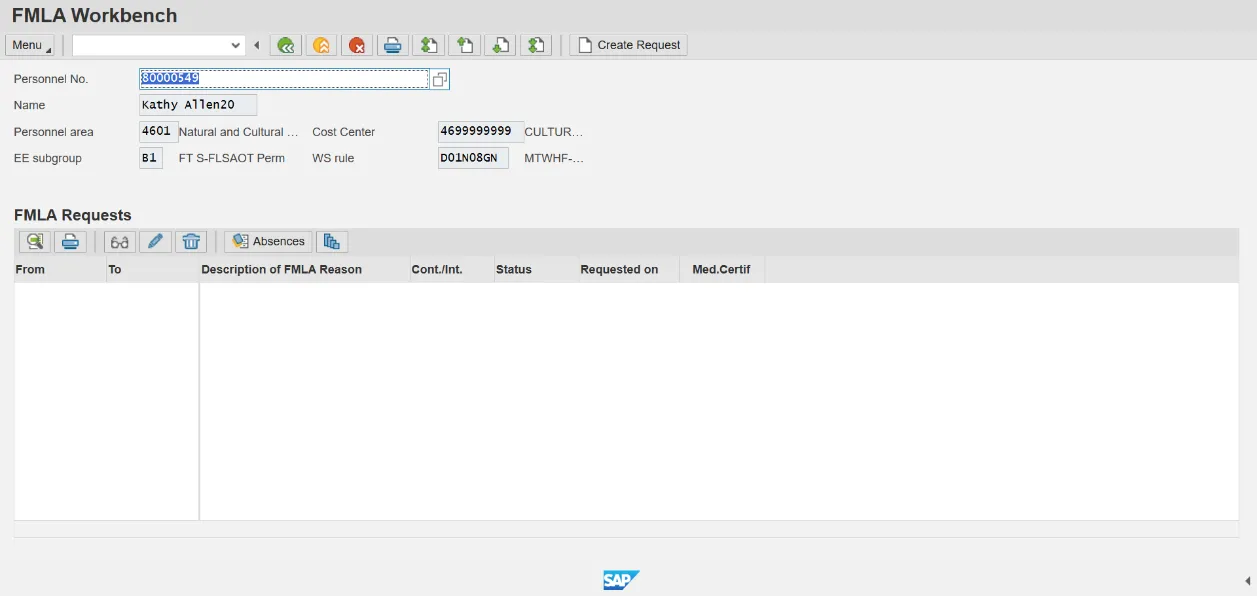
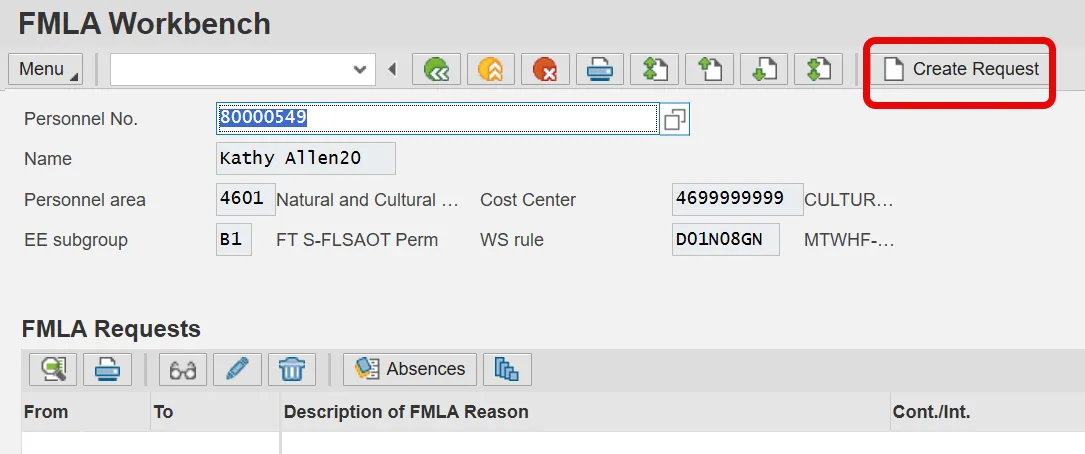
Step 5. Update the Personnel No. field:
Step 6. Click the Enter button.
An employee may have multiple approved FMLA requests. If the employee has previous FMLA requests, they will be listed under the screen heading FMLA Requests. The FMLA Workbench will manage any concurrent events in an entitlement period and deduct absences attributed to concurrent events from the same entitlement.
Select one of the following options:
|
If: |
Then: |
|---|---|
| You wish to create a FMLA request, | Proceed with step 7. |
| You wish to associate absences with an approved request, | Proceed to step 16. |
7. Click the Create Request button.
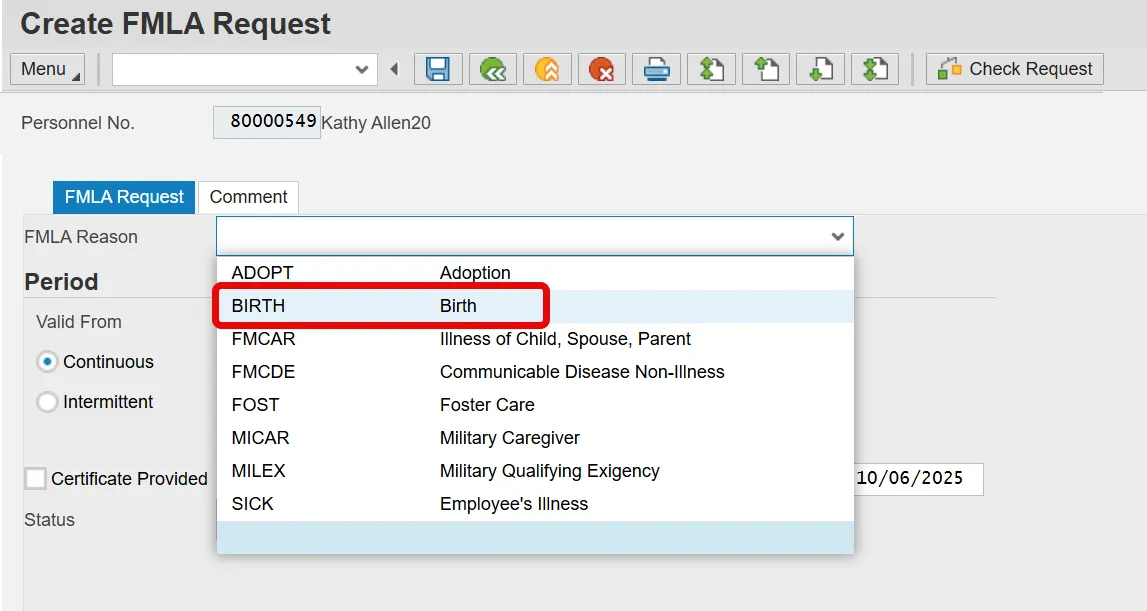
8. Click the FMLA Reason drop-down list.
There are eight reasons recognized as applicable for FMLA leave according to the Federal law and OSHR policy.
- Birth
- Adoption
- Foster Care
- Illness of Child, Spouse, Parent
- Employee’s Illness
- Communicable Disease Non-Illness
- Military Qualifying Exigency
- Military Caregiver
There is one reason recognized as applicable for FIL according to OSHR policy.
- Illness of Child, Spouse, Parent
An employee is entitled to FIL only after he or she has exhausted the leave entitlement provided by FMLA.
Step 9. Select Birth from the FMLA Reason drop-down list.
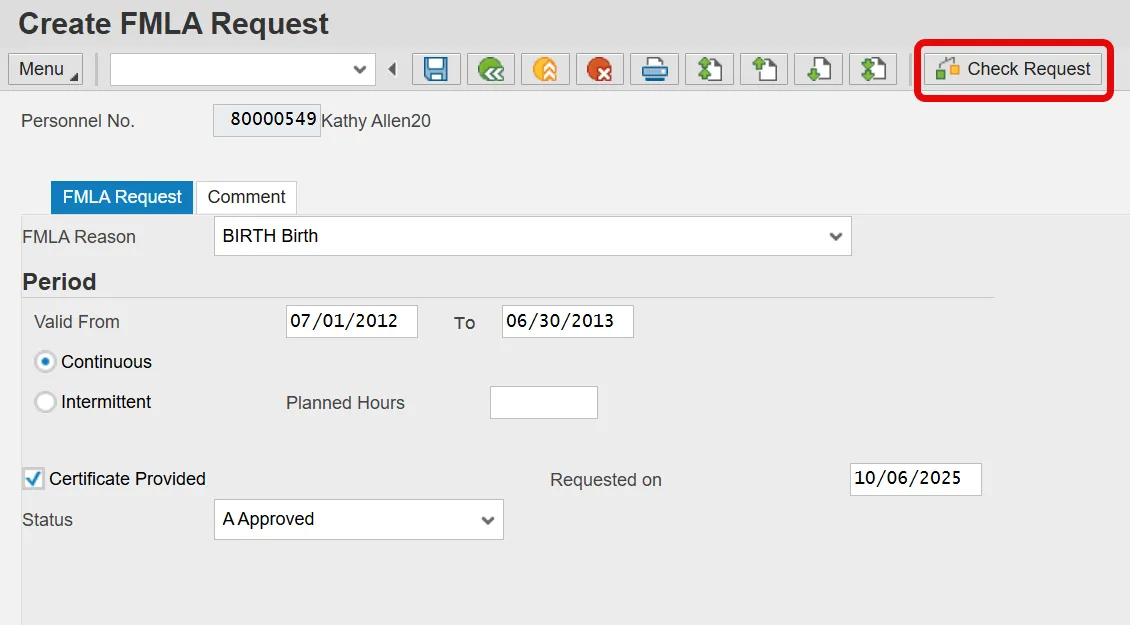
Step 10. Update the Valid To and From dates.
The Valid From and to dates should correspond with the period for which the employee is eligible for the leave entitlement - one year for FMLA requests. If the employee has an existing FMLA event, the to date will be adjusted automatically to the end date of the previous request. This functionality ensures that the employee does not receive entitlement in excess of that allowed by Federal law or OSHR policy.
Step 11. Click Certificate Provided checkbox.
Step 12. Click Check Request button.
The FMLA Workbench will perform the applicable eligibility checks against the request. If the employee is eligible, the request will have a green check mark in the Elgblty column as shown in the example that follows. If the employee is not eligible, a red 'X' will display in the Elgblty column. If the employee is ineligible the Service and/or Credit Hrs columns will provide additional information related to the employee's ineligibility.
Step 13. Click the Status drop-down list.
FMLA requests can be approved or rejected. If an employee is deemed ineligible, the request should be rejected. In the following example, the request is approved.
Step 14. Select Approved in the list box.
The FMLA request must be approved before absences can be associated with the event.
Step 15. Click the Save (Ctrl+S) button.
Step 16. After saving the request, the system displays the FMLA request number.
After approving and saving a request, you can return to the initial FMLA Workbench screen, or continue to record absences from the Create FMLA Request screen. The new request now displays under the FMLA Requests heading. The following steps detail how to associate absences to an existing FMLA event.
Step 17. Select (highlight) the applicable event.
Step 18. Click the Absences button.
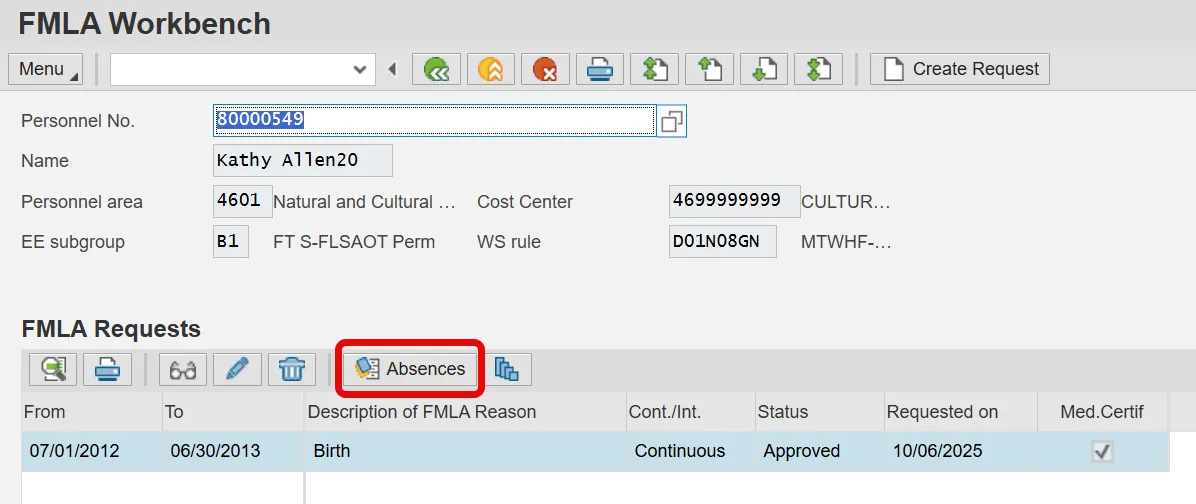
Information: Check that the desired request is highlighted when clicking the Absences button to ensure the absences are associated with the correct FMLA event.
Each FMLA Reason has a limited set of Absence Codes that will appear in this list. The list is further defined by the employee’s personnel subgrouping (Temporary, Non-Leave Earning or Regular). Click the link below to access tables with this specific information:
FMLA Reason Absence Assignment
Step 19. Click the checkbox for any applicable absences.
All of the employee's recorded absences in the validity period of the request are displayed on the Absences tab. If an absence is related to the FMLA event, select the box in the FMLA column. The hours of the checked absences will be deducted for the employee's leave entitlement.
In this example, it was determined that the Approved Leave absences on 10/4 and 10/5 were not applicable.
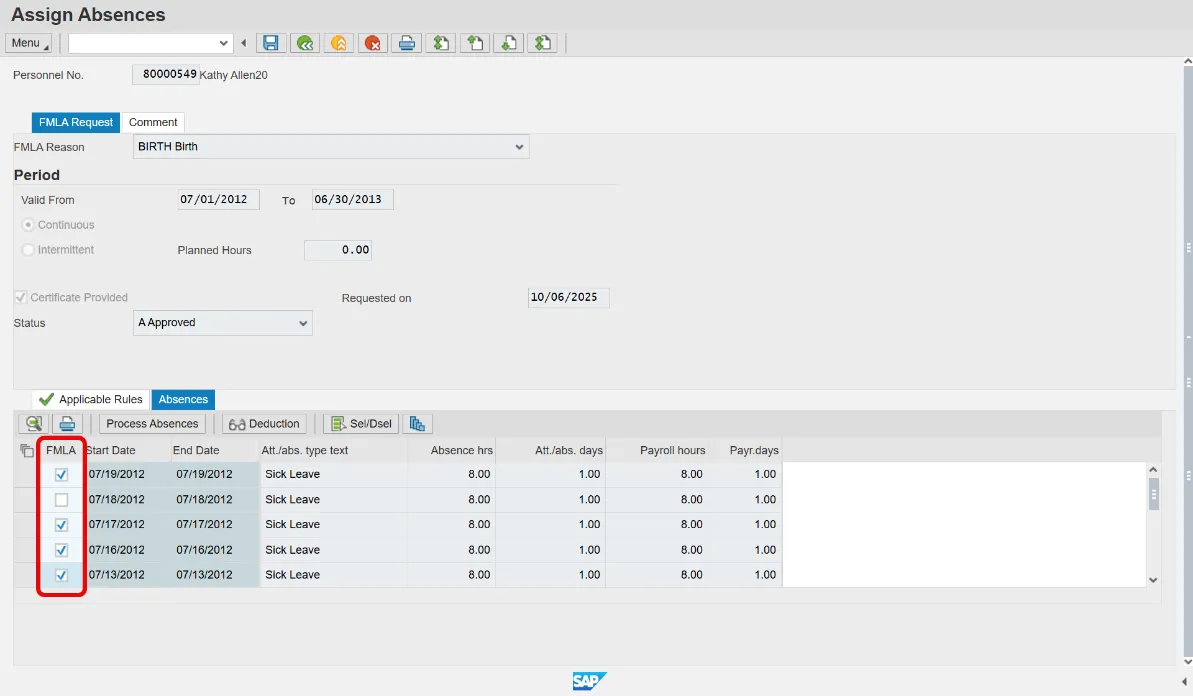
Step 20. Click Save. The FMLA request message at the bottom of the screen lets you know the request has been saved.
Step 21. Click the Applicable Rules tab.
Step 22. Select (highlight) the applicable event.
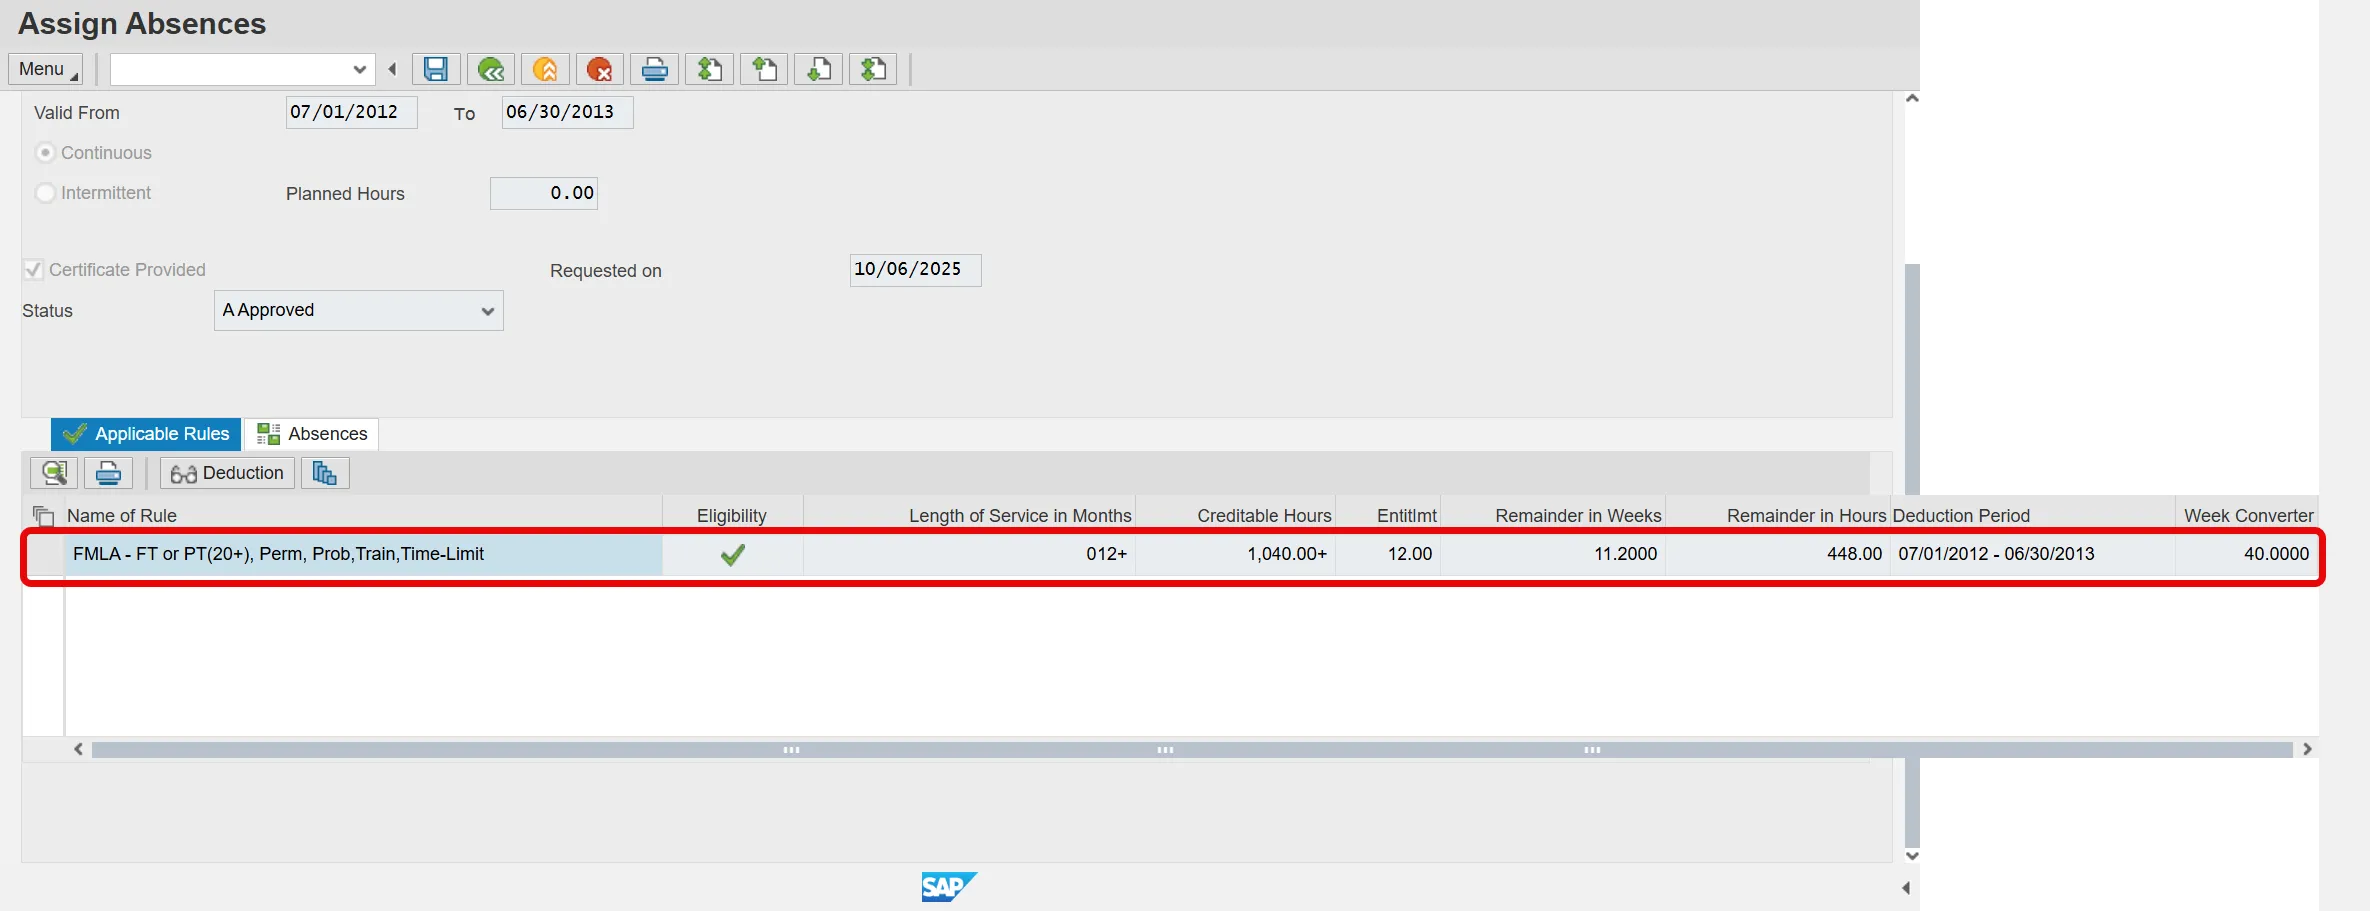
Step 23. Click the Deduction button.
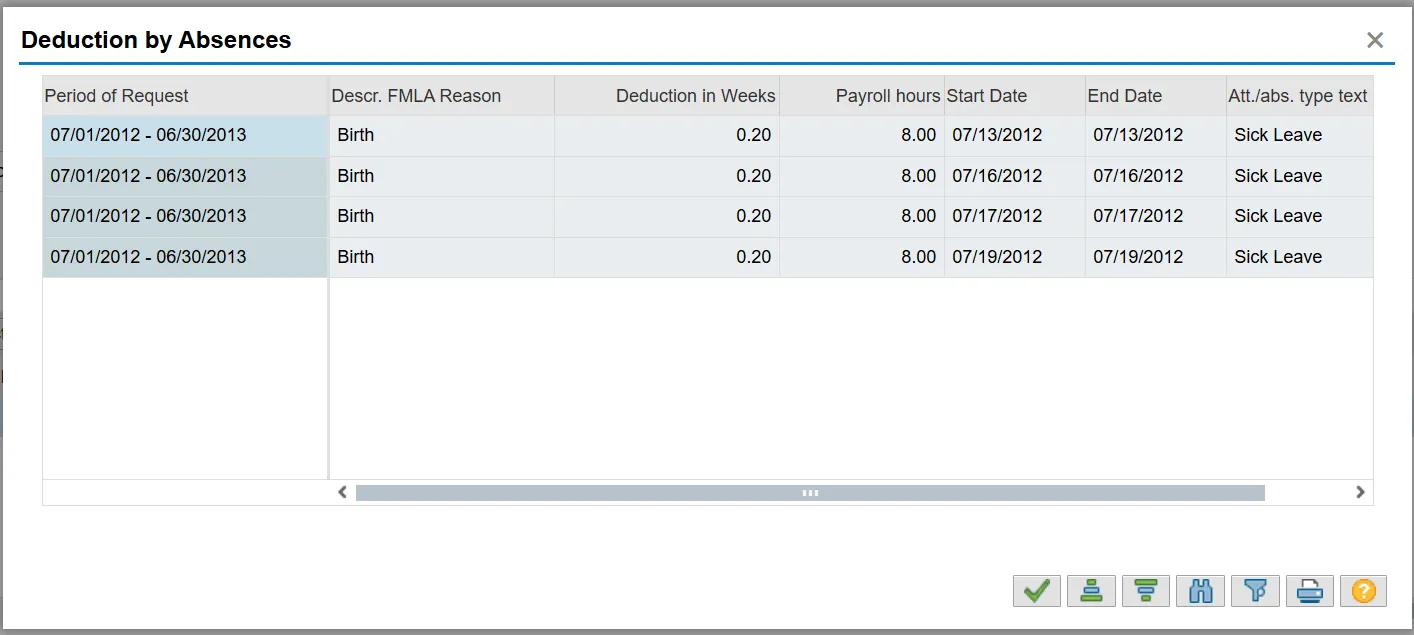
The absence deductions you requested have been processed.
Step 24. Click the green check to close the box.
Step 25. Click the Back (F3) button.
Step 26. Click the Back (F3) button to return to the SAP Easy Access screen.
The system task is complete.