Purpose
The purpose of this Business Process Procedure is to explain how to create a new position in the Integrated HR-Payroll System.
Trigger
A new position is needed.
Business Process Procedure Overview
All new position requests are submitted via the OM Workflow, transaction code ZOMA069, Action 100 to create a new position. The workflow process follows the appropriate approval process, which may include some or all of the following: Division Approval, Funding Approval, and OSBM Approval.
Note: Once a position number has been created, the start date cannot be changed. Therefore, it is important to work with Budget and establish an effective date for the new position BEFORE creating a PCR.
Procedure
There are 11 steps to complete this process.
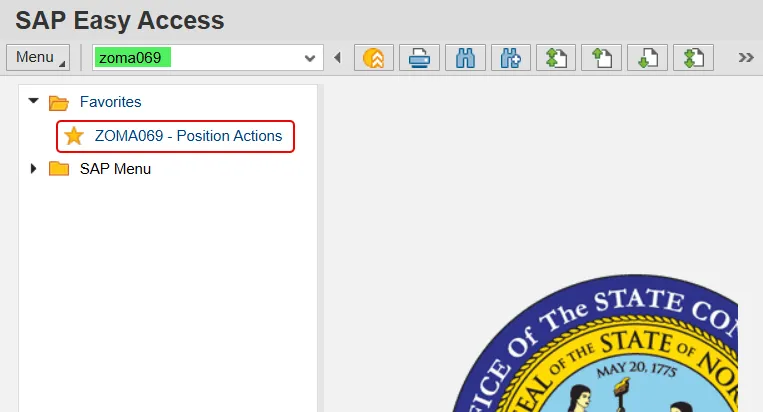
Step 1. Type zoma069 in the command field and press enter; or double click it from your favorites folder if you’ve previously saved it there.
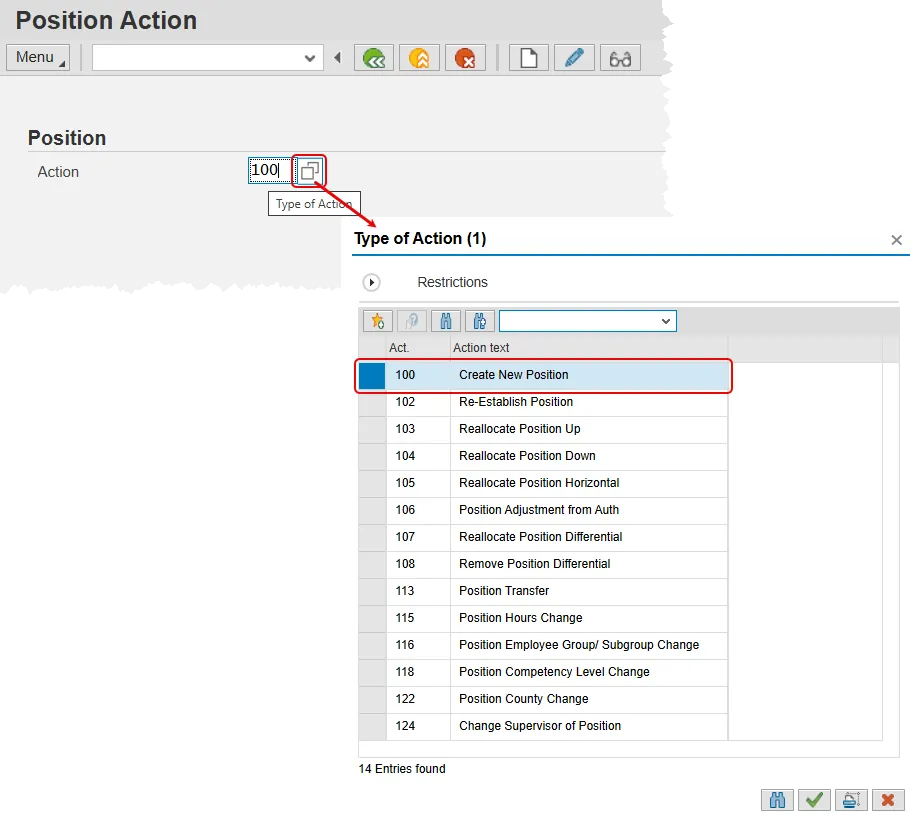
Step 2. On the Position Action screen:
- Type 100 in the Action field and press Enter.
OR
- Click in the field, the click the Matchcode button and then select action 100 – Create New Position.
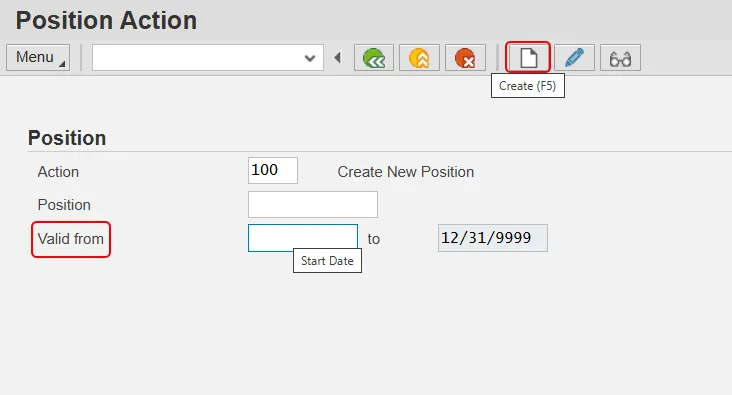
Step 3. Two new fields will appear and the Valid from field will default to today.
- Update the Valid from field to reflect the first day the position will be active.
- Click the Create button.
VERY IMPORTANT! Although there is a field for position number, you should never enter a position number when using the Create New Position action. The system will generate an 8-digit, non-intelligent number for the new position. Additionally, this is the last screen in which the action type and effective date can be altered. Double check this data before pressing the Create button. If you discover a mistake in one of these two items later, your only recourse will be to cancel the action and restart.
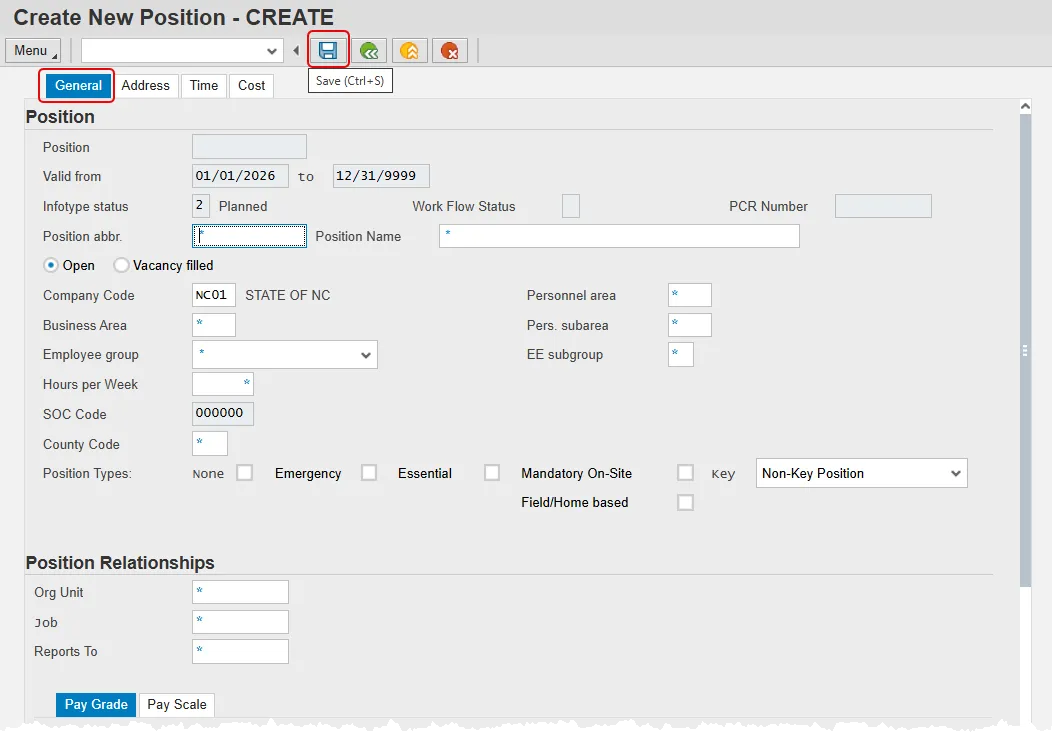
Step 4. The Create New Position General tab will appear with many open fields. Data is required in any field that has an asterisk (*) in it. Many of the fields will have a matchcode option that will appear to the right of the field when you click in it.
- Fill in all required fields and make one or more Position Types selection.
- Press Enter on your keyboard to validate the data.
- Review your entries and then click the Save button.
Note: Clicking the save button will ‘lock-in’ all data on this tab and turn all of the fields gray. If any data is later determined to be wrong, you will have to leave the action and come back to it in Change mode.
A list of the fields and their definitions on this tab is provided beneath the screen shot.
Note: There are two items that are dependent on the value entered into in the Job field and are not directly editable. This includes the SOC Code and the Pay Grade tab at the bottom of the screen.
- Position abbr. - Name of the Position abbreviation. Position short text is a 12-character field. Not all 12 characters have to be used. Start each short text word with a capital letter and follow the naming conventions of your agency.
- Position Name - Full description of Position Name, up to 40 characters long.
- Personnel Area - Code identifying the agency associated with the position.
- Business Area - Code identifying the organizational unit for which balance sheets and income statements are prepared. Usually the agency.
- Per. Subarea - Code that defines various working schedules so that Time Management can define groups of specific time entry rules.
- Employee Group - Drives benefits eligibility, leave, and pay calculations. This field has a drop-down menu instead of a matchcode button.
- EE subgroup - Code identifying the employees is subject to FLSA overtime, pull/part time status, and other calculation rules.
- Hour per Week - Represents the budgeted number of hours per week for the position.
- SOC Code – Will be determined by the value entered for the SOC code once the data on the page is validated.
- County Code - Contains the three-digit code for the county where the position is located.
- Position Types - The State has five separate designations for critical positions which are defined by OSHR as follows. If none of these apply, be sure to put a check in the None box.
- Emergency: Position designated by an agency that is mandatory/essential to agency operations during adverse weather or other conditions of a serious nature that prohibit some employees from reporting to work but do not necessitate the closing of state offices and facilities; or a position designated that is mandatory/essential during emergency conditions that necessitate the closing of state offices or curtailing of operations. These designations are related only to the “Adverse Weather and Emergency Closing” policy in the State Human Resources Manual.
- Essential: Position designated by an Executive Branch Department Head with the approval of the Office of State Budget and Management, as exempt from an Executive Order prohibiting the filling of positions. Essential positions include positions directly related to law enforcement and public safety, classroom instruction, and the custody or care of persons for whom the state has a constitutional duty to serve. Administrative and support positions are not deemed essential, but the Office of State Budget and Management may designate additional positions as Essential Positions depending upon the circumstances of each request.
- Key: Position that requires specialized knowledge that is unique within the organization. The specialized knowledge is essential for the organization to meet the goals and objectives that are linked to its mission or statutory requirements. The loss of an employee in a key position would lead to immediate difficulties in getting the work accomplished.
- Mandatory On-Site: Position occupied by employees in permanent, probationary, or time limited appointments that are required to report to a designated worksite (particularly when all other positions are restricted from coming into the workplace), other than their personal residence, and only for those specific dates and times that such onsite reporting is required during a public health emergency. These positions include, but are not limited to, positions that directly impact public health and patient care; public safety; operation of critical infrastructure and facilities; operation and safety of sensitive research labs and ongoing care for research animals, and the custody or care of persons or property for whom the state has a duty to continue to serve.
- Field/Home-Based: Positions which are required to work outside the agency or university worksite based on the service they provide or the nature of work. The work of field/homebased positions is mostly performed by traveling to various locations, within a region or working from home.
- Org. Unit - Contains the eight-digit number that represents the organizational unit to which the position will belong.
- Job - Eight-digit code identifying the job. A job is a class and are general classifications of tasks routinely performed together.
- Reports to - Contains the eight-digit position number that represents the supervising position for the newly proposed position.
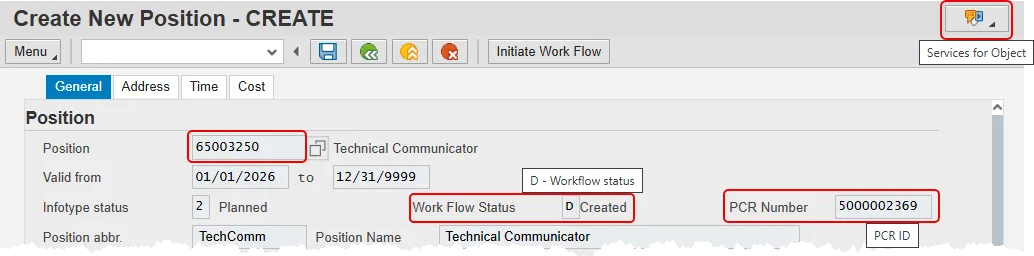
Step 5. Upon saving this screen, observe that some previously blank, non-editable fields have been filled in. This includes the SOC Code, Pay Scale and Pay Grade tabs in the data section.
Additionally, the system has assigned a new Position number, created a Position Change Request (PCR) Number and given a Work Flow Status of ‘D’ (Created). The Services for Object button has also appeared on the top-right of the screen.
BEST Shared Services recommends that you maintain a transaction log for all submitted actions. Having this information easily accessible will help with any future troubleshooting that may arise. Data that may be useful include:
- Creation date of the action,
- Effective date of the action,
- Action type,
- Position Number, and
- PCR Number.
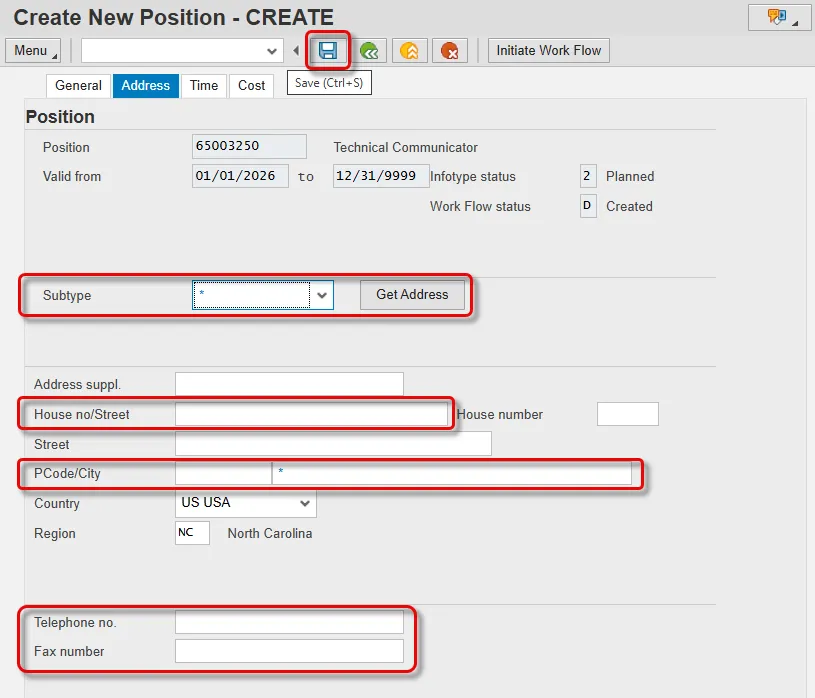
Step 6. Each newly created position is required to have either a Main or Mailing address at a minimum. There is also a place to enter a Courier address.
- Click on the Address tab.
Note: The Save button locks the tab, so only click it once all the addresses have been entered.
- Click the drop-down button in the Subtype field and select the type of address being entered.
- Click the Get Address button.
Note: This is a very important, but often overlooked step. Clicking the Get Address button ensures that the data will be associated with the Subtype you have chosen.
- Enter the address data in the following fields:
- House no/Street - The address street number and name, up to a maximum of 30 characters.
- PCode/City – Postal zip code and city. (City is technically the only required data point on this tab.)
- Telephone no. – The telephone number associated with this address.
- Fax number – The fax number associated with this address
Note: The State of North Carolina does not use any of the other fields on this screen, including Address suppl., House number, and Street.
- Press Enter on your keyboard.
Note: This is also an important but easily missed step. Neglecting to click the Enter button will result in a loss of data when selecting a new address subtype.
- Repeat steps b – e to add a second address subtype if applicable.
- Repeat steps b – e to add a third address subtype if applicable.
- Once all address subtypes have been entered, click the Save button to complete the tab.
Step 7. The Time tab contains the fields required for time entry and payroll calculation rules. A position can have one or more fields. The Premium rates are determined from the data saved on the Position in the Integrated HR-Payroll System, not what a person enters on their time sheet, so the person hired into this position will receive the premiums which are requested here when they submit their time.
- Click the Time tab.
- Complete the applicable fields. There are 10 possible entries, and you may need to use a vertical scroll bar to access all of them. Descriptions of each of the fields are below the screenshot.
- Press Enter on your keyboard to validate the data.
- Press the Save button.
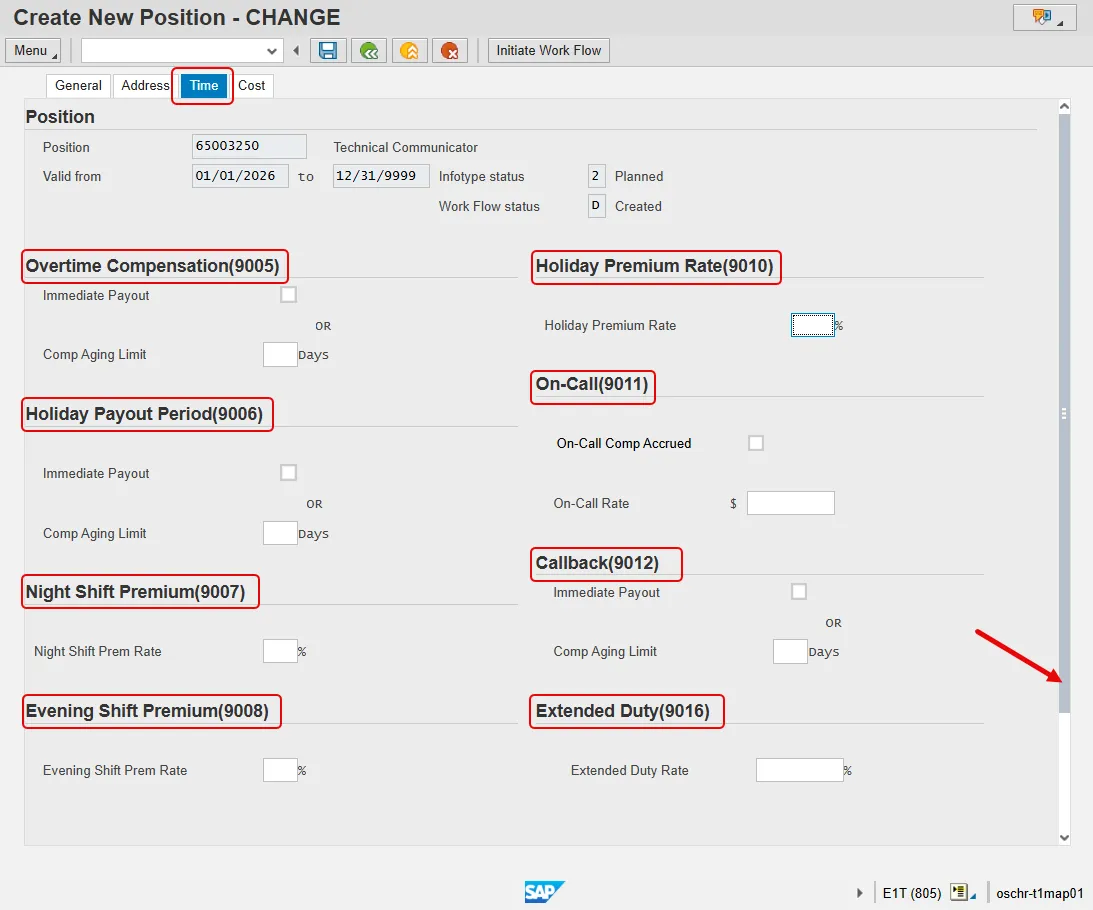
- Overtime Compensation (IT 9005) - Stores settings related to overtime compensation.
- If time worked beyond the overtime limit (40 hours, etc.) is to be paid or accumulated as compensatory time, the position must have a valid IT9005 record (which is this area).
- If overtime compensatory time is to be paid out (FLSA Subject only) or expired (FLSA Not-subject only) at a point earlier than 12 months from when it was earned, the Comp Aging Limit field should be populated with the corresponding number of days (30 days, 60 days, etc.).
- If it is to be paid out immediately, the Immediate Payout checkbox should be checked. The default is 365 days. An IT9005 record is not required if the position is not eligible for overtime pay or compensation.
- Holiday Payout Period (IT 9006) - Indicates if overtime compensatory time is to be paid out (FLSA Subject only) or expired (FLSA Not-Subject only) at a point earlier than 12 months from when it was earned. The Comp Aging Limit field should be populated with the corresponding number of days (30 days, 60 days, etc.). The default is 365 days. If no record exists, the default value of 365 applies. If it is to be paid out immediately, the Immediate Payout checkbox should be checked.
- Night Shift Prem Rate (IT 9007) - Pay rate increase for Night Shift premium. If OSHR has approved a rate other than the default of 10%, the rate as a percentage must be entered in the rate field.
- Evening Shift Premium (IT 9008) - Stores settings for positions that are eligible for evening shift premium. OSHR approved rates other than the default of 10% must be entered in the rate field.
- Weekend Shift Premium (IT 9009) - Stores settings for positions that are eligible for weekend shift premium. The OSHR approved rate other than the default of 10% must be entered in the rate field.
- Holiday Premium Rate (IT9010) - Pay rate increase for Holiday Pay. The OSHR-approved rate other than the default of 50% must be entered in the rate field.
- On-call (IT 9011) - Stores settings for positions that are eligible for On-Call compensation. The accrued box should be checked if the time is to be collected as On-Call comp time. The rate field must be populated with the OSHR approved on-call rate.
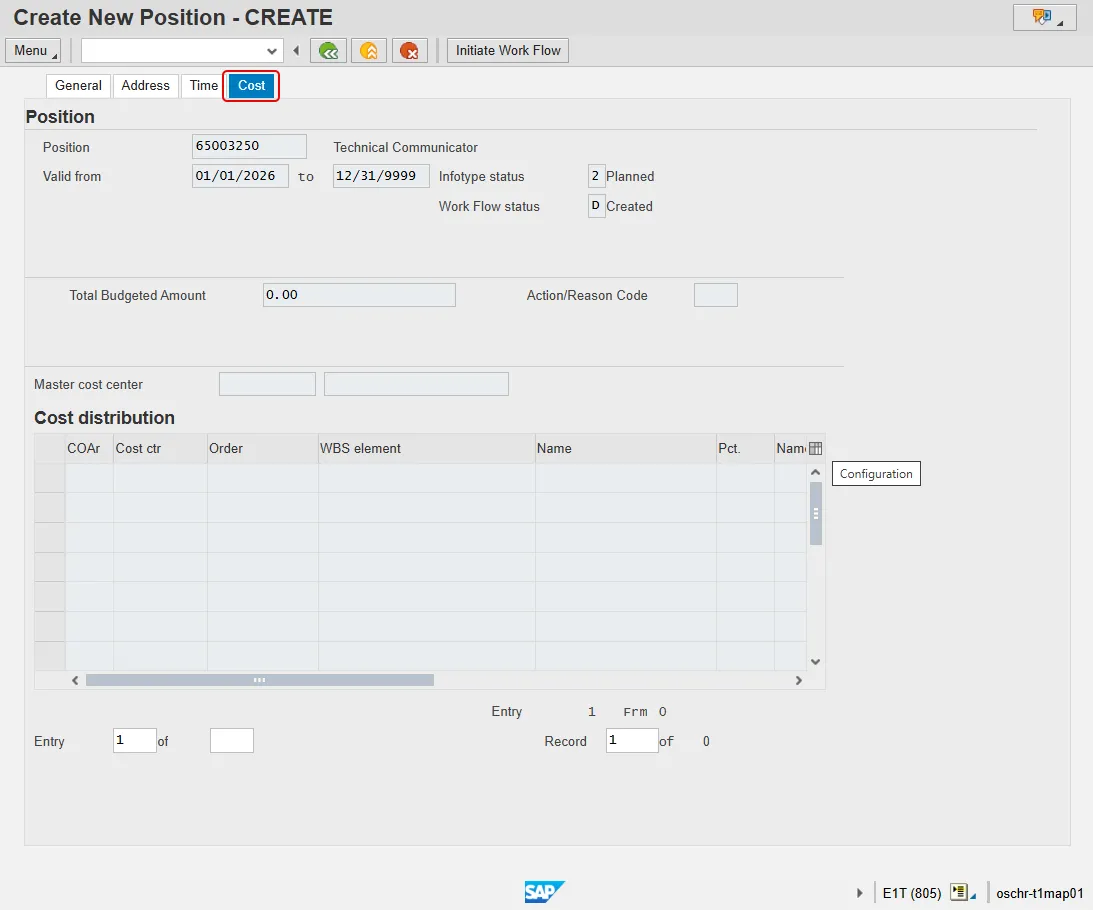
Step 8. Optional step: The initiator/requestor of the new position will not enter any data on the Cost tab. The workflow process includes the Funding Approver, who will enter the budget information on this tab.
- Click the Cost tab.
- Notice that the Cost tab fields are grayed out - the initiator/requestor does not have access to enter information here.
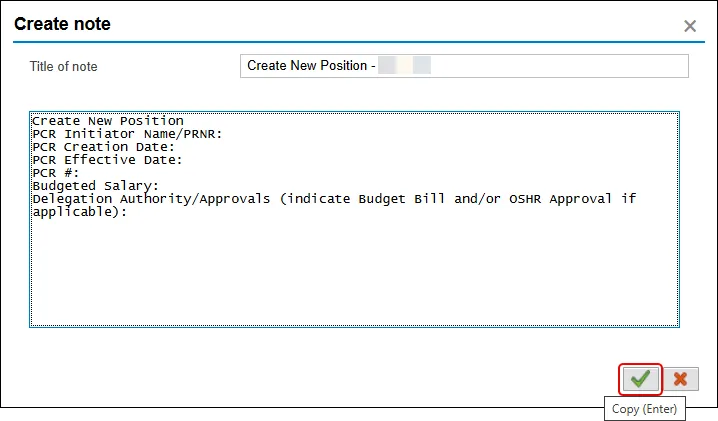
Step 9. Before a Position Change Request is submitted to Workflow you are required to provide a note using the OSHR created template. This can be done at any point after you save the General tab.
- Copy the appropriate template from the OM Action Notes Template.
- Click the Services for Object button, hover over Create… and then click Create note.

- Paste the template into the body of the Create note pop-up and fill out the missing data. Provide a Title of Note. BEST Shared Services recommends that the title be ‘Create New Position - <<position number>>’.
- Click the Copy (green check) button.
Step 10. There is no more data to enter.
- Double check each tab to ensure that the data is correct.
- When satisfied, click the Initiate Work Flow button.
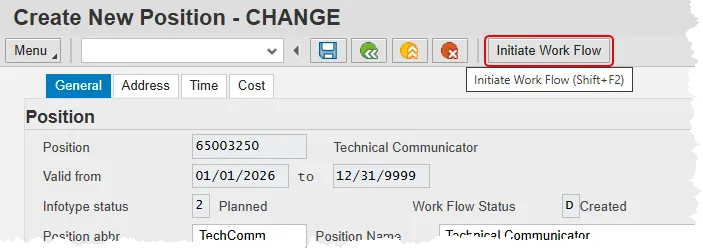
Select the Initiate Workflow button to send the Create New Position Action through the approval process. No changes can be made after the PCR has been submitted for approval unless the PCR is rejected at any stage and sent back to you (the initiator/requestor).
If you do not want to initiate workflow at this time, you can access the Create New Position action using the Change mode after you have entered both the original validity dates and the position number from transaction code ZOMA069 at any point in the future, up until the request has been submitted to workflow.
Step 11. Click the Back button.
The system task is complete.