Purpose
The purpose of this business process procedure is to explain how to execute a report in the background in the Integrated HR-Payroll System.
Trigger
There is a need to generate a report in the background.
Business Process Procedure Overview
SAP has a time-out limit of 10 minutes for any report and will stop running to preserve front-end capacity once that limit is reached.
This procedure runs the report in the background, bypassing the time-out and allowing you to continue using SAP, and even log off, while the report is running.
Process
There are 11 steps to complete this process.
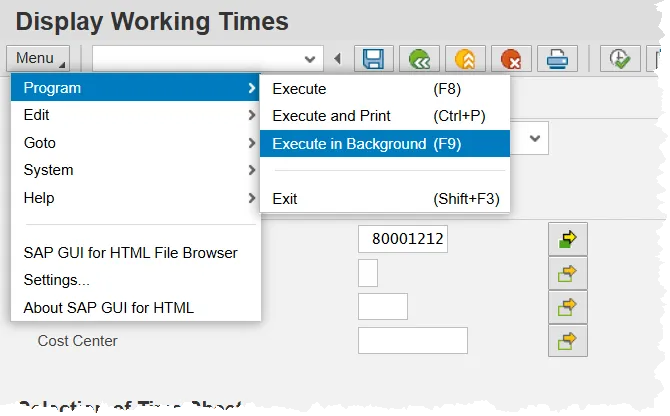
Step 1. Enter the filter criteria for the report in the foreground (to be displayed on the screen), but instead of clicking the Execute button, click the Menu button, then hover over Program. Finally, click Execute in Background from the menu.
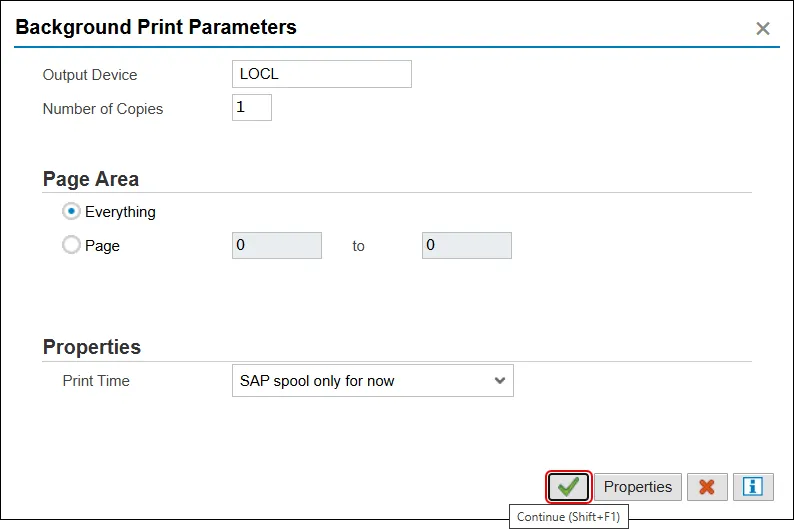
Step 2. Click Continue.
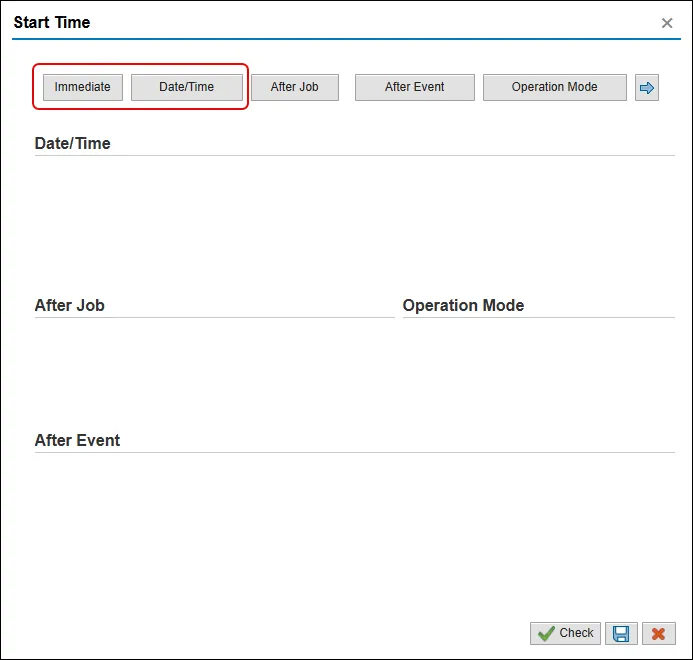
Step 3. Select the time that the report will run. To run the report immediately, click Immediate. To schedule the job to run at a time in the future (such as every Monday morning 5 am), click Date/Time.
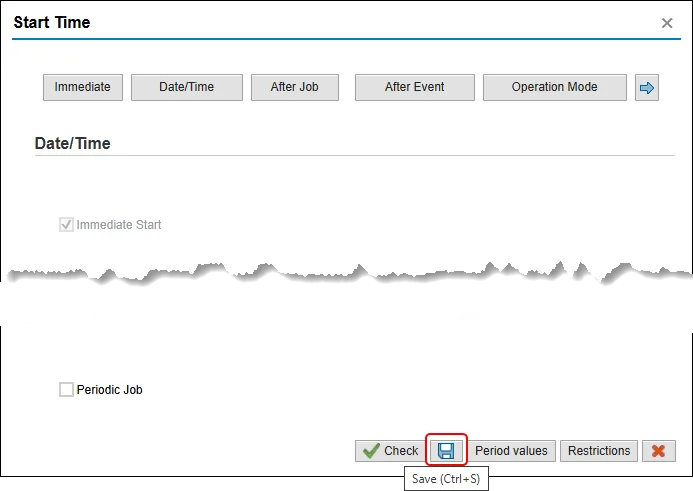
Step 4. Click the Save button to run the report.
Information: A report can be scheduled to run anytime, and your computer does not need to be on for the report to run. You can schedule a long report to begin at 6 am, and it will be ready when you arrive at work.
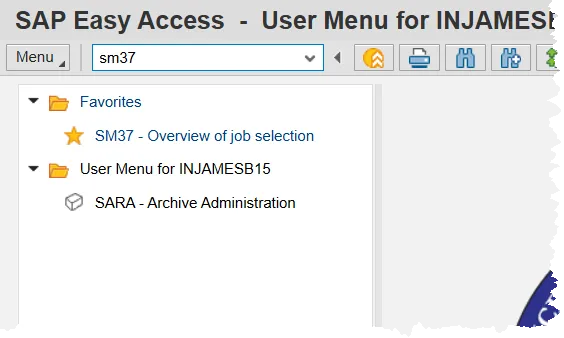
Step 5. To view the completed report, enter SM37 in the command field of the SAP Easy Access Screen and press enter. (Or double click it from your Favorites List if you’ve previously saved it there.)
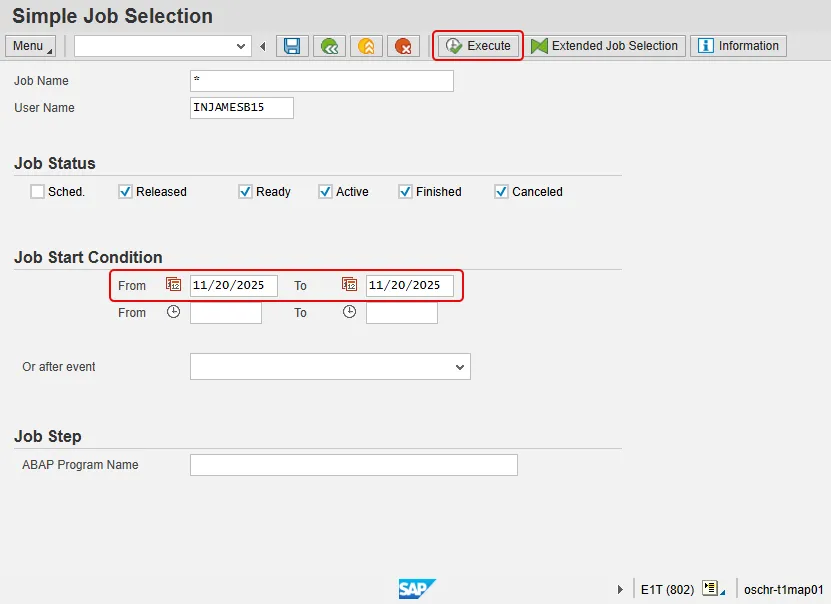
Step 6. On the Simple Job Selection screen and in the Job Start Condition section, input a date range which contains the date the background report was executed. Then, click the Execute button.
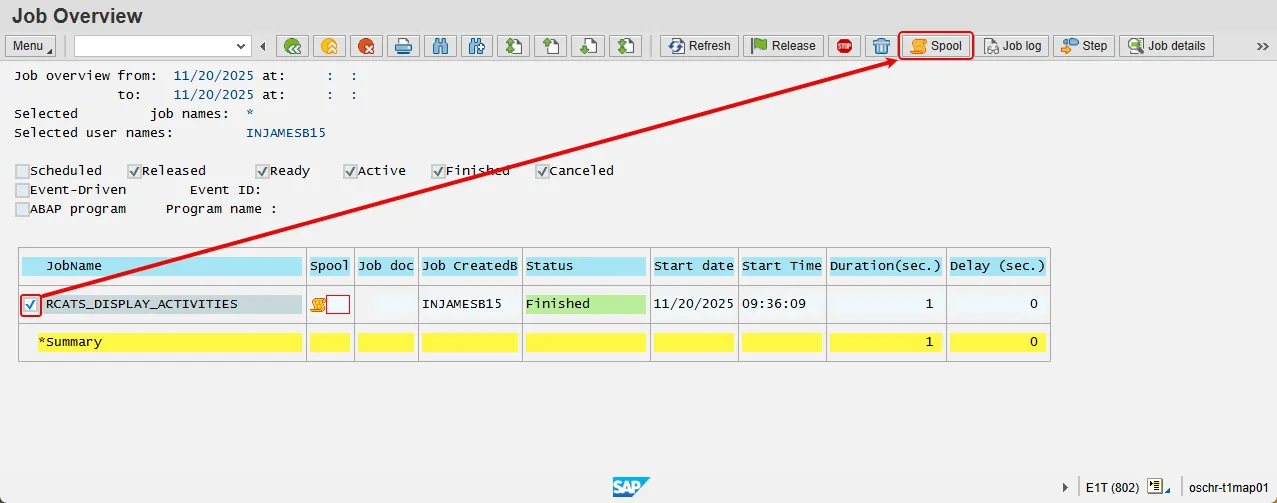
Step 7. The Job Overview screen will be displayed. Once the Job is finished, put a check in the box next to the report and press the Spool button.
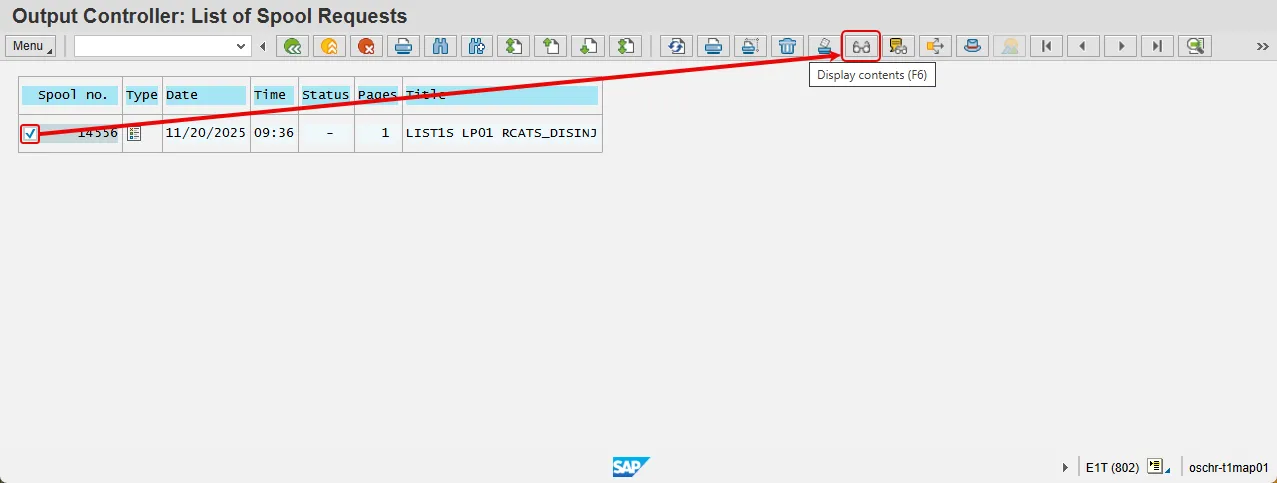
Step 8. The selected Report(s) will be displayed. Click the check box again and then press the Display contents button to view the completed report.
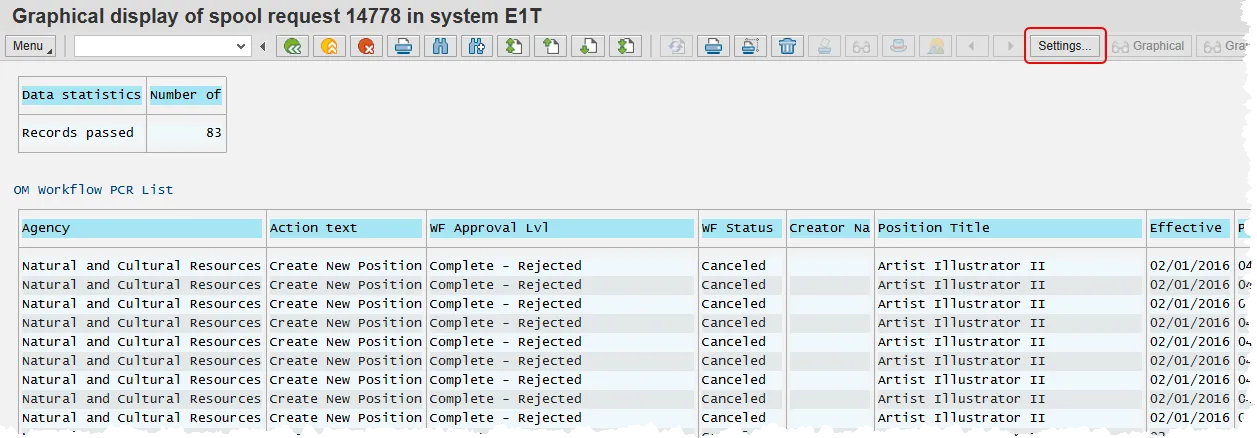
Step 9. The first 10 pages of the report will be displayed. To change the number of pages, click Settings.
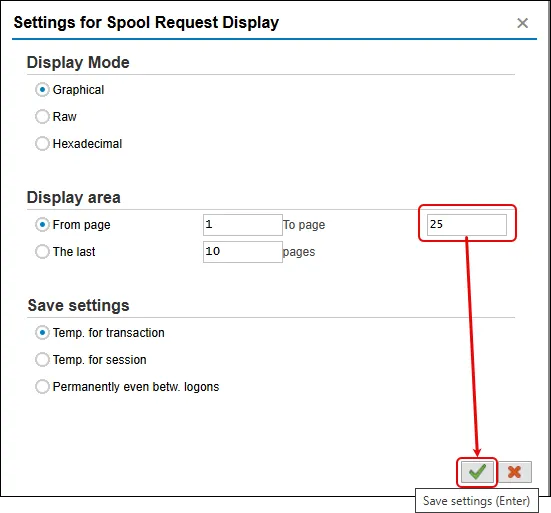
Step 10. Change the maximum number of pages that will be displayed and click the Save settings button (green check).
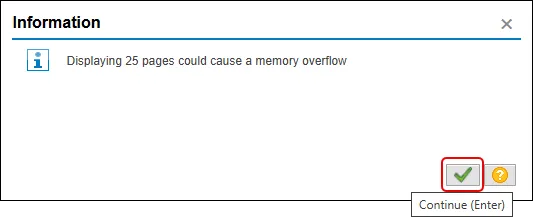
Step 11. You may receive message warning of a memory overflow. Click the Continue button.
Information: Click the Print directly button to print the entire report, or use Save to local file button to download the report as a file (i.e. MS Excel, an HTML document, text file, etc.).
